How React Is Transforming E-Commerce and SaaS Platforms
In the rapidly evolving digital landscape, businesses must leverage the best technologies to deliver seamless experiences. React, a powerful JavaScript library developed by Facebook, has emerged as a game-changer for both e-commerce and SaaS platforms. Its ability to create dynamic, high-performance user interfaces is revolutionizing how these industries operate, enhancing user engagement, and driving business growth.
The React Advantage for E-Commerce Platforms
E-commerce platforms demand fast, responsive, and scalable interfaces to cater to millions of users worldwide. React’s component-based architecture allows developers to build reusable UI components, reducing development time and ensuring consistency across the site. This modular design is perfect for e-commerce, where product listings, shopping carts, and checkout processes need frequent updates and customization.
Moreover, React’s virtual DOM optimizes rendering performance, ensuring that users experience swift page loads and smooth navigation. This performance boost directly correlates with higher conversion rates and improved customer retention. The flexibility of React also enables integration with various back-end systems and APIs, facilitating real-time inventory updates, personalized product recommendations, and efficient payment processing.
Why SaaS Platforms Benefit from React
SaaS platforms require robust and interactive user interfaces to manage complex data and workflows. React’s declarative nature simplifies UI development by making the code more predictable and easier to debug. This leads to faster feature releases and enhanced maintainability, crucial for SaaS providers who constantly update their offerings to meet user demands.
React’s ecosystem supports state management libraries like Redux, which help manage application state efficiently in large-scale SaaS applications. This ensures data consistency and seamless user experience even when handling multiple concurrent users and complex operations. Additionally, React’s compatibility with mobile frameworks like React Native allows SaaS companies to extend their reach by developing mobile apps with a shared codebase, reducing costs and accelerating time-to-market.
Learning React for Career Growth
For professionals aiming to excel in web development and enter the thriving fields of e-commerce and SaaS, mastering React is a strategic move. Enrolling in a React course in Karraikudi can provide hands-on experience with this versatile library, equipping learners with the skills to build modern web applications that meet industry standards.
Institutes like Maria Academy, a reputed software training institute, offer comprehensive courses that cover React fundamentals, advanced techniques, and practical projects. Such training ensures learners not only understand React’s core concepts but also how to apply them effectively in real-world scenarios.
Conclusion
React is undeniably transforming e-commerce and SaaS platforms by enabling the development of fast, scalable, and user-friendly applications. Its component-based architecture, performance optimization, and extensive ecosystem empower businesses to stay competitive in a digital-first world. For aspiring developers, pursuing a React course Karraikudi is an excellent step toward a successful career in these dynamic industries.
Investing in React skills today means contributing to the future of innovative web experiences tomorrow.
If you’re looking to build a career in modern web development, consider exploring React courses available in your area, including Karraikudi, to stay ahead in this competitive market.
Why Many Python Learners Fail Technical Interviews and How to Prepare Effectively
The journey from learning Python to acing technical interviews can often feel like a daunting leap, especially in a competitive market like Singapore’s thriving tech ecosystem. Despite mastering syntax and foundational programming concepts, many Python learners stumble during interviews. Understanding the root causes of these challenges and adopting a targeted preparation strategy is crucial for success, particularly for those pursuing opportunities via a Python Singapore course.
Common Reasons Python Learners Falter in Technical Interviews
- Surface-Level Understanding vs. Deep Conceptual Clarity
Many candidates excel at coding exercises by memorizing solutions or following tutorials but lack a profound comprehension of underlying principles. Interviewers seek developers who can articulate the rationale behind their approach, optimize algorithms, and demonstrate scalable solutions. Without this depth, candidates struggle to adapt to novel problems or engage in technical discussions effectively. - Neglecting Problem-Solving Methodology
Technical interviews assess not just coding skills but problem-solving acumen. Candidates often jump straight to coding without adequately analyzing the problem, considering edge cases, or planning their solution. This reactive approach leads to inefficient code and mistakes under pressure. - Inadequate Practice with Data Structures and Algorithms
Python’s simplicity can be deceptive; proficiency in language syntax alone doesn’t guarantee interview success. Mastery of core data structures (like trees, graphs, and hash maps) and algorithms (sorting, searching, dynamic programming) is essential. Many learners underestimate the time and effort needed to internalize these concepts, which are frequently tested in interviews. - Limited Exposure to Real-World Coding Environments
Coding on interactive platforms differs vastly from the high-stress, timed setting of interviews. Candidates unaccustomed to live coding, whiteboard sessions, or collaborative problem-solving may experience anxiety, impacting their performance. - Overlooking Communication Skills
Effective communication is critical during interviews. Explaining thought processes, discussing trade-offs, and responding to feedback showcase professionalism and teamwork readiness. Many candidates, however, focus solely on writing code and neglect this vital aspect.
Strategic Preparation for Technical Interview Success
Mastering Python for interviews demands a holistic approach that goes beyond coding drills. Here’s how learners can prepare more effectively:
- Develop Conceptual Mastery
Invest time in understanding the fundamentals thoroughly. Break down complex topics into manageable parts and revisit them periodically. Use resources that emphasize conceptual clarity alongside coding exercises. - Adopt a Problem-Solving Framework
Before coding, spend time dissecting the problem. Clarify requirements, identify constraints, and outline your approach. This structured thinking impresses interviewers and reduces errors. - Focus on Data Structures and Algorithms
Engage in deliberate practice with classic problem types. Platforms like LeetCode, HackerRank, and CodeSignal offer curated problems that simulate interview scenarios. Track progress and revisit challenging problems until they become intuitive. - Simulate Interview Conditions
Practice mock interviews under timed conditions with peers or mentors. This acclimates you to pressure and hones your ability to think and communicate clearly on the spot. - Enhance Communication Skills
Narrate your thought process aloud during practice sessions. Record yourself or seek feedback to improve clarity and confidence in articulation.
Leveraging Professional Training for a Competitive Edge
For those aiming to break into Singapore’s tech industry, enrolling in a structured Python Singapore course can be transformative. Institutions like Maria Academy, a reputed software training institute, offer comprehensive programs that integrate technical skills with interview preparation strategies. Their expert-led curriculum balances theory, practical coding, and soft skills development, enabling learners to navigate interviews confidently.
Conclusion
Failing technical interviews is a common hurdle but not an insurmountable one. By shifting from rote learning to strategic preparation, Python learners can bridge the gap between knowledge and application, turning interviews into opportunities to showcase their true potential.
If you aspire to excel in technical interviews and secure coveted roles in Singapore’s dynamic tech scene, consider a focused Python Course Singapore training path that equips you with the skills, mindset, and confidence required for success.
Invest in your future with a robust Python learning journey tailored for Singapore’s competitive job market—and transform interview challenges into career milestones.

Python interview preparation, Python technical interviews, Python coding skills, programming interview tips, Python developer jobs, coding interview practice, Python learning path, software development careers, Python training course, technical interview success
Why Industry-oriented Software Training Courses are preferred in Chennai
In an era defined by rapid technological evolution and digital transformation, the demand for highly skilled software professionals has surged exponentially. Both fresh graduates and seasoned professionals in Chennai are increasingly recognizing the imperative of pursuing industry-oriented software training courses to stay competitive, relevant, and future-ready. Among the numerous options available, Maria Academy stands as a distinguished leader, offering meticulously curated programs designed to bridge the skill gap between academia and industry demands.
The Imperative for Industry-Aligned Software Training
Traditional academic programs, while foundational, often fall short in equipping learners with the practical competencies required by contemporary IT enterprises. This discrepancy has catalyzed a shift towards software training courses and institutes in Chennai that emphasize real-world application, technical proficiency, and emerging technologies. Industry-aligned training enables learners to:
- Acquire hands-on experience with cutting-edge software tools, frameworks, and platforms
- Engage in live projects simulating real-world business challenges
- Develop problem-solving acumen and agile methodologies prevalent in software development cycles
- Enhance employability through targeted skill sets aligned with market requirements
- Cultivate soft skills and professional readiness for seamless workplace integration
For students embarking on their careers, such training significantly accelerates their transition from academic theory to professional excellence. For working professionals, it offers a strategic pathway for upskilling, career advancement, and role diversification in a rapidly shifting tech landscape.
Chennai: A Thriving Ecosystem for Software Education and Careers
Chennai’s stature as a prominent IT hub in India underpins its vibrant ecosystem of software training institutions. The city’s robust software industry, comprising multinational corporations, startups, and innovation centers, creates an ongoing demand for proficient talent. This ecosystem provides:
- Rich opportunities for experiential learning and internships within the local tech community
- Access to seasoned industry practitioners who bring invaluable insights to training programs
- Flexible course structures catering to the diverse needs of full-time students and working professionals
- Strong placement networks facilitating direct recruitment by leading IT firms
Maria Academy: Championing Industry-Centric Software Education in Chennai
What distinguishes Maria Academy from other software training institutes in Chennai is its unwavering commitment to delivering industry-centric education that empowers learners to excel in real-world environments.
- Curriculum Designed in Collaboration with Industry Experts: Ensures alignment with the latest technological advancements and employer expectations.
- Experienced Faculty with Professional Industry Backgrounds: Facilitates mentorship that blends theory with practical insights.
- Project-Centric Pedagogy: Enables learners to work on comprehensive projects that replicate challenges faced by software professionals.
- Flexible Learning Modalities: Offers weekday, weekend, and online training options to accommodate diverse learner schedules.
- Dedicated Placement Assistance: Leverages extensive industry partnerships to secure internships and job placements for graduates.
Strategic Benefits for Learners
For students, Maria Academy’s programs provide a competitive advantage, equipping them with the skills and confidence to navigate rigorous recruitment processes and excel in entry-level roles.
For working professionals, the academy serves as a catalyst for career growth, enabling skill augmentation in emerging domains such as Artificial Intelligence, Cloud Computing, Data Analytics, and DevOps, thereby opening avenues for promotions and lateral career shifts.
In both cases, the comprehensive support system encompassing mentorship, career counseling, and networking fosters sustained professional development.
Conclusion
The paradigm of software education is shifting decisively towards practical, industry-relevant training. For those aspiring to thrive in Chennai’s competitive IT landscape, selecting the right software training courses and institute in Chennai is a strategic decision that shapes career trajectories. Maria Academy exemplifies excellence in this domain, offering a robust platform for learners to acquire market-ready skills, engage with industry challenges, and achieve meaningful career outcomes.
Embark on your journey to professional excellence with Maria Academy — where industry expertise meets educational innovation.
Keywords: software training courses and institute in Chennai, industry-oriented software courses, Maria Academy, software training Chennai, professional software training, upskilling for IT professionals, software career development Chennai.
software training courses and training institute in chennai
Expert Tips for Building Interactive Dashboards with Power BI
In today’s data-driven world, creating interactive dashboards is crucial for effective decision-making. Power BI, a leading business analytics tool, enables users to transform raw data into visually engaging dashboards that tell a compelling story. Whether you are a beginner or aiming to enhance your skills, mastering Power BI can significantly impact your analytics capabilities. If you are in Chennai and looking for the best learning path, Maria Academy – Best Software Training Institute in Chennai offers expert courses to help you excel in Power BI and the broader Power Platform Chennai ecosystem.
Why Choose Power BI for Interactive Dashboards?
Power BI stands out due to its user-friendly interface, powerful data integration capabilities, and real-time analytics. It supports diverse data sources and offers customizable visuals. Interactive dashboards built on Power BI provide dynamic insights, helping businesses monitor key performance indicators (KPIs) and make data-driven decisions.
Expert Tips to Build Interactive Dashboards
1. Understand Your Audience and Goals
Before designing your dashboard, identify who will use it and what decisions they need to make. Tailor visuals and data points to address their specific needs for maximum impact.
2. Keep It Simple and Focused
Avoid clutter by including only relevant data. Use clean layouts and intuitive navigation. Remember, simplicity enhances user experience and speeds up decision-making.
3. Use Interactive Elements
Leverage Power BI’s slicers, filters, and drill-down features. These allow users to explore data at different levels, making dashboards more engaging and insightful.
4. Choose the Right Visuals
Select charts and graphs that best represent your data trends. For example, use bar charts for comparisons, line charts for trends, and maps for geographic data.
5. Optimize Performance
Large datasets can slow down dashboards. Use data reduction techniques like aggregations and incremental refresh to ensure smooth performance without compromising insights.
6. Incorporate Real-Time Data
Real-time dashboards help businesses react promptly to changes. Power BI’s integration with streaming data sources makes this possible, offering up-to-the-minute analytics.
7. Consistent Branding and Design
Apply consistent colors, fonts, and logos aligned with your organization’s branding. This builds professionalism and user trust.
8. Test and Iterate
Collect user feedback to refine your dashboard. Continuous improvement ensures that the dashboard remains relevant and valuable over time.
Learn Power BI and Power Platform in Chennai with Maria Academy
For professionals and students in Chennai eager to master Power BI and the Power Platform, Maria Academy is the ideal destination. Known as the Best Software Training Institute in Chennai, Maria Academy offers comprehensive courses that cover Power BI, Power Apps, Power Automate, and more. Their expert trainers provide hands-on learning experiences, empowering you to create impactful dashboards and automate workflows effortlessly.
Final Thoughts
Building interactive dashboards with Power BI requires a blend of technical skills, creativity, and understanding of business needs. By following these expert tips, you can create dashboards that not only visualize data effectively but also drive strategic actions. If you’re in Chennai and want to accelerate your learning journey, consider enrolling at Maria Academy – Best Software Training Institute in Chennai, where you can gain industry-relevant skills in Power BI and the Power Platform Chennai ecosystem.
Unlock the full potential of your data today with Power BI and the right training partner!
By integrating the keyword Power Platform Chennai and highlighting Maria Academy – Best Software Training Institute in Chennai, this blog is optimized for search engines and valuable for readers seeking expertise in interactive dashboards and Power BI training in Chennai.
Best Daily Practice Techniques for Power BI Beginners
If you’ve just started learning Power BI, you already know the basics feel manageable — drag a field here, build a chart there. But then you open a real dataset and suddenly nothing makes sense. Sound familiar?
The truth is, Power BI is one of those tools where consistent daily practice separates people who “know it” from people who can actually use it at work. This guide gives you practical techniques to build that habit — and build it right.
1. Start Every Day With a Real Dataset, Not a Tutorial One
Practice datasets provided in courses are clean, small, and forgiving. Real-world data is messy, inconsistent, and full of surprises. The sooner you start working with raw, unfiltered data, the faster your skills will grow.
Where to find free datasets to practice with:
- Kaggle.com — thousands of real-world datasets across industries
- data.gov.kw — Kuwait open government data
- World Bank Open Data — economic and development datasets
- Your own workplace data — even anonymized or sample versions
Pick a new dataset every week and commit to building at least one report from it. This single habit will do more for your growth than watching ten hours of tutorials.
2. Spend 15 Minutes a Day on Power Query
Power Query is the engine that cleans and shapes your data before it ever reaches a visual. Most beginners skip it. Most job descriptions require it.
Make it a daily habit to:
- Import a messy CSV or Excel file
- Remove duplicates, fix column types, and handle blank values
- Merge or append two tables together
- Create a custom column using simple formulas
You don’t need a huge project. Even fifteen focused minutes on Power Query every day will build muscle memory faster than you expect.
3. Write One DAX Formula Every Day
DAX (Data Analysis Expressions) is what makes Power BI powerful. It’s also what most beginners avoid because it looks intimidating.
Start small. Each day, write just one formula — not to complete a project, but to understand how it works. A simple progression might look like:
- Week 1 — SUM, COUNT, AVERAGE, MIN, MAX
- Week 2 — CALCULATE, FILTER, ALL
- Week 3 — SUMX, COUNTX, AVERAGEX
- Week 4 — Date intelligence functions like TOTALYTD, SAMEPERIODLASTYEAR
The goal isn’t memorization. It’s building an instinct for how DAX thinks — and that only comes from repetition.
4. Rebuild Reports You Admire
This is one of the most underused practice techniques. Find a Power BI report that impresses you — on Pinterest, LinkedIn, or the Microsoft Power BI community gallery — and try to rebuild it from scratch using your own data.
You won’t get it perfect. That’s the point. When you get stuck, you’ll search for the exact answer you need — which is far more effective than passively watching someone else do it.
Rebuilding teaches you design thinking, layout logic, and feature awareness all at once.
5. Practice Building Relationships in the Data Model
One of the most common mistakes beginners make is dumping everything into a single table. Power BI is designed around relationships between multiple tables — and understanding this early will save you enormous headaches later.
Each day, take two or three tables and:
- Identify the key that connects them
- Build the relationship in Model View
- Test it by filtering a visual from one table using a slicer from another
This kind of practice makes complex reports feel logical rather than overwhelming.
6. Focus on One Visual Type Per Week
Power BI offers dozens of chart types — and beginners often try to use all of them at once. A more effective approach is to dedicate a full week to mastering one visual at a time.
For example:
- Week 1 — Bar and column charts (formatting, sorting, drill-through)
- Week 2 — Line charts (trend lines, date hierarchies, forecasting)
- Week 3 — Cards and KPIs (conditional formatting, goal tracking)
- Week 4 — Matrix visuals (subtotals, row grouping, custom formatting)
By the end of a month, you’ll have genuine depth in four visual types rather than surface-level familiarity with twenty.
7. Document What You Learn Every Day
Keep a simple learning log — even a basic Word document or notebook works. After each practice session, write down:
- What you tried to do
- What worked and what didn’t
- The solution you found and where you found it
This habit does two things. First, it locks in what you’ve learned by forcing you to articulate it. Second, it builds a personal reference guide you’ll return to again and again as you tackle harder problems.
8. Share Your Work and Get Feedback
Learning in isolation has limits. Sharing your reports — even early, imperfect ones — accelerates growth in ways private practice can’t.
Options to consider:
- Post your reports in the Microsoft Power BI Community forums
- Share screenshots on LinkedIn with a short explanation of what you built
- Find a study partner or peer group to review each other’s work
- Join local or online data analytics communities in Kuwait
Feedback from others exposes blind spots you’d never notice on your own.
9. Set a Weekly Mini-Project Goal
Daily practice is most effective when it’s building toward something. At the start of each week, set one small, specific goal — for example:
- “Build a sales performance dashboard with at least three visuals and one dynamic slicer”
- “Create a report that compares this month’s revenue to the same period last year”
- “Build a working data model with four related tables”
Mini-projects give your daily habits direction and give you finished pieces to show potential employers or clients.
10. Review and Improve Something You Already Built
Not every session needs to be about creating something new. Some of the best learning comes from revisiting an older report and asking: How would I build this better today?
Look for opportunities to:
- Simplify a complex formula you wrote weeks ago
- Improve the layout and readability of a dashboard
- Replace a static visual with an interactive one
- Add a tooltip or drill-through page you didn’t know about before
Growth in Power BI isn’t always forward — sometimes it’s looking back with fresh eyes.
The Bigger Picture
Power BI is one of the most in-demand tools for data professionals in Kuwait and across the region. Companies aren’t just looking for people who have completed a course — they want analysts who can open Power BI on day one and get to work.
That confidence only comes from consistent, intentional practice. Not marathon sessions on weekends, but small, focused habits built into your daily routine.
Start with thirty minutes a day. Stay consistent. The results will follow.
📩 Interested in structured Power BI training with hands-on projects and expert guidance? Get in touch to learn about upcoming courses and available batches.
The best time to start practicing was yesterday. The second best time is today.
How to Choose the Right Data Analytics Training Institute in Kuwait
The demand for data analytics professionals in Kuwait is growing fast. From oil and gas to fintech and retail, every industry needs skilled analysts who can turn raw numbers into smart business decisions. But with so many training options available, how do you choose the right one?
This guide walks you through the key factors to evaluate before enrolling — so you invest your time and money wisely.
1. Check the Curriculum Depth and Relevance
The first thing to examine is what the course actually covers. A strong curriculum should include:
- Data fundamentals — statistics, data types, and data collection methods
- Tools and technologies — Excel, SQL, Python, Power BI, and Tableau
- Machine learning basics — predictive modeling and data-driven decision making
- Real-world projects — case studies relevant to Kuwait’s key industries
Avoid institutes that offer only surface-level overviews. The best programs take you from beginner concepts all the way to hands-on project work — because that’s what employers expect.
2. Look for Industry-Certified Trainers
The quality of instructors directly determines the value of your training. Look for trainers who:
- Have active industry experience in data analytics or business intelligence
- Hold certifications from recognized bodies like Google, Microsoft, IBM, or AWS
- Can explain complex concepts using practical, real-world examples
Ask institutes directly about their faculty backgrounds. A seasoned instructor who has worked on live analytics projects brings insights no textbook can replicate.
3. Evaluate Mode of Learning and Flexibility
Not everyone learns the same way. Good institutes offer:
- Live instructor-led sessions for interactive learning
- Recorded lectures for revision at your own pace
- Weekend and evening batches for working professionals
- Hybrid options combining online and in-person classes
Flexibility matters — especially if you are balancing a full-time job while upskilling.
4. Assess Hands-On Project Experience
Theory without practice is incomplete. Before selecting an institute, confirm that students work on:
- Live datasets from real industries
- End-to-end capstone projects
- Tools that are actively used in today’s workplaces
Employers in Kuwait’s competitive job market favor candidates who can demonstrate applied skills — not just course completion certificates.
5. Verify Certification and Recognition
Ensure the certification you receive carries real value. Key questions to ask:
- Is the certificate globally or regionally recognized?
- Does the institute have tie-ups with companies for placement support?
- Is the course aligned with credentials like Microsoft PL-300, Google Data Analytics, or IBM Data Analyst?
A recognized certificate can significantly boost your job prospects and salary negotiations.
6. Read Reviews and Student Testimonials
Word of mouth remains powerful. Research an institute’s reputation by:
- Checking Google Reviews and social media pages
- Speaking to former students directly
- Looking at placement records and alumni career outcomes
Genuine testimonials reveal the real learning experience — far beyond what any brochure promises.
7. Compare Course Fees and ROI
Cost matters, but it should never be the only deciding factor. Compare:
- What is included in the fee — study material, tools access, exam fees
- Whether EMI or installment options are available
- The likely salary growth or career advancement after completing the program
Think of it as an investment in your career, not just an expense.
8. Post-Training Support and Placement Assistance
The journey doesn’t end at course completion. Top institutes offer:
- Resume-building workshops
- Mock interviews and LinkedIn profile optimization
- Job referrals and placement assistance
- Access to an active alumni network
This kind of support can make the real difference between completing a course and actually landing a role you’ve been aiming for.
A Trusted Name to Consider
Among the growing options in Kuwait, Maria Academy — a software training institute — offers a wide range of courses including data analytics, programming, and business intelligence tools, making it a strong choice for professionals looking to upskill and advance their careers.
Ready to Take the Next Step?
Kuwait’s digital economy is expanding — and the right training puts you ahead of the curve. Whether you’re a fresh graduate or a working professional looking to switch roles, now is the ideal time to build skills that employers are actively hiring for.
Don’t wait for the perfect moment. Enroll, upskill, and let your data do the talking.
📩 Get in touch today to learn more about upcoming batches, course details, and fees.
Choosing the right institute is the first step. The second is taking action.
Tips to Master Python Programming Without Prior Coding Knowledge
Python has transformed the way beginners enter the software industry. A decade ago, learning programming without a technical background was considered difficult and time-consuming. Today, Python has changed that completely. Its simple syntax, real-world applications, and massive industry demand have made it one of the most recommended programming languages for students, freshers, non-IT graduates, and career switchers looking to build successful technology careers.
Despite this opportunity, many beginners still hesitate to start learning Python because they believe coding requires advanced mathematics, prior programming experience, or exceptional technical knowledge. In reality, most successful Python developers started with zero coding background. The difference between people who succeed and those who quit is not intelligence — it is the learning approach they follow.
If you want to master Python programming without prior coding knowledge, understanding how to learn strategically can help you avoid confusion, improve confidence, and accelerate your career growth in the IT industry.
Why Python Is Considered the Best Programming Language for Beginners
One of the biggest reasons Python dominates beginner programming courses is its readability and simplicity. Unlike traditional programming languages filled with complicated syntax and difficult structures, Python allows beginners to focus on problem-solving and logical thinking instead of memorizing complex rules.
This simplicity has made Python the preferred language across multiple industries including software development, artificial intelligence, machine learning, cybersecurity, automation, cloud computing, and data science. Global companies continue investing heavily in Python-based technologies, which is why the demand for skilled Python developers keeps increasing every year.
For beginners, this creates a major advantage. Learning Python not only helps build programming knowledge but also opens doors to high-demand career opportunities in the modern software industry.
Stop Memorizing Code and Start Understanding Programming Logic
One of the most common mistakes beginners make while learning Python is trying to memorize code line by line. This approach creates confusion because programming is not about remembering syntax — it is about understanding how to solve problems logically.
Professional developers rarely memorize every command. Instead, they understand how programming structures work together to achieve a specific output. Beginners should focus first on understanding concepts such as variables, loops, conditions, functions, data structures, and logical flow control.
Once the logic becomes clear, writing Python code becomes significantly easier. This is exactly why students who focus on understanding concepts progress much faster than students who simply copy programs from tutorials.
Build Confidence Through Small Real-Time Programs
Many beginners spend weeks watching tutorials without actually writing code. This slows down learning and reduces confidence. Python programming becomes easier only through consistent hands-on practice.
Starting with small applications helps beginners understand how coding works in real environments. Creating programs like calculators, attendance systems, simple billing applications, number guessing games, or task management tools can improve logical thinking and debugging skills gradually.
The goal is not to build advanced software immediately. The goal is to develop problem-solving confidence through practical implementation. Every small project teaches beginners how programming concepts work together inside real applications.
Real-Time Projects Help Beginners Learn Faster Than Theory
One major reason many learners struggle with programming is over-dependence on theoretical learning. Reading concepts alone does not prepare beginners for real software development environments. Companies expect candidates to apply knowledge practically.
Working on real-time Python projects helps beginners understand application flow, database connectivity, user interaction, API integration, automation processes, and backend logic implementation. This practical exposure becomes extremely valuable during interviews because recruiters prefer candidates who understand development workflows instead of only theoretical definitions.
Projects such as inventory management systems, online booking platforms, chatbot applications, automation tools, or mini web applications can significantly improve technical confidence and portfolio strength.
Consistency Matters More Than Technical Background
Many people avoid programming because they believe they are from non-technical backgrounds. In reality, consistency matters far more than previous education. Python is specifically designed to help beginners learn programming concepts more comfortably compared to many traditional languages.
Spending even one hour daily on coding practice can create significant improvement over time. Programming skills develop gradually through repetition, debugging, experimentation, and continuous learning. The biggest advantage successful learners have is consistency — not prior coding knowledge.
Instead of comparing yourself with experienced developers, focus on improving your own understanding step by step. Every expert programmer was once a complete beginner struggling with basic syntax and errors.
Why Professional Python Training Helps Beginners Grow Faster
Self-learning is possible, but many beginners waste months following random tutorials without a clear roadmap. Industry-oriented Python training programs help learners follow structured learning methods that align with current IT industry requirements.
Professional Python training institutes usually provide live projects, coding assignments, interview preparation, resume-building support, and placement assistance. This structured guidance helps beginners avoid confusion while improving both technical knowledge and practical exposure.
Modern Python training programs also include advanced technologies such as Django framework development, REST API integration, automation testing, data science fundamentals, machine learning basics, and cloud deployment concepts. Learning these technologies can significantly improve career opportunities for freshers entering the software industry.
Career Opportunities After Learning Python Programming
Python is no longer limited to software development alone. Today, Python professionals are hired across multiple technology domains because of the language’s flexibility and growing enterprise usage.
After mastering Python, learners can explore careers in:
- Full Stack Development
- Backend Development
- Automation Testing
- Artificial Intelligence
- Machine Learning
- Data Analytics
- Web Application Development
- Cloud-Based Software Development
The demand for Python developers continues to rise globally, making it one of the strongest long-term career options for freshers and career switchers.
Final Thoughts
Mastering Python programming without prior coding knowledge is completely achievable when beginners follow the right learning strategy. Instead of focusing on memorizing syntax, learners should concentrate on understanding logic, building practical projects, improving coding consistency, and gaining real-world development exposure.
Python has created opportunities for thousands of students, non-IT graduates, and beginners to enter the software industry successfully. With proper guidance, practical training, and continuous learning, even someone with zero technical background can build a rewarding career in programming and modern technology development.
How to Crack .NET Developer Interviews in Bangalore – Expert Tips for Freshers
The demand for skilled .NET developers in Bangalore has increased tremendously over the past few years. From multinational IT companies to fast-growing startups, businesses are actively hiring fresh talent who can work on web applications, enterprise software, cloud platforms, and API-based systems. However, despite the growing number of job openings, many freshers still struggle to clear .NET developer interviews because they prepare with outdated methods that no longer match current industry expectations.
Today, Bangalore software companies are not simply hiring candidates who can define programming concepts. Recruiters are searching for freshers who understand real-time project development, can solve technical problems confidently, and possess practical exposure to modern Microsoft technologies. If you are planning to build your career as a .NET developer in Bangalore, the right preparation strategy can significantly improve your chances of getting placed in leading IT companies.
Why Bangalore Companies Prefer Skilled .NET Developers
Bangalore remains one of India’s strongest software development hubs, where companies constantly require developers for enterprise applications, ERP solutions, e-commerce platforms, banking software, healthcare systems, and SaaS products. Since Microsoft technologies are widely used across industries, .NET developers continue to remain in high demand.
Companies usually look for candidates with knowledge in ASP.NET development, .NET Core, C# programming, SQL Server, MVC architecture, Web API development, cloud integration, and frontend connectivity. Freshers who understand how these technologies work together in real-time applications often stand out during interviews.
Unlike traditional hiring methods, companies now focus more on practical capability rather than theoretical knowledge alone. This is exactly why many candidates with certifications fail interviews while candidates with project-based knowledge get selected quickly.
The Real Reason Most Freshers Fail .NET Interviews
One of the biggest mistakes freshers make is preparing only interview questions available online without understanding the actual implementation behind concepts. Recruiters can easily identify candidates who have memorized answers without practical exposure.
For example, many candidates say they know ASP.NET MVC but fail to explain how requests move between the Model, View, and Controller in a live application. Some candidates mention SQL knowledge but struggle while writing joins, stored procedures, or CRUD operations during practical coding rounds.
Modern software companies in Bangalore conduct interviews to evaluate how candidates think technically, handle coding challenges, and approach real-world development scenarios. This means freshers must focus on understanding concepts deeply instead of simply learning definitions.
Build Real-Time .NET Projects to Increase Selection Chances
If you truly want to impress interviewers, practical projects are essential. A strong project portfolio immediately increases your credibility because it demonstrates your hands-on development skills.
Instead of creating simple academic projects, freshers should work on applications that resemble real business environments. Developing systems like online billing software, hospital management applications, inventory tracking platforms, employee management systems, or e-commerce portals can create a stronger impact during interviews.
While presenting projects, explain your database structure, authentication methods, APIs used, validation process, frontend integration, and challenges faced during development. Interviewers are more likely to shortlist candidates who can confidently explain how applications function in real-time environments.
Learn Modern Technologies That Bangalore IT Companies Expect
The software industry evolves rapidly, and companies now prefer candidates who understand modern development practices. Learning only traditional ASP.NET technologies may limit your opportunities in today’s competitive job market.
Freshers preparing for .NET developer jobs in Bangalore should also gain exposure to ASP.NET Core, RESTful API development, GitHub version control, cloud deployment basics, Azure fundamentals, and frontend frameworks. Companies value candidates who show willingness to adapt to evolving technologies because software development environments constantly change.
Having knowledge of modern development workflows can also improve your salary opportunities during placement interviews.
Communication Skills Matter More Than Freshers Think
Many technically strong candidates fail interviews because they cannot communicate effectively. Software companies do not only evaluate coding ability — they also observe confidence, presentation skills, problem-solving attitude, and communication clarity.
Freshers should practice explaining technical concepts naturally instead of giving memorized responses. Mock interviews, project presentations, and regular coding discussions can help improve confidence significantly. Candidates who communicate professionally often create a stronger impression even during difficult technical rounds.
Looking for Professional .NET Training and Placement Support?
Many freshers in Bangalore now prefer industry-oriented .NET training programs to improve practical exposure and interview readiness. Professional training institutes like Maria Academy help candidates gain real-time project experience, live coding knowledge, placement preparation, resume-building support, and mock interview practice.
Choosing the right .NET training institute in Bangalore can help freshers bridge the gap between academic learning and real software industry expectations. With proper mentorship and practical learning, candidates can improve both technical confidence and placement opportunities.
Final Thoughts
Cracking a .NET developer interview in Bangalore requires more than basic programming knowledge. Companies are searching for freshers who understand practical development, modern technologies, coding logic, database handling, and real-time project workflows. Candidates who focus on strong fundamentals, live project experience, communication skills, and continuous learning can successfully secure high-growth opportunities in Bangalore’s competitive IT industry.
If you are serious about starting your software career, begin preparing with industry-focused learning methods instead of outdated interview preparation techniques. The right skills and guidance can help you build a successful future as a professional .NET developer.
How to Prepare for React Developer Jobs in Malaysia

React course in Malaysia
The digital landscape in Malaysia is evolving at a breakneck speed. From fintech startups in Kuala Lumpur to global tech hubs in Cyberjaya, the demand for skilled frontend developers has never been higher. Among the various frameworks available, React.js remains the industry gold standard. If you are looking to land a lucrative React developer job in Malaysia, you need more than just basic coding skills; you need a strategic roadmap.
In this guide, we will break down exactly how you can prepare for the Malaysian tech market, master the essential stack, and stand out to top-tier recruiters.
1. Master the Core JavaScript Fundamentals
Before diving into the complexities of React, you must be proficient in JavaScript (ES6+). Many candidates make the mistake of jumping straight into React hooks without understanding closures, the event loop, destructuring, and arrow functions.
In Malaysia, technical interviews for frontend developers often start with a “JavaScript whiteboard challenge.” Ensure you are comfortable with asynchronous programming, promises, and async/await. These are the pillars that make React functional and scalable.
2. Build a Diverse React Project Portfolio
Employers in Malaysia value practical experience over static certificates. To secure a React developer role, you need a portfolio that demonstrates your ability to solve real-world problems.
Focus on building:
- A Dashboard Application: Use state management libraries like Redux Toolkit or Zustand to show how you handle complex data.
- An E-commerce Frontend: This demonstrates your proficiency with routing (React Router) and API integration.
- A Real-time App: Integrating Firebase or Socket.io proves you can work with live data—a highly sought-after skill in the Malaysian startup scene.
Host these projects on GitHub, and ensure your README files are professional. A well-documented repository speaks volumes about your coding discipline.
3. Understand the Malaysian Tech Stack Trends
While React is the core, companies in Malaysia rarely use it in isolation. To be a competitive candidate, familiarize yourself with the broader ecosystem:
- Next.js: This has become the standard for React development. If you know Server-Side Rendering (SSR) and Static Site Generation (SSG), you are already ahead of 80% of applicants.
- TypeScript: Type safety is no longer optional. Most enterprise-level firms in KL insist on TypeScript for large-scale applications.
- Tailwind CSS/Styled Components: Styling is a huge part of the frontend. Showcase that you can create responsive, accessible, and aesthetically pleasing interfaces.
4. Networking and LinkedIn Optimization
Malaysia’s tech industry is heavily driven by professional networks. Optimize your LinkedIn profile with keywords like “React Developer,” “Frontend Engineer,” and “JavaScript Expert.” Connect with local tech leads and join groups like “React Malaysia” to stay updated on hiring trends. Many high-paying roles are still filled through referrals and LinkedIn outreach rather than standard job portals.
5. Prepare for the Coding Assessment
Most companies in Malaysia utilize platforms like HackerRank or Codility for the initial round. Don’t just practice React; practice algorithmic thinking. Spend time on LeetCode solving “Easy” and “Medium” difficulty problems. This training will help you stay calm and logical during high-pressure technical screenings.
Accelerate Your Journey with Maria Academy
Self-study is effective, but it is often slow and lacks the mentorship required to clear professional interviews. If you want to bypass the trial-and-error phase, Maria Academy is your best partner.
Maria Academy is a premier software training institute dedicated to bridging the gap between academic knowledge and industry requirements. They offer specialized online and fast-track React development courses designed specifically for the Malaysian job market.
Why choose Maria Academy?
- Industry-Led Curriculum: Learn exactly what recruiters look for in 2024.
- Fast-track Options: Perfect for professionals looking to transition into tech quickly without spending years on generic bootcamps.
- Mentorship: Get direct feedback on your code from experienced software engineers.
- Flexible Learning: Their online courses allow you to study from the comfort of your home, fitting seamlessly into your busy Malaysian lifestyle.
Whether you are a fresh graduate or looking to make a career switch, Maria Academy provides the hands-on training and career support you need to land your dream React developer job in Malaysia.
Ready to start? Visit Maria Academy today to explore their upcoming course schedules and take the first step toward a high-paying career in software development.
Mastering Code: A Deep Dive into the Top Programming Courses in Singapore for Aspiring Developers

top programming courses in singapore for aspiring developers and software training programs
In the rapidly evolving digital landscape of Singapore, programming is no longer just a “tech skill”—it is the new literacy. Whether you are aiming to pivot your career into Software Engineering, Data Science, or Full-Stack Development, choosing the right training provider is the most critical step.
While many platforms offer entry-level “Hello World” tutorials, true professional growth requires deep-dive curriculum, industry-standard frameworks, and rigorous project-based learning. In this guide, we analyze the most robust programming courses in Singapore that go beyond the basics to provide advanced technical mastery.
What Defines a Superior Programming Course?
When evaluating professional coding bootcamps in Singapore, you must look past marketing slogans. An elite course must offer:
- Infrastructure-as-Code & DevOps Integration: Moving beyond simple syntax to understand how code is deployed in cloud environments (AWS/Azure).
- Architectural Patterns: Learning MVC, Microservices, and RESTful API design instead of just functional programming.
- Version Control Mastery: Deep usage of Git branching strategies (GitFlow) and CI/CD pipelines.
- Data Structures and Algorithms (DSA): The backbone of advanced software engineering interviews and high-performance applications.
Deep Analysis: Advanced Curriculum Standards
The gap between a “basic” student and an “advanced” developer lies in their ability to handle complexity. Advanced courses in Singapore now focus on Full-Stack MERN/MEAN architectures.
A high-level Full-Stack course should cover:
- Backend Engineering: Moving beyond simple database queries to handling complex database normalization, indexing, and asynchronous processing using Node.js or Python (FastAPI/Django).
- Frontend Sophistication: Moving beyond basic HTML/CSS to mastering React hooks, state management (Redux/Context API), and server-side rendering with Next.js.
- System Design: This is where the advanced content truly shines. Top-tier programs teach students how to scale applications, implement load balancers, and manage database sharding.
The Professional Edge: Why Specialized Training Matters
Singapore’s tech ecosystem is highly competitive. Employers are shifting away from hiring “generalist coders” toward specialists who understand Software Development Life Cycle (SDLC).
Advanced programs often include:
- Containerization: Mastery over Docker and Kubernetes.
- Testing Frameworks: Moving beyond manual testing to automated Unit Testing (Jest, Mocha) and End-to-End Testing (Cypress/Selenium).
- Security: Implementing OAuth, JWT, and understanding OWASP top 10 vulnerabilities.
If you are looking for a program that prioritizes these technical depths, you need a provider that mirrors real-world enterprise environments rather than classroom theory.
Your Pathway to Advanced Software Engineering
While there are many providers, Maria Academy Software Training Institute stands out for its commitment to industry-readiness and technical depth. Unlike mass-market bootcamps that focus on broad, shallow coverage, Maria Academy emphasizes high-intensity, practical mastery.
Why Choose Maria Academy?
Maria Academy addresses the two biggest pain points for professionals: Time and Flexibility.
- Fast-Track Intensive Programs: Understanding that career pivots require speed, Maria Academy offers accelerated tracks designed to compress 6–12 months of standard curriculum into a high-impact timeframe without sacrificing depth. You aren’t just learning to code; you are learning to build software like a Senior Engineer.
- Online Accessibility: Geography is no longer a barrier. Maria Academy’s online training environment uses state-of-the-art remote learning tools, allowing you to participate in live coding sessions, code reviews, and remote pair-programming from the comfort of your home or office in Singapore.
- Mentorship-Driven Approach: Their curriculum is curated by industry experts who understand the specific requirements of the Singaporean tech job market. Whether you are specializing in Backend Systems, Cloud Infrastructure, or Frontend frameworks, the instruction is tailored to meet the rigors of modern enterprise development.
Investing in Your Tech Future
The demand for skilled developers in Singapore will only continue to accelerate. To remain relevant, you must move beyond basic tutorials and invest in advanced training that covers architecture, deployment, and security.
If you are serious about mastering the craft, look for programs that emphasize hands-on, fast-track learning. Maria Academy Software Training Institute provides the perfect balance of technical rigor and flexibility, ensuring that you graduate with a portfolio that speaks for itself. Don’t just learn to code—learn to engineer the software of tomorrow.
Are you ready to accelerate your career? Visit Maria Academy Software Training Institute today to explore their upcoming online cohorts and take the first step toward becoming a high-level software developer.
Unlocking Career Opportunities After Completing a Power BI Course in Karaikudi

job-opportunities-after-power-bi-course-karaikudi
If you’re exploring ways to enhance your professional skill set or searching for promising job opportunities in Karaikudi, you’ve landed in the right spot. This week, let’s dive into the booming world of Power BI and what finishing a Power BI course can mean for your career prospects here. Whether you’re a fresh graduate, a working professional looking to upskill, or someone eager to switch careers, understanding how Power BI fits into the job market can open some exciting doors.
Power BI, a leading data visualization and business intelligence tool by Microsoft, has gained huge popularity across industries. With businesses increasingly relying on data-driven decision-making, Power BI professionals are in demand like never before. So, what’s the job landscape like in Karaikudi after completing a Power BI course? Let’s unpack this.
Why Power BI Skills Are in Demand in Karaikudi
Karaikudi, known for its vibrant business activities and emerging IT services, is witnessing a gradual but definite uptick in data-centric roles. Companies here—from local enterprises to expanding startups—are seeking candidates who can turn raw data into clear, actionable insights. Power BI professionals can craft interactive dashboards, generate comprehensive reports, and enable strategic planning across functions.
From finance to healthcare, manufacturing to retail, data analytics jobs that require Power BI expertise are popping up. Employers want individuals with proficiency not just in data handling but also in communicating insights effectively. That’s where Power BI training truly shines and becomes a career catalyst.
Career Paths You Can Explore After Completing Power BI Training
Post your training, several job roles could be within your reach. Here are some popular ones to consider:
- Data Analyst: Collect, process, and perform statistical analyses on large datasets using Power BI to help businesses make informed decisions.
- Business Intelligence Analyst: Design and develop BI solutions, prepare reports, and identify trends through Power BI dashboards.
- Power BI Developer: Build and maintain scalable BI reports and dashboards, automate data workflows, and optimize data models.
- Data Visualization Specialist: Focus on converting complex data into visually appealing and easy-to-understand formats.
Because Power BI integrates smoothly with other Microsoft tools like Excel, Azure, and SQL Server, professionals with cross-functional knowledge are especially valued. You could also find freelance or consultancy projects here, given the increasing need for short-term analytics experts.
How to Maximize Your Job Prospects in Karaikudi With Power BI
Just completing the course isn’t enough—you want to sharpen your edge. Here are some friendly tips:
- Hands-on Practice: Work on real datasets; build personal projects showcasing your Power BI dashboards.
- Certifications: If possible, aim for Microsoft’s official Power BI certification to stand out.
- Stay Updated: Power BI regularly adds features—keep learning and engage with online communities.
- Soft Skills: Communication and analytical thinking rank high; being able to narrate data stories is crucial.
- Networking: Connect with local tech groups, LinkedIn communities, or attend meetups in Karaikudi.
The good news is companies in Karaikudi are increasingly open to remote and hybrid roles. So, your options could extend beyond just the city.
Where to Kickstart Your Power BI Journey in Karaikudi?
One name that keeps popping up among locals eager to master Power BI is Maria Academy Software Training Institute. Known for offering both online and fast-track courses, Maria Academy understands the value of flexible, intensive training that fits today’s busy lives.
Whether you prefer learning remotely or want to dive deep with a rapid course, Maria Academy covers all bases—providing practical knowledge, industry-relevant tools, and placement support. They focus not only on technical mastery but also on helping you translate those skills into real workplace success.
In a nutshell, if you’re serious about powering up your career with Power BI skills in Karaikudi, finding the right course and guidance is key. Maria Academy might just be the partner you’re looking for.
If you’ve made it this far, I hope you’re feeling excited about the opportunities Power BI training unlocks here in Karaikudi. It’s a field that’s growing steadily and rewarding those who invest their time smartly. Whether you aim to be an in-demand data analyst or a creative BI developer, now is a great time to ride this wave.
Stay tuned for next week’s blog, where we’ll explore actionable tips on crafting a standout resume specifically for tech roles in Karaikudi. Until then, keep learning, stay curious, and don’t hesitate to reach out if you want to share your Power BI journey or ask questions. We’re all in this growth adventure together!
Best Data Analytics Course in Chennai – Career Guide 2026

Data analytics course in chennai
If you’re scrolling through the endless list of online certifications, wondering which data analytics course in Chennai will actually launch a rewarding career, you’re not alone. 2026 has turned data into the new oil, and Chennai’s tech ecosystem is hungry for professionals who can turn raw numbers into actionable insights. This guide breaks down everything you need to know – from the most sought‑after skills and realistic salary expectations to the career pathways that await you after graduation.
Why Data Analytics Is a Game‑Changer in 2026
- Explosive demand: Companies across fintech, health‑tech, e‑commerce, and manufacturing are investing heavily in analytics platforms. According to a recent NASSCOM report, data‑driven roles in South India have grown by 38 % year‑on‑year.
- Higher earning potential: The average data analyst salary in Chennai now hovers around ₹9‑12 Lakhs per annum, with senior positions crossing the ₹20 Lakhs mark.
- Versatile career routes: From business intelligence to machine‑learning support, a solid analytics foundation opens doors to roles such as Data Scientist, Business Analyst, Operations Analyst, and even Product Manager.
Core Skills Every Data Analyst Must Master
- Statistical Foundations – Understanding probability, hypothesis testing, and regression analysis is the backbone of any analytical decision.
- Data Manipulation & Cleaning – Proficiency in SQL, Python (pandas, NumPy), or R is non‑negotiable. Employers look for candidates who can wrangle messy datasets into clean, analysis‑ready tables.
- Visualization Tools – Mastery of Power BI, Tableau, or Google Data Studio enables you to communicate insights clearly to stakeholders.
- Business Acumen – Translating numbers into business value is what separates a data analyst from a data wrangler. Knowledge of domain‑specific metrics (e.g., churn rate for telecom, conversion funnel for e‑commerce) is crucial.
- Storytelling & Communication – Strong written and verbal communication skills help you present complex findings in simple, compelling narratives.
What to Look for in the Best Data Analytics Course in Chennai
- Industry‑aligned curriculum – Courses that blend theory with real‑world case studies from Chennai’s top firms (e.g., Zoho, Freshworks, Indian Oil).
- Hands‑on projects – Look for programs that give you access to live datasets, capstone projects, and internship opportunities.
- Certification credibility – Internationally recognized certificates (such as Google Data Analytics Professional Certificate or Microsoft Certified: Data Analyst Associate) add weight to your résumé.
- Placement support – Institutes that provide resume workshops, mock interviews, and direct campus drives dramatically increase your hiring odds.
- Experienced faculty – Trainers with at least 5–7 years of industry experience can share insider tips that textbooks miss.
Salary Snapshot for Data Analytics Professionals in Chennai (2026)
| Position | Experience | Approx. Salary (₹) |
| Junior Data Analyst | 0–1 yr | 5–7 Lakhs |
| Data Analyst | 2–4 yr | 9–12 Lakhs |
| Senior Data Analyst | 5–7 yr | 14–18 Lakhs |
| Analytics Manager | 8+ yr | 20–28 Lakhs |
| Data Scientist (Transition) | 3–5 yr (with ML skills) | 18–25 Lakhs |
Note: Salaries can rise sharply with certifications, advanced tools mastery, and a proven track record of delivering business impact.
Career Opportunities After Completing a Top‑Rated Course
- Business Intelligence Analyst – Work with dashboards and reporting tools to track key performance indicators (KPIs) for corporations.
- Operations Analyst – Optimize supply‑chain processes, reduce costs, and improve efficiency using data‑driven models.
- Marketing Analyst – Analyze campaign performance, segment audiences, and enhance ROI through predictive analytics.
- Financial Analyst – Assess investment opportunities, risk, and forecasting for banks and fintech startups.
- Product Analyst – Use usage data to guide product roadmap decisions and feature prioritization.
Chennai’s thriving startup ecosystem, along with its established IT parks like Tidel Park and OMR, constantly scout for fresh analytical talent. Moreover, multinational firms such as Accenture, Cognizant, and Capgemini regularly open entry‑level analytics roles, offering global exposure without leaving the city.
How to Maximize Your Learning Experience
- Practice daily: Dedicate at least an hour to coding exercises on platforms like Kaggle or HackerRank.
- Build a portfolio: Publish dashboards on Tableau Public or Power BI Community, and share your GitHub repository with completed projects.
- Network locally: Attend data‑science meetups, workshops, and hackathons organized in Chennai. Connections often lead to hidden job opportunities.
- Stay updated: Follow industry blogs (Towards Data Science, Analytics Vidhya) and keep an eye on emerging tools such as Snowflake, Databricks, and Looker.
Why Maria Academy Stands Out as the Premier Choice
When it comes to the best data analytics course in Chennai, Maria Academy consistently ranks at the top for several compelling reasons:
- Curriculum built for 2026: The program integrates the latest trends—cloud‑based analytics, AI‑assisted data preparation, and advanced visualization techniques—ensuring you graduate with future‑proof skills.
- Live industry projects: Students work on real data from Chennai’s leading startups and corporate partners, gaining hands‑on experience that employers love.
- Expert faculty: All instructors boast a minimum of 7 years of industry experience, bringing practical insights from roles at multinational firms and leading Indian tech houses.
- Placement record: Maria Academy boasts a 92 % placement rate within three months of graduation, with alumni landing roles at companies like Zoho, Freshworks, Amazon, and Capgemini.
- Certification support: The course prepares you for internationally recognized exams, and Maria Academy provides exam vouchers and dedicated coaching for certifications such as Microsoft Certified: Data Analyst Associate.
Choosing the right institute can be the difference between a short‑term certification and a lifelong, high‑earning career. Maria Academy’s blend of rigorous academics, industry exposure, and robust placement assistance makes it the ideal launchpad for aspiring data analysts in Chennai.
Data analytics is no longer a niche skill—it’s the lingua franca of every modern business. In 2026, a best data analytics course in Chennai can catapult you into a vibrant career with competitive salaries and endless growth possibilities. Focus on mastering core analytical tools, building a solid portfolio, and aligning yourself with institutions that deliver real‑world experience.
If you’re ready to transform raw data into strategic decisions, start your journey today with a program that bridges theory and practice—Maria Academy is waiting to guide you toward a data‑driven future.
Unlock the power of data. Shape the future of Chennai’s tech landscape.
Data Science Careers in Sharjah Using Python
Sharjah’s tech ecosystem is booming, and data‑driven decision‑making is at the heart of every successful business. If you’re wondering how to turn your passion for Python into a rewarding career, this guide will show you exactly why Sharjah is the perfect launchpad for data‑science professionals.

python course in sharjah
Why Python Is the Language of Choice for Data Science
Python has become the undisputed standard for data science because it offers:
- Simple syntax – easy for beginners yet powerful for experts.
- Rich libraries – pandas, NumPy, Scikit‑learn, TensorFlow, and Matplotlib accelerate every stage of the analytics pipeline.
- Strong community support – countless tutorials, forums, and open‑source projects keep you up‑to‑date.
Employers in Sharjah recognize these benefits, which is why Python skills are consistently listed at the top of data‑science job ads.
The Sharjah Advantage: A Growing Hub for Data‑Driven Companies
Sharjah’s strategic location, business‑friendly policies, and investment in smart‑city initiatives have attracted a diverse mix of organizations:
- Finance & Banking – banks are leveraging predictive analytics for risk management and fraud detection.
- Healthcare – hospitals use Python‑based models to predict patient outcomes and streamline operations.
- Logistics & Port Management – real‑time data analysis optimizes cargo flow through the Port of Khalid.
- Retail & E‑commerce – customer‑behaviour segmentation drives personalized marketing campaigns.
These sectors are actively hiring data scientists, machine‑learning engineers, and analytics consultants who are fluent in Python.
Top In‑Demand Roles in Sharjah’s Data Science Landscape
| Position | Typical Responsibilities | Average Salary (AED) |
| Data Scientist | Build predictive models, conduct A/B testing, visualize insights. | 12,000–18,000 |
| Machine‑Learning Engineer | Deploy ML pipelines, maintain model performance, work with cloud services. | 14,000–20,000 |
| Data Analyst | Clean and explore datasets, generate dashboards, support business decisions. | 8,000–12,000 |
| Business Intelligence (BI) Developer | Design data warehouses, create Power BI/Tableau reports, automate reporting. | 9,000–14,000 |
(Salary ranges are indicative and can vary by experience and company size.)
Essential Skills to Land a Data‑Science Job in Sharjah
- Python Proficiency – mastery of core libraries (pandas, NumPy) and advanced tools (TensorFlow, PyTorch).
- Statistical Foundations – hypothesis testing, regression, Bayesian methods.
- Data Visualization – storytelling with Matplotlib, Seaborn, Plotly, or Power BI.
- SQL & NoSQL – querying relational databases and working with MongoDB or Cassandra.
- Cloud Platforms – AWS, Azure, or Google Cloud for scalable model deployment.
- Domain Knowledge – understanding of finance, healthcare, logistics, or retail workflows in Sharjah.
How to Get Started – The Fast‑Track Path
If you’re new to Python or want to upgrade your data‑science toolkit, online training is the most flexible option. One institute that stands out in the UAE is Maria Academy Software Training Institute. Here’s why their courses are a perfect match for Sharjah aspirants:
- Comprehensive Curriculum – from Python basics to deep‑learning projects, all aligned with industry standards.
- Online Delivery – live instructor‑led sessions and on‑demand recordings let you learn from anywhere in Sharjah.
- Fast‑Track Programs – intensive 6‑week bootcamps designed for professionals who need job‑ready skills quickly.
- Career Support – resume workshops, mock interviews, and direct connections with local recruiters.
Whether you choose the “Python for Data Science” beginner track or the “Advanced Machine Learning with Python” fast‑track, Maria Academy equips you with the hands‑on experience employers demand.
Real‑World Success Stories from Sharjah
- Ahmed Al‑Mansoori, a recent graduate of Maria Academy’s fast‑track course, landed a junior data‑scientist role at a leading fintech startup within one month of completing the program.
- Fatima Saeed, who upskilled through the online Python for Data Analysis class, now leads a team of analysts at a multinational logistics firm, optimizing cargo routing with predictive models.
These stories illustrate the direct link between targeted Python training and rapid career progression in Sharjah’s competitive market.
Steps to Accelerate Your Data‑Science Career in Sharjah
- Enroll in a Python‑focused course – Maria Academy’s fast‑track options give you practical, project‑based learning.
- Build a portfolio – publish Jupyter notebooks on GitHub, showcase Kaggle competition results, or develop a small‑scale project for a local business.
- Network locally – attend Sharjah’s tech meetups, webinars, and AI conferences to meet hiring managers.
- Tailor your CV – highlight Python libraries, cloud certifications, and any domain‑specific projects.
- Apply strategically – target companies in finance, healthcare, logistics, and retail that explicitly mention Python in their job descriptions.
Your Data‑Science Future Starts Now
Sharjah is rapidly becoming a hotspot for data‑driven innovation, and Python is the engine powering that transformation. By mastering Python, understanding industry‑specific challenges, and leveraging fast‑track training from reputable providers like Maria Academy Software Training Institute, you can secure a high‑impact role that offers both financial reward and professional growth.
Ready to take the next step? Explore Maria Academy’s online fast‑track courses today and turn your Python skills into a thriving data‑science career right here in Sharjah!
The Future of Backend Development in Kuwait: Trends & Opportunities
Kuwait’s tech ecosystem is accelerating faster than ever. From government‑led smart‑city initiatives to a surge of fintech startups, the demand for robust, scalable, and secure backend systems is at an all‑time high. If you’re a developer, a tech entrepreneur, or a hiring manager, understanding the forces shaping the future of backend development in Kuwait is crucial for staying competitive.

Dot net course in kuwait
1. Cloud‑First Architecture Becomes the Norm
Kuwaiti businesses are moving away from on‑premise servers and embracing cloud platforms such as AWS, Azure, and Google Cloud. The benefits are clear: instant scalability, reduced capital expenditure, and built‑in security features that meet the region’s strict data‑privacy regulations. As a result, backend engineers are expected to master cloud‑native development, serverless functions, and infrastructure‑as‑code tools like Terraform.
2. Microservices and API‑Centric Design
Monolithic applications can’t keep up with the rapid release cycles demanded by today’s digital products. Companies in Kuwait are refactoring legacy systems into microservices that communicate through RESTful or GraphQL APIs. This modular approach not only speeds up development but also allows different teams to work independently, a critical advantage for the growing number of tech hubs in Kuwait City.
3. Programming Languages in the Spotlight
While Java and .NET have long dominated the enterprise scene, Node.js, Python, and Go are gaining traction for their speed of development and performance in handling real‑time data. Startups building AI‑powered chatbots or IoT platforms prefer these lightweight languages, which also integrate smoothly with cloud services and container orchestration tools like Kubernetes.
4. AI and Machine Learning Integration
Kuwait’s Vision 2035 emphasizes the role of artificial intelligence across sectors such as finance, healthcare, and transportation. Backend developers are now tasked with designing pipelines that ingest massive datasets, apply machine learning models, and expose predictions via secure APIs. Knowledge of frameworks such as TensorFlow, PyTorch, and MLflow is becoming a differentiator.
5. Emphasis on Cybersecurity
With the rise of digital services, cyber threats are also on the rise. Kuwaiti regulations require strict encryption, secure authentication, and regular penetration testing. Backend engineers must embed security best practices—OAuth2, JWT, OWASP guidelines—directly into the codebase rather than treating security as an afterthought.
6. Remote Work and Distributed Teams
The pandemic proved that high‑performing development teams can thrive remotely. Companies in Kuwait are now hiring talent from across the GCC and beyond, which expands the talent pool but also raises the bar for collaboration tools, version control standards, and documentation practices. Mastery of Git, CI/CD pipelines, and collaborative platforms like Jira and Confluence is essential.
7. The Talent Gap and Upskilling Needs
Despite a growing tech scene, Kuwait still faces a shortage of skilled backend developers who can navigate this complex landscape. Universities are updating curricula, but many professionals rely on self‑learning and bootcamps to stay current. This talent gap creates a massive opportunity for training institutes that can deliver online and fast‑track courses tailored to industry needs.
How to Position Yourself for Success
- Get Cloud Certified – AWS Certified Developer, Azure Developer Associate, or Google Associate Cloud Engineer badges add credibility.
- Build a Portfolio of Microservices – Deploy a small e‑commerce backend using Docker and Kubernetes to showcase your skills.
- Learn AI Fundamentals – Even a basic understanding of model deployment will set you apart in AI‑driven projects.
- Prioritize Security – Implement OWASP top‑10 mitigations in every project and highlight them in your résumé.
- Stay Updated on Local Regulations – Knowledge of Kuwait’s data‑protection laws (e.g., the Personal Data Protection Law) is a strong selling point.
Why Maria Academy Is the Perfect Partner for Your Journey
If you’re looking to bridge the skill gap quickly, Maria Academy Software Training Institute offers exactly what Kuwait’s tech market needs. Their online courses are designed for working professionals, featuring live mentorship, real‑world projects, and flexible schedules. For those who want to accelerate their career, the fast‑track programs deliver intensive, hands‑on training in backend technologies such as Node.js, Python, microservices architecture, and cloud platforms—all within a fraction of the time of traditional degrees.
By choosing Maria Academy, you gain:
- Industry‑relevant curriculum aligned with the latest trends in Kuwait’s backend development landscape.
- Certification pathways that are recognized by leading employers in the Gulf region.
- Career support services, including resume reviews and interview preparation, to help you land high‑impact roles.
Ready to be part of Kuwait’s digital transformation? Explore the courses at Maria Academy today and turn the future of backend development into your personal success story.
React Developer Salary in Dubai: Career Insights You Can’t Miss
React course in Dubai
If you’re a front‑end specialist eyeing the Gulf’s most dynamic tech hub, Dubai should be at the top of your list. The city’s rapid digital transformation, sky‑high skyscrapers, and tax‑free environment make it a magnet for React developers seeking both professional growth and an attractive paycheck. In this post we’ll break down the current React developer salary in Dubai, explore the factors that influence earnings, and give you practical tips to maximise your career potential.
Why Dubai is a Hotspot for React Talent
Dubai’s ambition to become a global “smart city” has spurred billions of dollars in investment for e‑commerce platforms, fintech solutions, and mobile apps. Companies ranging from multinational giants like Amazon, Microsoft, and Google to fast‑growing startups are constantly on the hunt for skilled front‑end engineers who can turn UI designs into seamless, high‑performance user experiences.
The React ecosystem—with its reusable components, virtual DOM, and robust community—has become the go‑to framework for building responsive web applications. As a result, React developer jobs in Dubai are abundant and often come with competitive compensation packages.
What’s the Average React Developer Salary in Dubai?
According to recent market surveys and recruitment data (2024), the average annual salary for a React developer in Dubai ranges between AED 180,000 and AED 260,000.
- Entry‑Level (0‑2 years): AED 150,000 – AED 180,000
- Mid‑Level (3‑5 years): AED 200,000 – AED 260,000
- Senior/Lead (5+ years): AED 300,000 – AED 420,000
These figures are tax‑free, meaning the gross amount is what you actually take home—an advantage that makes Dubai’s salary structure especially appealing compared with many Western markets.
Factors That Influence Your Paycheck
- Experience & Skill Depth – Mastery of React hooks, Redux, TypeScript, and server‑side rendering (Next.js) can push your salary to the top of the range.
- Industry Vertical – Fintech, e‑commerce, and travel tech companies often offer higher compensation due to the complexity and security requirements of their platforms.
- Company Size – Multinationals and large enterprises tend to have bigger budgets for tech talent, while well‑funded startups may compensate with equity or performance bonuses.
- Certification & Training – Holding recognized credentials (e.g., React Certified Developer or Full‑Stack JavaScript certifications) signals credibility and can justify a salary boost.
- Location Within the Emirate – While most tech offices are clustered in Business Bay, Dubai Internet City, and Jumeirah Lake Towers, remote‑first roles are emerging, offering flexibility but sometimes a slightly lower base salary.
How to Accelerate Your Earnings
- Specialise in Complementary Tech – Adding Node.js, GraphQL, or cloud platforms (AWS, Azure) to your skill set makes you a full‑stack asset, which commands premium rates.
- Showcase Real Projects – A strong GitHub portfolio with live demos of React applications demonstrates practical expertise to hiring managers.
- Network in the Local Community – Attend meet‑ups like Dubai React Community or join online forums. Building relationships can lead to referrals for high‑paying roles.
- Negotiate Smartly – Leverage the tax‑free advantage when discussing salary, but also ask for benefits such as health insurance, housing allowance, and annual flight tickets—standard perks in the UAE.
The Future Outlook for React Developers in Dubai
The UAE Vision 2030 emphasises digital innovation across government services, education, and tourism. With React at the core of many modern web solutions, demand for skilled developers is projected to grow 15‑20% annually over the next five years. Moreover, the rise of low‑code platforms and progressive web apps (PWAs) is expanding the scope of React’s use cases, creating new niches for niche specialisation.
If you’re contemplating a move or a salary negotiation, now is the perfect moment to upskill and position yourself as a high‑value candidate in a market that rewards expertise handsomely.
Ready to Upskill? Maria Academy Has You Covered
Whether you’re starting from scratch or looking to sharpen your React chops, Maria Academy offers comprehensive online and fast‑track courses designed for busy professionals. Their curriculum covers everything from basic JavaScript fundamentals to advanced React patterns, Redux, and server‑side rendering with Next.js.
- Online Learning: Flexible, self‑paced modules you can access from anywhere in the world.
- Fast‑Track Programs: Intensive bootcamps that take you from beginner to job‑ready in just 12 weeks.
Enroll today, earn a recognised certification, and boost your marketability in Dubai’s thriving tech scene. With Maria Academy’s industry‑aligned training, you’ll be equipped to command the salary you deserve.
Take the next step in your career—invest in your skills, understand the market, and watch your earnings soar in the dazzling city of Dubai.
Best Software Training Institute in Bangalore for Job‑Oriented Courses – Your Path to a High‑Paying IT Career
Bangalore, often hailed as the “Silicon Valley of India”, is a bustling hub where tech giants, startups, and multinational firms converge. Every day, thousands of fresh graduates and working professionals flood the city’s streets with a single goal: to land a job in the booming IT sector. The secret weapon? The right software training institute that offers job‑oriented courses designed to bridge the gap between academic learning and industry expectations.
In this article we dive deep into what makes an institute the best for software training in Bangalore, highlight the most in‑demand courses, and share tips on choosing a centre that guarantees a swift transition from classroom to corporate office.

best software training institute in bangalore
Why a Job‑Oriented Software Course Matters
Traditional engineering curricula often focus heavily on theory. While a strong foundation is essential, employers today look for practical skills, real‑world project experience, and certifications that prove a candidate can hit the ground running. A job‑oriented software course typically offers:
- Hands‑On Labs & Live Projects – Simulated industry environments where you build end‑to‑end applications.
- Industry‑Recognised Certifications – Partnerships with Microsoft, Oracle, AWS, or Google that add credibility to your resume.
- Placement Assistance & Interview Coaching – Dedicated career services, mock interviews, and resume building workshops.
- Flexible Learning Modes – Evening batches, weekend classes, and online options to accommodate working professionals.
When these elements combine, the result is a career‑ready graduate who can command a higher salary and enjoy rapid growth in the tech ecosystem.
Key Features of the Best Software Training Institute in Bangalore
If you are scanning through countless options, keep an eye on these hallmark traits that separate the good from the great:
- Curriculum Aligned with Industry Trends – Courses are regularly updated to include emerging technologies such as Cloud Computing, DevOps, Data Science, AI/ML, and Full‑Stack Development.
- Experienced Faculty – Instructors with 8+ years of industry experience, often holding senior positions in reputed firms.
- Small Batch Sizes – Typically 10‑15 students per batch, ensuring personalized attention and faster problem resolution.
- State‑of‑the‑Art Infrastructure – Modern labs equipped with the latest IDEs, servers, and collaboration tools.
- Strong Placement Record – Transparent statistics on student placements, average salary packages, and partner companies like Infosys, Wipro, TCS, Amazon, and start‑ups.
- Career Support Services – Dedicated placement cells, soft‑skill workshops, and alumni networks that keep you connected long after the course ends.
Most Sought‑After Job‑Oriented Courses in Bangalore
Below is a snapshot of the top courses that consistently attract high placement rates:
- Full‑Stack Web Development – Master HTML, CSS, JavaScript, React, Node.js, and database integration.
- Data Science & Analytics – Learn Python, R, SQL, Machine Learning algorithms, and Tableau for data‑driven decision making.
- Cloud Computing (AWS / Azure / Google Cloud) – Get hands‑on with cloud architecture, DevOps pipelines, and serverless solutions.
- Mobile App Development – Build native Android (Kotlin) and iOS (Swift) apps, plus cross‑platform solutions with Flutter.
- Cybersecurity & Ethical Hacking – Understand network security, penetration testing, and compliance frameworks.
- Artificial Intelligence & Machine Learning – Dive into deep learning, NLP, and AI model deployment.
These programs are deliberately job‑oriented, blending theory with live industry projects that mirror the challenges faced by top tech firms.
How to Choose the Right Institute
- Research Placement Statistics – Look for institutes that publish transparent placement data, including the number of students placed, average salary, and hiring partners.
- Check Course Flexibility – If you are a working professional, opt for evening, weekend, or online batches that fit your schedule.
- Read Student Reviews – Platforms like Google Reviews, Quora, and alumni forums provide authentic feedback on teaching quality and support services.
- Visit the Campus (or Virtual Tour) – A quick tour helps you gauge the learning environment, lab facilities, and overall vibe.
- Assess the Certification Value – Prefer institutes with tie‑ups to global certification bodies or recognized industry partners.
Why Bangalore Remains the Top Destination for IT Training
- Proximity to Tech Companies – Many institutes enjoy collaborations with nearby IT parks, giving students exposure to real‑time projects.
- Vibrant Startup Culture – The city’s entrepreneurial spirit means frequent hackathons, meetups, and networking events.
- Diverse Talent Pool – Learning alongside peers from various engineering and non‑engineering backgrounds enriches the classroom experience.
All these factors create a dynamic learning ecosystem that propels students straight into high‑impact roles.
Maria Academy – Your Gateway to Online & Fast‑Track Software Courses
If you are looking for a software training institute that blends flexibility with industry relevance, Maria Academy stands out as a compelling choice.
- Online Learning Platform: Access expertly crafted video lectures, interactive labs, and real‑time doubt‑clearing sessions from anywhere in the world.
- Fast‑Track Courses: Designed for professionals who need to upskill quickly, these intensive programs compress 3‑month curricula into 6‑8 weeks without compromising depth.
- Job‑Oriented Curriculum: Each course follows a hands‑on, project‑centric approach, ensuring you graduate with a portfolio that impresses recruiters.
- Placement Assistance: Maria Academy’s dedicated career services team provides resume reviews, mock interviews, and direct referrals to partner companies across Bangalore and beyond.
Whether you are a fresh graduate seeking a full‑stack developer role, a working professional aiming to transition into data science, or an entrepreneur wanting to build a cloud‑native solution, Maria Academy’s online and fast‑track courses give you the tools, mentorship, and confidence to succeed.
Choosing the best software training institute in Bangalore is a pivotal step toward a rewarding IT career. Focus on institutes that deliver job‑oriented curricula, hands‑on experience, and strong placement support. Keep an eye on emerging tech trends, ensure the course format aligns with your lifestyle, and don’t forget to read authentic student reviews.
When you combine these criteria with a reputable centre like Maria Academy, you set yourself up for fast‑track growth, higher employability, and a future‑proof skill set that will keep you ahead in the ever‑evolving tech landscape.
Take the first step today—research, enroll, and watch your career in software development take off!
Why Practical Training Matters in Power Platform Courses
In today’s fast‑moving digital landscape, businesses are racing to automate processes, visualize data, and build custom applications. Microsoft’s Power Platform—comprising Power Apps, Power Automate, Power BI, and Power Virtual Agents—has become the go‑to suite for citizen developers and IT pros alike. Yet, the real power of the platform is unlocked only through practical, hands‑on training. Below we explore why practical training is the catalyst for mastery, career growth, and measurable ROI.

practical power platform training with real world projects and business automation tools
1. Bridges the Gap Between Theory and Reality
- Concepts become skills – Reading about connectors, triggers, and formulas is useful, but only when learners actually create a flow or design a canvas app do the concepts stick.
- Immediate feedback – Interactive labs highlight errors instantly, allowing students to correct mistakes before they become habits.
2. Accelerates Skill Retention
The forgetting curve shows that information not applied within 24‑48 hours drops dramatically. Practical exercises:
- Reinforce memory by repeating actions (e.g., building a Power BI dashboard three times).
- Encourage muscle memory for drag‑and‑drop UI design and formula entry.
3. Mirrors Real‑World Business Challenges
Most online Power Platform courses focus on isolated features. Practical training:
- Simulates end‑to‑end projects—from data ingestion in Power BI to automated approvals in Power Automate.
- Exposes learners to governance and security—role‑based access, data loss prevention policies, and environment strategy.
Employers value candidates who can deliver a complete solution, not just a prototype.
4. Boosts Confidence for Citizen Developers
When learners see a functional app they built themselves, confidence spikes. This psychological boost:
- Encourages experimentation with advanced components (AI Builder, custom connectors).
- Drives adoption across the organization, turning a few power users into a culture of low‑code innovation.
5. Enhances Employability and Salary Potential
Industry reports consistently rank hands‑on Power Platform training among the top skills for 2024‑2025. Professionals who can:
- Design Power Apps that streamline field operations.
- Automate repetitive tasks with Power Automate.
- Create actionable insights with Power BI
are often eligible for higher‑pay roles such as Power Platform Analyst, Automation Engineer, or Business Intelligence Developer.
6. Provides a Safe Sandbox for Experimentation
Practical labs are built in isolated environments, allowing learners to:
- Test risky integrations without affecting production data.
- Explore new connectors (e.g., Azure OpenAI, Teams) without permission hurdles.
7. Aligns with Certification Requirements
Microsoft’s Power Platform certification exams demand demonstrated competency. Practical training:
- Covers scenario‑based questions.
- Offers lab‑based assessments that mirror the exam structure.
How to Choose a Practical Power Platform Course
- Lab‑Intensive Curriculum – Look for courses that promise daily hands‑on labs or real‑world projects.
- Mentor Support – Access to experts who can review your solutions and provide instant feedback.
- Career Services – Resume reviews, interview prep, and job placement assistance.
- Up‑to‑Date Content – Power Platform evolves rapidly; the course should include the latest connectors and AI features.
Lead‑Generating Takeaway
If you’re searching for online Power Platform courses that prioritize practical training, consider a program that blends theory with extensive hands‑on labs, real‑world case studies, and certification alignment. Such a course not only equips you with actionable skills but also positions you as a high‑impact contributor in any organization’s digital transformation journey.
Maria Academy offers exactly this type of immersive Power Platform training—combining practical labs, expert mentorship, and career‑focused outcomes to help you master Power Apps, Power Automate, Power BI, and more. Unlock your potential today with Maria Academy’s Power Platform course.
How to Build a Strong React Portfolio
If you’re a front‑end developer who wants to turn code into contracts, a well‑crafted React portfolio is your most powerful sales tool. Not only does it showcase your technical chops, it tells a story that convinces hiring managers, freelancers, and agencies that you can solve real business problems. Below is a step‑by‑step roadmap that helps you build a portfolio that ranks in search results, converts visitors into leads, and positions you as the go‑to React specialist.

How to Build a Strong React Portfolio
1. Choose Projects That Speak Business Value
Technical brilliance alone isn’t enough. Pick 4‑6 projects that demonstrate measurable outcomes:
- E‑commerce dashboard – reduced checkout time by 30 % using React Hooks and Context API.
- Real‑time chat app – handled 10 k concurrent users with Socket.io integration.
- Performance‑focused landing page – achieved a Lighthouse score of 95 % after code‑splitting with React.lazy.
When you write the case study, start with the problem, describe your solution, and finish with concrete results. Search engines love clear, keyword‑rich headings like “React E‑commerce Dashboard – Boosted Conversion Rate”.
2. Keep the Code Clean and Visible
Employ a public GitHub repository for every showcased project. Include a well‑documented README that:
- Lists the tech stack (React 18, TypeScript, Redux Toolkit, etc.).
- Provides a one‑line summary for SEO (“React inventory management system with GraphQL”).
- Shows a live demo link hosted on Vercel or Netlify.
A clean commit history signals professionalism, and the README content gets indexed, increasing organic traffic.
3. Design a User‑Centred Portfolio Site
Your portfolio itself is a product you sell. Follow these UI/UX rules:
- Hero section – a concise headline with the keyword “React developer portfolio”. Add a short CTA button: “Download My Resume”.
- Project cards – use lazy‑loaded images, hover effects, and short blurbs that include the phrase “React class in Karaikudi” only where it feels natural, e.g., “I taught a React class in Karaikudi that helped local startups prototype faster.”
- Contact form – integrate reCAPTCHA and a clear message field. Offer a free 30‑minute audit to capture leads.
Optimize page speed: compress images, enable gzip, and leverage React’s code‑splitting. Google PageSpeed will reward fast load times, boosting SEO.
4. Write SEO‑Optimized Content
Each project page should contain 300‑500 words of original copy that naturally incorporates target keywords: React portfolio, React developer showcase, React project case study, plus location‑specific terms if you serve a regional market (e.g., “Karaikudi”).
Use H2/H3 tags for structure, add alt text to every screenshot, and include internal links to related projects. This hierarchy helps search crawlers understand the relevance of your pages.
5. Leverage Social Proof
- Testimonials – ask former clients or mentors to write a line about your React expertise.
- Certificates – display any badges from online courses, such as a completion certificate from a “React class in Karaikudi” you attended or taught.
- Press mentions – if a blog or magazine featured your work, embed the snippet.
Social proof not only builds trust but also creates additional keyword opportunities.
6. Promote Your Portfolio Strategically
- LinkedIn – share a carousel of project screenshots with a short description and a link back to your site.
- Twitter/X – tweet a “Project of the Week” thread using #ReactJS and tag relevant industry accounts.
- Community groups – participate in local meetups. Mention that you’re part of the “Maria Academy” alumni network; this creates a natural backlink and signals authority in the region.
Consistent promotion drives traffic, and each click is a potential lead.
7. Convert Visitors into Clients
Your portfolio should be a lead‑generation machine:
- Clear CTA – every page ends with a button: “Schedule a Free Consultation”.
- Email capture – offer a downloadable cheat‑sheet titled “10 React Performance Tips” in exchange for an email address.
- Follow‑up sequence – once a visitor signs up, send a drip series that highlights a different project each day, ending with a personalized proposal invitation.
Automation tools like Mailchimp or HubSpot make this process seamless.
FAQ – Frequently Asked Questions
Q: Do I need a blog on my portfolio site?
A: A blog is a strong SEO booster. Publish posts about React performance, state management patterns, or experiences from teaching a React class in Karaikudi. These topics attract organic traffic and position you as an authority.
Q: Should I use TypeScript in my portfolio projects?
A: Yes. TypeScript is in high demand, and showcasing typed React components signals modern, enterprise‑ready skills.
Q: What’s the best way to measure portfolio success?
A: Track page views, bounce rate, form submissions, and the number of consultation bookings. Google Analytics and a simple CRM will give you a clear picture of conversion performance.
Ready to Turn Your Code Into Clients?
A powerful React portfolio doesn’t happen by accident—it requires thoughtful project selection, clean code, SEO‑savvy copy, and a lead‑focused design. If you’re looking for guidance, consider joining a local React class in Karaikudi offered by Maria Academy. Their hands‑on curriculum and community network can accelerate your learning and give you fresh material to enrich your portfolio.
Start building today, capture those leads, and watch opportunities flow in!
Why Power BI Skills Are Important for Data Analysts
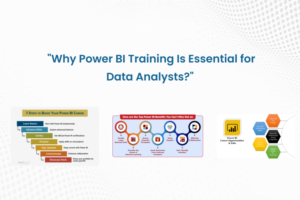
power bi skills for data analyst career and business intelligence dashboards
Introduction: The Rise of Power BI
In today’s data‑driven world, the ability to transform raw numbers into clear, actionable insights is no longer a luxury—it’s a core business requirement. Among the many business‑intelligence platforms available, Microsoft Power BI has emerged as a favourite for its blend of power, flexibility, and cost‑effectiveness. For data analysts, mastering Power BI is quickly becoming as essential as knowing Excel or SQL.
Why Power BI Is a Must‑Have Skill for Data Analysts
2.1 Faster Insight Generation
Power BI’s drag‑and‑drop interface lets analysts build dashboards in minutes rather than hours. Its built‑in DAX (Data Analysis Expressions) language streamlines complex calculations, meaning you can move from data ingestion to insight delivery with fewer bottlenecks.
2.2 Seamless Integration with Enterprise Data
From Azure Data Lake to on‑premise SQL Server, Power BI connects to virtually any data source. The platform’s gateway technology ensures that analysts can refresh reports in real time without compromising security—a critical advantage for organisations that need up‑to‑date performance metrics.
2.3 Interactive Visualisations that Tell a Story
Static spreadsheets rarely capture the nuance of business trends. Power BI’s interactive visualisations—slicers, drill‑throughs, and custom visuals—invite stakeholders to explore data on their own terms. This interactivity promotes data‑driven decision‑making across departments, positioning the analyst as a strategic partner rather than just a report generator.
Career Boost: From Analyst to Strategic Partner
Employers increasingly list “Power BI expertise” alongside traditional analytics skills. A data analyst who can design end‑to‑end reporting solutions not only adds immediate value but also opens doors to roles such as Business Intelligence Developer, Analytics Manager, or even Chief Data Officer. In competitive markets like Singapore, a certified Power BI skill set can differentiate you from peers and command higher remuneration.
Choosing the Right Learning Path in Singapore
If you’re based in Singapore, you have several options to upskill:
- Self‑paced online modules – great for busy professionals but can lack real‑world feedback.
- Power Bi class in Singapore – classroom‑based sessions provide hands‑on labs and immediate instructor support.
- Power Bi course in Singapore – intensive, often week‑long programs that combine theory with a capstone project.
When selecting a program, look for:
- Practical labs that use real business data.
- Mentor‑led Q&A sessions.
- Certification preparation for the Microsoft Power BI Analyst Associate exam.
Choosing a reputable provider ensures you acquire not just knowledge, but the confidence to apply Power BI in day‑to‑day analytics work.
How Maria Academy Can Help You Master Power BI
Maria Academy stands out as Singapore’s most comprehensive software‑training hub. Whether you’re seeking a full‑scale Power Bi course in Singapore, Maria Academy delivers:
- Industry‑relevant curriculum designed by certified Power BI professionals.
- Small class sizes for personalised guidance and rapid problem‑solving.
- Post‑course support, including access to a community of alumni and optional one‑on‑one tutoring.
Beyond Power BI, Maria Academy offers training across the entire Microsoft stack, data‑science tools, and emerging technologies—making it a one‑stop destination for all your upskilling needs.
Frequently Asked Questions
Q: Do I need prior experience with Microsoft Excel to take a Power BI class in Singapore?
A: While Excel familiarity speeds up learning, Maria Academy’s introductory modules start with the basics, so absolute beginners can join confidently.
Q: How long does it take to become proficient in Power BI?
A: A focused Power Bi course in Singapore typically runs 5–7 days of intensive training. Most participants feel comfortable building dashboards after completing the program and a few practice projects.
Q: Is the Power BI certification worth pursuing?
A: Yes. The Microsoft Power BI Analyst Associate certification validates your skill set to employers and often leads to higher salary brackets.
Q: Will I have access to course materials after the class ends?
A: Maria Academy provides lifetime access to lecture recordings, lab files, and practice exams, allowing you to refresh concepts whenever needed.
Q: Can I combine Power BI training with other software courses?
A: Absolutely. Maria Academy offers bundled packages that include Power BI alongside Azure, SQL Server, or Tableau, giving you a broader data‑analytics toolkit.
Ready to future‑proof your analytics career?
Enroll in a Power Bi class in Singapore at Maria Academy today and join the ranks of data professionals who turn raw data into strategic insight—fast, interactive, and with confidence.
Essential Skills Every .NET Developer Must Learn – A Guide for Aspiring Professionals in Chennai
The tech landscape in Chennai is buzzing with opportunities for .NET developers in Chennai. From multinational corporations setting up R&D centers to fast‑growing startups, the demand for skilled .NET talent has never been higher. If you’re aiming to land that coveted role or simply want to stay ahead of the curve, mastering the right skill set is non‑negotiable. Below, we break down the core competencies every modern .NET developer should own, sprinkled with location‑specific insights to help you navigate the Chennai job market.

dot net developer in Chennai
1. C# Mastery – The Backbone of .NET
C# remains the primary language for building robust .NET applications. A solid grasp of:
- Advanced language features – async/await, LINQ, generics, and pattern matching.
- Object‑Oriented Programming (OOP) concepts – encapsulation, inheritance, polymorphism, and SOLID principles.
These fundamentals enable you to write clean, maintainable code—something recruiters for dot net developers in Chennai often prioritize.
2. ASP.NET Core & MVC – Building Scalable Web Solutions
ASP.NET Core has become the go‑to framework for cross‑platform web development. Focus on:
- Razor Pages, MVC, and Web API development.
- Middleware pipeline customization and dependency injection.
- Security best practices – authentication, authorization, and data protection.
Companies in the Chennai IT hub are especially keen on developers who can create responsive, high‑performance web apps using ASP.NET Core.
3. Entity Framework Core – Data Access Simplified
Most enterprise applications rely heavily on databases. Proficiency in Entity Framework Core will let you:
- Design Code‑First and Database‑First models.
- Optimize queries with LINQ and raw SQL when needed.
- Implement migration strategies for seamless schema evolution.
Employers searching for dot net developers in Chennai frequently list EF Core expertise as a mandatory requirement.
4. Front‑End Integration – Beyond the Server Side
While .NET shines on the back end, a full‑stack mindset increases your marketability. Get comfortable with:
- JavaScript frameworks – Angular, React, or Vue.js (Angular pairs naturally with TypeScript).
- Bootstrap or Tailwind CSS for responsive design.
- RESTful services and GraphQL consumption from .NET clients.
A developer capable of bridging the gap between .NET and modern front‑end tech is a hot commodity in Chennai’s burgeoning startup ecosystem.
5. Cloud Computing – Azure is the New Normal
Microsoft Azure dominates the cloud scene for .NET workloads. Essential Azure skills include:
- App Services, Azure Functions, and Containers (Docker/Kubernetes).
- Azure DevOps pipelines for CI/CD automation.
- Cosmos DB, SQL Database, and Blob Storage integration.
Since many Chennai enterprises are migrating to the cloud, expertise in Azure can fast‑track your career as a .NET developer in Chennai.
6. Version Control & DevOps Practices
Understanding version control is a given, but modern DevOps practices set you apart:
- Git workflow mastery (feature branching, pull requests, rebasing).
- Infrastructure as Code with ARM templates or Terraform.
- Automated testing (unit, integration, UI) using xUnit, MSTest, or NUnit.
These capabilities align with the expectations of hiring managers looking for dot net developers in Chennai who can deliver code quickly and reliably.
7. Testing & Quality Assurance
A robust testing strategy is essential for any production‑grade .NET application:
- Write unit tests for business logic using mocking frameworks like Moq.
- Implement integration tests for data access layers.
- Use Selenium or Playwright for end‑to‑end UI testing.
Companies in Chennai value developers who can ensure code quality from day one.
8. Soft Skills & Agile Mindset
Technical prowess alone won’t land you the dream job. Complement your skill set with:
- Effective communication—explain complex concepts to non‑technical stakeholders.
- Team collaboration in Scrum or Kanban environments.
- Problem‑solving attitude—be proactive in identifying bottlenecks and proposing solutions.
These soft skills are repeatedly highlighted in job descriptions for dot net developers in Chennai.
9. Continuous Learning – Stay Ahead of the Curve
The .NET ecosystem evolves rapidly. Subscribe to official Microsoft blogs, follow community channels, and attend local meetups such as Chennai .NET User Group. Keeping your knowledge fresh will make you a more attractive candidate for any software development firm in Chennai.
- Where to Get Trained?
If you’re looking for a structured path to acquire these skills, consider enrolling in a reputable institute. Maria Academy stands out as the best software training institute in Chennai, offering industry‑aligned courses that cover everything from C# fundamentals to Azure DevOps pipelines. Their hands‑on approach ensures you graduate ready for real‑world challenges.
Final Thoughts
Becoming a sought‑after .NET developer in Chennai isn’t a matter of luck—it’s about building a comprehensive skill set that aligns with industry demands. Master C#, dive deep into ASP.NET Core, get comfortable with Azure, and polish your DevOps and soft‑skill abilities. With the right training and continuous learning, you’ll be well‑positioned to seize the abundant opportunities that Chennai’s thriving tech scene has to offer.
Ready to upgrade your career? Start mapping out your learning journey today and watch doors open across the Chennai IT corridor. Happy coding!
Best Programming Languages to Learn in 2026
Your roadmap to high‑impact tech careers in 2026 and beyond
The tech landscape moves faster than ever. If you’re planning a career switch, an up‑skill sprint, or simply want to stay relevant in the software ecosystem, choosing the right programming language to learn is the first—and most crucial—step. Below we break down the top programming languages to learn in 2026, why they matter, and where you can get hands‑on training in Chennai.

software training institute in chennai
1. Python – The All‑Rounder
Why Python shines in 2026
- Simple syntax → fast onboarding – Even beginners can write functional code after a few days of practice.
- AI/ML, Data Science, Automation – The language powers everything from predictive models to intelligent bots.
- Massive library ecosystem – NumPy, Pandas, TensorFlow, Scikit‑learn, and countless others let you solve problems without reinventing the wheel.
- Web development – Django and Flask make building RESTful APIs and full‑stack sites a breeze.
- DevOps & cloud automation – From AWS Lambda scripts to CI/CD pipelines, Python is a go‑to tool for engineers.
- Strong community & job demand – Companies of every size list Python as a core requirement, and salaries continue to rise.
Real‑world use cases
- Predictive maintenance for manufacturing plants.
- Automated report generation for finance teams.
- Scalable micro‑services that feed data into a data lake.
A growing number of software training institutes now run project‑based Python tracks. Typical curricula cover data analysis, API development, and a final capstone that mimics an industry‑grade AI pipeline.
If you’re based in Chennai, several software training institutes now offer project‑based Python tracks that cover everything from data analysis to building REST APIs.
2. JavaScript (and TypeScript) – The Web’s Backbone
- Full‑stack dominance: With Node.js on the server and React, Angular, or Vue on the client, JavaScript powers everything from single‑page apps to server‑less functions.
- TypeScript’s rise: Static typing adds robustness, making it a must‑learn for large‑scale web applications.
- Career boost: Front‑end, back‑end, and full‑stack roles consistently list JavaScript/TypeScript among the top required skills.
Local institutes frequently bundle JavaScript with modern frameworks, giving you a portfolio‑ready skill set in just a few months.
3. Go (Golang) – The Cloud‑Native Hero
- Performance & concurrency: Ideal for micro‑services, containers, and high‑throughput systems.
- Adopted by industry giants: Google, Docker, Kubernetes, and many cloud‑native startups rely heavily on Go.
- Developer productivity: Minimalistic syntax combined with powerful standard libraries.
For aspiring backend engineers, a short, intensive Go bootcamp can fast‑track you into high‑paying roles at cloud‑first companies.
4. Rust – Safety Meets Speed
- Memory safety without garbage collection: Perfect for system‑level programming, embedded devices, and performance‑critical apps.
- Growing demand: Companies building browsers (Mozilla), operating systems, and blockchain platforms are hiring Rust developers at premium rates.
- Future‑proof: As security concerns rise, Rust’s “no data races” guarantee becomes a competitive advantage.
Chennai’s emerging tech community now offers specialized Rust workshops that focus on real‑world projects like IoT firmware and blockchain smart contracts.
5. Kotlin – Android’s First Choice + Server‑Side
- Android development: Kotlin is now the default language for Android, replacing Java.
- Multiplatform: Kotlin Multiplatform lets you share code between Android, iOS, and backend services.
- Modern syntax: Concise, expressive, and interoperable with existing Java codebases.
If mobile app development is your goal, a Kotlin‑focused curriculum will equip you with the skills needed for both native Android and cross‑platform projects.
6. SQL & NoSQL (Database Languages) – Data is King
- SQL: Still the lingua franca for relational databases (PostgreSQL, MySQL, MS SQL).
- NoSQL: MongoDB, Cassandra, and DynamoDB are essential for handling unstructured data at scale.
- Data‑driven decisions: Every AI/ML pipeline starts with clean, queryable data.
A solid grasp of both SQL and a popular NoSQL solution can dramatically boost your employability in data engineering and analytics roles.
How to Choose the Right Language for You
-
Career Goal:
- Data Science / AI → Python (or R) for its rich ML ecosystem.
- Front‑End Web Development → JavaScript/TypeScript combined with React, Vue, or Angular.
- Full‑Stack Development → JavaScript (Node.js), Python (Django/Flask), or Go for seamless back‑end integration.
- System‑Level / Performance‑Critical Work → Rust or C/C++.
- Cloud / DevOps → Go for concurrency, Python for scripting.
- Mobile (Android) → Kotlin (or Java).
- Enterprise Backend → Java, Kotlin, or Go for proven scalability.
-
Industry Demand in Chennai:
Look at local job portals and see which technologies recruiters emphasize. In 2025–2026, Python, JavaScript, and Go topped the list for Chennai’s tech hiring trends.
-
Learning Curve vs. ROI:
If you’re starting from scratch, Python and JavaScript offer the fastest ramp‑up. For higher salary brackets, Go and Rust provide a compelling ROI after a moderate learning investment.
Where to Upskill in Chennai – A Balanced View
While the internet is flooded with free tutorials, a structured program from a reputable software training institute in Chennai can accelerate your journey:
- Hands‑on Projects: Real‑world assignments that mimic industry challenges.
- Mentor Support: Direct access to experienced instructors for doubt clearing.
- Placement Assistance: Some institutes partner with local IT firms for campus drives and internship pipelines.
Note: Several institutes, including Maria Academy, have built comprehensive curricula covering the languages listed above. Their courses blend theory with live coding labs, ensuring you graduate with a portfolio ready for the job market. However, the focus here is on the skill set, not on any single provider.
Quick Action Plan – From Zero to Hire in 6‑Months
- Weeks 1‑2 – Foundations
- Set up your development environment.
- Write your first Python script or JavaScript web page.
- Weeks 3‑4 – Core Concepts
- Master data structures, control flow, and basic algorithms.
- Build a simple CLI tool (Python) or a single‑page app (JS).
- Weeks 5‑8 – Project‑Based Learning
- Pick Go or Rust based on interest.
- Deploy a micro‑service or a system utility to a cloud platform.
- Weeks 9‑12 – Full‑Stack Integration
- Learn TypeScript + Node.js.
- Create an end‑to‑end web application (front‑end + back‑end + API).
- Weeks 13‑16 – Database Mastery
- Get comfortable with SQL (PostgreSQL/MySQL) and a NoSQL store (MongoDB).
- Design and query both a relational and a document database.
- Weeks 17‑24 – Capstone & Portfolio
- Combine your chosen languages into a full‑scale project (e.g., an AI‑driven dashboard backed by Go micro‑services and a React front‑end).
- Publish the code on GitHub, write a project blog, and start interview prep.
Follow this roadmap, leverage local IT training Chennai resources for mentorship, and you’ll be ready to tackle the most in‑demand roles by the end of 2026.
Final Thoughts
The best programming languages to learn in 2026 are those that align with market demand, personal career goals, and the evolving tech stack of modern enterprises. Whether you aim to become an AI analyst, a cloud engineer, a mobile app developer, or a system architect, mastering at least one language from the list above—and complementing it with solid database knowledge—will make you a high‑impact, results‑driven professional.
Start today: pick a language, enroll in a practical course at a trusted software training institute in Chennai, build real projects, and watch your career trajectory soar. The future of tech is bright—make sure you’re speaking its language.
How to Become a Data Analyst Without a Tech Background (Complete Beginner Guide)

How to Become a Data Analyst Without a Tech Background (Complete Beginner Guide)
The demand for data analysts has grown rapidly as organizations rely more on data to guide business decisions. From e-commerce companies to healthcare organizations, data is now at the center of strategic planning. Because of this shift, data analytics has become one of the fastest-growing career opportunities, and the good news is that you don’t necessarily need a technical background to enter this field.
Many professionals from commerce, finance, marketing, economics, and even humanities are successfully transitioning into data analytics roles. With the right learning path and practical training, beginners can build the required skills and start a career in analytics.
Why Non-Tech Professionals Can Become Data Analysts
Unlike some software development roles, data analytics is not purely about coding. It focuses on analyzing data, identifying patterns, and helping businesses make informed decisions.
Professionals with non-technical backgrounds often bring valuable skills such as:
- Business understanding
- Problem-solving ability
- Analytical thinking
- Communication skills
Companies often look for analysts who can translate data into business insights, which makes professionals from business-related fields well suited for analytics roles.
Step 1: Understand the Role of a Data Analyst
Before learning tools, it is important to understand what data analysts actually do in an organization.
A typical data analyst works with data to:
- Collect and organize datasets
- Clean and prepare raw data for analysis
- Identify patterns and trends
- Create dashboards and reports
- Provide insights that support business decisions
In simple terms, a data analyst converts raw data into meaningful information that helps companies improve performance.
Step 2: Learn the Essential Data Analytics Tools
To begin a career in data analytics, you only need to focus on a few core tools.
Excel
Excel is one of the most widely used tools for data analysis. Many businesses still rely on Excel for reporting and data management.
Important Excel skills include:
- Pivot tables
- Data cleaning
- Logical functions
- Charts and dashboards
SQL
SQL (Structured Query Language) is used to extract data from databases. Most companies store large datasets in databases, and analysts use SQL to retrieve relevant information.
With SQL, you can:
- Query large datasets
- Filter and organize data
- Join multiple data tables
Data Visualization Tools
Data visualization tools such as Power BI and Tableau help analysts present complex data in a simple visual format.
Businesses use dashboards created in these tools to track:
- Sales performance
- Marketing campaigns
- Customer behavior
- Operational metrics
Visualization helps decision-makers understand insights quickly.
Python (Optional for Beginners)
Python is increasingly used in data analytics for advanced data analysis and automation. Although beginners can start with Excel and SQL, learning Python later can help expand career opportunities.
Python libraries commonly used in analytics include tools for data analysis and visualization.
Step 3: Work on Real Data Projects
Practical experience is one of the most important factors when applying for data analytics jobs. Employers prefer candidates who can demonstrate real-world problem-solving skills.
Examples of beginner projects include:
- Sales data analysis
- Customer segmentation analysis
- Marketing campaign performance analysis
- Business dashboard creation
Projects help you apply theoretical knowledge and build confidence in using analytics tools.
Step 4: Build a Data Analytics Portfolio
A strong portfolio helps you stand out when applying for jobs, especially if you are transitioning from another field.
Your portfolio may include:
- Excel dashboards
- SQL queries and data analysis reports
- Power BI or Tableau dashboards
- Python-based data analysis projects
Recruiters often review portfolios to assess practical skills and analytical thinking.
Step 5: Take a Structured Data Analytics Course
Many beginners choose structured training programs to accelerate their learning journey. A well-designed course helps learners understand the complete analytics workflow, including data collection, analysis, and visualization.
A practical training program typically includes:
- Tool-based learning (Excel, SQL, Power BI, Python)
- Real-world projects
- Industry case studies
- Interview preparation
Learning through a structured program can significantly improve job readiness.
Data Analyst Salary Guide in India
Data analytics offers competitive salaries, even for beginners. Salaries vary depending on experience, location, and technical skills.
Entry-Level Data Analyst
- Salary range: ₹3 LPA – ₹6 LPA
- Typically for freshers or professionals with less than 2 years of experience
Mid-Level Data Analyst
- Salary range: ₹6 LPA – ₹12 LPA
- Professionals with 2–5 years of experience and strong tool expertise
Senior Data Analyst
- Salary range: ₹12 LPA – ₹20+ LPA
- Analysts with extensive experience in data strategy and advanced analytics
Cities such as Bangalore, Chennai, Hyderabad, and Mumbai often offer higher salary packages due to the presence of major technology companies and startups.
As organizations continue investing in data-driven decision making, the demand for skilled analysts is expected to grow further.
Career Opportunities After Learning Data Analytics
Once you build the required skills and experience, several career paths become available:
- Data Analyst
- Business Analyst
- Reporting Analyst
- Data Visualization Specialist
- Product Analyst
Many industries hire data analysts, including finance, healthcare, e-commerce, retail, logistics, and technology.
Frequently Asked Questions (FAQ)
Can I become a data analyst without a technical background?
Yes, many professionals transition into data analytics from non-technical fields such as commerce, finance, and marketing. With the right training and practical projects, it is possible to build the required analytical skills.
How long does it take to learn data analytics?
For beginners, learning the fundamentals of data analytics tools may take 3 to 6 months with consistent practice. Building strong project experience may take additional time.
Is coding required to become a data analyst?
Coding is not always mandatory for entry-level roles. Many analysts begin with Excel, SQL, and visualization tools. However, learning Python later can help expand career opportunities.
What skills are required to become a data analyst?
Key skills include:
- Data analysis
- SQL and Excel
- Data visualization
- Problem solving
- Analytical thinking
Are data analytics jobs in demand in India?
Yes, the demand for data analytics professionals is increasing across industries. As companies rely more on data-driven strategies, the need for skilled analysts continues to grow.
Why Python Skills Are Dominating the Tech Job Market in India (2026 Guide)

python course
The technology landscape in India is evolving faster than ever. Companies across industries are investing heavily in digital products, automation, data analytics, and artificial intelligence. In this transformation, one programming language continues to stand out — Python.
Over the last decade, Python has grown from a simple scripting language into one of the most powerful tools used by developers, data scientists, and technology companies worldwide. In 2026, Python skills are no longer just an advantage — they are becoming a core requirement in the modern tech job market.
If you are considering a career in programming, understanding why Python is dominating the industry can help you make smarter learning and career decisions.
The Rise of Python in the Modern Tech Ecosystem
Python has gained global popularity because of its simplicity, versatility, and powerful ecosystem. Unlike many programming languages that specialize in one area, Python supports multiple domains such as:
- Web development
- Data science and analytics
- Artificial intelligence and machine learning
- Automation and scripting
- Cloud and backend systems
This flexibility makes Python a preferred language for both startups and enterprise organizations building scalable applications.
Many developers begin their programming journey with Python because of its readable syntax and logical structure. At the same time, experienced engineers rely on it for complex projects involving data processing and AI systems.
Why Companies in India Prefer Python Developers
The demand for Python developers is growing rapidly because businesses are shifting toward data-driven and automated solutions. Python allows organizations to build such solutions faster and more efficiently.
Some key reasons companies prefer Python developers include:
1. Rapid Development and Faster Product Launch
Python enables developers to build applications quickly compared to many traditional programming languages. This helps companies:
- reduce development time
- launch products faster
- iterate quickly based on user feedback
For startups and SaaS companies, speed of development is often a critical factor for success.
2. Strong Role in Artificial Intelligence and Data Science
Python is widely used in fields such as:
- machine learning
- predictive analytics
- natural language processing
- data visualization
These technologies are transforming industries including finance, healthcare, e-commerce, and marketing. As organizations invest more in AI and analytics, the demand for Python developers continues to rise.
3. Versatility Across Multiple Tech Roles
A developer with Python skills can work in several career paths such as:
- Python developer
- data analyst
- machine learning engineer
- backend developer
- automation engineer
Because Python supports multiple domains, learning it opens doors to diverse technology careers.
4. Growing Startup and SaaS Ecosystem
India’s startup ecosystem is expanding rapidly, and many startups choose Python for building scalable applications. Frameworks used in Python development help teams build secure and efficient backend systems.
This growing ecosystem means companies constantly search for skilled Python programmers who can build reliable software products.
Skills Companies Expect from Python Developers in 2026
While Python is beginner-friendly, companies expect developers to go beyond basic syntax knowledge. Employers typically look for professionals who understand practical development workflows.
Important Python-related skills include:
- strong programming fundamentals
- understanding of data structures and algorithms
- API integration and backend development
- database handling and data processing
- debugging and performance optimization
Developers who combine these skills with real-world projects stand out during technical interviews.
The Importance of Practical Python Training
One reason many learners struggle to enter the job market is the gap between theoretical knowledge and practical application.
Companies prefer candidates who have experience working on:
- real-world projects
- collaborative coding environments
- version control systems
- deployment and debugging processes
Structured learning programs that focus on project-based training help bridge this gap and prepare students for real industry scenarios.
A well-designed Python course typically includes:
- hands-on coding exercises
- guided real-world projects
- mentorship and code reviews
- career guidance and interview preparation
This approach helps learners transition from beginners to job-ready developers more efficiently.
Career Opportunities for Python Developers in India
The demand for Python professionals continues to grow across multiple industries, including:
- technology companies
- fintech organizations
- e-commerce platforms
- healthcare technology firms
- digital marketing and analytics companies
As organizations adopt AI, automation, and data analytics, Python developers play a crucial role in building modern technology solutions.
With the right skills and project experience, Python professionals can move into advanced roles such as:
- senior Python developer
- data engineer
- machine learning engineer
- technical architect
This makes Python one of the most future-proof programming languages for tech careers.
Why Learning Python Today Is a Smart Career Move
The combination of high demand, versatility, and continuous technological innovation makes Python a powerful career skill. Whether you are a student, a working professional, or someone planning a career transition into technology, Python provides a strong foundation for entering the software industry.
However, success depends on how you learn the language. Focusing on real projects, industry-relevant tools, and structured training can make a significant difference in becoming job-ready.
Final Thoughts
Python has become one of the most influential programming languages in the modern technology ecosystem. Its role in web development, data science, artificial intelligence, and automation ensures that Python skills will remain valuable for years to come.
As the demand for skilled developers continues to grow, professionals who build strong programming fundamentals and practical project experience will have a clear advantage in the tech job market.
For aspiring developers, learning Python today is not just about mastering a programming language — it is about opening the door to long-term opportunities in the digital economy.
Frequently Asked Questions
1. Why is Python in high demand in the tech job market?
Python is widely used across multiple industries because it supports web development, data science, artificial intelligence, automation, and backend systems. Its simple syntax and powerful libraries allow companies to develop applications faster and analyze data efficiently. As businesses adopt AI and automation, the demand for Python developers continues to increase.
2. What career opportunities are available after learning Python?
Learning Python can open several career paths in the technology industry. Common roles include Python developer, backend developer, data analyst, machine learning engineer, and automation engineer. Many companies also hire Python professionals for data science and artificial intelligence projects.
3.Is Python a good programming language for beginners?
Yes, Python is considered one of the best programming languages for beginners. Its clean syntax and easy readability make it simpler to learn compared to many other programming languages. Beginners can quickly understand programming concepts and start building projects.
4.How long does it take to learn Python?
The time required to learn Python depends on the learning approach and practice level. Many learners can understand the fundamentals within 2 to 3 months. However, building professional-level skills often requires consistent practice and working on real projects.
5.What skills do companies expect from Python developers?
Companies typically look for Python developers who understand programming fundamentals, data structures, API integration, database handling, debugging, and backend development. Developers who have experience building real-world projects are often preferred during hiring.
6.Does learning Python help in artificial intelligence and data science careers?
Yes, Python plays a major role in artificial intelligence, machine learning, and data science. Many frameworks and libraries used in these fields are built around Python, making it one of the most important languages for professionals working in advanced technology sectors.
7.Is enrolling in a Python course useful for career growth?
A structured Python course can help learners understand programming fundamentals, build real projects, and gain practical development experience. Training programs that focus on hands-on practice and industry tools often help students become job-ready more quickly.
The React Talent Gap in India: What Companies Actually Look For in 2026
The demand for React developers in India has grown rapidly over the past few years. Startups, SaaS companies, and enterprise tech teams all rely on fast, scalable frontends — and React has become a default choice for building them. Yet hiring managers consistently report a surprising challenge: there are many React learners, but very few job-ready React developers.
This mismatch between supply and real industry readiness is what experts call the React talent gap. Understanding this gap is crucial if you want your skills to translate into real job opportunities, higher salaries, and faster career growth.
Let’s explore what companies truly expect from React professionals in 2026 — and how the right training can help bridge the gap.
Why the React Talent Gap Exists
Thousands of learners complete online tutorials every year, but companies still struggle to hire developers who can work on production systems. The problem isn’t the availability of courses — it’s the difference between learning React and building real applications with React.
Most hiring managers observe three common issues:
- Developers know syntax but lack architectural understanding
- Portfolio projects are too basic or copied from tutorials
- Limited exposure to real-world tools and workflows
In short, the industry needs problem solvers, not just framework users.
What Companies Actually Look for in React Developers
1. Strong JavaScript Fundamentals First
React is a JavaScript library — not a shortcut around JavaScript. Employers expect deep understanding of:
- ES6+ features
- Asynchronous programming
- Closures and scope
- Array and object manipulation
- Error handling
Candidates who rely only on component-level knowledge often struggle during technical interviews.
Industry insight: Many recruiters now test JavaScript problem-solving before React concepts.
- Real Project Experience (Not Demo Apps)
Companies prioritize developers who have built:
- Authentication systems
- API-driven dashboards
- Performance-optimized interfaces
- Scalable component architecture
- Responsive production-level UI
A portfolio demonstrating real-world complexity instantly separates candidates from the crowd.
What hiring teams want to see:
✔ Clean folder structure
✔ Reusable components
✔ State management strategy
✔ Deployment experience
This is where structured training programs with guided projects create a strong advantage.
- Modern React Ecosystem Knowledge
React alone is not enough anymore. In 2026, employers expect familiarity with the broader ecosystem:
- Hooks and functional components
- State management tools
- API integration
- Routing and navigation
- Performance optimization techniques
- Version control workflows
Developers who understand how React fits into a full application lifecycle are far more employable.
- Problem-Solving and Debugging Ability
In real projects, developers spend significant time debugging and improving code rather than writing it from scratch. Employers assess:
- Ability to identify performance bottlenecks
- Understanding of component re-rendering
- Error handling strategies
- Logical thinking during technical interviews
This skill is rarely built through passive learning — it develops through structured practice and guided mentorship.
- Understanding of Product Thinking
Companies increasingly prefer developers who understand why features are built, not just how.
Valuable traits include:
- User experience awareness
- Performance impact awareness
- Scalability thinking
- Collaboration with design and backend teams
React developers who think like product contributors often move faster into senior roles.
How the Right React Training Bridges the Gap
Because the talent gap is rooted in practical readiness, employers value candidates trained through project-driven learning environments rather than purely theoretical courses.
A career-focused React course should provide:
✔ Hands-on real-world projects
✔ Structured curriculum aligned with industry needs
✔ Mentorship and code reviews
✔ Deployment and portfolio building
✔ Exposure to team workflows
✔ Interview preparation
Programs designed with industry collaboration help learners move from “course completion” to “job readiness”.
This is why modern React training is shifting from tutorial-based learning to outcome-based learning — where the goal is employability, not just certification.
React Job Market Outlook in 2026
The demand for React developers continues to expand due to:
- Growth of SaaS platforms
- Rapid startup ecosystem expansion
- Increasing digital product development
- Need for scalable frontend performance
Companies are not just hiring more developers — they are hiring more skilled React specialists.
Professionals who combine:
- strong fundamentals
- real projects
- modern tools
- practical training
are seeing faster hiring cycles and stronger salary growth.
Who Should Learn React Today
React remains one of the most practical career paths for:
- aspiring web developers
- full stack learners
- career switchers entering tech
- software engineers upgrading frontend skills
However, success depends on learning the right way — focusing on application-building, not just concepts.
Final Thoughts
The React ecosystem in India is not facing a shortage of learners — it’s facing a shortage of industry-ready developers. Companies are looking for professionals who can contribute to real products from day one.
If your goal is to stand out in hiring pipelines, the focus should be:
- strong foundations
- production-level projects
- structured skill development
- practical industry exposure
A well-designed React course that emphasizes real-world application development can significantly accelerate this transition — helping bridge the gap between learning and employability. The opportunity is massive. The differentiator is readiness.
Best .NET Training Institute in Chennai
Introduction for .NET Training Institute in Chennai
Looking to master .NET and launch a successful career in software development? Maria Academy in Chennai stands out as one of the best training institutes for .NET, offering a perfect blend of theory, practical sessions, and real-time project experience.
At Maria Academy, our .NET training program is designed for both beginners and professionals, covering key concepts such as:
- C# Programming
- NET & ASP.NET MVC
- .NET Core & Web API
- Entity Framework & LINQ
- SQL Server Integration
- Real-time Project Implementation
With expert trainers, personalized guidance, and 100% placement support, Maria Academy ensures you’re not just trained but truly job ready. Our curriculum is updated regularly to match current industry needs, making us the preferred choice among students and IT professionals in Chennai.
Join Maria Academy – Your First Step Towards a Bright Future in .NET Development!
Importance of .NET Training Institute in Chennai
In today’s fast-paced IT industry, learning the .NET framework is a smart choice for anyone aspiring to build a strong career in software development. Here’s why .NET training is important:
1. High Demand for .NET Developers
.NET is widely used across industries to build web, desktop, and mobile applications. Companies look for skilled developers with expertise in C#, ASP.NET, .NET Core, and related technologies.
2. Versatile and Powerful Framework
.NET supports the development of scalable, secure, and high-performance applications. It works across platforms (Windows, Linux, macOS) and devices, making it a flexible tool for modern development
3. Job-Ready Skills
Training helps you learn key technologies such as:
- C# programming
- NET MVC
- .NET Core & Web API
- Entity Framework & SQL Server
These skills are essential for full-stack development and enterprise-level projects.
4.Real-Time Project Experience
Good .NET training includes hands-on projects that simulate real industry scenarios. This boosts your confidence and prepares you for technical interviews.
5. Career Growth and Opportunities
.NET developers are in demand across IT services, product companies, and startups. With the right training, you can start as a developer and grow into roles like:
- Full-Stack Developer
- Software Engineer
- Backend Developer
- .NET Architect
Why Focus on Technical & Development aspects in .NET Training Institute:
1.Bridges the Gap Between Theory and Industry Practice
- Many students come with academic knowledge but lack real-world development experience. Technical training:
- Prepares them to handle live projects.
- Builds confidence in using .NET tools and frameworks (like ASP.NET, C#, Entity Framework).
- Encourages hands-on coding, debugging, and deployment.
2.Meets Industry Demands
- Companies hiring .NET developers expect candidates to:
- Know how to build scalable applications.
- Understand MVC architecture, APIs, database integration, and security.
- Use tools like Visual Studio, NuGet, Git, and Azure.
- Focusing on development ensures your trainees meet these expectations.
3. Increasing Placement Success
- When students are trained in real coding environments:
- Their technical skills are easier to demonstrate in interviews.
- They can complete assessments and technical rounds with confidence.
- It boosts placement rates and employer trust in your institute
4.Builds a Strong Portfolio
- By focusing on development:
- Students build actual applications (e.g., login systems, e-commerce modules).
- They can showcase projects on GitHub or resumes.
- It gives them a competitive edge during job hunting.
5.Keeps the Training Relevant and Engaging
- Technical and hands-on sessions:
- Keep students actively involved.
- Reduce dropout rates and disengagement.
- Allow for problem-solving and teamwork – essential developer skills.
Business & Industry Perspective in .NET training Institute in Chennai
NET training plays a vital role in preparing professionals who meet the current demands of the job market. As .NET remains a preferred framework for developing scalable, secure, and enterprise-level applications across sectors like finance, healthcare, retail, and government, companies are actively seeking skilled developers who can contribute from day one. Training programs that focus on real-world use cases, project-based learning, and modern tools like ASP.NET Core, Entity Framework, and Azure not only bridge the industry skill gap but also produce job-ready talent. By aligning the curriculum with practical business requirements and technological trends, .NET training institutes position their students for better career opportunities while becoming valuable partners to organizations looking for competent, trained professionals.

Frequently Asked Questions (FAQs)
- What is .NET?
.NET is a free, open-source development platform developed by Microsoft. It allows developers to build various types of applications including web, desktop, mobile, cloud, and IoT. The platform provides a unified programming model and supports multiple languages like C#, F#, and VB.NET. It includes powerful libraries, runtime, and tools. With the latest versions like .NET 6, 7, and 8, it supports cross-platform development on Windows, Linux, and macOS.
- What languages are used in .NET development?
The primary language for .NET development is C#, known for its modern syntax and versatility. Other supported languages include F#, a functional-first language, and Visual Basic, which is still used in legacy enterprise apps. Developers can choose based on the application requirement, though C# remains the industry standard. .NET allows cross-language interoperability, meaning code in different languages can work together. This flexibility makes it a popular choice among developers.
- Is .NET suitable for building cloud and microservices-based applications?
Absolutely. Modern .NET versions (especially ASP.NET Core) are built with cloud-native and microservice architecture in mind. They offer lightweight APIs, Docker container support, and deep integration with Microsoft Azure, AWS, and other cloud providers. Developers can create scalable, distributed services that are easy to maintain and deploy. With support for RPC, REST, Kubernetes, and asynchronous processing, .NET is a powerful choice for cloud application development.
- this training suitable for beginners or only for experienced developers?
.NET training is beginner-friendly and starts with the basics of programming and C#. It gradually moves to advanced topics like API development and database integration. No prior coding experience is required for the foundation level. Experienced developers can also join for upgrading to the latest .NET versions. Courses are usually designed to accommodate all levels.
- What tools and software will be used during the training?
The most used tools are Visual Studio or Visual Studio Code, along with SQL Server for database handling. You’ll also use Postman for API testing and Git/GitHub for version control. These tools are standard in the software industry. The training will guide you step-by-step on how to install and use them effectively.
- Will I get hands-on practice or just theory?
Most .NET training programs include a lot of practical sessions along with theory. You’ll write code, work on mini-projects, and apply what you learn in real time. Trainers often assign tasks and conduct coding challenges. This helps reinforce learning and build confidence. Theory is limited to what’s necessary for understanding core concepts.
.Net Course in Chennai with placement
Introduction of .NET course in Chennai with placement
- .NET course in Chennai with placement designed to give you the practical skills and industry knowledge needed to succeed in today’s IT world. Through expert-led training in C#, ASP.NET, MVC, .NET Core, and more, you will gain the confidence to build real-time applications from scratch.
- What makes this course special is our 100% placement support, helping you connect with top companies through resume building, mock interviews, and job referrals. Whether you’re a fresher or looking to upskill, this course will guide you every step of the way to land your dream job in software development.
Why you should choose .Net Course in Chennai placement
You should choose a .NET course because it helps you build real-world applications using one of the most widely used technologies in the software industry. It’s a great choice for both freshers and professionals who want stable, high-paying jobs in web and application development.
Application for .Net Course
Maria Academy provides training and equips you with the skills needed to build a wide range of software applications. After completing the training, you can apply your knowledge in:
- Web Development
Build dynamic websites and web applications using ASP.NET, MVC, Razor Pages, and .NET Core.
- Desktop Applications
Create Windows-based desktop apps using Windows Forms and WPF (Windows Presentation Foundation).
- Enterprise Software
Develop scalable, secure, and performance-driven applications for businesses and enterprises.
- API & Backend Services
Build RESTful Web APIs to power mobile apps, front-end apps, and third-party integrations.
- Cloud-Based Solutions
Integrate .NET applications with Microsoft Azure for deployment, scalability, and cloud services.
- Mobile App Backends
Use .NET as the backend for mobile applications developed in Xamarin or other platforms.
- E-Commerce & ERP Systems
Design and manage business tools, dashboards, and transaction-based platforms
- Database Applications
Create data-driven apps using ADO.NET, Entity Framework, and SQL Server.
How front End with .Net Corse in Chennai with placement
Our Front-End with .NET course in Chennai is designed to equip you with the skills required to build modern, responsive, and user-friendly web interfaces using the .NET framework. This course covers essential front-end technologies like HTML, CSS, JavaScript, and integrates them with powerful .NET tools such as Razor Pages, Blazor, and ASP.NET MVC. You’ll learn to create dynamic UI components, handle client-side scripting, and build fully interactive web applications connected to backend services. With hands-on projects, expert guidance, and real-time training, this course prepares you to become a job-ready front-end developer with .NET expertise. The program also includes placement assistance, helping you confidently step into roles in top IT companies across Chennai and beyond.
Back-End .NET Course in Chennai with Placement
- Comprehensive Coverage of Back-End Technologies
Learn C#, ASP.NET Core, Web API, Entity Framework, and LINQDesign and develop RESTful APIs and server-side logic
- Real-Time Project Experience
Work on real-world back-end projectsBuild and deploy scalable web applicationsConnect to databases using SQL Server and Entity Framework
- Industry-Oriented Curriculum
Includes version control (Git), unit testing, and best coding practicesFollows MVC architecture and layered backend design
- Database Integration
Master relational database concepts with SQL ServerLearn CRUD operations, stored procedures, and data modeling
- Tools and Environments
Work with Visual Studio, Postman, SSMS, and .NET CLILearn to debug, deploy, and manage backend applications
- Career Support
100% Placement Assistance in ChennaiResume preparation, mock interviews, and technical testsTraining aligned with current IT industry demands
- Ideal For
Aspiring back-end developers, freshers, or career switchers.Anyone looking to become a full-stack .NET developer
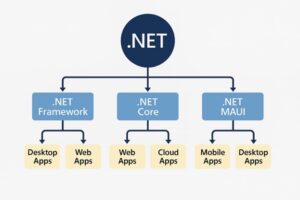
Frequently Asked Questions(FAQ):
- What programming language is used in .NET development?
i) The main programming language used in .NET development is C#, known for its power and versatility.
ii) Other supported languages include VB.NET and F#, depending on the project needs.
iii) C# is widely used for web, desktop, mobile, and cloud applications.
iv) VB.NET is simpler and often used in older business applications.
v) F# is preferred for data-heavy and functional programming tasks.vi) All .NET languages run on the Common Language Runtime (CLR), ensuring cross-language compatibility.
- What’s the difference between .NET Framework, .NET Core, and .NET 6/7/8?
i) .NET Framework: For Windows-only applications
ii) .NET Core: Cross-platform and open-source
iii) .NET 6/7/8: Unified platform (also called just “.NET”) combining both
- How is data handled in .NET applications?
i) Data in .NET applications is typically handled using ADO.NET, Entity Framework (EF), or Dapper.
ii) ADO.NET provides low-level access to databases using SQL commands and connections.
iii) Entity Framework is an ORM (Object-Relational Mapper) that allows developers to work with data using C# objects instead of raw SQL.
iv) Dapper is a lightweight ORM known for high performance and simplicity.
v) .NET supports connections to various databases like SQL Server, MySQL, Oracle, and more.
vi) Data handling also includes data validation, serialization, APIs, and secure data transfer over networks.
- Is this a full-stack .NET course or just backend?
i) On the back end, you’ll learn C#, ASP.NET Core, Web API, and database handling using Entity Framework and SQL Server.
ii) For the front end, the course includes HTML, CSS, JavaScript, and frameworks like Angular or React (based on the syllabus).
iii) It also covers API integration, authentication, and deployment techniques.
iv) You’ll gain hands-on experience in building complete web applications from scratch.
v) By the end of the course, you’ll be ready to work as a Full Stack .NET Developer.
- What kind of project work will I be doing during the training?
i) During the .NET training, you’ll work on real-time projects that simulate industry-level applications.
ii) You’ll build web applications using ASP.NET Core, Web API, C#, and SQL Server.
iii)Projects may include modules like user registration/login, admin dashboards, inventory management, or e-commerce portals.
iv)You’ll also practice front-end integration with HTML, CSS, JavaScript, or Angular/React (based on the course).
v)Each project will help you apply what you’ve learned and build a strong portfolio.
vi) By the end, you’ll be confident to handle full stack development tasks in real-world jobs
- What tools and techniques wil I get hands on experience with?
i) During the .NET course, you’ll gain hands-on experience with core tools and technologies used in the software industry.
ii) You’ll work with C#, ASP.NET Core, Web API, and Entity Framework for backend development.
iii) On the front end, you’ll learn HTML, CSS, JavaScript, and optionally Angular or React.
iv) For databases, you’ll use SQL Server and tools like SSMS (SQL Server Management Studio).
v) You’ll also work with Visual Studio, Postman for API testing, and Git/GitHub for version control.
vi) These tools will prepare you for real-world full stack .NET development.
Dot Net Training Institute in Chennai
Choosing the right Dot Net Training Institute in Chennai is more than just picking a place to study—it’s about investing in your future. In an era where technology drives every industry, .NET remains one of the most in-demand frameworks for developing secure, scalable, and high-performing applications.
Maria Academy has built its reputation as a center of excellence for .NET learning in Chennai, offering students not just training, but a complete career transformation. Let’s explore why .NET is a skill worth learning, what makes Maria Academy stand out, and how our training can open career doors for you.
The Role of .NET in Modern Development
.NET, created by Microsoft, is not just a programming framework—it’s a complete ecosystem. It supports multiple programming languages, integrates with cloud services, and is ideal for creating:
- Web portals
- Enterprise business applications
- Cross-platform mobile apps
- Secure e-commerce systems
- API-based services
This versatility makes training from a Dot Net Training Institute in Chennai a valuable step toward building a long-term IT career.
Growing Job Market for .NET Developers
IT companies in Chennai and across India are actively hiring .NET professionals due to the framework’s ability to handle large-scale, mission-critical projects. Roles include:
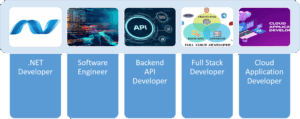
A structured course at Maria Academy prepares you for these roles with job-ready skills.
Why Maria Academy is Different
Unlike many institutes, Maria Academy does not believe in textbook-only learning. We blend theory with real-world practice, ensuring students understand how .NET is used in actual business environments.
Our unique features:
- Industry-Driven Curriculum – Updated to reflect current employer needs.
- Project-Based Learning – Build applications similar to what companies use daily.
- Technology Integration – Learn to connect .NET apps with AI, cloud, and databases.
- Career Guidance – From resume reviews to mock interviews.
- Certification Assistance – Guidance to clear Microsoft certification exams.
Special Focus on Enterprise-Level Skills
.NET is heavily used in enterprise environments where security, performance, and scalability are critical. Maria Academy trains students in:
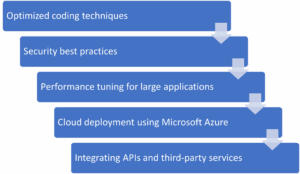
These are advanced skills that employers value highly.
Certification Benefits
Many companies prefer certified developers for their projects. Maria Academy helps students prepare for Microsoft Certified: .NET Developer Associate and related certifications. Achieving these credentials not only validates your skills but also increases your earning potential and job opportunities.
Course Highlights
Our program covers:
- Core C# programming
- ASP.NET Core MVC
- Entity Framework and database connectivity
- REST API creation and integration
- LINQ for data operations
- Azure cloud deployment
- Final capstone project simulating a real client requirement
Future Scope of .NET
The .NET framework is constantly evolving, introducing powerful features like .NET MAUI, which enables developers to build cross-platform applications for Windows, macOS, Android, and iOS using a single codebase. It also offers improved integration with cloud-native development, making it easier to create scalable, high-performance applications. These advancements ensure that .NET remains relevant in modern software development. By starting your learning journey now, you can master current technologies while preparing for future innovations. This positions you to leverage upcoming updates, adapt to industry changes, and take advantage of emerging career opportunities in diverse domains, from enterprise solutions to mobile app development.
Who Should Enroll?
The Dot Net Training Institute in Chennai program at Maria Academy is suitable for:
- Fresh graduates aiming for IT jobs
- Professionals upgrading their skill set
- Entrepreneurs wanting in-house application development skills
- Freelancers expanding their service offerings
Conclusion
In today’s competitive job market, possessing in-demand skills like .NET can give you a significant advantage over others. The .NET framework is widely used across industries, creating strong demand for skilled developers. If you are looking for a Dot Net Training Institute in Chennai that combines expert guidance, hands-on learning, and career-oriented training, Maria Academy stands out as a trusted choice. With industry-experienced trainers, real-time projects, and dedicated placement support, Maria Academy ensures you gain the knowledge and confidence to succeed in the IT field. Take the first step toward your dream career in software development—start your journey today.
Frequently Asked Questions
- What skills will I gain at Maria Academy’s Dot Net Training Institute in Chennai?
You will learn core and advanced C#, ASP.NET Core MVC, Entity Framework, API creation, database integration, and cloud deployment with Azure. You will also work on live projects, gaining practical skills that make you industry-ready and confident in handling real-world development challenges effectively.
- Does the course include Microsoft certification preparation?
Yes. Maria Academy provides dedicated training for Microsoft .NET certifications, including practice tests and exam guidance. Achieving certification boosts your professional credibility, improves job opportunities, and validates your technical expertise in the global IT job market, making you more competitive and employable in the industry.
- What industries hire .NET developers in Chennai?
.NET developers are in demand across finance, healthcare, e-commerce, logistics, and IT services sectors. Companies use .NET for secure, scalable solutions, and trained professionals from Maria Academy often find opportunities in software development firms, multinational corporations, and startup environments with attractive salary packages and growth prospects.
- As a student, how can I balance this course with my college work?
Maria Academy offers flexible batch timings, including evening and weekend classes. Recorded sessions and mentor guidance ensure you can catch up anytime. The training is structured to fit your schedule, allowing you to progress steadily without affecting your regular academic performance or personal commitments significantly.
- I’m from a non-programming background. Can I still learn .NET?
Absolutely. Our training starts with programming fundamentals before moving to advanced topics. We provide extra practice sessions and one-on-one mentoring to help beginners understand concepts clearly. Many of our successful students started without any coding knowledge and are now working as skilled .NET professionals confidently.
- Will I get real-time project experience?
Yes. From the first week, you will work on practical coding tasks. By the end of the course, you will have completed multiple projects, including a capstone project simulating an actual client requirement. This portfolio will showcase your skills to employers and give you an advantage in job interviews.
Best .NET Online Training
- In today’s fast-paced IT world, choosing the Best .NET Online Training can shape your career and open doors to high-paying opportunities. .NET, developed by Microsoft, is one of the most versatile frameworks for building web, desktop, mobile, and cloud applications. Whether you are a fresher or an experienced professional, learning .NET online from a reputed institute like Maria Academy ensures a strong foundation and hands-on expertise.
- At Maria Academy, we have trained hundreds of students and professionals, helping them transition into successful careers in software development. This blog will walk you through why .NET is so valuable, what makes online training the perfect choice, and why Maria Academy stands out as the top provider for Best .NET Online Training.
Why Choose .NET?
.NET is a free, open-source platform that supports multiple programming languages like C#, VB.NET, and F#. It is widely used for creating applications across various industries, including finance, healthcare, e-commerce, and more. The strong demand for skilled .NET developers makes it an attractive career path.
Some benefits of learning .NET include:
- Cross-platform development – Build applications for Windows, macOS, Linux, and mobile devices.
- High demand – Companies are actively hiring .NET developers worldwide.
- Strong career growth – Opportunities range from junior developer roles to senior architect positions.
- Integration with cloud services – Ideal for building modern, scalable applications.
Why Online Training is the Future
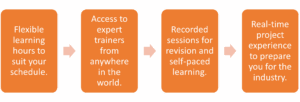
The world is moving towards remote learning, and IT training is no exception. Choosing the Best .NET Online Training gives you flexibility without compromising on quality. Online training offers:
Maria Academy combines these benefits with structured learning paths and constant mentor support.
Why Maria Academy Offers the Best .NET Online Training
When searching for the Best .NET Online Training, it’s not just about the syllabus—it’s about the learning experience. Maria Academy’s approach ensures:
- Beginner-Friendly Curriculum – Starting from basics like syntax, loops, and conditional statements to advanced topics like MVC architecture and API development.
- Live Interactive Classes – Learn directly from certified .NET trainers with industry experience.
- Real-Time Projects – Work on practical projects that mirror real-world business requirements.
- Placement Assistance – Resume building, interview preparation, and direct job referrals.
- Lifetime Access to Resources – Recorded videos, e-books, and coding exercises for ongoing learning.
Our goal is to make every student industry-ready by the end of the course.
Course Modules at Maria Academy
Our Best .NET Online Training program covers:
- Introduction to .NET Framework – Overview, architecture, and installation.
- C# Programming – Variables, data types, OOP concepts, collections.
- ASP.NET Core & MVC – Building scalable, maintainable web applications.
- Entity Framework – Working with databases using ORM.
- Web API Development – Creating RESTful services.
- LINQ – Querying data efficiently.
- Cloud Integration with Azure – Deploying and managing applications in the cloud.
- Capstone Project – Bringing all skills together in a final real-time project.
Real-Time Learning with Practical Projects
We believe theory is only the first step—hands-on practice is where true learning happens. At Maria Academy, each module includes a real-time project. These projects help students understand how to apply .NET concepts in actual business scenarios, giving them an edge in interviews.
Placement Support
Maria Academy does not just stop at training—we prepare you for your career journey. Our dedicated placement team works with industry recruiters to connect our students with the right opportunities. Many of our alumni are now working in leading IT companies as .NET developers, software engineers, and team leads.
Student Success Stories
Students often share how our Best .NET Online Training transformed their careers. From fresh graduates securing their first job to experienced professionals shifting into high-demand .NET roles, our training has been a game changer. Maria Academy takes pride in these success stories, as they reflect our commitment to excellence.
Who Can Join?
The Best .NET Online Training is suitable for:
- Fresh graduates in Computer Science or related fields.
- Working professionals aiming for a career shift into .NET development.
- Freelancers wanting to add .NET to their skill set.
- Entrepreneurs looking to develop custom applications for their businesses.
Conclusion
Choosing the Best .NET Online Training is an investment in your future. With the right guidance, structured curriculum, and hands-on experience from Maria Academy, you can master .NET development and step confidently into a rewarding career. Do not just learn—transform your career with Maria Academy’s expert-led .NET training.
Frequently Asked Questions:
- What is covered in the Best .NET Online Training course at Maria Academy?
Our training covers C#, ASP.NET Core, MVC, Entity Framework, Web APIs, LINQ, and cloud integration with Azure. You also work on real-time projects, ensuring both theoretical understanding and practical application, preparing you for industry-level challenges and interview readiness.
- How long is the Best .NET Online Training course?
The duration is typically 2 to 3 months, depending on your learning pace. We offer flexible schedules for working professionals and students. Live sessions, recorded videos, and doubt-clearing sessions ensure you stay on track and gain complete mastery of the concepts.
- Does Maria Academy provide placement support after the course?
Yes. Our dedicated placement cell works with industry recruiters to arrange interviews for students. We provide resume building, mock interviews, and job referrals. Many of our students have been placed in top IT companies as .NET developers, software engineers, and team leads.
- As a student, how do I balance learning .NET with my college schedule?
Maria Academy offers flexible online class timings, recorded sessions, and mentor support. This allows students to balance academic commitments with skill development. You can learn at your own pace while still completing the course within the planned time frame without stress.
- I am new to programming. Can I still join the Best .NET Online Training?
Absolutely. Our course starts from the basics, assuming no prior coding experience. We gradually move to advanced topics, ensuring you build confidence along the way. Our trainers provide extra guidance for beginners to help them catch up with technical concepts smoothly.
- Will I get project experience before completing the course?
Yes. Maria Academy integrates project-based learning from day one. Every module has practical assignments, and by the end, you will have completed multiple real-time projects. This ensures you have a strong portfolio to showcase during job interviews, giving you a competitive edge.
Free .NET Courses Online
Introduction
- In today’s competitive IT world, having the right technical skills can open doors to multiple career opportunities. One such skill in high demand is .NET development. Whether you aim to build web applications, mobile apps, or enterprise solutions, .NET offers a versatile platform supported by Microsoft. The best part? You can learn it without spending a single rupee through Free .NET Courses Online.
- At Maria Academy, we understand how important it is for students and working professionals to have access to quality resources. That’s why we guide our learners towards the best Free .NET Courses Online so they can upskill efficiently and confidently.
Why Learn .NET?
.NET is an open-source, cross-platform framework used to create secure, scalable, and high-performance applications. It supports multiple languages such as C#, VB.NET, and F#, making it suitable for diverse projects. From ASP.NET Core web apps to mobile development using .NET MAUI, the possibilities are endless.
Employers across the globe value developers who can work with .NET because it integrates seamlessly with cloud platforms like Microsoft Azure and supports both front-end and back-end development. By enrolling in Free .NET Courses Online, you can start your journey without any upfront cost and build a portfolio that employers trust.
Top Free .NET Courses Online
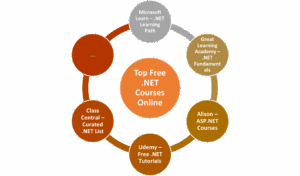
Microsoft Learn – .NET Learning Path
- Microsoft’s own learning platform offers structured modules on C#, ASP.NET Core, Blazor, and more. Each lesson includes hands-on exercises and quizzes. As the creator of .NET, Microsoft ensures the content is always updated to the latest version.
Great Learning Academy – .NET Fundamentals
- A beginner-friendly course that introduces the basics of .NET, C#, and object-oriented programming. It’s short, easy to follow, and comes with a certificate that can be added to your LinkedIn profile.
Alison – ASP.NET Courses
- Alison offers Free .NET Courses Online focusing on ASP.NET, perfect for aspiring web developers. The platform also provides assessments to test your knowledge, and optional certification is available.
Udemy – Free .NET Tutorials
- Udemy features several free introductory courses on C#, .NET Core, and API development. Although most are beginner level, they give you a strong starting point before moving to advanced paid options.
Class Central – Curated .NET List
- Class Central compiles some of the best Free .NET Courses Online from providers like Microsoft, EdX, and Future Learn, making it easier for you to choose the right course based on your career goals.
Benefits of Learning Through Free .NET Courses Online
- Cost-Effective Learning – You gain industry-ready skills without spending money.
- Flexibility – Most courses are self-paced, allowing you to balance studies, work, or internships.
- Practical Exposure – Courses often include projects and exercises to build your portfolio.
- Updated Content – Platforms like Microsoft Learn ensure you study the latest framework updates.
- Career Growth – .NET skills are valued across industries, from finance to healthcare and IT services.
Maria Academy’s Role in Your .NET Journey
- At Maria Academy, we believe that free learning resources should be combined with professional mentorship. We help students identify the right Free .NET Courses Online, guide them through practical projects, and prepare them for interviews. Our placement-focused approach ensures you are not just learning but also landing the right job.
- Our trainers also provide live sessions, doubt-clearing classes, and project-based learning that aligns with the industry’s expectations. Even though you start with free resources, our guidance ensures you reach an advanced professional level.
Tips for Succeeding in Free .NET Courses Online

- Set a Study Schedule – Even though courses are flexible, consistency is key.
- Practice Daily – Work on small coding problems in C# and ASP.NET Core.
- Build Projects – Create simple apps like a to-do list, weather app, or blog platform.
- Engage in Communities – Join .NET forums and GitHub projects to learn from peers.
- Update Your Portfolio – Add your certifications and projects to LinkedIn.
Career Opportunities After Learning .NET
With .NET skills, you can work as:

- .NET Developer – Building web and desktop applications.
- Full Stack Developer – Handling both front-end and back-end using .NET and JavaScript frameworks.
- Cloud Developer – Deploying .NET apps on Azure.
- Mobile App Developer – Using .NET MAUI for cross-platform apps.
Many companies prefer candidates trained on the latest frameworks, making Free .NET Courses Online a smart first step towards a lucrative career.
Conclusion
The demand for skilled .NET developers continues to grow, and the internet provides countless ways to learn without spending money. Platforms like Microsoft Learn, Great Learning, Alison, and Udemy offer structured and quality training for free.
At Maria Academy, we take it further by providing mentorship, projects, and placement support so you’re learning journey is both guided and career focused. Start exploring Free .NET Courses Online today and take the first step towards a rewarding software development career.
Frequently Asked Questions
- Are these courses updated for the latest .NET versions?
Most platforms, especially Microsoft Learn, update their materials to match the latest Long-Term Support (LTS) version of .NET. This ensures your knowledge remains relevant in real-world projects and interviews. - Can I learn both web and mobile development in these courses?
With .NET MAUI, you can create cross-platform mobile apps, while ASP.NET Core handles web applications. Many free courses cover both areas, giving you a complete development skill set. - Do I need prior programming experience for .NET?
Not necessarily. Many beginner-focused Free .NET Courses Online start with programming basics in C#, so even students from non-IT backgrounds can learn effectively with consistent practice. - Will these courses help me get a job?
Yes, especially when paired with real projects and internships. Employers value candidates with hands-on .NET experience. Maria Academy’s mentorship ensures you can turn free learning into a strong career advantage. - Can I manage these courses alongside my college schedule?
Since most Free .NET Courses Online are self-paced, you can study in short sessions during evenings or weekends, making it easy to balance learning with academic commitments. - Will I get a certificate after completion?
Many platforms, including Great Learning and Alison, offer free certificates. Microsoft Learn also provides digital badges that can be showcased on LinkedIn or in your resume.
DOT NET Certification Course
The demand for skilled .NET developers is rapidly growing across various industries, thanks to its versatility and widespread adoption in enterprise-level applications. If you are looking for a career in software development, our DOTNET Certification Course is the ideal starting point. With structured content, expert-led sessions, and hands-on project experience, this course equips you with everything needed to become a job-ready .NET developer.
What Is .NET?
.NET is a free, open-source development platform developed by Microsoft, designed for building a wide variety of applications including web, desktop, mobile, cloud, IoT, and more. It supports multiple programming languages such as C#, VB.NET, and F#, allowing developers to choose the language that best fits their project needs. One of its most notable components, ASP.NET, is built on top of the .NET platform and offers a robust framework for creating dynamic, scalable, and high-performance web applications and services. With its cross-platform capabilities and rich libraries, .NET enables developers to deliver secure, efficient, and feature-rich solutions for diverse business needs.
Why Choose a DOT NET Certification Course?
Enrolling in a structured DOTNET Certification Course not only speeds up your learning but also offers a career-focused roadmap. The course walks you through everything from foundational programming to enterprise-level application development using ASP.NET Core and C#. You will also explore front-end frameworks, database integration, API creation, and real-world deployment strategies.
Course Highlights
This DOTNET Certification Course is designed with the latest curriculum trends that match the expectations of hiring companies. Key features include:

- Beginner-friendly training in C#, ASP.NET Core, and MVC architecture.
- Live interactive sessions led by industry professionals.
- Project-based learning with real-world scenarios.
- Database integration using SQL Server and Entity Framework.
- Resume and portfolio building for job readiness.
- 100% placement assistance for eligible candidates.
What You Will Learn
Throughout the course, you will master a wide array of technologies and tools such as:
- C# programming fundamentals.
- Object-Oriented Programming (OOP).
- ASP.NET Web Forms and MVC.
- Razor Pages and Blazor for UI development.
- Entity Framework for database operations.
- API development and Postman testing.
- Deployment on IIS or cloud platforms like Azure
Each module is paired with practical assignments to ensure your understanding is industry-ready.
Who Can Join?
This course is suitable for:
- Final-year students from Computer Science, IT, or related fields.
- Graduates looking to shift into software development.
- Working professionals from non-development roles (testing/support).
- Freelancers interested in web application development.
- B. Com/B.Sc students with interest in coding and no prior programming experience.
There are no prerequisites to join—just a willingness to learn and a basic understanding of how applications work.
Advantages of DOT NET Certification Course
Enrolling in a certified DOTNET Certification Course brings several career and learning advantages:
- Structured Learning: Clear path from basics to advanced concepts.
- Career Boost: Helps in cracking technical interviews confidently.
- Global Recognition: .NET is used worldwide, creating international job opportunities.
- Enterprise Relevance: Widely adopted by medium and large-scale businesses.
- Strong Community Support: Active forums, Microsoft documentation, and GitHub repositories.
Limitations to Keep in Mind
While .NET is powerful, it’s important to be aware of certain limitations:
- Heavier for small apps: Might be overkill for simple applications.
- Microsoft Ecosystem: Best performance often seen within Windows environments.
- Learning Curve: Mastery takes time due to vast feature sets.
- Hosting Costs: Advanced hosting (e.g., Azure) can be pricey for individual developers.
However, these are easily manageable with proper guidance and training—something our course is built to provide.
Certification and Career Path
Upon successful completion, students receive a Course Completion Certificate from Maria Academy, which holds recognition among hiring partners in both startups and established IT firms. This certificate can be added to your LinkedIn profile, GitHub, or shared during job applications to prove your skillset.
Additionally, our dedicated placement team will assist you with:
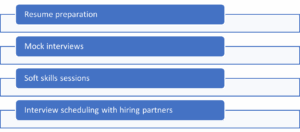
Placement Success Stories
We take pride in the fact that hundreds of students have successfully completed this DOTNET Certification Course and secured positions such as .NET Developer (Junior/Mid-level), Backend Developer (C#), Full-Stack Web Developer (ASP.NET with JavaScript frameworks), and Software Engineer specializing in the Microsoft Stack. What makes this achievement even more remarkable is that many of these students come from non-computer science backgrounds. Through our structured, step-by-step teaching approach, we have guided them from beginner to professional level, ensuring they gain both theoretical knowledge and hands-on skills. This practical training has empowered them to confidently enter the tech industry and excel in real-world projects.
Frequently Asked Questions (FAQ)
- Do I need prior coding knowledge to join this course?
Not at all. We start from the basics of C# and guide you through every concept at a beginner’s pace. Even students from B.Com or B.Sc backgrounds have successfully completed the course and got placed with ease after completing this training.
- Is the course completely free?
Yes. The entire core course—including live training, materials, and certification—is completely free. You will only pay if you opt for additional premium services like personalized mentorship or job guarantee plans, which are optional and not mandatory.
- What kind of certificate will I receive?
You will receive a Course Completion Certificate from Maria Academy, which is recognized by recruiters in both startups and mid-sized tech companies. You can attach it to your resume, LinkedIn profile, and GitHub portfolio to showcase your programming and project-based learning outcomes effectively.
- Will I get access to recorded sessions?
Do not worry! Every live session is recorded and uploaded for lifetime access. You can watch them anytime, re-learn the concepts at your own pace, and even revise before interviews or placement tests to boost your confidence and preparation effectively.
- Who are the trainers?
Our trainers are not just teachers—they are developers. With years of experience in building enterprise-grade ASP.NET applications, they bring real-world knowledge to every class. You will learn what really matters in interviews and on the job from industry practitioners.
- Can I get help with job placements after the course?
Absolutely. We offer end-to-end placement support—from resume building to interview scheduling. We have helped hundreds of student’s secure jobs in reputed companies. Our dedicated placement team ensures you are interview-ready and confident by the time you complete the course successfully.
Dot Net Certification Course Online
The demand for full-stack and back-end developers with Dot Net skills has consistently risen, especially with enterprises still relying heavily on .NET-based systems. If you are someone who wants to learn .NET from scratch, get certified, and build your career in web application development or enterprise software, this Dot Net Certification Course Online is tailored for you. Best of all, the core course is absolutely free, including live classes, certification, and interview preparation.
Offered by Maria Academy, this course is designed not just to teach, but to transform you into a job-ready developer through project-based learning. Whether you are a college student, fresher, or a working professional looking to transition into development, this training equips you with the practical skills required in the job market today. Choosing a Dot Net Certification Course Online helps you learn from anywhere, at your own pace, while still accessing expert mentorship and structured curriculum.
What Will You Learn in This Dot Net Certification Course?
- This Dot Net Certification Course Online covers everything from the absolute basics to advanced topics. It starts with C# programming fundamentals and progresses through OOPs concepts, ASP.NET Web Forms, ASP.NET MVC, ADO.NET, Entity Framework, LINQ, and even .NET Core and API development.
- You will also explore front-end technologies like HTML, CSS, Bootstrap, JavaScript, and frameworks like Angular or React in integration with .NET backends.
- Each topic is taught via live interactive sessions, followed by hands-on coding assignments, real-world project building, and one-on-one doubt clearing sessions. By the end of the course, you will have built at least two full-stack Dot Net applications, hosted them on GitHub, and be able to crack technical interviews with confidence.
Course Highlights:
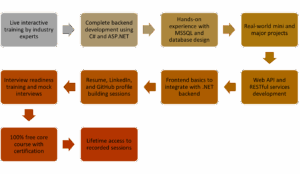
Who Can Join This Course?
This Dot Net Certification Course Online is ideal for:
- Final-year students from B.Sc., BCA, B. Com, and Engineering
- Fresh graduates seeking IT jobs
- Working professionals from non-programming backgrounds
- QA or support engineers transitioning into development
- Freelancers aiming to work on .NET projects
- Anyone with basic computer literacy and a willingness to learn programming
Course Advantages
- One of the biggest advantages of this Dot Net Certification Course Online is its beginner-friendly approach. You do not need prior coding experience to get started.
- The trainers explain every topic using practical examples and real-world scenarios. You will also build an actual portfolio of projects to show recruiters.
- Another major benefit is the job-focused curriculum. Unlike theoretical courses, this one teaches you exactly what you will use on the job—from database queries to business logic, deployment, and even debugging techniques. There’s also placement support, including soft skill training, resume workshops, and job referrals.
- Moreover, the lifetime access to recordings makes it possible to revise anytime, even during interview prep or internships.
Disadvantages / Considerations
- While the course offers tremendous value, it’s important to note that it requires consistent practice. As with any programming course, simply attending sessions is not enough—you must code regularly to gain confidence.
- Also, while the core course is free, some premium services like guaranteed job programs or one-on-one mentorship are paid—though entirely optional.
- You may also face a slight learning curve if you are completely new to programming. However, the trainers are extremely supportive, and doubt-clearing is given high priority. With the flexibility of the Dot Net Certification Course Online, you can take your time to master the concepts without pressure.
Certification Details
On successful completion of the course, you will receive a Course Completion Certificate from Maria Academy. This certificate is recognized by startups and mid-sized companies across India and can be attached to your resume, LinkedIn, or GitHub profile. It validates your practical knowledge of .NET development and your readiness for real-world projects.
Placement Support
Maria Academy offers dedicated placement support to every student. This includes:
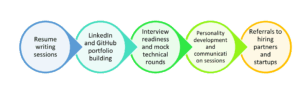
Students who complete the full course and practice consistently have been placed in software companies in Chennai, Coimbatore, Bangalore, and other cities across India. Even students from B. Com and B.Sc. backgrounds have successfully transitioned to IT careers, thanks to this effective Dot Net Certification Course Online.
Start with the Course
If you are serious about starting a career in software development, this Dot Net Certification Course Online can be your launchpad. With a curriculum designed by professionals, free certification, real-world projects, and placement guidance, you do not need to look elsewhere.
Whether you are still a student or a graduate wondering how to enter the IT industry, this Dot Net Certification Course Online opens doors. Learn at your own pace, build your confidence, and step into the world of .NET development with skills that truly matter.
Frequently Asked Questions (FAQ)
- Is the course completely free?
The entire core course—including live training, materials, and certification—is completely free. You will only pay if you opt for additional premium services like personalized mentorship or job guarantee plans, which are optional. - I am from a non-IT background. Can I still learn Dot Net?
We start from the basics of C# and guide you through every concept at a beginner’s pace. Even students from B. Com or B.Sc. backgrounds have successfully completed the course and got placed. - Will I get a certificate?
You will receive a Course Completion Certificate from Maria Academy, which is recognized by recruiters in both startups and mid-sized tech companies. You can attach it to your resume, LinkedIn profile, and GitHub portfolio to showcase your skills. - What if I miss a class?
Do not worry! Every live session is recorded and uploaded for lifetime access. You can watch them anytime, re-learn the concepts, and even revise before interviews or placements. - Who are the trainers?
Our trainers are not just teachers—they are developers. With years of experience in building enterprise-grade ASP.NET applications, they bring real-world knowledge to every class. You will learn what really matters in interviews and on the job. - How do I enroll?
Just fill out the registration form on the official Maria Academy website or contact their training coordinator on WhatsApp. You will be added to the upcoming batch group, and all schedules will be shared there.
ASP.NET Certification Course Free
If you have ever wanted to build professional, scalable, and secure web applications, ASP.NET is one of the most powerful frameworks to learn. Designed and supported by Microsoft, ASP.NET is the backbone of enterprise web development—and now, you can learn it for free.
At Maria Academy, we offer an ASP.NET Certification Course Free that takes you from zero knowledge to job-ready skills using a structured, hands-on approach. Whether you are a student, fresher, or working professional looking to switch to development, this course is built for you.
Why Learn ASP.NET?
ASP.NET is used by companies across the world to build everything from simple websites to large enterprise systems. By learning ASP.NET, you gain access to opportunities in:
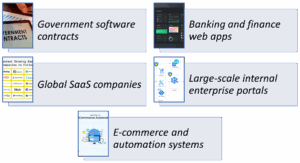
The best part? ASP.NET developers are in constant demand—especially in cities like Chennai, Bangalore, Pune, and for remote international clients. The ASP.NET Certification Course Free can help you enter this industry ready.
What Will You Learn in the Course?
Our ASP.NET Certification Course Free starts from fundamentals and goes all the way to real-time project development. You will not only learn how to write code but also how to solve business problems using technology.
Course Modules:

Introduction to ASP.NET & .NET Ecosystem
• What is ASP.NET and how it fits in Microsoft stack
• .NET Framework vs .NET Core vs .NET 6
• Real-time use cases and architecture overview
C# Programming Basics
• Syntax, loops, conditionals, and functions
• Object-Oriented Programming: Classes, Inheritance, Polymorphism
• Building console-based mini applications for practice
Frontend Technologies
• HTML5 and CSS3 Basics
• JavaScript for interactivity
• Bootstrap for responsive UI
ASP.NET MVC Development
• Model-View-Controller Architecture
• Routing, Controllers, and Views
• Razor syntax and dynamic page rendering
Working with Databases
• Introduction to SQL Server
• CRUD operations using ADO.NET and Entity Framework
• Code-First vs Database-First approaches
Authentication and User Management
• Creating login and registration systems
• Session management and user roles
• Identity-based authentication
Web API Creation
• Building RESTful services
• Returning and consuming JSON
• API testing with Postman
Project Development
• Choose your live project: Job Portal, Student Dashboard, Task Manager
• Full application development from scratch
• Hosting on IIS or Azure for real-world exposure
Certification & Recognition
On successful completion of the course and your final project, you will receive an ASP.NET Certification Course Free certificate from Maria Academy. This certificate validates your skills and gives you a strong edge in interviews and job applications.
Who Can Join?
This course is open to everyone, regardless of your background.
- Final-year engineering or computer science students.
- Fresh graduates looking for their first IT job.
- Working professionals from non-programming roles.
- Freelancers who want to upskill.
- Career switchers from testing, support, or admin roles.
No prior coding knowledge is needed—we start from the absolute basics.
Placement Support You Can Trust
Maria Academy does not just teach you to code—we prepare you for a job.
You will get:
• Resume building sessions tailored for .NET profiles
• Mock technical interviews
• LinkedIn optimization tips
• GitHub project portfolio guidance
• Direct referrals to hiring partners
Hundreds of students have already been placed through our ASP.NET Certification Course Free program.
Real Trainers. Real Experience.
Our trainers are experienced developers, not just academic instructors. They have built enterprise-level ASP.NET applications and bring practical, real-world insights into every session. You will learn beyond theory—focusing on what matters in job interviews, real projects, and the workplace. Their guidance helps bridge the gap between learning and professional development.
Flexible Training Formats
You can choose how you want to learn:

- Offline Training at our Chennai center.
- Live Online Batches with weekend and weekday options.
- Recorded Sessions for self-paced learning.
- Telegram group for ongoing doubt support and updates.
The ASP.NET Certification Course Free offers maximum flexibility to suit your schedule and learning preferences.
Ready to Launch Your Career in ASP.NET?
Learning ASP.NET can unlock high-paying job opportunities in software development. Our ASP.NET Certification Course Free is your chance to learn from industry experts, build a real project, and get certified without spending a single rupee.
Whether you’re a fresher or a working professional — this is your time to learn, build, and grow.
Register Now and Start Your ASP.NET Developer Journey Today!
Frequently Asked Questions (FAQs)
- Is the ASP.NET certification course free?
Yes, the complete core course including live sessions, learning materials, and certification is free. You only need to pay if you choose optional premium services such as one-on-one mentorship, job preparation packages, or placement guarantee programs. These services are not mandatory for course completion or certification. - Do I need any programming knowledge before joining?
Not at all. This course starts from the very basics of C# programming, making it suitable for complete beginners. Each concept is explained clearly at a beginner’s pace. Even students from non-technical backgrounds like B. Com or B.Sc. have completed the course successfully and secured placements in .NET development roles. - What kind of certificate will I get?
You will receive a Course Completion Certificate from Maria Academy upon successfully finishing the course. This certificate is recognized by recruiters in startups and mid-sized companies. It adds value to your resume, LinkedIn profile, and GitHub portfolio, helping you showcase your ASP.NET skills and improve your chances of getting hired. - What kind of job roles can I apply for after this course?
After completing the course, you can apply for roles like:
i) Junior ASP.NET Developer
ii) Web Application Developer (.NET stack)
iii)Backend Developer – C#
iv) Full-Stack Developer (with frontend + ASP.NET)
v) Software Engineer – Microsoft Technologies - What if I miss a session or want to revise?
Do not worry! All live sessions are recorded and made available for lifetime access. You can revisit them anytime to revise topics, catch up on missed classes, or prepare for interviews. This ensures you never miss out on learning, even if you are balancing studies, work, or other commitments. - Will I build a real project during the course?
Yes, the course includes a full hands-on project where you will build a real-world web application using ASP.NET. This helps you apply what you have learned, gain practical experience, and create a project you can showcase in interviews or add to your GitHub portfolio for better job visibility.
ASP.NET MVC Training in Chennai
In the modern web development landscape, ASP.NET MVC (Model-View-Controller) stands tall as one of the most in-demand frameworks for building scalable, secure, and responsive web applications. If you are aiming to become a proficient full stack developer or transition into enterprise-level web development, learning ASP.NET MVC is a wise move.
For those seeking the best ASP.NET MVC training in Chennai, Maria Academy offers a result-oriented course that bridges the gap between academic learning and professional development. Backed by experienced trainers, industry-standard tools, and a curriculum tailored for real-world application, our training ensures you are job-ready from day one.
ASP.NET MVC Frameworks:
The ASP.NET MVC framework enables clean separation of concerns, faster development cycles, and testable applications. With the MVC architecture:
- The Model handles application data and business logic.
- The View manages the user interface and display.
- The Controller manages input, updates models, and returns views.
This separation results in maintainable, scalable, and structured web applications — a key reason why major enterprises rely on ASP.NET MVC for complex projects.
Why ASP.NET MVC Training in Chennai Is the Right Step
- Chennai is home to a thriving tech ecosystem, including MNCs, product-based firms, and startup culture. Companies in Chennai actively hire developers skilled in .NET MVC to manage internal platforms, client-facing portals, and ERP systems.
- Maria Academy’s ASP.NET MVC course in Chennai prepares you for these job roles by giving you the tools and knowledge required to work with real-time data, build interactive web applications, and master deployment techniques.
What Makes Maria Academy Stand Out?
Maria Academy, a reputed training institute in Chennai, is known for its commitment to student success. Our ASP.NET MVC training is:
- Project-Based: Learn through real-time implementation.
- Mentor-Driven: Get guided by developers with 8+ years of industry experience.
- Placement-Oriented: Receive placement support and interview grooming.
We ensure that every student, regardless of their academic background, becomes confident in building, testing, and deploying MVC-based applications using .NET Core or .NET Framework.
Key Features of Our ASP.NET MVC Training in Chennai
- In-depth training on Model, View, and Controller components
- Hands-on experience with Entity Framework, Razor Views, and LINQ
- Focus on routing, filters, validations, and authentication
- Real-time capstone project for portfolio building
- Resume preparation and technical interview rounds
- Dedicated placement team for job assistance
Training Modules Covered
Unlike generic .NET courses, our ASP.NET MVC course in Chennai focuses solely on the MVC architecture and related technologies. Here’s what you will learn:
Fundamentals of ASP.NET MVC:
- Get introduced to the MVC pattern, web architecture, Visual Studio setup, and the .NET ecosystem.
Controllers and Routing:
- Learn how to build and configure controllers, action methods, and custom routing.
Views and Razor Syntax
- Explore Razor View Engine, HTML helpers, layout pages, and view management.
- Models and Data Binding
- Work with Models, perform form data binding, validations using Data Annotations, and more.
Entity Framework and LINQ
- Get practical exposure to ORM using Entity Framework and fetch/manipulate data using LINQ.
Authentication and Authorization
- Secure your application with built-in login, roles, claims, and identity management.
AJAX, jQuery, and API Integration
- Integrate front-end scripts and use AJAX calls with Web APIs for interactive applications.
Deployment and Hosting
- Learn how to deploy your applications to IIS or cloud platforms like Azure.
Who Should Join This ASP.NET MVC Training in Chennai?
This course is ideal for:
- Students with basic C# or .NET knowledge
- Working professionals looking to upskill
- Web developers shifting from Web Forms to MVC
- Anyone interested in full-stack .NET development
Whether you are a fresher or already in the IT industry, this program is structured to fit your learning curve and career goals.
Student Experience at Maria Academy
At Maria Academy, students are not just trained—they are transformed. From interactive sessions to project guidance, from peer coding sessions to mock interviews, we ensure every learner gets personalized attention.
We use a step-by-step teaching model, where each concept is first demonstrated and then reinforced with exercises, mini-projects, and assessments.
Tools and Technologies You Will Work With

Internship and Certification Support
Upon completion, students receive a Course Completion Certificate from Maria Academy. High-performing students may also be recommended for live internships with partnered companies, enhancing their resume and industry exposure.
Placement Support That Delivers Results
Our dedicated placement team assists students with:
- Resume preparation
- Interview preparation (technical + HR rounds)
- Mock coding rounds
- Referrals and direct interviews with hiring companies
Maria Academy’s alumni have been placed in top IT companies in Chennai and across India with impressive starting packages.
What You will Gain After Completing the Course
By the end of the ASP.NET MVC course in Chennai at Maria Academy, you will:
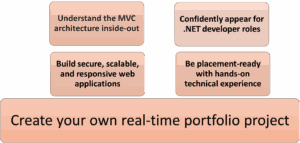
Step into Your .NET Future with Confidence
- Deciding where to upskill can shape the path of your tech career. At Maria Academy, our ASP.NET MVC training in Chennai is more than just a course—it’s a gateway to professional growth. With expert mentorship, real-world project experience, and comprehensive placement assistance, we ensure that you are ready to face industry demands confidently.
- Whether you aim to become a web developer or transition into a full-stack .NET engineer, this program gives you the right tools to succeed.
Frequently Asked Questions(FAQ):
- What is the difference between ASP.NET and ASP.NET MVC?
ASP.NET is a comprehensive framework, whereas ASP.NET MVC is a design pattern that divides applications into Model, View, and Controller. This separation enhances testability, scalability, and code organization, making it more efficient and maintainable compared to the older ASP.NET Web Forms approach.
- Will I learn only MVC or other .NET topics too?
The training mainly emphasizes MVC architecture, Razor views, controllers, and supporting technologies like Entity Framework (EF) and LINQ. Alongside these, the course also strengthens your foundational understanding of .NET and C#, ensuring you gain both core and advanced skills needed for real-world ASP.NET MVC development.
- Is there a real-time project included in the training?
Yes, you will complete a real-time capstone project demonstrating your skills in MVC, database integration, and user authentication. This hands-on project can be added to your GitHub portfolio and resume, showcasing your practical knowledge and making you stand out to potential employers during job applications or interviews.
- I am a student with no programming background. Can I join?
Absolutely. We begin with the basics, assuming no prior programming knowledge. Our step-by-step training approach is designed to help even non-IT students grasp concepts easily. With guided support and practical sessions, every learner can build confidence, understand ASP.NET MVC thoroughly, and succeed in real-world development tasks.
- Do you provide job assistance after course completion?
Yes, Maria Academy provides dedicated placement assistance, including personalized resume building, mock interviews, and soft skills training. We also connect students with our network of hiring partners in Chennai and other locations, ensuring strong job support after course completion. Our goal is to help you launch your career confidently.
- Can I attend classes online?
Yes, we offer both classroom training in Chennai and flexible online training for remote learners. Our online program includes live sessions, recorded videos, and dedicated doubt-clearing support to ensure continuous learning. Whether you prefer in-person or remote study, we provide quality training to suit your learning style.
ASP.NET Course in Chennai
In today’s competitive IT industry, mastering a robust and scalable framework is crucial for career growth. ASP.NET is one of the most in-demand technologies for building secure and dynamic web applications. If you are searching for the best ASP.NET course in Chennai, Maria Academy is your ideal destination. Our training program is tailored to transform both beginners and professionals into job-ready full stack .NET developers. With hands-on projects, real-time mentorship, and industry-relevant modules, we ensure every learner gains practical knowledge and confidence to excel in real-world environments. Join Maria Academy and build a successful career in ASP.NET development.
Why Choose ASP.NET
ASP.NET is a web development framework from Microsoft, widely used for building dynamic websites, applications, and services. It is part of the larger .NET ecosystem, offering language independence, high performance, and strong security features.
Unlike other platforms, ASP.NET supports:
- Web forms and MVC (Model View Controller) architecture.
- Integration with SQL Server and Azure.
- Modern development with .NET Core and .NET 6/7.
- Cross-platform development (Windows, Linux, macOS).
As companies move towards modern cloud-native applications, ASP.NET developers are in constant demand.
Maria Academy – Best ASP.NET Course in Chennai
Maria Academy is a well-known software training institute in Chennai, recognized for its project-first learning approach. We provide professional, industry-aligned training that prepares students for real-world IT challenges. Our ASP.NET course in Chennai is designed to build strong technical foundations through practical, hands-on experience. With a focus on real-time projects and interactive mentorship, students gain the confidence and skills needed to perform well in interviews and succeed in professional environments. This course is ideal for both beginners and career switchers.
What You Will Learn
Our curriculum is carefully structured to cover both frontend and backend using .NET technologies. It is ideal for students, working professionals, and career switchers alike.
Core Modules Include:
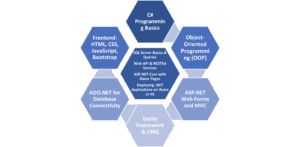
This makes our ASP.NET course in Chennai a true full stack experience!
Who Should Join the ASP.NET Course?
The ASP.NET course in Chennai at Maria Academy is structured to accommodate a diverse group of learners. Whether you’re just finishing your degree or are already working in IT, the program is flexible and beginner friendly.
It is best suited for:
- Final-year students pursuing IT/CS degrees.
- Graduates looking for a job in development.
- Professionals from non-development roles like testing or support.
- Freelancers and freshers wanting to gain project exposure.
- Anyone with a basic knowledge of computers and a strong desire to learn web development.
No prior programming knowledge is mandatory.
Unique Benefits of Joining Maria Academy
At Maria Academy, we do not just teach – we mentor and guide every student toward real-time outcomes. Our trainers are experienced professionals who currently work in the software industry and bring their insights directly into the classroom.
Some standout features of our ASP.NET training:
- 100% Placement Assistance.
- Real-time Projects and Code Reviews.
- Resume Building + Interview Preparation.
- Weekend & Weekday Batches.
- Offline Classroom + Online Learning Flexibility.
- Lifetime Access to Course Materials.
- Certificate of Completion from Maria Academy.
Projects You Will Work On
In our ASP.NET course in Chennai, practical learning is prioritized. Students will build industry-relevant mini and major projects such as:
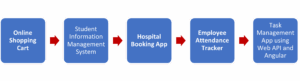
Each project is reviewed by mentors and evaluated as per IT standards. You will walk away with a strong portfolio and hands-on confidence.
How Maria Academy Helps with Placements
We are proud to say that Maria Academy has a consistent placement record for its ASP.NET course in Chennai. Our dedicated placement team works with top-tier companies and hiring partners. Every student receives one-on-one support in:
- Resume Optimization
- Mock Interviews (HR & Technical Rounds)
- Internship Opportunities
- Final Year Project Guidance
- Job Referrals & Direct Company Tie-ups
Many of our past students are now employed in companies like Infosys, TCS, Zoho, Accenture, and startups across India.
Enroll Now for the ASP.NET Course in Chennai
Don’t wait for the perfect moment—start your career journey today with the ASP.NET course in Chennai at Maria Academy. Enroll now to gain practical skills, industry knowledge, and expert guidance. Contact us for a free demo class, detailed syllabus overview, and personalized career counselling. You can reach out by visiting our center, calling us directly, or registering online through our website. Your IT career begins here!
Frequently Asked Questions (FAQs)
- What programming language is used in the ASP.NET course?
We primarily use C# (C-Sharp) for building ASP.NET applications. It’s beginner-friendly, object-oriented, and perfect for both frontend and backend logic. You will also learn database integration using SQL Server. All concepts are taught step-by-step with hands-on practice.
- Is this ASP.NET course based on .NET Core or .NET Framework?
The course starts with .NET Framework for MVC concepts. Then we move to ASP.NET Core to build modern, cross-platform apps. You will understand the transition between both frameworks.
This dual approach prepares you for any company’s tech stack.
- Will I learn backend and frontend both in this ASP.NET course?
Yes, it’s a Full Stack ASP.NET course at Maria Academy. You will learn backend development, API creation, and database operations. Alongside, we teach HTML, Bootstrap, and JavaScript for frontend. The goal is to make you a job-ready developer with complete skills.
- I am a B.Sc. Computer Science graduate. Can I join?
Absolutely! Many of our successful students are from B.Sc. and BCA backgrounds. The course doesn’t require prior development knowledge. We start from the basics and gradually build your skillset.
If you’re committed, you will succeed.
- Is placement guaranteed after the ASP.NET course in Chennai?
We offer 100% placement assistance, not job guarantees. You will get help with resume, interview scheduling, and HR connections. Our mentors guide you till you get placed in a good company.
Most students land jobs within 2–3 months after course completion.
- Can I attend this ASP.NET course online if I am not in Chennai?
Yes, we offer both offline and online ASP.NET courses. Live online sessions ensure you get the same level of interaction. You will also get recorded sessions for revision. This makes it convenient for learners across India and abroad.
ASP.NET Full Stack Developer Course
In the rapidly evolving world of software development, companies demand professionals who can manage both front-end and back-end tasks seamlessly. If you are planning to enter or grow in this field, enrolling in an ASP.NET Full Stack Developer Course could be your smartest career move. The course offered by Maria Academy is designed to shape well-rounded developers capable of creating dynamic web applications using Microsoft technologies.
Let us explore why this course is gaining such popularity and how it helps you master the full development cycle using ASP.NET.
What Is an ASP.NET Full Stack Developer Course?
An ASP.NET Full Stack Developer Course is a structured training program that teaches you how to develop applications using Microsoft’s ASP.NET framework for the back end while also mastering front-end technologies like HTML, CSS, JavaScript, and popular frameworks. Full stack developers are expected to be proficient across all layers of web development — user interface, business logic, and database interactions.
This course ensures that you become proficient in both client-side and server-side programming using the ASP.NET platform, making you a valuable asset to any modern development team.
What You Will Cover Throughout the ASP.NET Full Stack Developer Course
The ASP.NET Full Stack Developer Course from Maria Academy includes a rich set of tools, languages, and real-time project practice. Here is a simplified yet detailed list of what you will work with:
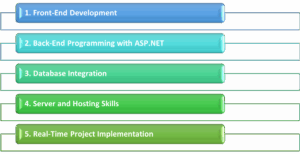
Front-End Development:
- HTML5 and CSS3 for layout and design.
- JavaScript and jQuery for dynamic interactivity.
- Bootstrap for responsive UI components.
Back-End Programming with ASP.NET:
- ASP.NET Core and MVC architecture.
- Routing, middleware, and model binding.
- RESTful services using ASP.NET Web API.
Database Integration:
- SQL Server for structured data handling.
- ADO.NET and Entity Framework Core for data access.
- LINQ for database querying.
Server and Hosting Skills:
- Introduction to IIS (Internet Information Services).
- Deployment and hosting on Azure or local servers.
- Configuration and security practices for production-ready apps.
Real-Time Project Implementation:
- Build enterprise-grade applications.
- Integrate all the technologies learned.
- Apply security, testing, and performance optimization.
By the end of the course, you will be capable of handling both development and deployment tasks from scratch, aligning with modern company expectations.
Why Choose the ASP.NET Full Stack Developer Course from Maria Academy?
While many institutions offer similar training, Maria Academy provides industry-focused education backed by real-world examples, experienced mentors, and a certification that carries weight. Here are a few reasons why learners prefer Maria Academy:
- You receive personalized mentor support for coding challenges.
- The curriculum is regularly updated to reflect real-time industry needs.
- Certification provided at the end is valid across multiple job platforms.
- Placement assistance ensures you move smoothly into the professional world.
The ASP.NET Full Stack Developer Course is carefully crafted to match the latest Microsoft technology standards, helping you stand out in today’s crowded job market.
Benefits of Completing the ASP.NET Full Stack Developer Course
This course is not just about learning ASP.NET; it is about becoming a complete developer. Some of the key advantages include:
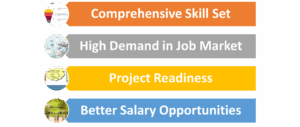
- Comprehensive Skill Set: You gain both front-end and back-end skills, making you a well-rounded developer.
- High Demand in Job Market: ASP.NET is widely used in enterprise-grade applications; full stack developers who can work with it are highly sought-after.
- Better Salary Opportunities: Full stack developers generally earn higher salaries due to their broad skill range.
- Project Readiness: You will graduate with projects you can showcase to recruiters, increasing your chances of employment.
Who Can Join This ASP.NET Full Stack Developer Course?
The course is designed for a broad audience. Whether you are:
- A fresher from college with a basic understanding of programming
- A working professional looking to switch to full stack development
- A web designer who wants to learn backend logic
- A student aiming to build portfolio-worthy projects
This ASP.NET Full Stack Developer Course helps you progress quickly with structured guidance and support.
Certification and Job Support
On completion of the course, Maria Academy provides an official certification that adds credibility to your resume. In addition, learners get:

This course not only educates you but also equips you to face recruitment processes with confidence.
Career Paths After Completing the ASP.NET Full Stack Developer Course
After finishing the course, here are some of the roles you can apply for:
- Full Stack .NET Developer
- Web Application Developer
- ASP.NET MVC Developer
- Software Engineer (Microsoft Stack)
- Backend Developer (ASP.NET Core)
These job titles span multiple industries, from finance and healthcare to education and e-commerce. ASP.NET continues to power many enterprise-level applications, making your skills highly relevant.
Why ASP.NET Is Still a Strong Career Choice
Some may question if ASP.NET is still relevant in 2025. The answer is a definite yes. ASP.NET Core has modernized the framework, making it cross-platform, faster, and cloud-optimized. It supports containerization, microservices, and modern UI integrations — which means ASP.NET is evolving with the industry.
Companies that require secure and scalable web applications continue to invest in ASP.NET, ensuring steady demand for trained developers.
Explore More with ASP.NET Technologies
Once you complete the ASP.NET Full Stack Developer Course, you can explore advanced paths such as:
- Building cloud-native apps with Azure and ASP.NET Core
- Learning Blazor for building rich web UIs using C#
- Integrating with third-party APIs and microservices
- Enhancing performance and security in .NET-based applications
Stay updated with the evolving ASP.NET ecosystem, and you will continue to grow in your career.
Frequently Asked Questions(FAQ):
- What is the difference between ASP.NET and ASP.NET Core?
ASP.NET Core is a cross-platform, high-performance version of ASP.NET, offering better scalability, modular design, and cloud integration. It is the modern replacement for the traditional ASP.NET framework and is recommended for new projects.
- How does the ASP.NET Full Stack Developer Course help in real-world job preparation?
The course includes practical projects, database integration, and hosting exercises. These simulate real development tasks, giving you hands-on experience that prepares you for interviews and actual job roles in development teams.
- Is it necessary to learn both front-end and back-end to become a full stack ASP.NET developer?
Yes, full stack developers are expected to work across the entire development lifecycle. Understanding both front-end tools and ASP.NET back-end logic allows you to create complete, production-ready applications with better team collaboration.
- Is this course suitable for college students or beginners?
Absolutely. The course starts from the basics and gradually introduces advanced topics. It is structured to support learners from any background who are willing to put in the effort to become job-ready developers.
- What kind of certification will I receive after course completion?
You will receive an industry-recognized certificate from Maria Academy that validates your skills in ASP.NET full stack development. This certification improves your profile visibility among recruiters and boosts your employment chances.
- Can I get job placement support after finishing the course?
Yes, Maria Academy offers dedicated job support which includes resume review, interview preparation, and job referrals. You also get access to a network of hiring companies looking for trained ASP.NET developers.
Full Stack Dot Net Developer Course
In the evolving landscape of web and enterprise application development, the demand for full stack developers has significantly increased. Organizations seek professionals who can efficiently manage both client-side and server-side development. The Full Stack Dot Net Developer Course offered by Maria Academy is designed to build these versatile skills from the ground up.
This course empowers learners with the knowledge and tools required to develop complete end-to-end applications using the powerful Microsoft .NET ecosystem. Whether you are an aspiring programmer or someone aiming to expand their existing knowledge, this structured training provides everything you need to build full stack web applications with confidence.
What Makes Full Stack Dot Net Development Unique?
Full stack development using the .NET framework is a strategic choice for many companies and developers. The reason lies in its ability to deliver enterprise-grade, secure, and scalable applications across platforms. With this training, learners master the integration of front-end, back-end, and database systems using Microsoft technologies.
The course covers all critical layers of development, including responsive UI design, business logic implementation, and secure data handling. Developers trained in the full .NET stack can manage projects independently or contribute effectively to large development teams.
Why Choose the Full Stack Dot Net Developer Course from Maria Academy?
Choosing the right training provider plays a key role in your career growth. Maria Academy offers a well-curated Full Stack Dot Net Developer Course that emphasizes real-time learning and industry expectations. Here is why this program stands out:
- Comprehensive coverage of both front-end and back-end technologies
- Guided hands-on project development using Visual Studio, ASP.NET, and SQL Server
- Structured mentorship by experienced Dot Net professionals
- Industry-recognized certification to validate your skills
- Access to interview preparation, career guidance, and placement support
Technologies You Will Learn
This full stack program is focused on helping learners become proficient across all development layers. Here is an overview of the core technologies covered:

- Frontend Development: HTML5, CSS3, Bootstrap, JavaScript, and Angular or React for dynamic user interfaces
- Backend Development: C#, ASP.NET Core MVC, RESTful APIs for handling business logic and integration
- Database Management: Microsoft SQL Server for managing, querying, and securing data
- Version Control: Git and GitHub for managing codebase and collaborative development
- Deployment: Hosting applications on IIS, Azure Cloud, or local servers
Each technology is taught with project examples, code demonstrations, and best practices to ensure strong conceptual clarity.
Career Opportunities After Completing This Course
The IT industry is constantly seeking full stack developers with Microsoft technology experience. After completing the Full Stack Dot Net Developer Course, learners can confidently apply for the following roles:
- Full Stack .NET Developer
- ASP.NET Core Developer
- Backend API Developer
- Software Engineer – Microsoft Stack
- Web Application Developer
Additionally, the knowledge gained from this course also prepares learners to pursue freelancing opportunities, start-ups, or independent software projects.
What You Will Build and Practice
Learning by doing is at the core of Maria Academy’s training methodology. Learners are guided to build a variety of applications, such as:
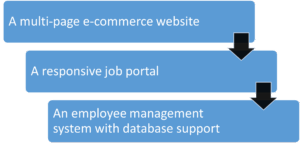
These real-world projects serve as portfolio pieces for learners during job applications and interviews.
Flexible Learning with Lifetime Access
Understanding that learners have different schedules, the course is structured with flexible timing options. Maria Academy provides:
- Online video classes with playback access
- Live mentorship sessions for code walkthroughs
- Doubt-clearing forums and chat support
- Lifetime access to updated training materials
- Post-course interview preparation and resume building support
This flexible format helps students, working professionals, and career changers learn at their own pace.
Certification That Adds Value to Your Career
The Full Stack Dot Net Developer Course ends with a certification exam to validate your skills. On passing the exam, learners receive a professional certificate from Maria Academy. This certificate demonstrates your practical expertise in full stack development and enhances your credibility in the job market.
Whether you are applying for your first job or aiming for a career switch, the certification adds measurable value to your resume.
Ready to Build Full Stack Web Apps with Microsoft Technology?
If you are passionate about learning software development and want to master both frontend and backend skills, then this course is the ideal path. With the Full Stack Dot Net Developer Course by Maria Academy, you get industry-grade training, real-world project experience, and a certification that opens doors to top job roles.
Begin your journey toward becoming a Microsoft full stack developer today — learn, build, and transform your career with confidence.
Frequently Asked Questions:
- What is a Full Stack Dot Net Developer?
A Full Stack Dot Net Developer is a software engineer skilled in both frontend and backend development using Microsoft technologies. They work with tools like ASP.NET, C#, SQL Server, and JavaScript to build complete web applications. Their role involves building responsive user interfaces, managing APIs, and handling data storage. This developer profile is highly sought after in product-based and service-based companies worldwide.
- How is this course different from basic Dot Net training?
Unlike basic courses that only focus on C# or ASP.NET, this course trains you in complete application development. You will learn frontend, backend, and database technologies, along with project deployment practices. The curriculum includes hands-on experience and real-time application building from start to finish. It prepares you to manage complete development workflows as a full stack professional.
- What technical background is required to join this course?
No prior programming experience is required; a basic understanding of computers is sufficient. The course starts from fundamentals and gradually progresses to advanced topics. Every module is explained with real-world use cases and developer-centric examples. Learners from any academic background can successfully complete this training.
- As a student, can I manage this course with college classes?
Yes, the course is designed with flexibility to support students’ academic schedules. You can attend weekend classes or access recordings at your convenience. Many students join during college and use the projects to strengthen their resumes. Maria Academy also provides career mentoring tailored to students’ needs.
- Will this certification help in getting a job?
Yes, this certification validates your full stack development skills to employers. It boosts your chances in job interviews and helps you stand out among other candidates. The course includes interview training, project portfolio creation, and resume support. With growing demand for .NET developers, this certification adds strong credibility.
- Is this course useful for career changers?
Absolutely. This course is ideal for anyone switching from non-technical roles into software development. It starts from the basics and offers hands-on practice with complete applications. Career changers benefit from the guided support and structured learning path. The final certification showcases your readiness for full stack development roles.
Dot Net Training Online with Certification
In today’s competitive tech landscape, simply knowing how to code is not enough — verified skills make all the difference. That’s where Dot Net training online with certification becomes essential. With this course, you don not just learn programming concepts like C#, ASP.NET, and SQL — you also earn a recognized certificate that proves your expertise. Offered by Maria Academy, this training is ideal for freshers, students, and working professionals who want to level up their careers. Whether you are aiming for a development role or planning to shift into tech, this certification helps boost your credibility and opens better opportunities.
Why Dot Net Remains a Top Choice for Developers
Dot NET is not just a programming platform, it’s a development ecosystem supported by Microsoft and trusted by companies worldwide. From web applications to enterprise software and cloud APIs —Dot NET plays a powerful role.
Here’s why it’s still in demand:
- Cross-platform capabilities (Windows, Linux, macOS)
- Strong language support (C#, F#)
- Robust framework for full-stack and API development
- Widely used in banking, healthcare, and e-commerce
With .NET, you are not learning for the sake of learning — you are aligning yourself with real industry needs.
What You will Learn Through This Online Certification Training
The Dot Net training online with certification program provides well-structured learning paths designed by industry experts. It’s not about watching a few videos — it’s about mastering the stack.
Here’s a look at the key learning coverage:
- Object-Oriented Programming using C#
- ASP.NET Core for backend web development
- Entity Framework for working with databases
- Razor Pages and MVC architecture
- API development with REST and JSON
- SQL integration and database queries
- Deployment strategies on IIS and cloud platforms
Each topic is taught with hands-on coding examples, quizzes, and real-world projects to ensure skill-building.
Certification That Proves Your Skills
Completing this course is not just about learning — it’s about proving your expertise with a recognized certification.
Here’s what makes the certification valuable:
- A verified certificate issued by Maria Academy
- Trusted by hiring managers for showcasing real skills
- Demonstrates both frontend and backend development proficiency
- Can be added to LinkedIn and resumes for better visibility
Whether you are applying for jobs or seeking promotions, having a formal certificate adds weight to your profile.
Advantages of Going the Certified .NET Route
Unlike generic tutorials or scattered YouTube content, structured training gives you:
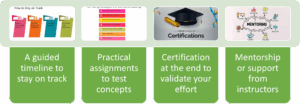
This method is more strategic than self-learning. It ensures you do not just understand the “how” but also the “why” behind full stack development practices.
Where Maria Academy Makes a Difference
There are many online courses, but Maria Academy designs its .NET training with real-world scenarios and practical use cases. Here’s how it stands apart:
- Industry-aligned curriculum with updated .NET features
- Full-stack project simulations from start to finish
- Quiz-based learning to reinforce each topic
- Certificate that highlights your expertise
- Soft skill and interview tips included as bonus
Plus, the training is flexible — accessible from anywhere, anytime.
Who Should Enroll in This Dot Net Online Training?
This training is not limited to developers alone. It benefits a wide range of learners:

- Students looking to specialize in backend development
- Professionals switching to Microsoft tech stack
- Freelancers aiming to offer .NET services
- Frontend developers expanding to full stack
If you are serious about coding and want to add a reliable certificate to your portfolio, this is the right path.
Real Projects You Will Build Along the Way
Learning becomes meaningful when you apply it. This course includes multiple practical projects such as:
- Blog application using ASP.NET MVC
- File upload and management system
- Real-time dashboard using Web API
- E-commerce cart functionality with session management
- User authentication and role-based access control
Each project will be part of your portfolio — a great asset during job interviews.
Step Into Your Development Career
Becoming a Dot NET developer goes beyond understanding syntax — it’s about building secure, scalable, and real-world applications. With Dot Net training online with certification from Maria Academy, you gain hands-on experience and industry-relevant skills. This training equips you to confidently handle real-time projects using C#, ASP.NET, and more. Whether you’re a beginner or upgrading your skills, this certification gives you a strong advantage in today’s job market. Enroll now and take a solid step toward your professional growth.
Frequently Asked Questions(FAQ):
- What is Dot Net training online with certification good for?
This training is ideal for building enterprise-grade web and desktop apps. It provides a structured approach to learning C#, ASP.NET, and database tools. You will also gain real-world project experience and job-ready skills. Certification adds recognized proof of your development expertise.
- How does this certified training differ from learning .NET on your own?
Self-learning lack’s structure and industry alignment. Certified training includes hands-on projects, instructor guidance, and quizzes. You stay accountable and progress systematically through the modules. In the end, you also earn a certificate that validates your skills.
- Is this course up to date with the latest .NET technologies?
Yes, it includes ASP.NET Core, EF Core, and Razor Pages. The curriculum is regularly updated with Microsoft’s .NET releases. You will learn cloud-ready and cross-platform coding practices.
Maria Academy ensures the content reflects current industry standards.
- Can students from non-CS backgrounds take this course?
Yes, it’s designed to be beginner-friendly even for non-CS students. Fundamentals like variables, loops, and logic are covered clearly. You do not need prior experience in programming or databases.
With consistent effort, anyone can master .NET through this course.
- Does this certification improve campus or internship chances?
Definitely! Employers prefer candidates with practical experience. This course includes job-oriented training and full-stack demos. Your certificate acts as proof of readiness for internships or jobs.
Many students use it to crack coding rounds confidently.
- What is the format of the certificate I receive?
The certificate includes your name, course title, and completion date. It’s digitally verifiable and shareable on platforms like LinkedIn. You can also download and print it for physical use.
Maria Academy’s name gives the certificate credibility in tech circles.
Dot Net Full Stack Developer Course
In the world of software development, full stack developers are considered the all-rounders. They know both the front-end and back-end technologies and can build an application from start to finish. If you are planning to step into this versatile role, enrolling in a Dot Net Full Stack Developer Course is your best career move — and Maria Academy makes that journey easier and more effective.
By mastering both client-side and server-side development with Microsoft technologies, you will be prepared for a wide range of job opportunities. Let’s explore what this course offers, how it benefits you, and why it’s becoming one of the most sought-after paths in tech.
What Does It Mean to Be a .NET Full Stack Developer?
- A .NET Full Stack Developer is skilled in using .NET technologies for the back end and web technologies like HTML, CSS, and JavaScript for the front end.
- They handle the entire software development lifecycle — from designing user interfaces to managing databases and APIs.
- These developers are in high demand due to their ability to work across the entire stack and deliver complete, functional applications.
The Dot Net Full Stack Developer Course offered by Maria Academy trains you in all these core skills, ensuring you are job-ready from day one.
Why Choose a Dot Net Full Stack Developer Course?
Choosing a full stack course is not just about learning to code — it’s about becoming a problem solver, a creator, and a well-rounded developer. Here’s why this course stands out:
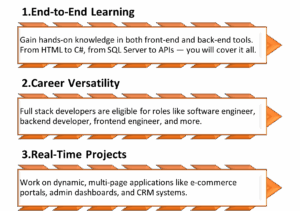
What You will Learn During the Course
The Dot Net Full Stack Developer Course guides you from beginner to expert, covering front-end, back-end, databases, and deployment — empowering you with real-world skills for full stack development success
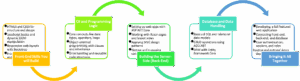
Tools & Technologies You will Gain Expertise In
As part of the Dot Net Full Stack Developer Course, you will actively work with:
- Languages: C#, HTML, JavaScript, T-SQL
- Frameworks: ASP.NET Core MVC, Entity Framework
- Tools: Visual Studio, Git & GitHub, Postman
- UI Libraries: Bootstrap 4 or 5 for responsive design
- Databases: SQL Server and SQLite
- Bonus: Cloud deployment (Azure basics)
All tools are provided or guided for free usage, and the environment setup is taught clearly to support smooth learning.
Career Opportunities After the Course
Once you complete the Dot Net Full Stack Developer Course, you will be equipped to apply for roles such as:
- .NET Full Stack Developer
- Backend Developer (.NET Core)
- Front-End Developer with ASP.NET experience
- Software Engineer (Web Apps)
- API Developer
- Junior to Mid-Level Software Developer
Companies today are looking for multi-skilled developers who can manage both sides of application development — and this course prepares you for exactly that.
Is This Course for You?
This course is crafted for learners at all levels, especially:
- Final-year students and freshers wanting to become job-ready
- Non-CS graduates seeking an entry into the IT field
- Career changers moving from other industries into tech
- Freelancers looking to upgrade from basic coding to full stack
- IT professionals wanting to upgrade to .NET Core
You do not need to have programming knowledge — just commitment, curiosity, and the willingness to learn.
What Makes Maria Academy the Right Choice?
Maria Academy is known for providing high-quality, practical, and accessible tech training at no cost. Here’s why thousands of learners trust it:
- Courses created by seasoned industry professionals
- Structured video lessons, real-world examples, and exercises
- Support from mentors, community, and live webinars
- A trusted name in job-focused, certification-backed training
The Dot Net Full Stack Developer Course is just one of their popular offerings aimed at building a strong foundation in modern software development.
Begin Your Transformation Today
i) Taking the step toward becoming a full stack developer is a long-term investment in your career.
ii) With the Dot Net Full Stack Developer Course at Maria Academy, you do not just learn—you build real-world software, earn a recognized certification, and prepare yourself for tech roles across industries.
iii)Every topic is broken down for easy understanding, and real-time projects ensure you apply what you learn immediately.
iv)If you are serious about getting into software development, this course is the perfect starting point.
Frequently Asked Questions (FAQ):
- What technologies are taught in the Dot Net Full Stack Developer Course?
The course covers HTML, CSS, JavaScript, C#, ASP.NET Core, SQL Server, and Entity Framework. You will also learn to integrate front-end and back-end components using MVC. All essential tools used in real projects are included in the training. Maria Academy ensures the curriculum matches industry demands.
- How does this course help in building full stack applications?
It trains you to build complete web apps — from UI to backend to database. You will use C# and ASP.NET for business logic and SQL for storage. Frontend design with HTML/CSS and Bootstrap is also included. The final project combines all these skills into one working solution. - Is ASP.NET Core still relevant in 2025?
Yes, ASP.NET Core is in high demand for modern, cloud-based applications. It’s fast, secure, and supported across platforms like Linux and Windows. Major companies use it for enterprise web portals and APIs. The Dot Net Full Stack Developer Course keeps you up to date.
- Can I learn full stack development without a technical background?
This course is designed for students from any background. It starts with the basics and builds up to advanced concepts. All topics are explained in a clear and beginner-friendly way. Maria Academy supports you through every step of the course.
- Will I get a certificate after completing the course?
Yes, after completing all modules and submitting the project. You will receive a certification from Maria Academy to add to your resume. It’s a shareable, verifiable certificate recognized by hiring teams. This gives you an edge during job or internship applications.
- Does this course help in preparing for job interviews?
Yes, it includes practical tasks and interview-style questions. Real-time projects help you answer technical rounds with confidence. Maria Academy also offers resume tips and mock interview support. Completing this course boosts your technical and presentation skills.
Dot Net Training Online Free with Certification
In today’s evolving IT landscape, staying updated with modern technologies is not a luxury – it’s a necessity. Among the most trusted and powerful platforms in software development is Microsoft’s .NET. Whether you are an aspiring developer or a student exploring programming for the first time, Dot Net training online free with certification offers the best of both worlds – practical skills and recognition – without spending a rupee.
At Maria Academy, we make this possible by providing a unique learning experience that’s both accessible and career focused.
What is .NET:
- .NET (pronounced “dot net”) is a free, open-source, cross-platform development framework created by Microsoft. It is used to build applications ranging from web, mobile, desktop, gaming, cloud-based apps, to IoT and more.
- The beauty of the .NET platform lies in its flexibility and versatility. Developers can use multiple languages like C#, F#, and VB.NET. The platform supports modern development practices and is widely adopted in enterprise environments across the globe.
- Whether it’s ASP.NET for web apps, WinForms for desktop, or Blazor for single-page applications, Dot Net training online free with certification can prepare you to build scalable, real-world projects using these technologies.
Why Choose Dot Net Training Online Free with Certification?
There are many online courses, but few provide genuine value and certification at no cost. Here’s why enrolling in Dot Net training online free with certification at Maria Academy is an intelligent career move:
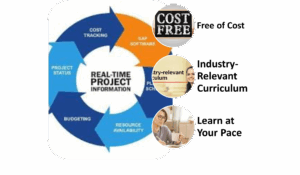
Free of Cost
No hidden fees, no expensive subscriptions. The training modules, downloadable resources, assignments, and even the certification are available for free.
Industry-Relevant Curriculum
Maria Academy has designed its curriculum with the help of industry experts. The course content aligns with what companies expect from a full stack .NET developer.
Learn at Your Pace
The course is completely self-paced. You can access pre-recorded videos, live sessions (when available), quizzes, and coding tasks from anywhere, at any time.
Real-Time Projects
Get hands-on with mini-projects and a capstone project. Apply your learning by building a full-fledged web application using ASP.NET Core, Entity Framework, and SQL Server.
What You’ll Learn in Dot Net Training:
Our Dot Net training online free with certification is structured into well-defined modules:

Module 1: Introduction to .NET
- Overview of .NET ecosystem
- CLR, CTS, and CLS
- Understanding the .NET runtime
Module 2: C# Programming Fundamentals
- Variables, data types, operators
- Control structures, loops
- Functions, arrays, OOP concepts
Module 3: Web Development with ASP.NET Core
- MVC Architecture
- Razor Pages
- Routing, Middleware
Module 4: Working with Databases
- Connecting to SQL Server
- CRUD operations with ADO.NET
- Using Entity Framework Core
Module 5: Authentication and Authorization
- Identity management
- JWT Tokens
- Role-based access
Module 6: Real-World Project
- Build a complete e-commerce site or student management system
- Responsive front-end using Bootstrap
- Back-end in ASP.NET Core
- Deployment on Azure (optional module)
Why Maria Academy?
There are plenty of courses online. So what makes Maria Academy’s Dot Net training online free with certification stand out?
- Trusted by 10,000+ learners
- Expert faculty with 10+ years of industry experience
- Mentorship support for doubts and interview preparation
- 100% job-oriented learning path
- Resume and portfolio building support after certification
We are dedicated to helping students and fresh graduates launch their software careers with confidence.
Who Should Join This Course?
This course is ideal for:
- College students who want to explore programming
- Aspiring full-stack developers looking to build a strong foundation
- Job seekers and career switchers entering IT from non-tech backgrounds
- Freelancers aiming to upskill in modern development tools
- Working professionals who want to refresh or upgrade their knowledge in .NET
Even if you are from a non-programming background, our teaching approach is simplified and beginner friendly.
Tools & Technologies Covered
When you join Dot Net training online free with certification, you will also get hands-on with:
- Visual Studio IDE
- SQL Server / SQLite
- ASP.NET Core MVC
- Bootstrap for UI
- Git & GitHub for version control
- Azure (bonus deployment module)
Certification – Proof of Your Skills
Maria Academy offers a free certification after successful completion of the course. The certificate includes your name, course details, and a unique ID that can be verified by employers. It also reflects your project work and final score.
You can use this certificate to:

Your Learning Journey Starts Here:
- Whether you are a student, job seeker, or career changer, now is the right time to upskill. The demand for .NET developers continues to grow across industries like finance, healthcare, and e-commerce.
- Dot Net training online free with certification offered by Maria Academy, you gain real-world coding experience, practical knowledge, and a valuable credential – all at zero cost.
- Learning C#, ASP.NET Core, and SQL will open doors to multiple career paths including full-stack development, backend services, and cloud integration.
- Do not miss the chance to learn from experts, build projects, and earn a certificate that truly reflects your skills. Your future in tech begins with this course.
Frequently Asked Questions(FAQ):
- What is .NET used for in real-world applications?
.NET is a powerful development platform used to build a wide variety of applications such as web apps, desktop software, cloud services, mobile apps, games, and even IoT solutions.
Major enterprises rely on .NET for internal and customer-facing applications because of its stability, performance, and support from Microsoft. With tools like ASP.NET Core, Blazor, and Xamarin, developers can build full-stack applications using just C# and .NET libraries. If you’re trained well, especially through Dot Net training online free with certification from Maria Academy, you can contribute to modern and scalable software projects across industries.
- How is ASP.NET Core different from the traditional .NET Framework?
ASP.NET Core is the newer, open-source, and cross-platform version of ASP.NET that allows you to build modern web applications on Windows, Linux, or macOS. Unlike the traditional .NET Framework which only runs on Windows, ASP.NET Core is lightweight, modular, and optimized for performance. It supports better integration with cloud technologies, modern frontend tools, and RESTful API development. When you take Dot Net training online free with certification at Maria Academy, you get hands-on experience with ASP.NET Core to build web apps the industry demands today.
- Which programming languages are used in .NET, and what does this course focus on?
.NET supports multiple languages including C#, F#, and VB.NET. However, C# is the most widely used and powerful language in the .NET ecosystem. The course offered by Maria Academy mainly focuses on C# as it’s beginner-friendly and highly used in modern software development. It covers syntax, object-oriented programming, LINQ, and practical applications with ASP.NET Core and databases. By completing the Dot Net training online free with certification, you will become proficient in C# programming for real-world development.
- Is Dot Net training online free with certification suitable for absolute beginners?
Yes, the course is specifically designed for beginners who have no prior programming knowledge.
It starts with basic concepts like variables and loops in C#, and gradually moves to more complex topics like MVC and database integration.
Maria Academy structures the learning path step-by-step so that even students from non-technical backgrounds can follow and succeed.
You will also get assignments and projects to reinforce your understanding, making it a complete beginner-to-intermediate level training.
- Will I receive any guidance if I get stuck during the training?
Definitely. Maria Academy offers dedicated support through discussion forums, recorded solutions, and expert-led Q&A sessions. In addition to video content, there are downloadable resources and email support options available to clarify your doubts. You can also connect with peers and mentors in the learner community, which helps when you face coding issues or conceptual blocks.
The Dot Net training online free with certification ensures you are never left alone in your learning journey.
- Does this certification improve my job or internship chances?
Yes, completing this course along with the certification gives you a competitive edge in the job market. It shows employers that you have practical knowledge of real-world tools like C#, ASP.NET, and SQL Server. Maria Academy also helps you build a working portfolio with project experience, which you can showcase during interviews. Having the Dot Net training online free with certification on your resume proves your commitment and readiness for software development roles.
Dot Net Training in Chennai
Are you searching for the best Dot Net Training in Chennai? Look no further than Maria Academy, your trusted destination for practical and job-oriented Dot Net training. Our course is designed for both beginners and experienced professionals who want to upgrade their skills and secure a rewarding career in software development.
Dot Net is a versatile framework developed by Microsoft that supports building and running applications on Windows. From desktop apps to web services and cloud-based systems, Dot Net is widely used by top companies worldwide. At Maria Academy, we ensure you get a deep understanding of the Dot Net ecosystem, including ASP.NET, C#, MVC, .NET Core, and more.
Why Choose Dot Net Training in Chennai at Maria Academy:
Our Dot Net Training in Chennai stands out for its industry-based curriculum, hands-on projects, and personalized mentorship. Here’s why students trust Maria Academy for their Dot Net journey:
- Structured Syllabus: Covers C#, ASP.NET, MVC, Web API, Entity Framework, .NET Core, and Azure basics.
- Experienced Trainers: Learn from IT professionals with over 10+ years of real-time industry experience.
- Live Projects: Work on real-world projects to gain confidence and hands-on practice.
- Job-Oriented Approach: We prepare you for interviews and job placements with mock sessions and resume support.
- Flexible Timings: Weekday and weekend batches available for working professionals and freshers.
Choosing the right Dot Net Training in Chennai is crucial, and Maria Academy ensures you are industry-ready from day one.
What You will Learn in Our Dot Net Course
Our Dot Net Training in Chennai is comprehensive and beginner friendly. Whether you are from a computer science background or a non-technical graduate, we help you master the Dot Net framework step by step.
Course Highlights:
- Introduction to .NET Framework and .NET Core
- Understanding the Common Language Runtime (CLR)
- Programming with C#
- Working with ASP.NET Web Forms and MVC
- Building APIs using Web API
- Database connectivity with ADO.NET and Entity Framework
- Deploying applications on IIS and Azure
- Advanced concepts in .NET Core and Blazor (optional)
By the end of the course, you will be able to create robust desktop, web, and cloud-based applications using Dot Net technologies.
Benefits of Dot Net Training in Chennai
The demand for Dot Net developers is growing in both startups and large enterprises. Here’s why enrolling in a Dot Net Training in Chennai can boost your career:
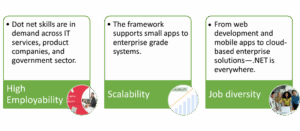
Maria Academy’s Dot Net Training in Chennai ensures you are job-ready, technically strong, and confident in your development career.
Who Should Attend This Dot Net Training:
Our Dot Net Training in Chennai is ideal for:
- Fresh Graduates in B.Sc / BCA / B.E / B.Tech / MCA
- Working professionals looking to switch to software development
- Freelancers or entrepreneurs building web-based apps
- .NET developers who want to upgrade to .NET Core or full-stack development
Even if you have no programming background, our Dot Net training takes you from basics to advanced topics with complete support.
Career Scope After Dot Net Training
Completing the Dot Net Training in Chennai at Maria Academy opens multiple career options. You can apply for roles like:
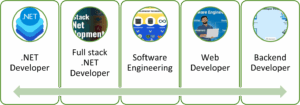
You can also work in domains such as healthcare, banking, retail, and Ed-tech, where .NET-based solutions are commonly used.
Our placement assistance ensures your resume reaches top companies in Chennai and beyond. We also provide internship support for college students.
Why Maria Academy for Dot Net Training in Chennai:
When it comes to quality education and student support, Maria Academy stands ahead. We are known for our practical teaching style, strong industry ties, and one-on-one mentoring. What makes us the best for Dot Net Training in Chennai?
- Customized Learning Paths: We identify your skill level and tailor the pace accordingly.
- Interview Prep: Get access to technical interview questions, coding tests, and mock interviews.
- Project Reviews: Every project you build will be reviewed by experts with real-time suggestions.
- Updated Curriculum: Our syllabus is frequently updated to match industry trends and .NET versions.
- Positive Learning Environment: Learn in a supportive, doubt-clearing environment with friendly instructors.
Thousands of students have transformed their careers after completing their Dot Net training with us.
Start Your Career with the Best Dot Net Training in Chennai:
If you are serious about entering the software industry or upskilling to a future-proof development stack, the Dot Net Training in Chennai at Maria Academy is your perfect choice. With expert trainers, personalized support, and job assistance, you will gain the confidence and skills to become a successful .NET developer.
Frequently Asked Questions (FAQs):
- Is this Dot Net training course suitable for someone from a non-IT or arts background?
Yes, this training is ideal for both IT and non-IT graduates. Even if you have no prior programming experience, you will be able to learn effectively. The course starts with fundamentals and gradually progresses to advanced Dot Net concepts, making it beginner friendly. - Will I receive a recognized certificate after completing the Dot Net course?
Yes, after successfully completing the course, you will receive a course completion certificate from Maria Academy. This certificate is recognized by recruiters and companies, and it adds value to your resume. - Do you offer placement assistance after training?
Yes, Maria Academy provides full placement support. You will receive help with resume building, technical interview preparation, and referrals to job openings through our hiring partners in Chennai and other locations. - What technologies will I learn during this Dot Net training program?
You will learn ASP.NET, ASP.NET Core, MVC architecture, Entity Framework, C#, SQL Server, and project deployment techniques. These technologies are widely used in building scalable enterprise applications. - Are there any prerequisites for learning Dot Net at Maria Academy?
No, there are no strict prerequisites. However, having a basic understanding of computers or logic will be helpful. The training starts from scratch and is designed to help even beginners become proficient Dot Net developers. - Will I work on real-time projects and tools during the training?
Yes, you will work on real-time projects that simulate industry-level applications. Tools like Visual Studio, SQL Server Management Studio, and Git are included in the training to give you hands-on experience in a professional environment.
Dot Net Developer Courses
Dot Net Developer Courses at Maria Academy offer a career-defining pathway into the Microsoft ecosystem. Whether you are a beginner or someone looking to upgrade your development skills, this course will help you master the tools and technologies used to create dynamic, secure, and scalable applications.
Dot Net remains one of the most widely used frameworks in enterprise-level development, making certified .NET developers highly valuable in the tech job market. At Maria Academy, we ensure a comprehensive, structured, and hands-on learning experience to help you confidently enter this competitive space.
Why Choose Dot Net Developer Courses at Maria Academy:
Maria Academy is renowned for delivering practical and industry-relevant training that equips learners with real-world skills. With years of experience in training both students and working professionals, the academy’s Dot Net Developer Courses are thoughtfully designed to meet current industry demands. Learners receive hands-on training from expert developers, in-depth coverage of the entire .NET ecosystem, and access to live project development for practical exposure. The program also includes code review sessions, mock interviews, and dedicated job placement support to enhance career readiness. Our curriculum is continuously updated and aligned with the evolving needs of the software industry, ensuring that you are fully job-ready by the end of the course.
What You Will Learn in Dot Net Developer Courses:
The Dot Net Developer Courses at Maria Academy are structured to build you from the ground up. You will start with the fundamentals and gradually advance into expert-level topics. Here’s a breakdown of the key modules:
C# Programming Fundamentals
- Variables, Data Types, Control Structures
- OOP concepts like Inheritance, Abstraction, and Polymorphism
- Exception Handling, Collections, and File I/O
- Working with Delegates, Events, and LINQ
ASP.NET Web Development
- Understanding ASP.NET Web Forms
- Mastering ASP.NET MVC Architecture
- Controllers, Views, Routing, and Razor Engine
- Client-server interaction using JavaScript and jQuery
.NET Core & Cross-Platform Development
- Building web apps with ASP.NET Core
- Dependency Injection and Middleware
- RESTful Web API with .NET Core
- Hosting and Deployment on Cloud Platforms
ADO.NET and Database Integration
- Establishing connections with SQL Server
- CRUD operations and Stored Procedures
- Entity Framework and Code First Approach
Front-End Technologies
- HTML5, CSS3, Bootstrap for responsive UI
- JavaScript fundamentals and DOM manipulation
- Introduction to React-JS or Angular for SPA
Real-Time Projects
- Building a task management system
- Creating a multi-user blog or e-commerce admin
- Developing dashboards with user authentication
Tools and IDEs Covered
A Dot Net Developer is expected to be comfortable with development tools. Our course ensures you gain fluency in:
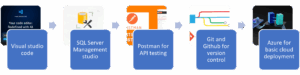
Learn Through Projects and Practice
At Maria Academy, we firmly believe in a project-first approach to learning, ensuring that every student gains hands-on experience throughout the course. Our Dot Net Developer Courses are packed with a wide range of assignments and mini-projects that help reinforce each concept. During the training, you will build practical applications such as login authentication systems, role-based dashboards, data management panels, and CRUD apps integrated with a front-end interface. As a culmination of your learning, the capstone project challenges you to develop a complete full-stack .NET application using MVC or .NET Core. This includes designing the front-end, integrating APIs, managing database structures, and deploying the final product, giving you a real-world project experience.
Who Can Take This Course:
The Dot Net Developer Courses are well-suited for a diverse group of learners, including final-year students pursuing degrees in Computer Science or IT, working professionals from testing or support backgrounds who are transitioning into development roles, fresh graduates preparing for IT interviews, and freelancers aiming to build Microsoft-based applications. The course is designed to be accessible, with no strict prerequisites other than a willingness to learn programming and a basic understanding of how web applications function.
Career Opportunities After Completion
Completing this course opens the door to a wide range of job opportunities, such as:
- Dot Net Developer
- Backend Developer (.NET Core)
- Full Stack Developer (C# + JavaScript frameworks)
- Web Application Developer
- Software Engineer (Microsoft Stack)
- Junior .NET Programmer
Many of our past students are now working at companies like TCS, Cognizant, Accenture, and top startups.
Certification and Resume Support
Maria Academy provides a course completion certificate recognized by recruiters and hiring partners. In addition, we assist you with:
- Building your resume with project highlights
- Interview preparation and mock technical rounds
- GitHub portfolio setup
- Soft skills and communication improvement
Advantages of Course Learning
Opting for a professional Dot Net Developer Course at a reputed institute like Maria Academy has several advantages:
- Structured Learning – Instead of piecing together information from YouTube and blogs, you get a well-organized curriculum designed by industry experts.
- Hands-On Practice – Real-time mini projects and major capstone projects ensure that you get practical exposure.
- Doubt Clarification Sessions – Unlike online recorded courses, classroom or live online sessions let you interact and ask questions.
- Industry-Relevant Curriculum – Learn tools and practices that are actually used by companies today.
These benefits not only boost your technical skills but also give you a competitive edge when entering the job market.
Advantages of Learning from Maria Academy
- Experienced Trainers: Learn from trainers with real-time project experience
- Affordable Course Fees: Flexible payment and EMI options
- Updated Curriculum: Aligned with modern development trends
- Placement Support: Resume preparation, referrals, and mock interviews
- Lifetime Access: Revisit content or projects even after course completion
Frequently Asked Questions (FAQs)
- Is the Dot Net Developer Course suitable for beginners?
Yes, this course is designed for beginners who have little or no prior programming experience. It begins with fundamental programming concepts using C# and gradually progresses to advanced topics like .NET Core, MVC, and RESTful APIs. The training also includes hands-on coding, which helps students understand real-world applications better. Students from both IT and non-IT backgrounds have successfully transitioned into Dot Net development roles after completing this course. - Will I receive placement support after completing the course?
Yes, Maria Academy provides end-to-end placement assistance to all eligible students. The support includes resume preparation, interview training, aptitude coaching, and mock interviews conducted by industry professionals. We also collaborate with hiring partners to share job openings and conduct direct recruitment drives. Many of our trainees are now working in reputed software companies across Chennai and other cities. - What is the duration of the Dot Net Developer Course in Chennai?
The course duration typically ranges from 2 to 3 months, depending on the selected batch and the learning pace of the student. It includes over 50 hours of instructor-led training, weekend or weekday sessions, project development, and doubt-clearing discussions. Students are also given time to practice independently and submit regular assignments. We ensure the curriculum is flexible enough to accommodate college students, working professionals, and freshers alike. - What is a Dot Net Developer?
A Dot Net Developer is a software engineer who specializes in building applications using Microsoft’s .NET technologies. These professionals develop dynamic websites, web APIs, desktop software, and enterprise-grade systems. A Dot Net Developer typically works with languages like C#, uses Visual Studio as an IDE, and develops with frameworks such as ASP.NET MVC or .NET Core. They are also responsible for debugging, maintaining, and deploying the applications across platforms. - How does the .NET framework support application development?
The .NET framework provides a comprehensive environment for building and running software applications. It includes the Common Language Runtime (CLR) for executing code and the Framework Class Library (FCL) for reusable functions. With built-in support for memory management, security, and exception handling, it simplifies complex application development. Developers can also build cross-language applications using C#, VB.NET, or F#, all integrated under the same runtime environment. - What is the difference between .NET Framework and .NET Core?
The .NET Framework is a traditional, Windows-only platform mainly used for desktop and web application development. In contrast, .NET Core is a lightweight, high-performance, open-source framework that runs across Windows, Linux, and macOS. While .NET Framework is ideal for legacy systems, .NET Core (now unified under .NET 6 and 7) is preferred for modern cloud-based and microservice applications. Dot Net Core also supports better scalability, performance tuning, and containerization using Docker and Kubernetes.
Best Dot Net Training
Looking to launch your career in software development? Join the best Dot Net training at Maria Academy, where expert instructors guide you through every step of the learning journey. This comprehensive course is designed to help you gain a strong foundation in .NET technologies such as C#, ASP.NET, ADO.NET, and MVC. With a focus on hands-on training, real-time projects, and practical case studies, you will learn how to build robust web and desktop applications that meet real-world needs.
Maria Academy’s Dot Net training in Chennai is ideal for both beginners and IT professionals who want to upgrade their skills. The curriculum is updated regularly to match industry standards and includes interview preparation and career support. Whether you aim to become a software developer, backend programmer, or full-stack .NET expert, this course helps you build job-ready skills to succeed in the IT field with confidence.
Why Choose the Best Dot Net Training:
- At Maria Academy, the best Dot Net training equips you with a complete understanding of the entire .NET ecosystem. The course covers key technologies such as .NET Core, ASP.NET, ADO.NET, MVC, Entity Framework, C#, and integration with front-end tools. With the help of experienced trainers, complex concepts are broken down into simpler modules, ensuring you gain strong hands-on knowledge through real-time project work.
- Whether you are a fresher, a final-year student, or a working professional aiming to shift into software development, this course provides everything you need to master the .NET framework and become job-ready in today’s competitive IT industry.
What is Dot Net:
The Dot Net framework, developed by Microsoft, is a robust and flexible software development platform. It supports multiple programming languages such as C#, VB.NET, and F#. Developers use it to build Windows applications, web apps, and cloud-based solutions.
The best part of using .NET is its cross-platform nature – meaning the same codebase can run on Windows, Linux, or macOS using .NET Core or .NET 6/7.
By taking the best Dot Net training, you can build:
- Enterprise web applications
- Desktop apps for business automation
- APIs for mobile and web
- Cloud-integrated applications using Azure
Key Highlights of Best Dot Net Training at Maria Academy:
Here’s what makes Maria Academy stand out:
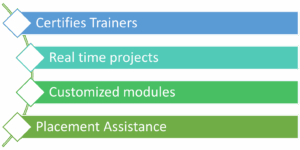
- Certified Trainers with 10+ years of experience
- Real-time Projects simulating industry scenarios
- Customized Modules for beginners and experienced learners
- Placement Assistance with resume preparation and mock interviews
What You Will Learn in Best Dot Net Training
The best Dot Net training covers every critical topic required in today’s job market:
C# Programming Language
Learn the fundamentals of C#, object-oriented concepts, data structures, and memory management.
ASP.NET MVC
Understand how to build scalable and maintainable web applications using the MVC architecture.
Entity Framework
Work with real databases using ORM (Object Relational Mapping), data access layers, and LINQ queries.
ADO.NET
Hands-on practice connecting with SQL Server databases using ADO.NET components like Datasets and Data Adapters.
Web API Development
- Build and test RESTful APIs that connect your frontend with backend services.
- .NET Core and .NET 6/7
- Learn the latest cross-platform .NET Core concepts that are widely used in today’s microservice-based architecture.
- Windows Forms and WPF
- Design interactive user interfaces using Windows Forms and Windows Presentation Foundation.
- Azure Integration (Bonus Module)
- Get introduced to Azure cloud services and how .NET apps can be deployed in cloud environments.
Who Can Join the Best Dot Net Training
The best Dot Net training is open to:
- Fresh graduates looking to enter the IT industry
- College students who want to build industry skills before placement
- Professionals from BPO or non-IT backgrounds wanting to switch to development
- IT developers wanting to upgrade from older technologies
No prior programming experience is required – we start from the basics and take you to advanced levels.
Benefits of Taking the Best Dot Net Training in Chennai
Enrolling in the best Dot Net training can open doors to high-paying roles like:
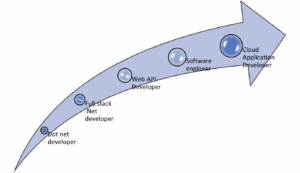
Top IT companies in Chennai and India are hiring skilled .NET professionals with salaries starting from ₹3.5 LPA and going up to ₹12 LPA depending on experience and specialization.
Real-World Projects and Assessments
At Maria Academy, you won’t just learn theory — you will gain practical experience through hands-on training. Each module is followed by practical sessions that help reinforce your understanding. You will work on mini projects such as creating login forms, user dashboards, and admin panels, allowing you to apply what you learn immediately. As part of the curriculum, you will also complete a capstone project involving full-stack development using C#, MVC, and SQL Server, preparing you for real-world scenarios. Additionally, weekly assessments are conducted to monitor your progress, identify areas of improvement, and help you become a confident and skilled Dot Net developer.
Tools and Platforms Covered
- Visual Studio 2022
- SQL Server Management Studio (SSMS)
- Git/GitHub for version control
- Postman for API testing
- Microsoft Azure
You will get hands-on experience with each of these during the best Dot Net training program.
Certifications Provided
Once you complete the training, you will receive:
- Course Completion Certificate from Maria Academy
- Project Work Evaluation Report
- Guidance to apply for Microsoft .NET Certifications (AZ-204, etc.)
Frequently Asked Questions (FAQs)
- Why is it important to learn both ASP.NET and ASP.NET Core in a Dot Net training program?
Learning both ASP.NET and ASP.NET Core ensures you’re prepared for real-world development across different platforms and projects. ASP.NET is still widely used in enterprise systems running on Windows, while ASP.NET Core is the future of cross-platform and cloud-ready development. At Maria Academy, the training covers both frameworks, so you’re equipped for legacy systems and modern full-stack development alike. - How does Entity Framework simplify database operations in .NET?
Entity Framework (EF) is an Object-Relational Mapper (ORM) that allows developers to interact with databases using C# instead of SQL. It automates data fetching, updating, and inserting with LINQ, thus speeding up development and reducing errors. In the course, you’ll use EF in real-time projects to connect front-end forms with SQL Server. - What is MVC architecture, and why is it important in .NET development?
MVC stands for Model-View-Controller – a design pattern that separates the application into three layers:
i)Model (Data Logic)
ii)view (UI)
iii)Controller (User Input Logic)
This separation makes code easier to manage, scale, and test. Maria Academy’s Dot Net course includes MVC in-depth, where you’ll build structured applications that follow industry best practices.
- I am from a non-IT background. Can I still join and succeed in the course?
Absolutely. The Dot Net course at Maria Academy is designed for beginners. We start with basic programming (C#), explain logic-building in simple ways, and gradually introduce web and database concepts. Many students from mechanical, civil, and arts backgrounds have successfully completed the course and secured jobs in IT companies. - How will the training help me become job ready as a .NET developer?
The training is highly practical. You will build mini-projects after each topic and a final full-stack capstone project integrating C#, MVC, ADO.NET, SQL, and React. Weekly assessments, mock interviews, and real-world tasks ensure you’re not just learning but applying concepts like an industry professional. Placement assistance is also provided. - Can I manage this course along with my job or college schedule?
Yes, we offer flexible morning, evening, and weekend batches to suit college students and working professionals. The recorded sessions and doubt-clearing support mean you won’t miss out even if you miss a class. Many part-time learners have successfully completed the course and switched to development roles within weeks.
ASP.NET Core with React JS
Are you aiming to become a full-stack developer? ASP.NET Core with React JS is the perfect technology stack to learn. At Maria Academy, we offer the most comprehensive ASP.NET Core with React JS training in Chennai designed for both beginners and working professionals. This course enables you to build modern, high-performance web applications using Microsoft’s powerful backend and Facebook’s popular frontend framework.
Whether you want to get hired in a top IT company or build your own full-stack projects, this training gives you the practical knowledge and industry exposure you need to succeed.
Why Choose ASP.NET Core with React JS:
ASP.NET Core is a cross-platform, open-source framework developed by Microsoft for building backend APIs, while React JS is a powerful JavaScript library used for building user interfaces. Together, ASP.NET Core with React JS offers a fast, scalable, and modern solution for full-stack development.
Choosing this tech stack has several advantages:
- Separation of concerns between backend and frontend
- High performance with asynchronous API calls
- Cross-platform support
- Large community support for both technologies
- Future-proof technology stack used by companies like Microsoft, Netflix, and Walmart
By mastering ASP.NET Core with React JS, you gain the ability to create enterprise-level web applications that are fast, secure, and maintainable.
Maria Academy: Best ASP.NET Core with React JS Training in Chennai
Maria Academy provides expert-level ASP.NET Core with React JS training with a focus on project-based learning. Our curriculum is carefully designed to teach both front-end and back-end skills that are relevant in the real-world development environment.
Here’s why our training stands out:
- Trainers from the software industry with years of hands-on experience
- Live coding sessions, real-time problem-solving
- Full-stack capstone project to showcase your skills
- Interview preparation, resume building, and placement support
If you are looking for a complete ASP.NET Core with React JS course in Chennai, Maria Academy offers the right mix of practical and theoretical training.
What You will Learn in the ASP.NET Core with React JS Course
This full-stack training program is broken into carefully structured modules that take you from the basics to advanced concepts.
Backend – ASP.NET Core:
- Introduction to .NET Core and project structure
- RESTful API development
- Dependency injection
- Entity Framework Core and LINQ
- Authentication and Authorization (JWT, Identity)
- Exception handling and middleware
- API versioning and documentation using Swagger
Frontend – React JS:
- Introduction to React and JSX
- Components, Props, and State management
- React Router and navigation
- REST API integration using Axios/Fetch
- Form handling and validation
- Redux for global state management
- Deployment-ready React builds
Integration:
- Connecting ASP.NET Core backend with React frontend
- Using CORS, HTTP Client, and API Services
- Environment setup for full-stack deployment
By the end of this training, you will confidently build, deploy, and manage full-stack applications using ASP.NET Core with React JS.
Real-Time Projects and Hands-On Practice
At Maria Academy, we focus on building confidence through practical exposure. That’s why every topic is followed by:
- Mini projects: Login system, registration forms, CRUD operations
- Capstone project: A full-stack web application like an Employee Management System or E-Commerce Dashboard
- Version control: Using Git and GitHub to manage codebase
- Cloud deployment: Deploying your ASP.NET Core + React app to platforms like Azure or Netlify
Hands-on sessions ensure you are not just learning but doing. This is what makes our ASP.NET Core with React JS course highly effective and industry relevant.
Who Can Join the ASP.NET Core with React JS Course
This training is perfect for:
- Final-year engineering or computer science students
- Fresh graduates looking for a job in full-stack development
- Working professionals who want to shift into the development field
- .NET developers who want to upskill with modern frontend technology
- Anyone looking for high-paying software development roles
No prior experience in React or ASP.NET Core? No problem! We start from the basics and gradually move to advanced topics.
Career Scope of ASP.NET Core with React JS
Companies today are hiring full-stack developers who can handle both the front-end and back-end development. Having skills in ASP.NET Core with React JS makes you a highly asset to IT firms. Some popular job roles include:
- Full Stack .NET Developer
- React Developer with .NET backend
- Backend Developer (ASP.NET Core)
- Software Engineer – Full Stack
- Web Application Developer
Industries such as finance, healthcare, e-commerce, and education are constantly looking for developers with ASP.NET Core and React JS skills.
Tools & Technologies You’ll Master
During this training, you will become proficient with a variety of tools and libraries, including:
- Visual Studio & Visual Studio Code
- SQL Server / MySQL
- Postman (for API testing)
- Swagger (API documentation)
- Git, GitHub (Version Control)
- Node.js, npm, Webpack (React build tools)
- Azure, Netlify, Vercel (Deployment platforms)
These are the same tools used in real-world software development environments.
Why Maria Academy is Your Best Choice:
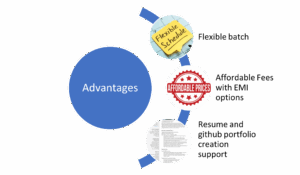
At Maria Academy, we don’t just teach – we mentor. Our approach is student-centered, with the aim to prepare you for industry challenges. Benefits of joining Maria Academy:
Our past students are now placed in top companies like TCS, Infosys, Zoho, Wipro, and Accenture.
Frequently Asked Questions (FAQs)
- Do I need prior coding experience to learn ASP.NET Core with React JS?
Not necessarily. This course is designed for both beginners and those with some prior programming exposure. The training starts with the fundamentals of C#, gradually progressing to advanced concepts in ASP.NET Core and React JS. With hands-on practice, guided exercises, and personal mentoring from Maria Academy, even students without a coding background can successfully master full-stack development. - What types of projects will I build during the training?
You will work on real-world mini projects like login systems, dashboards, and user management modules. In the final phase, you will build a full-stack capstone project combining ASP.NET Core for the backend and React JS for the frontend. This includes API development, database handling with Entity Framework, frontend routing, and component state management—providing a complete development lifecycle experience. - Will I receive a certificate upon course completion?
Yes. Once you successfully complete all required assessments and the final capstone project, Maria Academy awards you a course completion certificate. This certificate is recognized by several hiring partners and adds credibility to your resume. It also demonstrates your practical skills and ability to build full-stack web applications from scratch. - What kind of placement support does the course include?
Maria Academy offers comprehensive placement support. This includes resume building tailored for full-stack developer roles, mock technical interviews with real-time feedback, LinkedIn profile enhancement, and connections to recruiters in top software companies. Many students secure internships or full-time jobs immediately after completing the training. - Can I attend this training online? Will I miss out on hands-on support?
No worries! The online version is as effective as classroom training. All live sessions are instructor-led with interactive Q&A, screen sharing, and project walkthroughs. You also get access to session recordings, assignment reviews, and one-on-one mentor support—ensuring you are never left behind whether you attend online or in-person. - How long is the ASP.NET Core with React JS course at Maria Academy?
The course generally lasts for 2 to 3 months, depending on the batch type—regular or weekend. Each week includes structured theory sessions, hands-on coding practice, project assignments, and reviews. If you are a working professional, weekend and evening batches provide the flexibility to balance work and learning efficiently.
Dot Net Developer Course
Are you looking to kick-start a career in software development using Microsoft technologies:
The Dot Net Developer Course offered by Maria Academy is your gateway to becoming an expert in building dynamic, scalable, and enterprise-level applications. Whether you are a beginner, student, or a working professional planning a career switch, this course is designed to equip you with real-world programming skills using the powerful Microsoft .NET ecosystem.
What is the Dot Net Developer Course:
- The Dot Net Developer Course is a specialized training program focused on Microsoft’s .NET framework, which is widely used to build secure and scalable web applications, desktop applications, APIs, and cloud-based services. It includes learning programming languages like C#, ASP.NET, ADO.NET, Entity Framework, MVC, and modern architecture like .NET Core, Web API, and Azure basics.
- .NET is a cross-platform, open-source development framework used by developers worldwide. It supports multiple programming languages and provides a rich library, robust security, and great performance, making it a top choice for enterprises and developers alike.
What You will Learn in the Course:

Why Choose a Career as a Dot Net Developer
Dot Net Developers are in demand across industries like IT services, finance, healthcare, government, and more. The .NET platform is trusted by organizations for building secure and high-performance applications. Choosing this path opens several job roles with attractive salary packages and long-term growth.
Key reasons to choose the Dot Net career path:
- High employability in MNCs and startups
- Excellent documentation and community support
- Future-ready technology with .NET Core and .NET 6/7
- Scalable architecture suitable for cloud and enterprise solutions
- Seamless integration with Microsoft Azure, SQL Server, and other tools
Why Enroll in Maria Academy’s Dot Net Developer Course:
At Maria Academy, our goal is to help learners transform into industry-ready professionals. Our Dot Net Developer Course is carefully designed by expert trainers who have 8–10+ years of real-time industry experience. The training not only covers theoretical knowledge but also ensures hands-on coding, project building, and deployment.
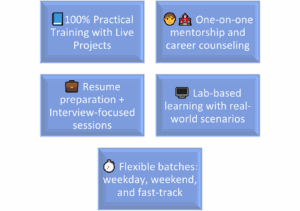
Who Can Take This Course
The Dot Net Developer Course is suitable for:
- Students or fresh graduates (BCA, B.sc (CS), B.E, B.Tech, MCA)
- Working professionals planning to upskill
- Non-IT background aspirants wanting to enter software development
- Web developers looking to add .NET to their skillset
No prior programming experience is required. We start from the basics and take you to advanced levels with personalized attention.
Tools & Technologies You Will Work With
Throughout the Dot Net Developer Course, you will use tools and frameworks such as:
- Visual Studio 2022
- Microsoft SQL Server
- Microsoft Azure (Basic Cloud Hosting)
- Git and GitHub for version control
- Postman for API Testing
- Bootstrap, jQuery, and AJAX
- Entity Framework and LINQ
You will build complete applications using these technologies to reinforce your learning.
Real-Time Projects You Will Build
Project-based learning is central to our teaching methodology. Here are a few projects you will develop during the course:
- Employee Management System – CRUD operations with database and UI
- Online Leave Application Portal – Authentication, role management, admin panel
- E-Commerce Product CatLog – Product listing, filtering, cart system (MVC)
- REST API for Student Info – Built using Web API with JSON endpoints
Each project will be deployed locally and on cloud platforms, helping you understand both development and hosting.
Dot Net Developer Course Certification
After completing the training and assessments, students receive a Dot Net Developer Certification from Maria Academy, recognized by leading hiring companies and recruiters. It adds credibility to your resume and showcases your commitment to skill-building.
You can proudly showcase your certificate on:
- LinkedIn profile
- Resume/CV
- Job portals like Naukri, Monster, Indeed
Career Paths After the Dot Net Developer Course
Upon completion of the course, students are ready for a variety of roles in the IT sector. Some common job titles include:
- Dot Net Developer
- Software Engineer (.NET)
- ASP.NET MVC Developer
- Web API Developer
- Full Stack .NET Developer
- Backend Developer
- Junior Cloud Developer (with Azure basics)
Hiring companies include: TCS, Infosys, Accenture, Cognizant, Capgemini, and numerous startups hiring for .NET profiles.
Placement Support at Maria Academy
We believe that training is incomplete without helping students land jobs. That’s why our dedicated placement team provides:
- Mock interviews with technical panels
- HR grooming and communication tips
- Resume revision and job referrals
- Direct interview scheduling with partner companies
- Weekly job updates and hiring alerts
Our placement success stories include students from both IT and non-IT backgrounds who have successfully transitioned to Dot Net development roles.
Frequently Asked Questions
- What is a Dot Net Developer Course?
A Dot Net Developer Course is a structured training program that equips learners with the skills to build web applications, desktop applications, and enterprise-level software using Microsoft’s .NET framework. At Maria Academy, this course includes hands-on projects, real-time examples, and industry-focused modules to prepare students for job-ready roles. - Who should take the Dot Net Developer Course?
This course is ideal for:
i) Freshers looking to start a career in software development.
ii) Graduates in IT or Computer Science.
iii) Working professionals seeking a domain switch.
iv) Entrepreneurs wanting to build software products
No prior experience is required, as Maria Academy’s Dot Net Developer Course starts from the basics. - Is the Dot Net Developer Course suitable for beginners?
Yes. The course is beginner-friendly. It starts with foundational concepts like data types, loops, and object-oriented programming, then gradually progresses to advanced .NET modules. Our trainers guide you step-by-step, ensuring every concept is well understood. - Will I receive a certificate after completion?
Absolutely. Every student who successfully completes the Dot Net Developer Course from Maria Academy will be awarded a course completion certificate. This certificate is industry-recognized and adds value to your resume. - Do you offer placement assistance?
Yes. Maria Academy offers 100% placement assistance. We have tie-ups with top IT companies and conduct mock interviews, resume-building sessions, and soft skills training to help you crack real-world job interviews confidently.
- How practical is the Dot Net Developer Course?
The course is designed to be 80% practical and 20% theory. Students build real-time projects such as:Employee Management SystemseCommerce PortalsInventory Tracking SoftwareWeb-based CRM systems
This hands-on learning ensures that learners become proficient .NET developers ready to work in any enterprise environment.
- Can I take the Dot Net Developer Course online?
Yes. Maria Academy offers both online and offline modes. Students can choose classroom training at our Chennai center or attend virtual live sessions from anywhere in the world with recorded session access.
Free SQL Course
Structured Query Language (SQL) is an essential skill for anyone working with databases. Whether you’re a beginner or looking to enhance your database knowledge, this free SQL course will provide you with the foundational skills needed to interact with databases efficiently.
Why Learn SQL
SQL is the standard language for managing and manipulating databases. It is used across various industries, including technology, finance, healthcare, and more. Mastering SQL can open doors to numerous career opportunities, such as database administration, data analysis, and backend development.
Benefits of Learning SQL:
- High Demand Skill: Many companies require SQL expertise for data-driven decision-making.
- Easy to Learn: SQL syntax is straightforward and resembles natural language.
- Universal Application: Works with various database management systems (DBMS) like MySQL, PostgreSQL, SQL Server, and SQLite.
- Career Growth: Opens opportunities in data science, business intelligence, and software development.
Why Use SQL :
- SQL allows users to access data in relational database management systems.
- It enables users to describe and define the data within the database, as well as manipulate that data effectively.
- Additionally, SQL can be embedded within other programming languages using SQL modules, libraries, and pre-compilers.
- Users have the capability to create and drop databases and tables, along with creating views, stored procedures, and functions.
- Moreover, SQL allows users to set permissions on tables, procedures, and views, ensuring proper access control.
Features of SQL :

Grow Your Skills with Us
We’re excited to offer this course as part of a variety of programs. When you sign up, you’ll get to pick a program that suits you best!
- Discover new ideas with guidance from industry experts.
- Build a solid understanding of different subjects or tools.
- Enhance your job skills with fun, hands-on projects.
- Earn a career certificate you can proudly share!
Free SQL Course Platforms
You can find free SQL courses on:
- Khan Academy (Introduction to SQL)
- W3Schools (Interactive SQL Tutorial)
- Mode Analytics SQL Tutorial
- SQLZoo (Interactive SQL Practice)
- Coursera (Audit Option) (University Courses)
- Udacity (Intro to Relational Databases)
- Code-Academy (Basic SQL Track Free Version)
Advantages of SQL:
SQL (Structured Query Language) is widely used for managing and manipulating relational databases.
Easy to Learn and Use
- SQL uses simple English-like commands (e.g., SELECT, INSERT, UPDATE, DELETE), making it beginner-friendly.
Standardized Language
- SQL is a widely adopted standard supported by most database management systems (DBMS) like MySQL, PostgreSQL, SQL Server, and Oracle.
High Performance
- SQL databases are optimized for speed and scalability, handling complex queries and large volumes of data efficiently.
Scalability
- SQL databases can handle vast amounts of data and are scalable for growing business needs.
Integration with Programming Languages
- SQL can be integrated with various programming languages like Python, Java, PHP, and C# for seamless application development.
Frequently asked questions about SQL
- What is the primary key in SQL?
A primary key is a unique identifier for each record in a table. It ensures that every row in the table contains a distinct and non-null value in the primary key column. Primary keys are essential for enforcing data integrity and establishing relationships between tables.
- What is a constraint in SQL? Name a few.
A constraint in SQL is a crucial rule that governs the data in a table, ensuring that the information remains accurate and reliable. Among the most essential constraints are:– PRIMARY KEY: This guarantees that every value in a designated column is unique, eliminating duplicates.
– FOREIGN KEY: This maintains referential integrity, connecting tables and ensuring consistent relationships between them.
– UNIQUE: This constraint safeguards against duplicate values in a column, promoting data integrity.
– CHECK: This specifies conditions that data must be fulfilled before insertion or updates, enhancing data validation.
– NOT NULL: This ensures that crucial columns cannot contain NULL values, promoting completeness of data.
- What is the view in SQL?
In SQL, a view is a virtual table that is derived from the result set of an SQL statement. A view consists of rows and columns similar to a real table. The fields in a view are taken from one or more actual tables within the database.
- What is the trigger in SQL?
A trigger in SQL is a predefined sequence of actions that automatically execute when a specific event occurs, such as when an INSERT or DELETE operation is performed on a table. Triggers are used to ensure data consistency, conduct auditing, and simplify various tasks.
- What are aggregate functions? Can you name a few?
Aggregate function in SQL performs calculations on a set of values and return a single result.- MIN() – returns the smallest value within the selected column.
- MAX() – returns the largest value within the selected column.
- COUNT() – returns the number of rows in a set.
- SUM() – returns the total sum of a numerical column.
- AVG() – returns the average value of a numerical column.
Conclusion:
This free SQL course provides a structured learning path to help you gain proficiency in SQL. By following along with the modules and practicing regularly, you’ll be able to master SQL and apply it effectively in various fields like data analysis, software development, and database administration.
LEARN SQL ONLINE
Join this SQL course to master the skills needed to effectively manage large datasets and perform insightful data analysis using the industry-standard data management language. Don’t miss out on the opportunity to enhance your expertise!
About This Course
Information is everywhere, and you can harness its power by learning the basics of SQL. SQL is used in data science, analytics, and engineering, making it easy to work with data and to make informed decisions regarding strategy, operations, and business. This skill is beneficial for anyone who interacts with data, even in non-technical roles. In this SQL course, you will learn how to manage large datasets and analyze real-world data.
Earn Your Certificate of Completion
Show your dedication by earning a certificate for every course or learning path you successfully finish.
Validate Your Achievement
Receive a prestigious certificate that confirms your hard work and completion of the course or path.
Accumulate Your Success
With each course and learning path you conquer, you’ll build a valuable collection of certificates.
Promote Your Accomplishments
Easily display your certificates on your LinkedIn profile to enhance your professional image and showcase your achievements.
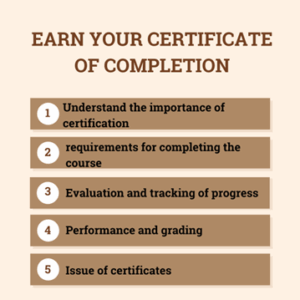
What you’ll learn
- To filter, sort, and summarize data, use SQL queries. You may also edit dates, strings, and numerical data from various sources for analysis.
- Assess and create datasets to address your business questions and challenges using SQL.
- Use the collaborative Databricks workspace to create an end-to-end pipeline that reads data, transforms it, and saves the results.
- Craft a compelling project proposal, carefully select relevant data, conduct thorough statistical analysis, establish clear metrics, effectively present your findings, and provide actionable recommendations. This process will ensure impactful results and informed decision-making.
Description:
SQL (Structured Query Language) is a standard programming language used to manage and manipulate relational databases. Learning SQL online provides hands-on experience in writing queries, retrieving and modifying data, and managing database structures. It is essential for database administrators, data analysts, software developers, and business intelligence professionals.
Key Highlights:
- Gain a strong foundation in essential SQL concepts, starting from scratch.
- Unlock advanced SQL techniques to tackle complex data analysis with confidence.
- Discover the principles of database design, normalization, and indexing to enhance your skill set.
- Engage with real-world datasets to develop practical problem-solving abilities.
- Learn to optimize your queries for improved speed and superior performance.
Key Topics Covered:
Introduction to SQL
- What is SQL?
- Importance of SQL in databases
- Relational Database Management Systems (RDBMS)
SQL Basics
- Data types and constraints
- Creating and managing databases
- Creating and modifying tables (CREATE, ALTER, DROP)
Data Querying with SQL
- SELECT statement for data retrieval
- Filtering data using WHERE
- Sorting results with ORDER BY
- Using DISTINCT to remove duplicates
Advanced Querying
- Aggregation functions (COUNT, SUM, AVG, MAX, MIN)
- Grouping data with GROUP BY
- Filtering groups using HAVING
- Joining tables (INNER JOIN, LEFT JOIN, RIGHT JOIN, FULL JOIN)
Data Manipulation
- Inserting data (INSERT INTO)
- Updating existing records (UPDATE)
- Deleting data (DELETE)
- Transaction control (COMMIT, ROLLBACK, SAVEPOINT)
Working with Subqueries and Views
- Using subqueries for complex queries
- Creating and managing views
Indexes and Optimization
- Understanding indexes for performance improvement
- Optimizing SQL queries
Stored Procedures and Functions
- Writing stored procedures
- Using functions for reusable logic
User Access and Security
- Managing database users and roles
- Granting and revoking privileges
Advanced Topics (Optional)
NoSQL vs SQL databases
Using SQL with big data
SQL in cloud databases (AWS, Azure, Google Cloud)
Frequently asked questions (FAQ):
- What are the benefits of an online SQL course?
This SQL certification course provides you with all the knowledge necessary to effectively work with SQL databases and integrate them into your applications. You will learn how to properly structure your database, write efficient SQL statements and clauses, and manage your SQL database to support scalable growth.
- How do I start learning SQL?
To begin learning SQL, start by setting clear goals for what you want to achieve. Next, find a reliable resource or course that suits your learning style. Finally, make sure to practice regularly to enhance your skills effectively.
- What is the best way to learn SQL?
SQL closely resembles the English language, making it relatively easy to learn independently. You can quickly pick up the basics by following online tutorials that cover the syntax and key concepts of the language. However, to become proficient in SQL, it is essential to practice regularly and work with data. Many people find it beneficial to learn tshrough tutorials, courses, or certification programs. These methods often include structured exercises and assignments that allow you to practice the skills you are acquiring, which can significantly accelerate your learning process.
- Is SQL in demand in 2025?
Since SQL provides the foundation for the effective administration and use of data in a variety of applications and sectors, proficiency with it is essential for machine learning engineers, data scientists, data engineers, data analysts, and software developers.
- What does SQL do?
SQL is a powerful tool that empowers users to access and retrieve valuable data from databases. It is essential for data scientists and analysts, allowing them to efficiently gather and prepare data for insightful analysis and impactful visualization. Moreover, marketers can leverage SQL to uncover how different types of content resonate with their audience, driving more effective strategies and enhancing engagement.
Who This Course Is For:
- Aspiring beginners eager to dive into SQL and database management from square one.
- Data analysts and scientists wanting to elevate their skills in data querying and analysis.
- Software developers aimed at seamlessly integrating database functionality into their applications.
- Business professionals seeking to harness data for impactful decision-making.
- Students and academics desiring a strong foundation and advanced expertise in SQL for academic projects and research.
- IT professionals dedicated to mastering database management and optimization.
- Career changers ready to embrace exciting opportunities in data-related fields or database administration.
- Anyone enthusiastic about mastering SQL and PostgreSQL for both personal enrichment and professional advancement.
We do it for you
Give us a try and join 1000+ happy students
Reviews
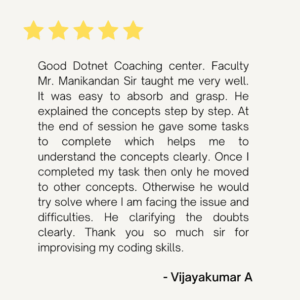
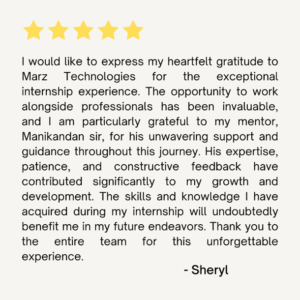
Microsoft SQL Server Certification
SQL Server Certification :
- SQL Server certifications provide a structured method to validate expertise, addressing various roles such as database administration, development, and business intelligence.
- SQL Server certifications are for all levels of experience in database management and data analysis.
- These certifications show that you have the skills to manage SQL Server environments.
- Earning a certification helps you prove your abilities to employers and coworkers.
Why Pursue SQL Server Certification:
Pursuing an SQL Server Certification can be highly beneficial for career growth, skill development, and job opportunities.
Professional Growth
- Higher Salary Potential – Certified professionals often earn more than non-certified peers.
- Better Job Opportunities – SQL skills are in demand for roles like Database Administrator (DBA), Data Analyst, Data Engineer, and Software Developer.
Industry Recognition
- Global Recognition – Microsoft certifications are widely respected in the IT industry.
- Validation of Expertise – Demonstrates your knowledge of SQL database management, security, performance tuning, and cloud integration.
High Demand for SQL Knowledge
- SQL is used in almost every industry, including finance, healthcare, retail, and tech.
- Many companies rely on Microsoft SQL Server, Azure SQL, and other relational databases for their operations.
Practical Education & Skill Development
- Certification training covers database security, optimization, automation, and troubleshooting.
- Prepares you for real-world challenges with practical labs and case studies.
Competitive Benefits
- Help you stand out from other candidates in job applications and promotions.
- Demonstrates commitment to learning and professional growth.
Pathway to Advanced Certifications
SQL Server certification can be a steppingstone to more advanced IT credentials, such as:
- Microsoft Certified: Azure Data Engineer Associate (DP-203)
- Microsoft Certified: Azure Solutions Architect Expert
SQL Server Certification Paths:
Microsoft offers a variety of SQL Server certification paths tailored to different IT roles and specializations.
These certifications allow professionals to validate their expertise in key areas such as Database Administration, Database Development, and Business Intelligence Development.
Selecting the appropriate certification path is essential for aligning with your career goals and fostering professional growth.
Certification Paths
Administration of databases: This path is ideal for professionals responsible for installing, maintaining, configuring, and securing database systems. Certifications in this category validate the skills necessary to ensure that database systems are efficient, secure, and highly available.
Development of databases: Designed for individuals who create and manage database solutions, this certification path assesses proficiency in designing database structures, defining data types, and implementing stored procedures, functions, and views.
Developing Business Intelligence: Targeted at professionals specializing in data analysis to support business decision-making, this path covers skills in implementing data models, developing reports, and designing dashboards.
Selecting the Right SQL Certification for Your Career
Boost Your Career with a Certificate
- Earning a certificate is a powerful statement of your commitment to skill enhancement.
- You can list this certificate as a credential on your CV, resume, LinkedIn profile, and other professional platforms.
- It provides you with the credibility needed for increased responsibilities, larger projects, and higher salaries.
- In today’s competitive job market, knowledge is power.
- Documenting your skills not only helps you advance in your current career but also enables you to pursue new opportunities.
Pros and Cons of SQL
SQL (Structured Query Language) is widely used for managing relational databases.
Pros of SQL:
Easy to Learn and Use
- SQL uses simple and readable syntax (e.g., SELECT * FROM table_name;), making it accessible for beginners and professionals.
Powerful and Efficient
- SQL allows complex queries to retrieve, manipulate, and manage large amounts of data efficiently.
Data Integrity and Security
- SQL databases support constraints (e.g., PRIMARY KEY, FOREIGN KEY, UNIQUE, NOT NULL) that enforce data integrity.
Cons of SQL:
Scalability Limitations
- Traditional SQL databases struggle with horizontal scaling (adding more servers) compared to NoSQL databases like MongoDB.
Expensive for Enterprise Solutions
- Some SQL-based systems (e.g., Oracle, SQL Server) require costly licensing and maintenance.
Performance Issues with Large Joins
- Complex queries with multiple joins can slow down performance if not optimized properly.
Frequently asked questions (FAQ)
- What is a subquery?
A SQL subquery, also referred to as a nested query or inner query, is a query that exists within another SQL statement. It enables you to use the result of one query as input for another query. Subqueries are enclosed in parentheses and can be employed in various parts of a SQL statement, including the SELECT, FROM, and WHERE clauses.
- What are indexes and types?
Indexing is a valuable technique that optimizes search times in database queries. The structure of database indexing includes a search key and a pointer. There are four types of indexing: Primary, Secondary, Clustering, and Multivalued Indexing. Primary indexing itself is divided into two categories: dense indexing and sparse indexing.
- What is the difference between a function and a stored procedure?
Triggers are unique stored procedures that run automatically in response to database events; functions are named operations that return a single value or a table; and stored procedures are reusable sets of SQL statements that can accept arguments and produce results.
- What is the primary key in SQL?
Each row in a table is usually uniquely identified by values contained in a column or combination of columns. The table’s entity integrity is maintained by this column, or columns, which are referred to as the primary key (PK).
- List the different types of relationships in SQL.?
There are three types of relationships between the data you are likely to encounter at this stage in the design: one-to-one, one-to-many, and many-to-many. To be able to identify these relationships, you need to examine the data and have an understanding of what business rules apply to the data and tables.
SQL Certification
SQL Certification:
An SQL certification is a credential that proves your proficiency in Structured Query Language (SQL), which is used for managing and querying databases. These certifications are offered by various organizations, they assess abilities in writing SQL queries and managing databases effectively.
Purpose of SQL Certification
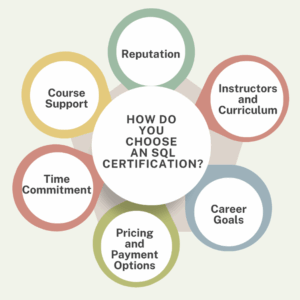
- Validates SQL Skills: Shows that you have knowledge of SQL syntax, database management, and data manipulation.
- Improves Job Prospects: Helps in landing roles such as Data Analyst, Database Administrator (DBA), Software Engineer, and more.
- Enhances Career Growth: Employers often prefer certified professionals for specialized database roles.
- Boosts Confidence: Structured learning and certification ensure you have a strong foundation in SQL
How to Get SQL Certified :
- Choose a Certification – Decide between vendor-specific (Microsoft, Oracle) or general SQL certifications.
- Learn SQL Basics – Understand SQL syntax, queries, joins, and database management.
- Practice with Real Databases – Use MySQL, PostgreSQL, SQL Server, or Oracle for hands-on experience.
- Pass the Exam – Most certifications require you to take a proctored exam (online or in-person).
- Get Certified & Showcase It – Add the certification to your resume and LinkedIn profile.
What You Will Learn in SQL :
SQL (Structured Query Language) is used for managing and manipulating databases. You will learn:
- How to create, modify, and manage databases
- Writing SQL queries to retrieve and update data
- Optimizing database performance
- Using joins, subqueries, and indexing
- Implementing security and user permissions
Key Topics Covered
- Introduction to Databases & SQL
- Basic SQL Queries (SELECT, INSERT, UPDATE, DELETE)
- Filtering Data (WHERE, ORDER BY, GROUP BY, HAVING)
- Joins and Relationships (INNER JOIN, LEFT JOIN, RIGHT JOIN, FULL JOIN)
- Subqueries and Nested Queries
- Database Normalization & Constraints
- Indexing and Performance Optimization
- Stored Procedures and Functions
- Database Security and User Management
- Advanced SQL Features (Views, Triggers, Transactions).
Description
SQL is a crucial skill for data analysts, software developers, and database administrators.
This course will teach you how to interact with databases efficiently.
You’ll start with basic queries and move to advanced database management concepts.
By the end, you’ll be able to work with real-world databases, optimize performance, and ensure data security.
Frequently Asked Questions
- What is SQL and why is it important for data analysis?
SQL (Structured Query Language) is a programming language used to manage and manipulate relational databases. It allows users to retrieve, update, insert, and delete data stored in structured formats.i) Efficient Data Retrieval – SQL enables analysts to extract specific data from large databases quickly using queries.
ii) Data Manipulation – Analysts can filter, sort, aggregate, and transform raw data for better insights.
iii)Scalability – SQL works well with large datasets, making it useful for enterprise-level data analysis.
iv)Data Integrity – Ensures accuracy and consistency of data using constraints and relationships.
v)Integration with BI Tools – Many analytics and business intelligence tools (e.g., Tableau, Power BI) rely on SQL for querying databases.
vi)Automation – SQL scripts can automate data reporting and ETL (Extract, Transform, Load) processes.
vii)Cross-Platform Compatibility – SQL works with various database management systems (e.g., MySQL, PostgreSQL, SQL Server, Oracle).
- What are the benefits of SQL in data analysis?
SQL allows users to efficiently create, read, update, and delete records in databases. Its widespread use is partly due to its versatility, ease of understanding, and robust functionality, which facilitates precise management of large data sets.
- what is SQL used for?
Structured Query Language (SQL) is a powerful programming language designed for efficiently storing and processing information in relational databases. By organizing data in a clear tabular format, with rows and columns representing distinct data attributes and their interconnections, SQL enables users to manage and retrieve valuable insights from their data seamlessly. Embracing SQL can significantly enhance your ability to unlock the potential of your data.
- Is SQL a good career path?
SQL (Structured Query Language) is an essential skill in data management, making it a must-have for anyone pursuing a career in data processing or analysis. This guide presents a strategic roadmap for professional growth in SQL-related fields, highlighting the critical roles and skills required to elevate your career from a novice to a seasoned expert. Embrace the opportunity to enhance your expertise and open doors to new possibilities in data management.
- What is the best career path for a SQL Developer?
The most promising career paths for database developers specializing in SQL encompass a variety of roles that leverage their expertise in database management and data analysis. Key positions include:i) Data Engineer: Responsible for designing, building, and maintaining the data architecture and infrastructure necessary for data collection and processing.
ii) Data Administrator: Focuses on managing and maintaining database systems, ensuring their efficiency, security, and availability for users within an organization.
iii) Data Scientist: Utilizes statistical methods and machine learning techniques to analyze and interpret complex data sets, often to inform business decisions and strategies.
iv)Data Analyst: Analyzes data to extract actionable insights, create reports, and support data-driven decision-making processes within the organization.
v)Business Intelligence Developer: Develops and manages the technology and tools needed to transform data into actionable intelligence, often using data visualization techniques to present findings.
SQL ONLINE COURSE WITH A CERTIFICATE
SQL Courses
SQL courses teach a language designed for working with databases. Learn the fundamentals, such as querying data, database design, and data manipulation. SQL is crucial for database administration, data analysis, and backend development.
What you will learn:
- SQL Basics and Advanced Concepts
- How to use SQL for data analysis
- Job-oriented SQL skills for data analysis
- Essential skills needed to secure a job as a SQL Developer
Benefits of an SQL Certificate:
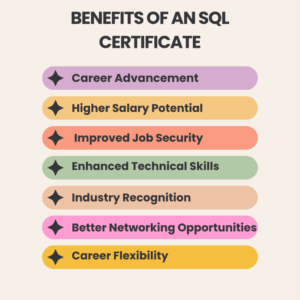
- Improve your chances of securing a job in SQL development.
- Distinguish yourself from other candidates.
- The certificate verifies your mastery of the fundamental skills in SQL development, fostering trust with potential employers.
- Highlight your skills on your resume, LinkedIn, and other social media platforms.
- Increase your appeal in the job market.
SQL Key Features:
- Covers SQL concepts from basic to advanced levels.
- Includes dedicated live sessions led by industry experts.
- Offers self-paced learning modules so you can study at your convenience.
- Features hands-on projects to apply skills to real-world scenarios.
- Provides an engaging learning experience with demo sessions and real-world examples.
- Upon completion, you will receive an industry-recognized certificate.
Who Should Consider Getting Certified?
Getting certified can be beneficial for a wide range of individuals, depending on their career goals, industry, and professional development aspirations.
Learn more about SQL
Enroll in an SQL course at Maria Academy and discover how to build, analyze, and restore various databases. SQL is one of the most widely used programming languages globally, essential for designing the databases that many applications rely on. As a result, SQL skills are highly sought after by employers. Learn from industry experts about the growing importance of data in today’s business world. Prepare to enhance your resume by adding SQL to your skill set!
Course Content
Module 1: Introduction to Databases & SQL
- Overview of Databases
- What is SQL?
- Types of Databases: RDBMS vs. NoSQL
- SQL vs. Other Query Languages
- Popular SQL Databases (MySQL, PostgreSQL, SQL Server, SQLite, Oracle)
Module 2: SQL Basics & Database Management
- Introduction to Tables, Rows, and Columns
- Creating a Database (CREATE DATABASE)
- Deleting a Database (DROP DATABASE)
- Creating Tables (CREATE TABLE)
- Modifying Table Structure (ALTER TABLE)
- Dropping Tables (DROP TABLE)
Module 3: Data Manipulation (DML)
- Inserting Data (INSERT INTO)
- Updating Data (UPDATE)
- Deleting Data (DELETE)
- Retrieving Data (SELECT)
Module 4: Filtering & Sorting Data
- Filtering Data with WHERE Clause
- Using Operators (BETWEEN, IN, LIKE, AND, OR, NOT)
- Sorting Results (ORDER BY)
- Limiting Results (LIMIT, OFFSET)
- Using Aliases (AS)
Module 5: Aggregate Functions & Grouping
- Aggregate Functions (COUNT, SUM, AVG, MIN, MAX)
- Grouping Data (GROUP BY)
- Filtering Grouped Data (HAVING)
Module 6: Working with Joins
- Understanding Database Relationships
- Types of Joins:
- INNER JOIN
- LEFT JOIN
- RIGHT JOIN
- FULL JOIN
- SELF JOIN
- CROSS JOIN
Module 7: Subqueries & Nested Queries
- Subqueries in SELECT, FROM, WHERE
- Correlated Subqueries
- Common Table Expressions (CTEs)
Module 8: Constraints & Indexing
- Primary Key & Foreign Key
- Unique & Not Null Constraints
- Default Constraints
- Indexing Basics (CREATE INDEX, DROP INDEX)
- Clustered vs. Non-Clustered Indexes
Module 9: Views & Stored Procedures
- Creating & Using Views (CREATE VIEW)
- Modifying Views (ALTER VIEW, DROP VIEW)
- Introduction to Stored Procedures (CREATE PROCEDURE)
- Creating and Executing Functions (CREATE FUNCTION)
- Understanding Triggers (CREATE TRIGGER)
Module 10: Transactions & Concurrency Control
- Introduction to Transactions
- COMMIT, ROLLBACK, and SAVEPOINT
- ACID Properties of Transactions
- Locking Mechanisms (LOCK TABLE, UNLOCK TABLE)
- Deadlocks & Concurrency Control
Module 11: Advanced SQL & Performance Optimization
- Query Optimization Techniques
- Using Execution Plans
- Indexing Strategies for Performance Improvement
- Avoiding Common SQL Mistakes
- Partitioning & Sharding for Large Databases
Module 12: SQL for Data Analysis & Business Intelligence
- Writing Complex Queries for Analytics
- Using SQL with BI Tools (Power BI, Tableau)
- Window Functions (RANK(), DENSE_RANK(), ROW_NUMBER())
- Case Statements & Conditional Expressions
Module 13: SQL and NoSQL (Optional Advanced Topic)
- Difference Between SQL and NoSQL
- Storing and Querying JSON Data
- Working with XML in SQL
Why Join this Program :
Develop Skills for Real Career Growth
Our cutting-edge curriculum is designed in collaboration with industry leaders and academic experts to help you acquire job-ready skills.
Learn from Experts in the Field
Our instructors are active professionals who bring current best practices and case studies to the classroom, ensuring that the training fits seamlessly into your work schedule.
Gain Practical Experience by Solving Real-World Problems
Engage in capstone projects that utilize real-world data sets and participate in virtual labs for hands-on learning experiences.
Receive Structured Support to Ensure Continuous Learning
Our 24/7 learning support offers guidance from mentors and a community of like-minded peers, helping you to resolve any conceptual doubts that arise.
SQL Certification Training FAQs
- What is SQL Certification?
An SQL certification is a credential that verifies your knowledge and skills in Structured Query Language (SQL), which is used to manage and manipulate databases. SQL certifications are offered by various organizations and tech companies to help individuals demonstrate their expertise in database management, querying, and optimization.
- What skills can I acquire from SQL courses at Maria Academy?
The SQL courses at Maria Academy provide learners with essential skills in database management and querying, including:i) Basic to advanced SQL commands for data retrieval, insertion, updating, and deletionii) Techniques for designing and managing relational databasesiii) Skills in writing complex queries to analyze and manipulate dataiv) Understanding of database optimization and performance tuning
v)Application of SQL in data science for querying large datasets
vi)Integration of SQL with other data analysis tools and programming language.
- What is SQL Server?
SQL Server is a relational database management system (RDBMS) developed by Microsoft. It is designed to store and retrieve data as requested by other software applications, making it a popular choice for efficiently managing and organizing large amounts of data. SQL Server supports Structured Query Language (SQL), which is the standard language used for managing relational databases. It offers a variety of features, including data storage, data integrity, security, transaction management, and high availability. SQL Server is widely utilized by businesses, organizations, and institutions for data-driven applications and analytics.
- What jobs demand you learn SQL?
There are several jobs that require you to learn SQL, including:i) Database Administratorii)Big Data Analystiii)Data Scientistiv) Systems Analyst
v) Business Analyst
vi) Software Developer
- What are the 5 types of SQL?
SQL commands are essential for effective database management. These commands are categorized into Data Definition Language (DDL), Data Manipulation Language (DML), Data Control Language (DCL), Data Query Language (DQL), and Transaction Control Language (TCL).
ONLINE SQL COURSE
Unlock your potential with our comprehensive online SQL courses, designed for everyone from beginners to advanced learners.
Elevate your data handling skills with engaging courses that encompass everything from the essentials of SQL to specialized SQL for Data Analysis.
Enroll today and earn valuable certificates that will highlight your SQL expertise and set you apart in the job market!
PREREQUISITES FOR ONLINE SQL TRAINING :
- Basic Computer Knowledge – Familiarity with using a computer and navigating software applications.
- Understanding of Databases – A general idea of what databases are and how data is stored can be beneficial but is not mandatory.
- Logical Thinking & Problem-Solving Skills – Helps in writing and optimizing SQL queries.
- Basic Knowledge of Excel or Spreadsheets – Understanding tables and data organization is a plus.
WHY CHOOSE LIVE SQL TRAINING :
- Real-Time Instructor-Led Classes – Get direct guidance from experienced SQL professionals.
- Hands-On Learning – Practice SQL queries in live coding environments.
- Q&A and Doubt Resolution – Get instant answers to your questions during the session.
- Structured Curriculum – Covers SQL fundamentals, advanced queries, database optimization, and more.
- Flexible Schedules – Choose batches that fit your availability.
- Communication Tools: Familiarize yourself with the communication platforms or tools used by the training provider, such as Zoom, Microsoft Teams, Slack, or others.
- Technical Support: Know how to contact technical support in case you face any issues with accessing the live sessions or course materials.
BENEFITS OF SQL ONLINE TRAINING
- Learn at Your Own Pace – Access course materials anytime, anywhere, and progress at your convenience.
- Hands-On Practice – Work on real-world projects, interactive exercises, and live coding environments.
- Expert Guidance – Learn from experienced instructors with industry knowledge and practical insights.
- Industry-Recognized Certification – Earn a certificate that boosts your resume and career prospects.
- Cost-Effective Learning – Get high-quality training at a fraction of the cost of traditional classroom programs.
- Flexible Learning Modes – Choose from self-paced, live online, or instructor-led training.
- Career Growth Opportunities – Gain in-demand SQL skills for roles in data analysis, software development, and database administration.
TRAINER PROFILE
The trainers at Maria Academy are professional experts in SQL courses and have extensive experience in the field.
They provide a comprehensive learning experience, ensuring that students not only grasp theoretical concepts but also gain practical skills that can be applied in real-world scenarios. with a minimum of 8 years of industry experience.
They are well-versed in handling complex real-time projects. Our mentors provide personalized mentorship, career guidance, and practical insights based on their extensive experience in the field.
Mariya Academy’s trainers emphasize both theoretical and practical knowledge of the SQL language.
WHY ONLINE BOOTCAMP
Fast-Track Learning
- Bootcamps are designed to teach you SQL quickly—often within weeks.
- Perfect if you’re trying to switch careers, prep for a job interview, or start a data-related role fast.
Hands-On Practice
- Most bootcamps include real-world projects, exercises, and challenges, not just theory.
- You actually write queries, clean data, and build reports—just like on the job.
Career-Oriented
- Many bootcamps offer job support, mock interviews, or certifications to add to your resume.
- SQL is a top skill for roles like Data Analyst, Business Analyst, Data Engineer, etc.
FREQUENTLY ASKED QUESTION
- What are the benefits of learning SQL?
Mastering SQL empowers you to efficiently retrieve the data you need, leveraging the full potential of the database engine. With SQL skills, you can confidently navigate any relational database system available today. This ability not only enhances your versatility but also makes you an invaluable asset in the job market, regardless of the software or employer.
- What is the difference between DBMS and RDBMS?
DBMS stands for Database Management System, while RDBMS stands for Relational Database Management System. In a DBMS, data is stored as files, whereas in an RDBMS, data is organized in the form of tables.
- What is a “trigger”?
Triggers are stored procedures that enforce integrity rules in a database. They automatically execute when data-modification operations occur, such as inserts, updates, or deletes. Associated with specific tables, triggers activate in response to relevant statements like insert, update, delete, and query.
- What is Auto Increment feature in SQL?
Auto Increment is a feature in SQL that automatically generates unique values for a column whenever new rows are inserted into a table. This feature is commonly used to create surrogate keys, such as primary keys, which serve as unique identifiers for each row in a table.
- What is joining in SQL?
A JOIN in SQL is a command that combines records from two or more tables in a database. It allows you to merge data from fields in different tables based on common values present in each table. If you work with databases, you will likely need to use SQL JOINs to retrieve and manipulate related data effectively.
Learn React in Chennai
Why Study React
Studying React is a smart choice for beginners who want to create modern, dynamic, and interactive user interfaces. Its component-based architecture allows developers to write reusable code, making projects easier to maintain and scale. The Virtual DOM ensures fast and smooth performance, enhancing user experiences. With a large and supportive community, learners have access to abundant resources, tutorials, and tools to aid their growth. Additionally, mastering React opens the door to excellent job opportunities in both web and mobile app development.
Highlights of React Training in Chennai:
- Training at Beginner to Advanced Level.
- Live Coding and Practical Projects.
- Professional Trainers from the Sector.
- Completely Practical and Hands-on Approach.
- Help with Placement & Interview Training.
- Weekend and Weekday Batches That Are Flexible.
- React Props, State, and Components.
What You’ll Learn:
The fundamentals of contemporary React development will be covered first, including how to use JSX to create reusable user interface elements and props and state to handle data. The course gives you a solid foundation by covering both functional and class-based components. As you go, you’ll learn how to handle dynamic behaviour with React Hooks like use State and use Effect and create single-page apps with React Router. Through practical, real-time projects, you’ll also learn how to handle forms with validation using Formik and Yup, connect to REST APIs using Axios or Fetch, and manage state using Redux or Context API.
Who Should Join:
Anyone looking to advance their knowledge or get started in the field of front-end programming should take this ReactJS course. Regardless of your level of web programming experience, this course will help you acquire the skills necessary to build dynamic and responsive online apps.
- Students and recent graduates interested in pursuing a career in web development.
- working professionals that want to transition to full-stack or front-end development.
- IT enthusiasts with a strong interest in contemporary JavaScript frameworks who wish to get knowledgeable about best practices.
- designers want to improve their abilities and create websites that are more scalable and dynamic.
- Independent contractors or business owners that want to oversee small to medium-sized projects or create their own online applications.
Where to Learn React in Chennai:
The best option for thorough and useful React JS training is Maria Academy. Situated in the centre of Chennai, Maria Academy provides a well-organized curriculum that will quickly elevate you from novice to expert.
Why Choose Maria Academy:
- Practical Experience with Real-World Projects to Develop a Strong Portfolio.
- Extensive course covering state management, hooks, API integration, and all the basics of React.
- Small batches guarantee individualized attention and improved education.
- Placement Support to help you get your ideal job by helping you with resume writing, interview preparation, and job placement.
- Adjustable timings to fit your schedule with weekend and weekday batches
100% Placement opportunities:
Maria Academy not only delivers high-quality technical training but also ensures students are job-ready through comprehensive placement assistance. From resume building and interview preparation to mock tests and career counseling, the academy supports learners at every stage. With tie-ups across various companies, students gain access to job alerts, networking opportunities, and live project experience to strengthen their portfolios. Placement coordinators actively connect candidates with suitable employers, and support continues until they secure a job. Many alumni have successfully launched their careers in reputed companies, making Maria Academy a trusted bridge between learning and employment.
Frequently Asked Questions:
- What is React, and why should I learn it?
React is a popular JavaScript library for building user interfaces. It’s in high demand among companies, making it a great skill for web development careers. - Do I need prior programming knowledge to learn React?
Basic knowledge of HTML, CSS, and JavaScript is recommended, but some institutes also offer beginner friendly React courses. - Are there job opportunities in Chennai after learning React?
Yes, Chennai has a strong IT sector with multiple openings for React Developers, especially in startups and product-based companies. - Can I learn React online from Chennai-based institutes?
Yes, many training centers in Chennai offer both online and offline classes. - How long does it take to learn React in Chennai?
Most training programs range from 1 to 3 months, depending on the depth of the syllabus and practice sessions.
React For Beginners
React Introduction:
Facebook created the React open-source JavaScript toolkit to create reusable, interactive, and quick user interfaces, particularly for single-page apps. Because of its component-based architecture, developers can deconstruct intricate user interfaces into more manageable, reusable components. Additionally, React makes use of a virtual document object model (DOM) to effectively update just the site elements that change, enhancing user experience and efficiency.
Why Choose React for Beginners:
If you’re stepping into the world of web development, React is one of the best technologies to start with. Created by Facebook, React has grown into one of the most popular JavaScript libraries, powering websites and applications used by millions of people every day.
- Easy to Learn– For beginners, reacts learning curve is friendly. If you already know HTML, CSS, and JavaScript, you can quickly pick up the basics of React and start building projects.
- Component-Based Approach– React breaks down your UI into reusable pieces called Components. This not only makes your code cleaner but also saves development time.
- Fast and Efficient– React uses a Virtual DOM to update only the parts of a web page that change, making applications faster and smoother for users.
- Real-World Project Skills– By learning React, you can build interactive applications like e-commerce websites, social media platforms, dashboards, and more.
- Huge Community Support –As one of the most widely used libraries, React has an active community. You’ll find countless tutorials, forums, and resources to help you whenever you’re stuck.
- High Demand in the Job Market – Companies across the globe are constantly hiring React developers. Learning React increases your chances of landing a job or freelance work quickly.
- Future-Proof Technology –React continues to evolve with features like Hooks and concurrent rendering, ensuring it stays relevant in the ever-changing tech industry.
Core Concepts of React
If you’re new to React, understanding its core concepts will make your learning journey much smoother. Let’s break them down in a beginner-friendly way.
- Components – React apps are built using Components — reusable pieces of code that define parts of the user interface. Components can be Functional or class-based, but beginners often start with functional components.
- JSX (JavaScript XML)– JSX allows you to write HTML-like syntax inside JavaScript. It makes your code more readable and easier to write.
- Props (Properties)–Props are used to pass data from one component to another. They are read-only and help make components reusable.
- State- State is like a component’s memory. It stores data that can change over time, and when the state changes, react automatically re-renders the UI.
- Hooks– Hooks are special functions that let you “hook” into React’s features. Beginners often start with:
i) useState – For managing state.
ii)useEffect – For handling side effects like API calls
- Event Handling– React lets you handle user actions like clicks, form submissions, or key presses using event listeners.
- Virtual DOM – The Virtual DOM is React’s secret weapon for speed. Instead of updating the whole web page, it updates only the changed elements, making apps faster.
- Conditional Rendering- React allows you to show or hide parts of the UI based on certain conditions, like displaying a login button only if the user is not signed in.
What is the use of React at Beginners:
React is an open-source JavaScript library developed by Facebook that helps beginners build fast, interactive, and dynamic web applications. It simplifies development by using reusable components, updates only the necessary parts of a webpage through its Virtual DOM and combines HTML with JavaScript using JSX for easier coding. With just basic HTML, CSS, and JavaScript knowledge, beginners can quickly create projects like to-do lists, portfolios, and e-commerce sites while learning real-world skills. Widely used by top companies and supported by a large community, React offers both an easy learning curve and strong career opportunities, making it an ideal starting point for modern web development.
Advantage of React at Beginners:
One major advantage of React is its component-based architecture, which enables reusable UI elements, saving time and ensuring consistency. Its Virtual DOM improves speed by updating only the changed parts of a page, resulting in smoother performance. React also benefits from a large community and rich ecosystem, offering abundant tutorials, tools, and resources for learners. Additionally, it is highly flexible, allowing integration with other libraries and frameworks for building web, mobile, or existing applications with ease.
Disadvantage of React at Beginners:
A key challenge for beginners is Reacts Fast-paced updates, which can make it hard to keep up with best practices. Its JSX syntax, combining HTML and JavaScript, may feel confusing at first. Since React focuses mainly on the view layer, learners often need additional libraries like Redux or React Router for state management and routing. The learning curve for advanced topics such as hooks, context, and performance optimization can also be steep beyond the basics
React Job Opportunities:
- High demand – React is one of the most in-demand front-end libraries in the job market.
- Diverse roles – Job openings include React Developer, Front-End Developer, Full Stack Developer, and UI Engineer.
- Industry adoption – Widely used by startups, tech companies, and enterprises for web and mobile apps.
- Good salary potential – React developers often earn competitive salaries compared to other front-end technologies.
- Global opportunities – Skills in React are in demand worldwide, offering chances for remote and overseas jobs.
- Cross-platform scope – React Native knowledge opens opportunities in mobile app development.
- Freelancing & startups – Strong React skills can help you land freelance projects or build your own products.
Frequently asked Questions:
- What is React and why is it popular?
React is a JavaScript library developed by Facebook for building user interfaces. It’s popular because it’s fast, component-based, and backed by a large community, making it easy for beginners to learn and use. - Is React a framework or a library?
React is a library, not a full-fledged framework. It focuses only on the view layer of applications, which means you may need other libraries for state management, routing, and backend communication. - What is JSX and why is it used in React?
JSX (JavaScript XML) is a syntax extension that lets you write HTML inside JavaScript. It makes code more readable and allows developers to create UI elements in a more intuitive way. - What career opportunities are available after learning React?
Learning React opens doors to roles like Frontend Developer, Full-Stack Developer, and UI Engineer. It’s in high demand in web and mobile development, offering good job prospects and salaries. - What will I build in the React beginner course at Maria Academy?
At Maria Academy, beginners work on hands-on projects like simple web applications, interactive forms, and portfolio pages. This helps students apply concepts immediately and build a strong foundation. - Does Maria Academy provide placement assistance after the React course?
Yes, Maria Academy offers placement support, including resume building, mock interviews, and connecting students with hiring partners to help them start their careers in React development.
Best React JS Development Course
Learn Modern React: From the Fundamentals to the Advanced:
- Master Modern React from Basics to Advanced is a thorough course that will provide you the tools you need to create websites that are dynamic, responsive, and quick with React.
- From the fundamentals like components, props, and state to more complex subjects like React Hooks, routing, and state management using Redux or Context API, this course walks you through every important idea, regardless of your level of JavaScript expertise. By means of actual projects, real-world examples, and professional mentoring, you will acquire the necessary skills and confidence to create React applications that are ready for production.
- In today’s cutthroat digital world, this course is ideal for professionals, developers, and students who want to improve their abilities. It will help you become a successful React developer.
Course Objectives For React JS:
Comprehend the TypeScript framework, its benefits, and how to configure the Node.js environment for TypeScript translation.
- To gain knowledge of TypeScript variables and data types, such as String, Number, Array, Object, Tuple, Enum, Void, and NULL; variable declarations; and the distinctions between “var” and “let” keywords.
- Examining TypeScript’s object-oriented programming features, including constructors, inheritance, properties, methods, class design, object generation, and access modifiers.
- learning about single-page applications (SPA), its features, importance, and component-based architecture using React JS.
- To learn about the fundamentals of React JS, including selecting the appropriate IDE, dealing with browsers and browser plugins, comprehending Reacts syntax, and NodeJS, NPM, and Webpack. To become knowledgeable about JSX (JavaScript Extension), its format, renderer, expressions, comments.
Learn From Industry Experts with Real-Time Experience:
Learn from Real-Time Experienced Industry Experts and acquire knowledge beyond what is found in textbooks. Our professors offer real-world experience, current practices, and workable solutions to the classroom as seasoned professionals who are currently employed in the computer sector. In addition to teaching principles, they also discuss best practices, common problems, and advice on how React is used in real-world projects. With their practical experience, you will gain mentorship that equips you for real-world work situations and learn how to handle issues like a professional developer. This guarantees that you’re preparing for the practical world of software development rather than merely academically studying it.
Build Real-World Projects and Hands-On Applications:
Create Hands-On Applications and Real-World Projects to Get Real-World Experience That Will Make You Stand Out. The main goal of this course is to teach you by doing as you create completely functional applications with React. You will work on practical projects including task organizers, e-commerce pages, dashboards, and more, ranging from interactive user interfaces to API-driven data handling. Every project is made to mimic authentic development settings, assisting you in applying ideas like components, hooks, routing, and state management in a useful manner. You will have a solid project portfolio by the end of the course that will demonstrate your abilities to prospective employers.
Gain Expertise in React Hooks, Routing & State Management:
Comprehending React Hooks, Routing, and State Management is crucial for creating cutting-edge, effective React apps. You can design more functional, cleaner components with sophisticated features like managing state and side effects without using class components by using React hooks like use State and use Effect. Your app’s user experience will be seamless and straightforward if you use React Router to generate fluid navigating between pages or views. In the meanwhile, you can manage data flow throughout your application, particularly as it becomes more complicated, by employing efficient state management strategies, such as Context API or Redux. To guarantee that you acquire useful, in-demand React abilities, this course walks you through these fundamental subjects step-by-step while fusing theory with real-world applications.

Placement Assistance & Resume Support in React JS Development Course in Chennai:
100% Placement Help & Resume Support in Chennai’s Best React JS Development Course guarantees that you’re not just prepared for the workforce but also taught. Our placement cell is committed to connecting you with genuine possibilities by collaborating directly with leading IT firms. We help you at every stage, from writing a polished CV specifically for React positions to getting you ready with technical tests, practical interviews, and soft skill training. Our comprehensive job support is intended to provide you a solid foundation in React so that you may enter the IT sector with confidence, regardless of your experience level or desire to change careers.
Get Certified with the Best React JS Development Course in Chennai:
Take the top React training in Chennai to improve your resume. An industry-recognized certificate attesting to your proficiency with React and contemporary front-end programming will be awarded to you upon successful completion of the course. This certification improves your résumé and gives you a competitive advantage in freelance work and job interviews. Whether you’re a student, recent graduate, or working professional, the certification helps you stand out in a competitive job market by demonstrating your dedication to learning and practical experience.
Get React training at affordable fees, available in both online and offline modes across Chennai:
Interested in learning React without going over budget. Our flexible and reasonably priced React course offers instruction at reasonable costs with EMI alternatives to ensure that everyone can access it. Several locations throughout Chennai offer both online and offline learning options, depending on your preference for the ease of online learning or the practical experience of in-person sessions. Take the next step in your development career, on your terms and within your means, by learning from professionals in the field and creating practical projects.
Free Demo Classes to Get You Started Risk-Free – Best React Js Development Course in Maria Academy in Chennai:
We provide free trial sessions so you can see how good our instruction is before deciding to sign up. Get a personal glimpse at our project-based curriculum, hands-on approach, and experienced teaching style. If you want to see if our React course is right for you, these risk-free sessions are ideal. Our demo sessions, which are included in the top React training in Chennai, assist you in making an informed choice without charging you up front.
Frequently Asked Questions:
- Who can join this course?
Students, freshers, and professionals with basic HTML, CSS, and JavaScript knowledge can enroll. - What will I learn in this course?
You’ll master React fundamentals, Hooks, routing, API integration, and build real-time projects. - Is it available online and offline?
Yes, Maria Academy in Chennai offer both classroom and live online training options. - Do I get a certificate after completion?
Yes, you’ll receive an industry-recognized certificate after completing the course. - Is placement support provided?
Maria Academy provide resume help, interview prep, and job placement assistance.
React JS Bootcamp in Chennai
Introduction to React & JSX:
Best JS React Bootcamp in Chennai, a JavaScript library created by Facebook for creating dynamic user interfaces, is given in the “Introduction to React & JSX” module of React JS Bootcamps in Chennai. This module discusses the history of React, its fundamental ideas, and the importance of JSX (JavaScript XML), which enables programmers to create HTML-like syntax inside JavaScript. The virtual DOM, how to set up the React development environment, and how to use the React Developer Tools for effective debugging are all taught to students. Learners may create web applications that are responsive and maintainable by grasping these foundational concepts.
Reacts Components and props:
The Components and Props module is essential to React JS Bootcamps in Chennai since it introduces students to the component-based architecture of React. The development and differentiation of functional and class components are covered in this topic, with a focus on their modularity and reusability. Students gain knowledge of component state management, lifecycle techniques for efficient component maintenance, and how to use props to transmit data across components.
State Management & Event Handling in React in React Bootcamp in Chennai:
The State Management & Event Handling module is essential for creating dynamic and responsive applications at React JS Bootcamps in Chennai. With the help of the use State and use Effect hooks, this module explores component state management, empowering developers to effectively manage side effects and data changes. Students investigate the idea of lifting state up to allow components to communicate data and comprehend the significance of immutability in state updates. Another crucial component is event management, where students learn how to control user interactions by supplying arguments to event functions, binding event handlers, and using Reacts synthetic event system.
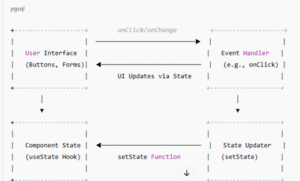
- User Interface (UI): Represents the interactive elements like buttons and forms that users interact with.
- Event Handler: Functions such as on Click or on Change that respond to user interactions.
- State Updater (set State): Functions provided by Reacts use State hook to update the component’s state based on events.
- Component State: Holds the current state of the component, which determines what is rendered in the UI.
When a user interacts with the UI the corresponding event handler is triggered. This handler uses the set State function to update the component’s state. React then re-renders the UI to reflect the new state, completing the cycle.
React Hooks &Routing with React Router:
To learn current front-end development, the “React Hooks & Routing with React Router” module is essential in React JS Bootcamps in Chennai. By exploring React Hooks like useState, useEffect, and useContext, this module helps developers effectively handle state and side effects inside functional components. It also discusses React Router, a potent tool for managing client-side routing in one-page apps. To construct smooth user experiences, learners experiment with managing navigation, nested route implementation, and route definition.
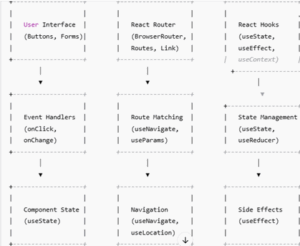
i) User Interface (UI): Represents interactive elements like buttons and forms that users interact with.
ii) Event Handlers: Functions such as onClick or onChange that respond to user interactions.
iii) Component State: Managed using the useState hook, it holds the current state of the component, which determines what is rendered in the UI.
iv) React Router:
- Browser Router: Wraps the application to enable routing.
- Routes: Defines the mapping between URL paths and components.
- Link: Provides navigation between routes.
v) Route Matching: Handles navigation and URL matching using hooks like useNavigate and useParams
vi) React Hooks:
- useState: Manages local component state.
- useEffect: Handles side effects such as fetching data or subscribing to external data sources.
- useContext: Shares state across multiple components without prop drilling.
Form Handling and Validation & Integration with APIs:
React Bootcamps focus on creating controlled components, which employ the useState hook to link form inputs to component state. This method guarantees that the user interface and the underlying data model are in real-time synchronization. The following validation methods are taught to guarantee data integrity:
- Client-side validation: Implementing checks within the program to give users instant feedback is known as client-side validation.
- Third-Party Libraries: Making use of fortified form management and schema-based validation solutions such as Yup and Formik.
Integration with APIs:
A basic feature of contemporary web apps is the ability to communicate with external APIs.
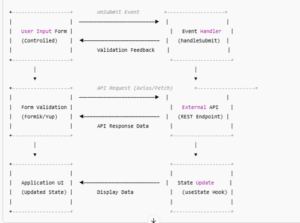
- Retrieving data from RESTful APIs using fetch or Axios is known as data fetching.
- Async/await syntax for managing asynchronous calls and loading states are examples of asynchronous operations.
- Try-catch blocks are used in error handling to elegantly manage mistakes that arise during API interactions
Capturing the fundamental ideas covered in React JS Bootcamps, this diagram shows how data moves from user input to validation, API communication, and UI refresh.
State Management With Redux:
Learning State Management with Redux is crucial for creating scalable and maintainable applications in React JS Bootcamps all throughout Chennai. Redux functions as a predictable state container, centralizing the state of the application and enabling unidirectional data flow, making testing and debugging easier. To efficiently handle intricate state exchanges, participants learn how to use fundamental Redux ideas, such as actions, reducers, and the store.

Testing and Debugging React:
Multiple stages of testing are performed on React applications.
- Unit testing: Confirms the functionality of individual parts. Commonly used tools include the React Testing Library and Jest.
- Integration testing: Verifies that the application’s various components function as intended.
- End-to-End (E2E) testing: This method tests the application’s flow by simulating actual user scenarios. Popular options for E2E testing are Cypress and Puppeteer.
- React Developer Tools: Examine state, properties, and component hierarchies.
- Redux Dev Tools: Track dispatched actions and state changes in Redux-enabled applications.
- Chrome Dev Tools: Examine network requests, debug JavaScript code, and profile performance.
Deployment and Server-Side Rendering (SSR):
Preparing the React application for production is part of deployment.
- Building the Application: Bundle the application using programs like Vite or Webpack.
- Configure the environment by setting up variables for the development, staging, and production phases.
- Hosting: Use Node.js to deploy the application on conventional servers or on platforms such as Netlify and Vercel..
- By rendering React components on the server, Server-Side Rendering (SSR) improves SEO and perform an Next are frameworks. A well-liked framework that makes SSR in React apps easier is called JavaScripts.
- Hydration: React adds event listeners on the client-side to make the application interactive once the server renders the HTML.
- Data Fetching: Fetch necessary data on the server before rendering to guarantee the client obtains a completely populated page.
- Error Handling: To detect and elegantly handle mistakes, use error boundaries.
Frequently Asked Questions
- Which Bootcamp is “best”?
When it comes to React training in Chennai, there’s no one-size-fits-all answer — but if you’re considering Maria Academy, it can be a strong choice for learners who want experienced trainers (9–12 years), hands-on projects, affordable fees, and placement assistance with ties to MNCs.
- Are placements guaranteed?
Claims of guaranteed placements are common—but verify details. Maria Academy offer placement assistance, but real success often depends on your own efforts, ongoing practice, and interview prep.
- How to evaluate an institute?
i) Project work and portfolio support.
ii) Resume, mock interviews, and placement guidance
iii) Mentorship and support beyond sessions
iv) Flexibility (timings, online/offline options).
v) Refund or installment policies.
- What else should I learn along with React?
Strong JavaScript fundamentals (ES6+), modern state management (Redux, Context), routing (React Router), API integration, and deployment practices make you job ready. Full-stack knowledge or familiarity with frameworks like Next.js can be a bonus.
- What’s the ideal approach?
i) Learning Maria Academy Classes deeper to practice and Building real projects—one small, one medium (e.g., Todo app and blog dashboard).
ii) Contributing code to GitHub and showcasing on a personal site or LinkedIn.
iii) Networking with developers via forums or local meetups.
React.Js Course
Introduction :
Training in Chennai for React.js Course provides practical instruction and knowledgeable mentoring to enable students to acquire in-demand skills in the React.js framework. Maria Academy is one of the top React JS Training Institutes in Chennai. With practical projects and certifications that are relevant to the market, students are well-equipped to become skilled Frontend Developers and launch a lucrative web development career.
Hands-on Training at Maria Academy:
At Maria Academy, students construct real-time web applications from scratch to master React.js Course. Through live coding sessions, individualized coaching, and assignments model after real-world situations, you will acquire hands-on experience and be prepared for the workforce right away.
Practice with live coding sessions and assignments:
- They acquire useful skills by utilizing React.js Course to create real-time web applications. The training is meant to mimic real-world situations, where students use ideas like state, hooks, components, props, and routing in real-world applications.
- Whether it’s an e-commerce interface, blog, dashboard, or to-do app, students work directly with professionals. This project-based learning strategy helps students develop a good portfolio for job interviews in addition to increasing their confidence when coding.
- Maria Academy guarantees that each student is prepared for the workforce with practical React development experience by using this approach.
Core Concepts of React: JSX, Components, Props, and State:
All React.js Course applications are built on top of JSX, Components, Props, and State. JSX (JavaScriptXML) makes it easier for developers to create user interfaces by enabling them to write HTML-like syntax directly in JavaScript. React apps are built using components, which allow for modular design and code reuse. Props, which stand for properties, are used to transfer data across components so that user interface rendering can be dynamic and customized. State is a component’s representation of dynamic data that is subject to change over time, allowing for responsive and interactive user experiences. React offers a strong and adaptable framework for creating contemporary web interfaces when combined with these ideas.
100% Placement Support at Maria Academy:
With our 100% placement help, we get you ready for actual employment prospects. To successfully showcase your abilities and expertise to potential employers, our committed career staff helps you prepare a professional resume. To boost your confidence and enhance your performance during the interview, we conduct practice interviews. Furthermore, we offer job referrals to leading IT and tech firms through our robust network of hiring partners, providing you with a direct route to employment. Our goal is your career success.
Certification:
Students at Maria Academy receive an industry-recognized accreditation upon successfully completing the course. You become more competitive in the job market with this certification, which attests to the abilities and information you gained during the course. Certifications from reputable organizations like Maria Academy are highly valued by employers since they show that you are dedicated to studying and stay current with business trends. Improve your chances of landing a job with a unique credential!
Modifiable Batches for Your Benefit:
Every student has unique schedules and responsibilities, and we at Maria Academy are aware of this. For this reason, we provide customizable batch options to meet your requirements. Regardless of your preferred learning schedule, we provide both weekday and weekend batches to give you the flexibility you need to manage your personal life, career, and studies. To help you select the learning approach that suits you best, we also provide both online and offline training modalities. You can accomplish your goals at your own speed and effortlessly fit your learning journey into your hectic schedule with our flexible options.
Real-Time Projects at Maria Academy Chennai:
At Maria Academy Chennai, we place a strong emphasis on experiential learning by using real-world projects to provide you real-world exposure. Throughout the course, you will work on one or two finished projects that mimic real-world applications, including creating a to-do app or an e-commerce site. These assignments provide you with the chance to demonstrate your abilities to prospective employers in addition to reinforcing the principles you have learnt. By the end of the course, you will have a strong portfolio of work that shows that you can handle challenging issues and produce outcomes, which will prepare you for the workforce and boost your self-confidence.
Affordable Fees at Maria Academy Chennai:
Maria Academy Chennai is aware of the financial difficulties that job seekers and students may encounter. For this reason, we provide reasonable costs together with cost-effective options designed to satisfy the requirements of professionals and students alike. Our mission is to ensure that everyone has access to high-quality education at a cost that doesn’t break the bank. Our affordable plans let you prepare for your profession and acquire useful skills without having to worry about high tuition costs.
Frequently asked questions:
- Who can learn React.js Course?
Anyone with basic HTML, CSS, and JavaScript knowledge can learn React.JS. It’s ideal for freshers, web developers, and software engineers wanting to build modern web applications. - How long does it take to learn React.js Course?
Maria Academy in Chennai offer 1–2 month courses. With consistent practice, you can start building projects within 4–6 weeks. - Do I need to know JavaScript before learning React.js Course?
Yes, a good grasp of JavaScript ES6 concepts (like arrow functions, classes, destructuring) is highly recommended. - Will the course include real-time projects?
Yes, Maria Academy include hands-on projects to help you build a portfolio. - Are there placement opportunities after the course?
Yes, Maria Academy offer placement support, resume building, and mock interviews until you get placed. - Is React.js Course in demand in Chennai’s job market?
Yes, React.JS developers are highly in demand in Chennai’s IT industry, especially in software companies, startups, and product-based firms. - Which is better – online or classroom training?
If you prefer face-to-face interaction and networking, classroom training works best. For flexible schedules, online training is equally effective. - Will I receive a certificate after completing the React.js Course course?
Yes, Maria Academy in Chennai provide an industry-recognized certificate upon successful completion of the course, which can be added to your resume and LinkedIn profile.
REACT TUTORIAL
Introduction :
React is a powerful and flexible JavaScript library used for building dynamic and responsive user interfaces. Developed and maintained by Facebook, React has become the most popular technology for front-end development across the world. If you’re planning to step into the world of modern web development, learning React is the perfect choice. In Chennai, numerous training institutes offer React tutorials designed for both beginners and professionals. A React tutorial in Chennai can help you gain the skills required to build high-performance web applications with ease.
Hands-On Training with React :
The best part of enrolling in a React tutorial in Chennai is the hands-on training approach. These React tutorials are not just about theory—they focus on practical learning. Every concept, from basic components to advanced hooks, is taught through real coding exercises. Whether it’s understanding JSX syntax, managing state with React hooks like use state and use Effect, or integrating with backend APIs, hands-on practice is at the core of every React session. This method helps you confidently build real-time React applications step-by-step.
Code It Live – Practice React with Expert Mentors in Real Time :
React tutorials in Chennai provide a hands-on, practical approach through live coding sessions that help learners build real-time coding skills. These interactive sessions allow students to write React code step by step with expert guidance, making it easier to grasp essential concepts like components, state, props, hooks, and API integration. Live sessions also encourage immediate feedback and troubleshooting, which accelerates learning. This method of learning React offers an immersive experience where theory is directly applied to real-world code. For anyone serious about mastering React development, these practice-based React tutorials in Chennai are among the most effective ways to succeed.
Setting Up Your First React Project with Vite or CRA
In this React tutorial, learners begin by setting up their first project using popular tools like Create React App (CRA) or Vite. These tools simplify the setup process, making it easy for beginners to dive into React development without worrying about complex configurations. With just a few terminal commands, a fully functional project structure is created, complete with pre-configured settings for JSX, hot reloading, and development servers. This ready-to-code environment saves time and allows students to focus on learning core concepts like components, state, and props. Starting React this way builds a strong foundation for future project-based React training.
Managing State and Props in React
In every React tutorial, mastering state and props is essential. During your React training, you’ll learn to build dynamic user interfaces by managing component data with state and passing information using props. These core concepts are vital for handling interactions and data flow in applications, making them crucial for effective, real-world React development.
Deploying React Apps :

In this React tutorial, you’ll learn to deploy applications using platforms like Netlify, Vercel, or GitHub Pages. The React training covers building production-ready apps, setting up hosting, and using version control with Git. These deployment skills are essential for showcasing your React development projects and preparing for real-world software engineering roles.
React Router and Navigation
This section of the React tutorial teaches you how to use React Router for creating single-page apps with multiple views. In React training, routing helps you build real-world applications like dashboards, blogs, and user management systems.
Real-Time Projects Using React
React tutorials in Chennai offer live project-based learning to help students experience real development workflows. These projects are modelled after actual business requirements. Some of the real-time React projects include:
- A React to-do app with task tracking
- A weather forecast app using React API integration
- A fully responsive React portfolio website
- An e-commerce site using React with Redux
- A blog platform using React and Firebase
These projects are designed to strengthen your understanding of React fundamentals and prepare you for real-world challenges in the software industry
Industry-Recognized Certification
Once you complete the React tutorial in Chennai, you’ll receive a certification that verifies your skills. This React certification is highly valuable when applying for jobs or internships. It proves that you have completed a structured training program and have practical experience working with React projects. Many institutes in Chennai provide globally recognized certificates after successful course completion and assessment.
100% Placement Opportunities :

A major benefit of joining a React tutorial in Chennai is the strong placement support. Many training institutes provide 100% placement assistance through mock interviews, resume building sessions, and direct referrals to partner companies. Chennai is home to many IT companies and startups actively hiring skilled React developers. Completing a React tutorial with placement support increases your chances of securing a high-paying job right after your training.
Learn React, Your Way – Flexible Timings That Fit You
React tutorials in Chennai offer flexible batch timings to fit your personal schedule. Whether you prefer weekday or weekend sessions, you can choose a React class that works best for you. These sessions include real-time coding practice with expert guidance to help you learn React efficiently. With hands-on training and convenient batch options, learning React becomes simple, stress-free, and flexible for every student.
Affordable React Learning for Every Aspiring Developer
Learning React in Chennai doesn’t have to be expensive. Most React tutorials are priced affordably, with flexible payment options, instalment plans, and special student discounts. The goal is to make high-quality React training accessible to everyone—whether you are a student, fresher, or working professional. Compared to other cities, Chennai offers excellent React training at a reasonable fee without compromising on quality.
Frequently Asked Questions (FAQs):
- Will I receive a certificate after completing the React tutorial at Marz Technology?
Yes. Upon finishing your React training, Marz Technology provides a React tutorial certificate recognized by recruiters and tech companies. - Is prior coding knowledge required to start React training?
Basic knowledge of JavaScript is useful, but this React tutorial is beginner-friendly and supports learners throughout their React development journey. - Are real-world projects part of the React training?
Yes, the React tutorial includes practical projects like a to-do app, portfolio, blog, and admin dashboard to strengthen your React development skills. - Is placement support offered after the React training?
Absolutely. Marz Technology supports React tutorial graduates with resume building, mock interviews, and job referrals for React development roles. - Can I become a full-stack developer with this React training?
Yes. Pairing this React tutorial with backend skills (like Node.js or .NET) prepares you for full-stack React development roles. - Will I learn how to connect React with APIs?
Yes, API integration is a key part of the React training, helping you build data-driven React development projects. - Is this React tutorial available online?
Yes. Marz Technology offers both online React training and offline classroom sessions, based on your location and preference. - Will this tutorial help me build a portfolio?
Yes. By the end of the React tutorial, you’ll have completed projects to showcase in your portfolio for React development roles.
BEST REACT TRAINING IN CHENNAI
Introduction
If you’re looking to start a successful career in frontend development, enrolling in the best React training in Chennai is the smartest move you can make. React is a powerful JavaScript library used by top companies to build modern, fast, and scalable web applications. The best React training in Chennai offers a hands-on learning experience through live coding, real-time projects, and expert mentorship. Whether you’re a student, working professional, or career switcher, this course provides the skills needed to become a job ready React developer. With practical sessions, certification, and placement support, the best React training in Chennai ensures you’re prepared for today’s tech-driven job market.
Why Learn React JS in 2025 :
React JS remains one of the most in-demand front-end frameworks in the software industry. With tech companies in Chennai and across India focusing on dynamic, responsive web applications, React offers developers the tools to build efficient, scalable user interfaces. Its component-based architecture, reusable code, and strong ecosystem make it a preferred choice for front-end development. Learning React in 2025 means gaining skills that are highly relevant for full-stack development, freelancing, or startup tech roles.
Features of Top React Training in Chennai :
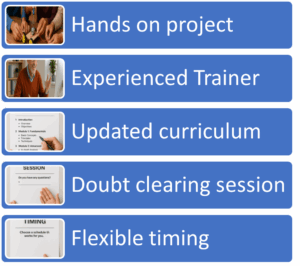
Project-Based Learning: What Makes It Effective :

- Theory is important, but project-based learning helps you understand React by using it. Reputed institutes in Chennai integrate mini-projects and capstone projects such as:
- This hands-on approach allows learners to apply concepts like JSX, props, state, lifecycle methods, and APIs in real time, making learning more meaningful and job ready.
Curriculum Breakdown :
A standard React JS course in Chennai will cover:
- JSX & Components: Building UI with custom components.
- Props & State: Managing dynamic data.
- Lifecycle Methods: Handling UI updates efficiently.
- Hooks: Writing cleaner, functional code.
- Routing with React Router: Creating multi-page apps.
- Redux (optional): Managing global state.
Student Reviews & Success Stories :
Success stories from previous learners often speak louder than advertisements. Many students who took React courses in Chennai have gone on to secure positions at top tech companies or have successfully freelanced. Some reviews highlight:
- Positive feedback on trainer support
- Appreciation for interview preparation
- Value of real-time project work
These testimonials are a great way to judge the quality and effectiveness of a training program.
React Training with Placement Support :
Many React training canters in Chennai offer placement assistance, which includes:
- Resume building support
- Mock interviews with technical panels
- Referrals to hiring companies
- Internship opportunities
While not every program guarantees placement, choosing a course with a proven track record increases your chances of landing a React developer job quickly.
Online vs Offline React Classes in Chennai :

Offline classes offer personalized attention and face-to-face trainer interaction, while online classes provide flexible timing, recorded sessions, and the convenience of learning from anywhere.
Why Choose the Best React Training in Chennai for a Career in Frontend Development :
When it comes to starting a career in frontend development, enrolling in the best React training in Chennai can make all the difference. React is one of the most in-demand technologies in 2025, used by top companies to build high-performance user interfaces. The best React training in Chennai offers a practical, hands-on approach where students build real-time projects, learn React hooks, master state management, and integrate APIs.
What sets the best React training in Chennai apart is the access to expert trainers, personalized doubt clearing, and project-based learning tailored for beginners and experienced developers. Whether you’re looking for online or classroom sessions, this training ensures your job-ready with a solid React portfolio. Plus, many institutes offer placement support and certifications, boosting your career prospects in the tech industry.
Top Reasons to Choose the Best React Training in Chennai :
If you’re looking to start a rewarding career in frontend development, enrolling in the best React training in Chennai is your first step toward success. React is widely used for building modern web applications, and the best React training in Chennai gives you hands-on experience with real-time projects, live coding sessions, and expert mentorship.
The course covers everything from components, props, and state to advanced topics like React Hooks, API integration, and deployment. What makes it the best React training in Chennai is the blend of theoretical learning and practical implementation, along with placement support, certification, and flexible online/offline class options—perfect for students and professionals alike.
Certification & Portfolio :
Upon course completion, students receive a globally recognized certification along with a GitHub portfolio showcasing real-time React projects. This combination boosts your credibility, making you stand out to employers during job applications and technical interviews.
Frequently asked questions (FAQ) :
- What are the prerequisites to join a React JS training course?
A basic understanding of HTML, CSS, and JavaScript is recommended before starting a React course. Familiarity with ES6 features like arrow functions, destructuring, and classes will be helpful. Some institutes offer a pre-course module for beginners. Anyone with a programming mindset can learn React with the right guidance. - How long does it take to complete a React JS course?
Most React courses in Chennai last between 1 to 3 months depending on the depth of the curriculum. Fast-track programs may finish in 4 weeks, while full stack React courses might take longer. Regular batches usually span 6 to 8 weeks with weekend and weekday options. Institutes also offer flexible timing for working professionals. - Will I get a certificate after completing the React training?
Yes, reputed training centres provide a course completion certificate. Some also offer internship certificates if you take part in projects. While certification helps, real value lies in the hands-on skills you gain. Employers prefer demonstrable knowledge over just a certificate. - Do training centres in Chennai offer placement support?
Many institutes offer placement assistance including mock interviews, resume preparation, and referrals. Though job placement is not guaranteed everywhere, top centres have tie-ups with IT companies. Students with strong project work often get internship or job opportunities through these platforms. - What makes Maria Academy Technology the best choice for React training in Chennai?
Maria Academy Technology offers expert trainers, real-time projects, live coding sessions, and placement support, making it one of the best choices for React training in Chennai. - Do you offer both online and offline React training in Chennai?
Yes, we offer flexible React training in Chennai through both online and offline modes to suit the schedules of students and working professionals. - Is there placement support after React training at Maria Academy Technology?
Yes, we offer complete placement assistance including resume building, mock interviews, and referrals to hiring partners for React development jobs. - Will I learn deployment as part of the React training?
Our React training in Chennai includes deployment of projects to Netlify, Vercel, and GitHub Pages—an essential skill for every frontend developer.
React.js Interview Question
What is React.js?
- React is a JavaScript library for building user interfaces, particularly single-page applications. It allows developers to create reusable UI components, manage state, and efficiently update the DOM.
What are Components in React?
- Components are independent and reusable bits of code. They serve the same purpose as JavaScript functions, but work in isolation and return HTML. Components come in two types,
Functional Components (with Hooks)
Class Components (with life cycle methods)
What is JSX?
- JSX combines HTML and JavaScript in a single syntax, allowing you to create UI components in React. It simplifies rendering dynamic content by embedding JavaScript expressions inside HTML-like tags.
|
Const element = <h1>Hello, world! </h1>; |
What is the Virtual DOM?
- The virtual DOM is a lightweight copy of the real DOM. React uses it to detect changes and update only the parts that changed, improving performance.
What is the Difference Between props and state?
props
- The Data is passed from one component to another.
- It is Immutable (cannot be modified).
- Props can be used with state and functional components.
- Props are read-only
state
- The Data is passed within the component only.
- It is Mutable (can be modified).
- The state can be used only with the state components/class component (Before 16.0).
- The state is both read and write
What are React Hooks?
- Hooks are functions that let you use state and lifecycle methods in functional components.
Common hooks: - useState(),useEffect(),useContext(),useRef(),useMemo().
What is the Difference Between Controlled and Uncontrolled Components?
- Controlled components: Form data is handled by React via useState().
- Uncontrolled components: Form data is handled by the DOM, accessed using useRef().
What is Functional Component?
- A functional component is a React component defined as a function that accepts props as an argument and returns JSX.
function Welcome(props) {
return <h1>Hello, props.name}</h1>;
}
What is Class Component?
- Class components are basically JavaScript Object Oriented classes with functions you can use to render React components. The advantage of using classes in React is that they contain lifecycle methods that identify when state changes and update the global state or the component state using the keyword this.
import React from “react”;
class Welcome extends React. Component {
render() {
return <h1>Hello, {this.props.name}</h1>;
}
}
What is the Purpose of keys in React lists?
- Keys help React identify which items have changed, are added, or are removed. They improve performance during list rendering.
{items. Map(item => <li key={item.id}>{item.name}</li>)}
What is Redux and why is it used with React?
- Redux is a state management library that stores the application’s state in a single global store, making state predictable and easier to manage across components.
What is React Context API?
- Context API provides a way to pass data through the component tree without having to pass props manually at every level (useful for themes, auth, etc.).
What is memoization in React?
- React provides React.memo() and useMemo() to optimize performance by preventing unnecessary re-renders.
What are higher-order components (HOC)?
- A Higher-Order Component is a function that takes a component and returns a new component. It’s used for reusing component logic.
| const EnhancedComponent = withAuth(Component);
|
Difference between useEffect and useLayoutEffect?
- useEffect: Runs after paint (asynchronously).
- useLayoutEffect: Runs before paint (synchronously), useful for layout-related changes.
What are the components of Redux?
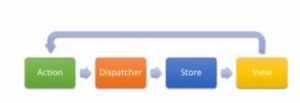
- Redux has three main components: the store (which holds the application state), actions (which describe what to do), and reducers (which define how the state changes in response to actions)
What is React Router?
- React Router library adds navigation and routing to single page React applications. It lets you define routes and navigate between different components without reloading the page.
Why do we need to React Router?
- React Router allows seamless navigation in a single-page application (SPA) by managing URL changes without refreshing the page, improving user experience and enabling multi-view applications.
How do you implement React routing?
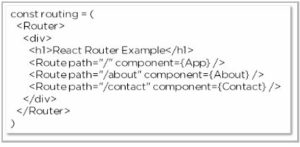
- To implement React routing, install react-router-dom, define routes using Route and Switch components, and use Link or NavLink to navigate between them without reloading the page. Considering we have the components App, About, and Contact in our application:
What is the difference between React and Angular?
- React is a JavaScript library, while Angular is a framework. React uses one virtual DOM and one-way data binding and has a small bundle size. Conversely, Angular uses real DOM and two-way data binding and is lighter and faster.
VITE REACT APP
Introduction :
In recent years, React has become one of the most popular JavaScript libraries for building user interfaces. However, traditional tools like Create React App (CRA) are starting to show their age — especially when it comes to speed and flexibility. Enter Vite (pronounced “veet”): a lightning-fast build tool created by Evan You (the creator of Vue.js).
Vite + React offers an incredible developer experience with instant hot module reloads, minimal setup, and ultra-fast builds. Whether you’re a beginner or migrating from CRA, this combo makes frontend development easier, faster, and modern.
Vite Advantages :
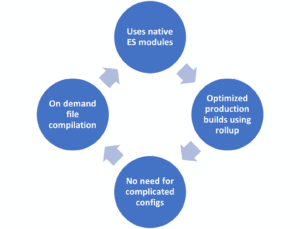
Getting Started with Vite + React :
Starting a new React project with Vite is surprisingly easy and fast. Vite provides a simple command-line setup that creates a ready-to-use React app with minimal boilerplate. Once the project is initialized, you only need to install dependencies and run a single command to start the development server. The app will launch almost instantly in your browser, with hot reload enabled by default. Unlike Create React App, Vite doesn’t require any complex configuration or ejecting to customize settings. This makes it especially attractive for both beginners and experienced developers.
-
Project Structure OverviewAdding React Router
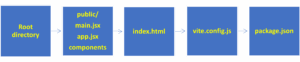
Routing is essential in any single-page application, and React Router is the standard solution. With Vite, integrating React Router is seamless. Once installed, it enables navigation between pages like “Home”, “About”, or “Contact” without reloading the browser. You define your routes in a central place, then create component files for each page. Using React Router with Vite makes the application feel dynamic and structured, giving users a smooth browsing experience while keeping your code modular and maintainable.
Useful Vite Plugins :
Vite offers a robust plugin system that enhances the development process. One essential plugin is @vitejs/plugin-react, which enables features like fast refresh and JSX transformation. You can also use plugins to add Progressive Web App (PWA) support, environment variable compatibility, or path aliasing for cleaner imports. These plugins are easy to install and configure through the Vite config file. Thanks to its ecosystem, Vite allows you to extend your app’s capabilities without sacrificing speed or simplicity.
Deployment Made Easy

Once your Vite React app is ready, deploying it online is quick and beginner-friendly. First, run the build command, which generates a dist folder containing all the optimized files your website needs. You can upload this folder to platforms like Netlify or Vercel for free. Simply connect your GitHub repository, click Deploy, and your app goes live within minutes. These platforms also support continuous deployment, meaning every time you push updates to GitHub, your live site updates automatically. It’s fast, hassle-free, and ideal for developers of all skill levels—especially beginners looking for a smooth deployment process.
Why Vite React is the Future of Frontend Development
Setting up a Vite React project is incredibly simple and fast, making it perfect for developers of all levels. With just a single terminal command, you can scaffold a brand-new Vite React app in seconds. The Vite React CLI creates the basic project structure instantly, allowing you to jump right into coding without any complicated setup. After installing dependencies, you can run the Vite React development server to preview your app live with lightning-fast hot module replacement (HMR). Vite React streamlines the entire process, offering a smooth, efficient, and modern approach to building frontend applications quickly and effortlessly.
Top 5 Features That Make Vite React Stand Out
Vite React app offers powerful features that boost performance and developer experience. It includes lightning-fast hot module replacement (HMR), built-in TypeScript support, JSX transformation, and optimized build outputs. Vite React also supports plugin integration for advanced customization needs. With its modern architecture and rapid build times, it stands out as one of the best tools for efficient and streamlined web development, making it a top choice for frontend developers.
Boost Your Performance with Vite React Optimization
Optimizing your Vite React app is essential for delivering a fast, smooth user experience. Vite React supports powerful techniques like code splitting, lazy loading, and asset preloading to ensure only necessary code is loaded at the right time. These features significantly improve performance and responsiveness. Vite’s built-in Rollup-based build system also enables advanced optimizations such as tree-shaking and code minification, reducing the final bundle size. These performance enhancements help your app load faster and run more efficiently. With minimal setup and configuration, Vite React makes performance tuning easy, making it ideal for building high-quality, production-ready web applications.
Building a Blog App Using Vite React
Learn to build a fast and modern blog app using Vite React, from project setup to adding components and styling. Vite React provides a smooth and efficient development experience, making it easy to create scalable and maintainable applications. With its lightning-fast performance and developer-friendly tools, building a blog becomes quick and enjoyable. By the end of this guide, you’ll feel confident using Vite React to build real-world web applications with clean structure and great performance.
Career Opportunities
Explore job roles such as Frontend Developer, React Developer, UI Engineer, and explain how Vite React enhances development speed and code quality. Mention companies looking for developers skilled in fast, modern tools like Vite React.
Top 5 Job Roles You Can Get with Vite React Skills
- React.js Developer
- UI/UX Frontend Developer
- Web App Engineer
- Full Stack JavaScript Developer
- Frontend Performance Optimization Specialist
Frequently asked questions (FAQ)
- What is Vite and Why use vite instead of creating React App (CRA)?
i) Vite is a fast frontend build tool that uses native ES modules for instant development and Rollup for optimized production builds. It makes modern web development lightning fast. ii)Vite starts quickly, reloads instantly, and avoids heavy config files. It offers a smoother and faster developer experience than CRA. - Is Vite only for React?
No. Vite supports various frameworks like Vue, Svelte, Preact, and plain JavaScript. It’s designed as a flexible, framework-agnostic tool.
- Is Vite good for large projects?
Yes, Vite handles large apps efficiently by processing only the modules in use. This results in faster development and better performance. - How do I deploy a Vite + React app?
Run the build command and upload the dist folder to platforms like Netlify or Vercel. Deployment is simple and doesn’t require extra setup. - Does Vite support TypeScript?
Yes. Vite has native TypeScript support, and you can start with a React + TypeScript template directly using the Vite CLI. - Can companies use Vite for production apps?
Absolutely. Many companies choose Vite for its speed, simplicity, and scalability. It’s suitable for enterprise-level web applications. - Why are companies switching from Webpack to Vite?
Companies prefer Vite for its faster builds, better HMR, and easier setup. It reduces developer wait time and improves team productivity.
React with .NET Training in Chennai
Introduction
Learning React with .NET equips you with in-demand skills that are highly valued by employers. Especially in a growing IT hub like Chennai, this combination opens doors to exciting career opportunities. This blog highlights the power of combining React and .NET, the advantages of mastering them together, and the best places for training in Chennai.
What is React :

- React is a popular JavaScript library developed by Facebook, widely used in modern web development. It plays a vital role in React with .NET training in Chennai, especially for building dynamic and responsive user interfaces. React uses reusable components, which helps developers write clean, modular, and maintainable code.
- One of the core features of React is the Virtual DOM, which updates UI elements efficiently, enhancing performance. React also offers Hooks for managing state and side effects without writing class components, making the development process simpler and more powerful.
- The training covers routing, API integration, and frontend-backend communication using React and .NET. Whether you’re a student or a working professional, mastering React through our React with .NET training in Chennai opens up vast career opportunities in the software industry.
What is .NET :
- .NET is a powerful development framework created by Microsoft, widely adopted for building secure, scalable, and high-performance backend services. In our React with .NET training in Chennai, .NET plays a crucial role in teaching how to develop enterprise-grade web APIs and server-side logic.
- With the evolution of ASP.NET Core, developers can now build cross-platform, lightweight, and lightning-fast backend applications that seamlessly integrate with modern frontend libraries like React.
- .NET supports the C# programming language, offering strong typing, asynchronous programming, and seamless database connectivity through Entity Framework Core. Built-in security features such as authentication and authorization make .NET an ideal choice for enterprise and commercial applications.
- During the React with .NET training in Chennai, students will learn how to connect their React frontend with a .NET backend, handle data securely, and deploy full-stack apps. Learning .NET as part of React with .NET training in Chennai significantly boosts your backend development skills and job prospects.
Reason behind combining React with .NET:
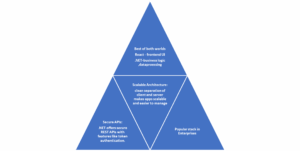
Learn in Chennai:
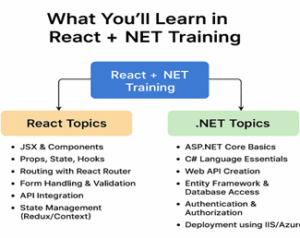
Chennai is one of India’s top IT cities with thousands of software companies and startups. Many training institutes offer full-stack development courses, and there’s high demand for React + .NET developers in local companies. Plus, training fees are more affordable compared to other metro cities.
Who Should Join
- Final year students looking for placement skills
- Working professionals shifting to full-stack roles
- Beginners interested in web development
- Anyone who wants to learn high-paying, in-demand tech stack
Career Opportunities
After completing the React with .NET training in Chennai, you become eligible for various high-demand roles such as Full-Stack Developer, Frontend Developer (React), Backend Developer (.NET Core), Web Application Developer, and Software Engineer (React + C#). This training equips you with both frontend and backend expertise, making you a versatile candidate in the modern software development industry.
Projects in React with .NET Training in Chennai
During the React with .NET training in Chennai, students will work on:
- Employee Management System
- E-commerce Product Dashboard
- Real-time Chat App
- Online Course Booking System
Enroll Now – React with .NET Training in Chennai
Boost your career with in-demand full-stack skills. Join our React with .NET training in Chennai today and get trained by industry experts. Limited seats available – start your full-stack journey now!
Frequently Asked Questions
- What is React with .NET training?
React with .NET training is a full-stack development course where you learn React for building frontend interfaces and .NET (C# and ASP.NET Core) for backend services. This helps you build complete web applications with both client and server-side logic. - What are the job roles after this course?
After completing the course, you can apply for roles like Full-Stack Developer, React Developer, .NET Developer, or Web Application Developer. These roles are in high demand in today’s job market. - Do training centers provide placement support?
Yes, reputed institutes offer placement support. This includes resume building, mock interviews, job referrals, and connecting you with IT hiring partners. - Can I take this course online?
Absolutely. Many training centers in Chennai offer both online and offline options. Online courses include live sessions, recorded videos, and interactive doubt-clearing. - What is the average salary after completing this course?
Freshers can expect ₹3–5 LPA. With 2–3 years of experience, full-stack developers skilled in React and .NET can earn between ₹8–15 LPA or higher. - Will I get hands-on project experience during the training?
Yes, most training centers include real-time projects in their curriculum. You’ll build complete applications using React for the frontend and .NET for the backend, giving you practical experience and a portfolio to showcase to employers.
REACT FULL STACK DEVELOPMENT
Introduction:
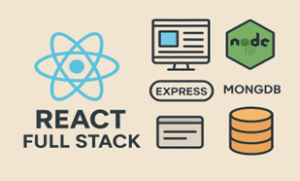
React and .NET online training offers industry-recognized certification that boosts your resume and job prospects. Through hands-on learning, you’ll build and deploy full-stack applications using React for the frontend and .NET for the backend. These real-world projects enhance your portfolio and showcase your practical skills. The training prepares you for roles such as Full Stack Developer, Software Engineer, or .NET Developer. It’s a powerful step toward career growth in today’s competitive tech job market.
What is React Full Stack Development:
React Full Stack Development involves using React for building responsive and dynamic user interfaces on the frontend, while connecting it with powerful backend technologies like Node.js, Express.js, and MongoDB. This combination is commonly known as the MERN stack (MongoDB, Express, React, Node.js). Using React on the client side allows for fast, interactive interfaces, while Node.js handles server-side operations efficiently. Since both frontend and backend use JavaScript, developers benefit from a unified language throughout the entire application. This makes development faster, more consistent, and easier to manage, making React Full Stack Development a popular choice in the modern web ecosystem.
Why Choose React for Full Stack:
React is great for full stack development because it promotes the use of reusable components, which simplifies coding and improves project structure. One of the major advantages of React in full stack development is its strong ecosystem, including libraries like Redux, React Router, and development tools like Vite or Webpack. These tools make the development process smoother and more efficient. Additionally, React works seamlessly with REST APIs, allowing easy communication with backend services. This makes React full stack development ideal for building modern, scalable web applications that are fast, responsive, and easy to maintain using the JavaScript stack.
Frontend with React:
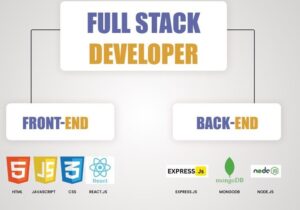
In full stack apps, React is ideal for building fast, responsive, and interactive frontends. React allows developers to create dynamic, real-time user interfaces without the need to reload the page. Features like JSX and the Virtual DOM make React efficient and easy to work with, enhancing the overall user experience. When used in full stack development, React ensures the frontend is smooth, flexible, and perfectly integrated with backend APIs, making it a top choice for modern web applications.
Backend Integration with React:
Even though React is primarily a frontend library, it integrates seamlessly with backend tools like Node.js and Express. In React full stack development, the frontend built with React communicates with the backend using HTTP requests, such as GET, POST, PUT, and DELETE, to fetch or update data from the server. The key advantage is that both React and backend technologies like Node.js use JavaScript, which makes the development process smoother and more consistent. This shared language simplifies data flow between client and server. As a result, react full stack development becomes efficient, fast, and developer-friendly for building modern web apps.
Database Connectivity in React Full Stack
In React Full Stack projects, databases like MongoDB are used to store and manage data, while React displays this data on the user interface through backend APIs. The backend, typically built with Node.js and Express, handles API requests, authentication, and session management. React fetches and updates data in real time, ensuring the UI stays in sync with the database. This setup allows for secure login, protected routes, and seamless user interactions in dynamic, data-driven applications.
Benefits of React Full Stack Development
React Full Stack Development brings several benefits. One of the biggest is that it allows developers to use a single programming language—JavaScript—across the entire stack. This makes development faster and less complex. React also promotes modularity, which helps in organizing code better. Additionally, full stack projects using React are highly scalable and suitable for enterprise-level applications. The real-time capabilities of React combined with powerful backend tools offer the best of both world.
Who can take React Full Stack Development
React Full Stack Training is ideal for:
- Engineering or IT students (like B.Tech/B.E in CSE, IT, AIML, etc.).
- Freshers preparing for job placements.
- Frontend developers learning backend skills.
- Backend developers who want to master React.js.
- Anyone who wants to become a Full Stack Developer.
No prior experience is needed—just basic HTML, CSS, and JavaScript knowledge is enough to get started.
Career Opportunities after React Full Stack Training
After completing your React Full Stack Training, you’ll be eligible for job roles like:
- React Developer.
- Full Stack Web Developer
- MERN Stack Developer
- Frontend Engineer
- Java Scripts Developer
- Software Engineer (Web)
Top Skills You Need for React Full Stack Development
To master React Full Stack Development, you need to learn React components, state management, routing, and backend tools like Express, MongoDB, and REST APIs. React Full Stack Development also requires Git, version control, deployment skills, and strong problem-solving abilities. Learning these essential skills will make your React Full Stack Development journey smoother and more rewarding.
Best Project Ideas for React Full Stack Development
Working on real projects is key to mastering React Full Stack Development. Popular project ideas include task managers, e-commerce platforms, social media apps, and job portals. These projects help you understand React Full Stack Development from database to UI. Building full stack apps gives you the confidence and portfolio to land your first job.
Frequently asked questions
- What is React Full Stack Development?
React Full Stack Development involves creating both the frontend and backend of web applications. React is used for the user interface, while Node.js, Express, and MongoDB handle backend logic and data storage. - What technologies are used in React Full Stack?
Common tools include React for frontend, Node.js and Express for backend processing, and MongoDB for database storage. These technologies work well together using JavaScript. - How does Express.js support backend development?
Express is a simple web framework built on Node.js. It makes it easier to manage routes, APIs, and server responses in a clean and organized way. - Why is MongoDB preferred in full stack development?
MongoDB is a NoSQL database that stores data in a flexible, JSON-like format. It fits perfectly with JavaScript and works smoothly with Node.js applications. - Can I use MySQL instead of MongoDB?
Yes, you can use MySQL, which is a relational database. However, MongoDB is often preferred in JavaScript-based projects for its simplicity and speed. - Is learning only React enough for a job?
React alone is good for frontend roles, but full stack knowledge makes you more competitive. It opens up opportunities to work on complete web solutions.
React and .NET Online Training
Introduction:
React and .NET online training offers industry-recognized certification that boosts your resume and job prospects. Through hands-on learning, you’ll build and deploy full-stack applications using React for the frontend and .NET for the backend. These real-world projects enhance your portfolio and showcase your practical skills. The training prepares you for roles such as Full Stack Developer, Software Engineer, or .NET Developer. It’s a powerful step toward career growth in today’s competitive tech job market.
Why Choose React and .NET Online Training:
React and .NET online training offers a powerful combination of frontend and backend technologies. React, developed by Facebook, allows you to build fast, responsive user interfaces. On the other hand, .NET, developed by Microsoft, provides a robust backend framework for scalable and secure web applications. Through online training, learners gain hands-on experience in both technologies, forming a full-stack ecosystem that powers modern web development.
Why React and .NET Online Training is the Perfect Combo for Full Stack Development:
React and .NET online training gives you the best of both frontend and backend technologies. With React handling user interfaces and .NET managing secure backend logic, you gain full stack skills that are in high demand. React and .NET online training prepares you to build enterprise-grade web apps with speed, structure, and scalability. Whether you’re a beginner or experienced developer, React and .NET online training helps bridge the gap between design and functionality.
Who Should Enroll :
Our React and .NET online training is ideal for:
- College students pursuing IT or Computer Science
- Job seekers preparing for full-stack developer roles
- Working professionals who want to switch to web development
- Entrepreneurs building web-based products
Key Benefits of React and .NET Online Training:

Success Stories: How Online Training in React and .NET Transformed My Career:
React and .NET online training completely transformed my career and gave me the direction I needed. Before joining the training, I found full-stack development confusing and lacked clarity in both frontend and backend concepts. However, the structured and practical approach of the React and .NET online training helped me master essential technologies like React, ASP.NET, and REST APIs. I built real-world projects that boosted my confidence and skills. The flexibility of the online format allowed me to learn at my own pace. Thanks to this React and .NET online training, I secured a full-stack developer job and started a successful career.
How React and .NET Online Training Helped Me Get Placed
I joined React and .NET online training during my final year of college. The projects and mock interviews in the React and .NET online training program gave me the confidence to crack my technical rounds. I built a full stack project using React for frontend and .NET for APIs. Thanks to React and .NET online training, I landed a developer job with a leading IT company.
Top Companies Hiring After React and .NET Online Training
Completing React and .NET online training opens doors to top recruiters like TCS, Infosys, Accenture, and Wipro. These companies prefer candidates with hands-on skills in both frontend and backend. React and .NET online training gives you that dual-edge expertise. With projects, GitHub portfolios, and certifications, React and .NET online training prepares you for real-world job roles and competitive placements.
Real-World Projects You’ll Build
During the React and .NET online training, you’ll build projects like:
- A job portal application
- A task management tool
- A social media clone
- An e-commerce website with admin and user dashboards
Benefits of Certification
- Industry Recognition: Stand out in job interviews
- Practical Projects: Build real-world apps
- Portfolio-Ready: Deploy full-stack applications
- Career Boost: Land roles like Full-Stack Developer, Software Engineer, .NET Developer
Frequently asked questions (FAQ)
- What is React and .NET online training?
React and .NET online training by Maria Academy Technology is a full-stack development course that teaches you how to build modern web applications using two powerful technologies: React for frontend and ASP.NET Core for backend. The training is designed for beginners, students, and professionals aiming to develop job-ready skills for the IT industry. It includes live classes, practical sessions, and real-time projects to ensure strong hands-on experience.
- Do I need prior coding knowledge to join?
No, prior coding experience is not mandatory. Maria Academy Technology’s React, and .NET online training starts from the basics and gradually moves to advanced concepts. Even if you’re a beginner, you’ll be guided through each step with proper explanations, hands-on tasks, and mentorship. A basic understanding of HTML or C# is a plus, but not compulsory.
- Will I receive a certificate after completion?
Yes. Upon completing the course, Maria Academy Technology provides an industry-recognized certificate in React and .NET full stack development. This certificate can be added to your resume and LinkedIn profile to showcase your skills and training background. It helps in demonstrating your technical readiness during job applications or interviews.
- Will Maria Academy Technology help with placements?
Yes. Maria Academy Technology provides placement support to students who complete the training.
This includes Resume preparation, Interview guidance and mock interviews, Project portfolio review Job referrals and placement drives through partnered companies.
Although job placement is not guaranteed, many students from previous batches have successfully secured jobs with support from the placement team.
- Is the placement support available for freshers?
Absolutely. Maria Academy Technology’s React, and .NET online training is especially beneficial for freshers. The structured learning, real-time projects, and personalized interview prep make it easier for fresh graduates to land their first IT job in frontend, backend, or full stack development.
- Can I access the training materials after the course ends?
Yes. Students get lifetime access to course materials, source code, and project files via the LMS (Learning Management System). This ensures you can revise, practice, and improve your skills even after training completion.
MVC ARCHITECTURE
Introduction :
- In the world of software development, maintaining clean, modular, and scalable code is a top priority. One architectural pattern that has stood the test of time for achieving this is the MVC architecture. Whether you’re building a small website or a large-scale enterprise application, using MVC architecture ensures a more structured and maintainable development process.
- This blog will dive into the details of MVC architecture, its core components, advantages, how it works in various programming environments (especially .NET), and why it’s widely adopted in modern application development.
MVC Architecture:
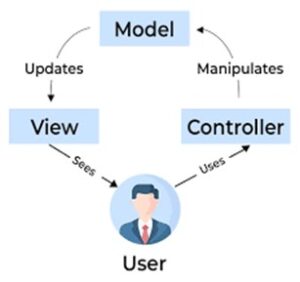
MVC architecture, short for Model-View-Controller, is a design pattern that separates an application into three interconnected components:
- Model – Handles data and business logic.
- View – Manages how data is presented to the user.
- Controller – Processes user input and updates the Model and View.
By keeping these responsibilities separate, MVC architecture promotes organized code, easier debugging, and more efficient collaboration among developers.
History of MVC Architecture :
The concept of MVC architecture originated in the 1970s with Trygve Reenskaug, who introduced it for use in Smalltalk applications. It quickly became a foundational pattern for GUI applications and, later, web applications. Over the years, it evolved and was adopted by modern frameworks like:
- ASP.NET MVC (Microsoft)
- Laravel (PHP)
- Django (Python)
- Ruby on Rails (Ruby)
Today, developers across all languages continue to use MVC architecture to maintain clean, scalable codebases.
Breaking Down the MVC Components

I. Model in MVC Architecture
The Model is the core of the application’s logic. It directly manages the data, rules, and logic of the application. It responds to requests from the controller and updates the data layer.
In MVC architecture, the Model:
- Represents the business rules and data.
- Communicates with the database (e.g., via ORM like Entity Framework).
- Does not interact with the UI directly.
II. View in MVC Architecture
The View is responsible for displaying the data provided by the Model in a user-friendly manner. It’s you the user interface of the application.
In MVC architecture, the View:
- Is made of HTML, CSS, and JavaScript in web development.
- Only presents data, it doesn’t process it.
- Changes when the Model data changes.
III. Controller in MVC Architecture
The Controller acts as an intermediary between the Model and the View. It processes incoming requests, calls model methods, and determines which view to display.
In MVC architecture, the Controller:
- Handles user input and interaction.
- Interprets the input and updates the Model accordingly.
- Selects the appropriate View for the response.
How MVC Architecture Works Together
- A user interacts with the application’s UI (View), like clicking a button.
- The Controller receives this input, processes it, and makes decisions.
- The Controller interacts with the Model to get or update data.
- Once the Model processes the data, the Controller selects a View to display the updated data.
- The View presents the data back to the user.
Advantages of Using MVC Architecture:
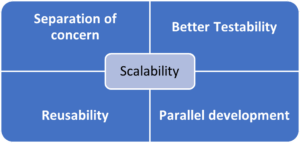
- Separation of Concerns-Each component has its distinct role, making the codebase cleaner and easier to manage.
- Better Testability-Since components are isolated; unit testing and debugging are much easier.
- Scalability-Large-scale projects benefit from MVC architecture because of its modularity and support for multiple developers working independently.
- Reusability-Views and Models can be reused across different Controllers or even projects.
- Parallel Development-Different team members can work on the Model, View, and Controller simultaneously without interfering with each other.
MVC Architecture in ASP.NET
ASP.NET MVC is one of the most popular frameworks implementing the MVC pattern.
- Model: Uses classes to represent application data and business logic.
- View: Uses Razor syntax to dynamically generate HTML based on model data.
- Controller: Handles HTTP requests, calls business logic, and returns a View or JSON.
ASP.NET MVC enhances the MVC architecture experience with built-in support for routing, authentication, filters, and more.
Use Cases of MVC Architecture
- Web Applications: Ideal for clean, responsive interfaces.
- Enterprise Apps: Large-scale systems benefit from its maintainability.
- Mobile Apps: Some mobile frameworks like iOS use MVC patterns.
- APIs: RESTful APIs can be built using MVC frameworks like ASP.NET Core MVC.
Best Practices in Implementing MVC Architecture
- Keep Controllers slim and shift business logic to Models or services.
- Avoid business logic in Views.
- Use View Models to pass specific data from Controller to View.
- Make Models reusable and testable.
- Use dependency injection in Controllers for better flexibility.
When followed properly, these practices elevate the performance and maintainability of any project built using MVC architecture.
Real-World Example of MVC Architecture
Let’s take a simple example: a Login Page in a web application.
- View: Displays the login form with fields for username and password.
- Controller: Receives the user’s input when they press “Login,” validates it, and sends it to the Model.
- Model: Checks the credentials in the database and returns whether the login is successful or not.
- Controller: Based on the result, the controller sends the user to a success or error View.
This modular flow makes it easier to update the login design (View), logic (Model), or flow (Controller) independently.
Frequently Asked Questions (FAQs)
- What is MVC architecture in simple terms?
MVC architecture is a design pattern that separates an application into three parts: Model (data), View (UI), and Controller (logic), making development cleaner and more organized. - Why is MVC architecture important in web development?
It improves maintainability, scalability, and code reusability, making it easier for developers to work on large-scale applications. - Is MVC architecture only used in ASP.NET?
MVC architecture is used across various technologies, including Java, Python (Django), PHP (Laravel), and JavaScript (Angular, though it follows MVVM more closely). - How does MVC improve application performance?
By separating concerns, developers can optimize each layer (UI, business logic, data) individually, leading to better performance. - Which programming language is best to implement MVC?
C# (with ASP.NET) is one of the best and most popular languages for implementing MVC architecture. - Does MVC architecture work with APIs?
Many RESTful APIs are developed using MVC-style frameworks like ASP.NET Core MVC. - Where can I learn MVC architecture with certification and placement?
Platforms like Marz Technology offer certified training programs in ASP.NET MVC with hands-on projects and 100% placement support, ideal for freshers and working professionals.
ASP.NET Core Training Online
Introduction:
ASP.NET Core training online is a great starting point for anyone looking to become a web development expert. ASP.NET Core is a modern, high-performance, open-source framework by Microsoft used to build dynamic websites, web APIs, and microservices. With the flexibility to learn from anywhere, ASP.NET Core training online is ideal for students, professionals, and career switchers.
The training covers essential backend skills like API development, database integration with Entity Framework Core, and authentication using Identity and OAuth. You’ll also work on real-time projects and learn how to integrate with frontend tools like Angular or React. With ASP.NET Core training online, you gain practical, job-ready skills for a successful tech career.
Overview of ASP.NET Core:
- ASP.NET Core is a free, open-source, cross-platform web framework developed by Microsoft. It is designed for building modern, high-performance web applications, RESTful APIs, and microservices. Unlike traditional ASP.NET, ASP.NET Core runs on Windows, Linux, and macOS, making it ideal for cross-platform development.
- In ASP.NET Core training, learners are introduced to its architecture, modular components, and lightweight runtime. The framework offers built-in support for dependency injection, middleware pipelines, and asynchronous programming—ensuring scalability and maintainability.
- It supports Razor Pages, MVC, and Web APIs in a unified environment. Developers can easily integrate ASP.NET Core with modern frontend tools like Angular or React. It also works seamlessly with Entity Framework Core for data access.
- ASP.NET Core training emphasizes real-time project development, deployment on cloud platforms like Azure, and best practices in security and performance. Its flexibility, speed, and strong Microsoft ecosystem make it a top choice for modern web development.
Benefits of ASP .NET Core:
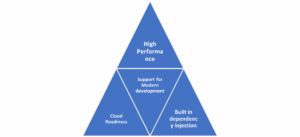
Project Structure and Configuration:
Understanding the structure of an ASP.NET Core project is essential. ASP.NET Core training introduces the standard folder layout and configuration files like appsettings.json, Program.cs, and Startup.cs. Configuration in ASP.NET Core is highly flexible, supporting JSON, environment variables, and secret management. Learners gain hands-on experience managing settings for development, staging, and production environments during their ASP.NET Core training.
Razor Pages vs MVC in ASP.NET Core
- In ASP.NET Core training, developers learn both Razor Pages and MVC (Model-View-Controller). Razor Pages are simple and page-focused, ideal for small web apps, while MVC offers full control and is suited for complex, scalable applications.
- The training covers when to use each approach, with hands-on practice in routing, data handling, and architecture design. By the end of the ASP.NET Core training, learners can choose the right pattern based on project needs.
Dependency Injection and Middleware
- In ASP.NET Core, Dependency Injection (DI) is built-in, helping developers write clean, testable, and modular code by managing dependencies effectively. Middleware allows customization of the request pipeline for tasks like logging, authentication, and error handling.
- In ASP.NET Core training, learners practice implementing DI for service management and building custom middleware to improve app performance and security. Together, they form the backbone of scalable and maintainable ASP.NET Core applications.
Building Secure REST APIs
A key part of ASP.NET Core training is learning how to build and secure REST APIs, which are essential for modern web and mobile applications. Learners start by setting up API controllers, defining endpoints using attribute-based routing, and handling HTTP methods like GET, POST, PUT, and DELETE. The training emphasizes clean input validation, model binding, and proper use of status codes to ensure API reliability. Security topics such as HTTPS enforcement, Cross-Origin Resource Sharing (CORS), data sanitization, and centralized exception handling are covered in detail. By the end of the ASP.NET Core training, students can create robust, scalable, and secure APIs suitable for real-world production environments.
Integration with Front-End Frameworks (Angular, React)
Modern web apps are often built using a combination of frontend and backend technologies. ASP.NET Core training teaches how to integrate the backend with Angular or React using REST APIs. Learners understand how to serve SPA (Single Page Application) apps, handle routing, and manage authentication between ASP.NET Core and frontend frameworks.
I. Authentication Using Identity & OAuth:
Security is a major focus in ASP.NET Core training. ASP.NET Core Identity provides user registration, login, and role management. OAuth integration allows social logins (Google, Facebook) and secure token-based access. The training shows how to implement both local and external authentication mechanisms using ASP.NET Core.
II. Using Entity Framework Core with ASP.NET Core:
- Entity Framework Core (EF Core) is the preferred ORM in ASP.NET Core training. It allows developers to manage database operations using C# code. Learners perform migrations, CRUD operations, and LINQ queries. Real-time projects help in understanding database-first and code-first approaches within the ASP.NET Core ecosystem.
- Hosting & Deploying ASP.NET Core Apps
Deployment is a crucial step covered in ASP.NET Core training. Students learn how to publish applications to IIS, Docker containers, or cloud platforms like Microsoft Azure. Topics include environment configurations, CI/CD pipelines, and monitoring. This makes ASP.NET Core training complete, from development to live deployment.
Real-world Projects For Practical Learning
- Blog application with user authentication
- Inventory management system with database CRUD operations
- Social media clone using ASP.NET Core MVC and Razor
- API integration for weather, maps, or payment services
Certification Roadmap
ASP.NET Core training helps prepare learners for Microsoft certifications like “Azure Web Developer” and “.NET Web App Developer.” The course includes mock exams, study guides, and practice tests to ensure you’re fully equipped for the certification process, boosting both your knowledge and job-ready credentials.
Who Can learn ASP.NET Core Training :

Frequently Asked Questions (FAQS)
- What is ASP.NET Core training online?
ASP.NET Core training online is a remote learning program that teaches how to build dynamic, secure, and scalable web applications using ASP.NET Core. It’s conducted through live sessions or self-paced videos. - Will I be able to build real-world web applications during this training?
Absolutely. You’ll work on real-time projects such as blog platforms, booking systems, admin dashboards, and full-stack applications that mirror industry needs. - What tools and technologies will I learn besides ASP.NET Core?
You’ll work with Entity Framework Core, SQL Server, Visual Studio, Azure Cloud, Git, REST APIs, and frontend libraries like React or Bootstrap (in some advanced courses). - Will I receive a certificate after completing ASP.NET Core training at Maria Academy Technology?
Yes. After successfully completing the ASP.NET Core training, Maria Academy Technology provides an industry-recognized course completion certificate, which adds value to your resume and professional profile. - Is the certificate from Maria Academy Technology valid for job applications?
Absolutely. The certificate is recognized by recruiters and can be used to showcase your skills in ASP.NET Core during job interviews or LinkedIn profiles. - Does Maria Academy Technology offer placement assistance?
Yes. Maria Academy Technology offers placement support which includes resume building, mock interviews, and job referrals to partner companies looking for skilled ASP.NET Core developers.
Dot Net Core Training
Introduction :
Dot Net Core training is highly sought after by developers aiming to build modern, high-performance, and cross-platform applications. Developed by Microsoft, Dot Net Core is open-source and ideal for creating cloud-based web apps, IoT solutions, and enterprise systems. The training covers essential backend development skills, including C#, MVC architecture, RESTful APIs, and Entity Framework Core. It also prepares learners to integrate with frontend tools like Angular or React. Whether you’re a beginner or an experienced programmer, Dot Net Core training equips you with real-world skills and project experience, opening doors to roles in full-stack, backend, or cloud-based development.
Why Choose Dot Net Core Training :
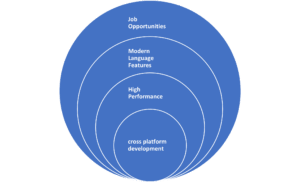
Real-world Projects
- E-commerce web application using .NET Core and Entity Framework
- RESTful API for a booking system (Hotel, Ticket, Appointment)
- Integration of payment gateway APIs in Dot Net Core
- Cloud deployment using Azure App Services
- Inventory Management System
- Learning Management System (LMS)
- Job Portal Platform
Industry-Relevant Skills
- Cross-platform development (Windows, macOS, Linux)
- Microservices architecture and containerization (Docker)
- Integration with front-end frameworks like Angular or React
- Version control with Git and CI/CD setup
Benefits of Learning Dot Net core Training :

I) Career Opportunities
Dot Net Core training unlocks a wide range of career opportunities in today’s tech-driven job market. Trained professionals can pursue roles such as .NET Developer, Backend Developer, Full-Stack Developer, or even Azure Cloud Engineer. With the growing demand for cross-platform, scalable, and cloud-ready applications, companies—especially startups, MNCs, and cloud-based product firms—are actively seeking developers with Dot Net Core expertise. This framework’s versatility in handling web development, APIs, microservices, and cloud integration makes it highly valuable. Whether you’re starting your career or upskilling, mastering Dot Net Core significantly enhances your job prospects and long-term growth in the IT industry.
II) Dot Net Core with Entity Framework Core: A Powerful Duo
Dot Net Core training, learners dive into Entity Framework Core (EF Core), a powerful Object-Relational Mapping (ORM) tool that simplifies database operations using C#. EF Core allows developers to interact with databases using code instead of writing raw SQL, streamlining development and reducing errors. Through hands-on training, learners practice key features like code-first migrations, model creation, data seeding, and performing CRUD operations using LINQ queries. This integration between Dot Net Core and EF Core helps in building fast, maintainable, and scalable applications. Mastering this combination prepares developers to confidently handle real-world, data-driven projects across various industries.
III) Mastering RESTful APIs in Dot Net Core
REST APIs are the foundation of most modern web and mobile applications, and a key focus area in Dot Net Core training. The training teaches how to design and develop efficient APIs using ASP.NET Core, covering essential topics like routing, controllers, request/response handling, and proper use of HTTP methods and status codes. Learners also explore middleware components for logging, error handling, and performance tuning. Security is a core aspect, including techniques like token-based authentication, authorization, and CORS configuration. Mastering REST API development in Dot Net Core enables you to build scalable, secure, and maintainable backend services for real-world applications.
IV) Integrating Dot Net Core with Frontend Technologies
Full-stack development is highly in demand across the tech industry, and Dot Net Core training often includes comprehensive modules on integrating with popular frontend frameworks like React, Angular, or Vue. Learners are taught how to build complete applications by connecting dynamic user interfaces with powerful Dot Net Core backends. This includes consuming REST APIs, handling JSON data, managing authentication tokens such as JWT, and ensuring secure client-server communication. Through hands-on projects, students gain practical experience in building scalable, responsive, and modern web applications. This full-stack capability significantly boosts your job readiness and opens broader career opportunities.
V) Cloud Deployment Using Azure in Dot Net Core Training
One of the key advantages of Dot Net Core training is gaining hands-on experience with cloud deployment, especially using Microsoft Azure. Developers learn how to host web applications on Azure App Services, configure Azure SQL Databases for scalable data storage, and implement CI/CD pipelines using tools like Azure DevOps or GitHub Actions for automated deployment. This training ensures that applications built with Dot Net Core are cloud-ready, secure, and optimized for production environments. By mastering cloud integration, developers become capable of building modern, distributed systems that meet today’s enterprise and startup needs, enhancing both job readiness and real-world project expertise
VI) Dot Net Core Microservices Architecture for Scalable Apps
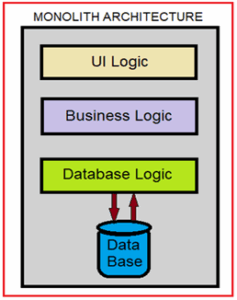
Modern enterprise applications increasingly rely on microservices architecture to achieve better scalability, flexibility, and maintainability. In Dot Net Core training, learners are introduced to the fundamentals of designing and implementing microservices using ASP.NET Core. The training covers key concepts such as breaking down monolithic applications, setting up API gateways, deploying services using Docker containers, and enabling smooth communication between independent services through protocols like HTTP or GRPC. By working on real-world scenarios, learners understand how to build distributed systems that can scale efficiently and be maintained independently. Mastering microservices with Dot Net Core equips developers for complex, high-performance enterprise environments.
Frequently Asked Questions (FAQs)
- What is Dot Net Core training and who is it for?
Dot Net Core training is a course designed to teach developers how to build modern, scalable, and high-performance applications using Microsoft’s .NET Core framework. It’s ideal for students, software developers, and professionals looking to upskill. - Do I need programming experience before joining Dot Net Core training?
Yes, basic knowledge of programming, especially in C# or object-oriented programming, is recommended. Some courses offer beginner modules to help you get started. - Will I get certified after Dot Net Core training?
Dot Net Core training programs prepare you for Microsoft certifications like “.NET Developer” or “Azure Developer Associate,” and also provide a recognized course completion certificate upon finishing. - What kind of projects will I work on during Dot Net Core training?
You’ll build real-time web applications such as e-commerce platforms, API-based services, content management systems (CMS), and integrate third-party services like payment gateways. - Will I receive a certificate after completing Dot Net Core training at Maria Academy?
Yes. After successfully completing the Dot Net Core training, Maria Academy provides an industry-recognized course completion certificate that strengthens your resume and validates your skills. - Is the certificate from Maria Academy valid for job applications?
Absolutely. The certificate is well-recognized by employers and can be showcased in job applications, LinkedIn profiles, and during interviews to highlight your Dot Net Core expertise. - Does Maria Academy offer placement assistance?
Yes. Maria Academy provides placement support, including resume preparation, mock interviews, and job referrals to partner companies hiring for Dot Net Core roles. - Do I need to attend classes in person?
No. Maria Academy offers both online and offline Dot Net Core training, so you can choose the format that best fits your schedule and learning style.
DOT NET COURSE
Introduction
- In today’s competitive IT world, it’s essential to master technologies that are scalable, reliable, and widely used. Microsoft’s .NET framework continues to dominate the development ecosystem with its flexibility and power. A Dot Net course can be the ideal path to enter or grow in this space.
- Whether you’re a student, jobseeker, or working professional, a Dot Net course will empower you with the knowledge to build enterprise-grade applications, websites, APIs, and cloud-based solutions. With companies across the world using .NET for their critical systems, the demand for skilled .NET developers continues to rise.
Benefits of a Dot Net Course
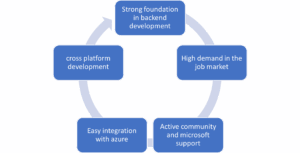
Dot Net Course with Blazor: The Future of Web Development
Many advanced Dot Net courses now include Blazor, a powerful framework for building interactive web UIs using C#. A Dot Net course that teaches Blazor gives you full-stack capabilities with just one language. With Microsoft pushing for Blazor adoption, a Dot Net course with Blazor is a smart choice for modern, scalable web development.
What You’ll Learn in a Dot Net Course
1.C# Programming Basics and Advanced Concepts
2.Web Application Development with ASP.NET
3.MVC Architecture and API Development
4.Database Integration with SQL Server
5.Deployment on IIS and Azure
6.Secure Authentication and Role Management
7.Real-time Project Building and Debugging
Topics Covered in a Dot Net Course
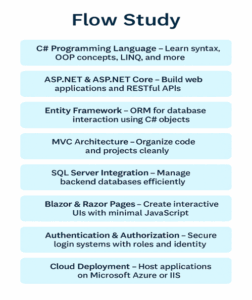
Dot Net Course vs Java Course: Which One Should You Choose
If you’re confused between a Dot Net course and a Java course, consider your goals. A Dot Net course is best suited for those who want to build enterprise-level applications on the Microsoft stack. It’s widely used in banking, insurance, and government sectors. With cross-platform support and strong community backing, a Dot Net course gives you great flexibility and job prospect.
Why a Dot Net Course is the Smartest Investment for Your Software Career
Enrolling a Dot Net course in Maria Academy is one of the best decisions you can make for a successful career in software development. A Dot Net course equips you with in-demand skills like C#, ASP.NET, MVC, and Entity Framework, making you job-ready in a short time. Whether you’re a beginner or looking to upskill, a Dot Net course helps you build strong backend applications, APIs, and enterprise-level web apps. Most Dot Net course programs also include project-based learning, certification, and placement support. With the tech world moving fast, taking a Dot Net course keeps you competitive and future ready.
Why a Dot Net Course is Ideal for Working Professionals
A Dot Net course is perfect for working professionals looking to upskill or switch to development roles. Maria Academy, Dot Net course offers flexible timings, online learning, and project-based modules tailored to real job roles. By completing a Dot Net course, professionals can enhance their career and move into higher-paying development jobs with confidence.
Career Opportunities After a Dot Net Course
After completing a Dot Net course, you open doors to a wide range of job opportunities in the software industry. You can pursue roles such as .NET Developer, where you’ll work on building and maintaining web or desktop applications using C# and ASP.NET. If you’re skilled in connecting with databases and APIs, you can become a Backend Developer. With added frontend knowledge, the Full Stack Developer role becomes a great option. You can also work as a Software Engineer or move into a Cloud Developer position if your Dot Net course includes Azure integration, expanding your career scope even further.
How to Build a Resume After Completing a Dot Net Course
After finishing your Dot Net course, your resume should highlight your technical skills, projects, and certifications. Mention your expertise in C#, ASP.NET, MVC, and SQL Server. Include projects done during the Dot Net course, and link to your GitHub portfolio. A well-structured resume post-Dot Net course increases your chances of getting shortlisted for interviews.
Certification
A Dot Net course certification validates your skills in C#, ASP.NET, and backend development, making you stand out in the job market. It boosts your chances of getting hired by top companies and increases your salary potential. With global recognition, this certification opens doors to roles like .NET Developer, Full Stack Developer, and Cloud Engineer. It’s the perfect step for students, freshers, and working professionals aiming to build a strong IT career.
Frequently Asked Questions
- What is a Dot Net course?
A Dot Net course teaches you how to build robust web, desktop, and cloud applications using Microsoft’s .NET framework. You’ll learn technologies like C#, ASP.NET, .NET Core, and SQL Server, which are essential for backend and enterprise-level development. A good Dot Net course also includes hands-on projects to strengthen your practical skills.
- Do I need prior coding knowledge to join?
No, most Dot Net courses are beginner-friendly and start with the basics of programming and logic building. However, if you have prior knowledge of programming, it can help you learn faster. The course gradually moves to advanced topics like API development, database handling, and deployment.
- What job roles can I get after completing a Dot Net course?
Completing a Dot Net course opens doors to job roles such as .NET Developer, Full Stack Developer, Backend Developer, and Software Engineer. These roles involve working with technologies taught in the course, such as ASP.NET, MVC, and C#. Many companies prefer candidates with .NET skills for enterprise-level application development.
- Is certification provided after the course?
Yes, Maria Academy offer a course completion certificate at the end of the Dot Net course. Some also guide you in preparing for official Microsoft Certifications like the “Microsoft Certified: .NET Developer” badge, which adds extra value to your resume and helps in job placements.
- Can I learn Dot Net online?
Yes, Maria Academy offer Dot Net courses online, with both live interactive sessions and recorded video options. Online Dot Net courses provide flexibility for working professionals and students, allowing you to learn from anywhere without compromising on quality or mentorship.
- Is .NET only for Windows?
No, with the advent of .NET Core and .NET 6/7/8, you can now build cross-platform applications that run on Windows, Linux, and macOS. This makes Dot Net development more flexible and suitable for a wide range of software projects in different environments.
- Will I get placement support?
Yes, Maria Academy provide dedicated placement support, including resume building, mock interviews, career counselling, and referrals. Some even conduct Job Offers and connect you with partner companies. This increases your chances of landing a job after completing the Dot Net course.
DOT NET DEVELOPER COURSE
Introduction to Dot Net Development
Dot Net Developed by Microsoft is a flexible and powerful platform used for building a wide range of applications—from web apps to mobile and desktop solutions. Known for its strong performance, security features, and support across multiple operating systems, Dot Net is widely adopted in both startups and enterprise environments. This course introduces you to the essential tools and frameworks within the Dot Net ecosystem, helping you gain a solid foundation to build dynamic and scalable software
Why Choose a Dot Net Developer Course
In 2025, Dot Net continues to be a go-to technology for companies building robust, enterprise-grade solutions. With the evolution of .NET 8 and increased adoption of Microsoft Azure, the demand for Dot Net developers is higher than ever. Enrolling in a structured course helps learners stay current with industry trends, sharpen their backend development skills, and position themselves for roles in high-growth tech companies.
What Will You Learn in the Dot Net Developer Course
The course takes a hands-on approach to teach core development skills using Microsoft technologies.
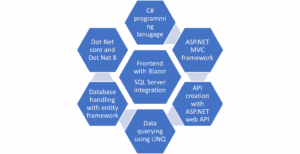
The curriculum is designed to make you confident in both front-end and back-end development using Dot Net.
I) How Dot Net Training Prepares You for Cloud and Azure Development
Dot Net training includes modules on Azure cloud services, deployment, and containerization. As cloud computing grows, Dot Net training with Azure skills
gives you a competitive edge. You’ll learn how to host web apps, manage APIs, and scale services using cloud tools—all as part of your Dot Net training journey in Maria Academy.
II) Hands-On Projects and Real-World Applications
In our Dot Net training, you’ll work on real-time projects that reflect actual industry tasks, helping you build strong, job-ready skills. Projects include building an online store with product management and checkout features, developing a basic HR management system to handle employee data and roles, and creating a REST API for a student portal with login, attendance, and results modules. You’ll also connect weather APIs to build a live weather dashboard. These hands-on projects in the Dot Net training not only reinforce what you learn but also give you the confidence to handle real-world development challenges in the workplace.
iii) Who Can Enroll in This Course
This course is ideal for a wide audience, including:
- Undergraduate IT and computer science students
- Recent graduates seeking to specialize in development
- Professionals looking to upgrade or switch careers
- Anyone with a basic understanding of programming who wants to explore software development
No previous experience in Dot Net is required to get started.
Expert Trainers with Real-Time Industry Experience at Maria Academy
Our instructors are experienced working professionals who have built and deployed real-world applications using the Dot Net platform. They bring valuable industry insights into every session, combining theoretical knowledge with practical application. Through live coding sessions, real-time demonstrations, and hands-on problem-solving, they help bridge the gap between textbook concepts and actual software development. Their guidance aligns with current industry standards, ensuring you’re learning what employers expect. With personalized mentorship and practical examples, you’ll gain not just technical skills but also the confidence to tackle real development challenges. This makes your Dot Net training both career-focused and industry-relevant.
Updated Curriculum with Latest Dot Net Features
Technology evolves rapidly, and our Dot Net training evolves with it to keep you up to date. Dot Net training, you’ll gain hands-on experience with the latest tools and frameworks, including Dot Net 8, Blazor Framework, and Azure cloud services. Every module in the Dot Net training is aligned with real-world projects and industry needs. By working with modern technologies, this Dot Net training ensures your skills are job-ready and competitive. Whether you’re a student or professional, our Dot Net training helps you build confidence and stay ahead in the fast-changing world of software development.
Dot Net Training for Beginners:
If you’re a new to programming, Dot Net training is a great place to start. The Dot Net training covers basic programming concepts, C# syntax, object-oriented principles, and gradually builds up to web development with ASP.NET. By the end of the Dot Net training, even beginners can confidently build and deploy full web applications.
Course Certification & Career Support
Upon course completion, you’ll receive a certificate that validates your skills. In addition, career support includes:

These services aim to boost your chances of getting hired faster in top tech companies.
Flexible Timings and Learning Options
We understand that every learner has a different schedule, which is why our training program offers complete flexibility. You can choose between weekday or weekend classes, based on your availability. Sessions are available in the morning, afternoon, or evening, allowing both students and working professionals to learn without disrupting their daily routine. Additionally, we offer the convenience of in-person and online learning formats, so you can join from anywhere or attend classes at the center. This flexible structure ensures that everyone, regardless of their time constraints, can benefit from the training and progress at their own pace.
Career Opportunities After the Course
Completing this course opens the door to various job opportunities in the tech industry. Some of the roles you can pursue include

With your new skills, you’ll be equipped to work in both service-based and product-based company
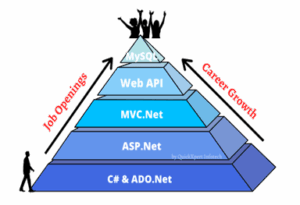
Frequently Asked Questions (FAQs)
- What is the Dot Net Developer Course all about?
The course focuses on building software using Microsoft’s Dot Net framework. You’ll learn C#, ASP.NET, .NET Core, and tools to create web and desktop applications. It’s ideal for aspiring developers who want real-world project experience.
- What are the career opportunities after this course?
After completing the course, you can apply for roles like Dot Net Developer, Backend Developer, Full Stack Developer, or Software Engineer.
- Are the classes online or offline & are you receive a certificate after the course?
Maria Academy offers both online and offline classes, depending on the course and student preference. Yes, students receive a certificate upon successful completion of the course.
- Do I need any prior programming experience to join?
Not necessarily. The course starts with the basics of programming and gradually moves to advanced Dot Net concepts. Anyone with a willingness to learn can join.
- How long does the course take to complete?
i) The course lasts between 2 to 4 months depending on your chosen batch (weekday/weekend). It includes theory, hands-on projects, and assessments.
ii) Yes, we provide career support through mock interviews, resume building, and referrals to hiring partners. Our aim is to help you get job ready.
Dot Net Training Online Free With Certification
Introduction
Imagine launching your software development career without spending a single rupee—no tuition fees, no expensive textbooks, and no lengthy prerequisites. That’s the promise of Dot Net Training online free with certification training online free with certification. Designed for students, job seekers, and career changers, these programs combine high-quality technical education with hands-on practice and industry-recognized credentials—all at zero cost.
This blog walks you through everything you need to know: the power of the .NET platform, the structure of free training programs, the kinds of projects you’ll build, and how certified training through platforms like Marz Technology can prepare you for real job opportunities and interviews.
Understanding the Dot Net Framework Training Online Free with Certification.
- .NET is Microsoft’s powerful development platform that supports the creation of applications across multiple domains—web, desktop, mobile, cloud, and IoT. Built to be fast, scalable, and secure, .NET supports modern programming techniques and allows developers to write code in languages like C#, VB.NET, and F#.
- From enterprise-grade applications to small business websites, .NET is trusted across industries. With tools like ASP.NET, Entity Framework, and Web API, developers can create robust backends, dynamic user interfaces, and responsive web services with ease.
Structured Path to Career Building through Free Dot Net Training Online free with Certification Training
Free .NET training courses are not random tutorials—they are step-by-step, structured programs that mirror the demands of real software development roles. These trainings help beginners grow into confident developers by building essential skills and completing capstone projects.
Most platforms break down the learning process into modules, giving learners clarity on what to expect next and how each topic builds upon the previous. This roadmap makes it easier to stay focused and reach specific skill goals.
Curriculum Overview of Dot Net Training Online Free With Certification Training
C# Programming Basics
Syntax, variables, conditional statements, loops, and methods
Object-Oriented Programming
Principles like encapsulation, inheritance, interfaces, and abstraction
ASP.NET and Web Forms
Building responsive and interactive web applications using server-side tools
Database Management with ADO.NET and Entity Framework
Performing CRUD operations and designing relational databases
Web API and MVC Development
Creating RESTful APIs, understanding MVC architecture, and routing logic
Capstone Project and Certification
Applying everything learned in a final project to qualify for certification.
Job-Oriented Training in Maria Academy
Maria Academy provides job-oriented.NET training. With practical project experience, this course covers fundamental subjects like C#, ASP.NET, MVC, Entity Framework, and.NET Core. To prepare students for the workforce, the training consists of practical exercises, résumé writing, and practice interviews. Maria Academy guarantees that students acquire the technical abilities required to thrive in the modern IT job market by emphasizing both theory and real-world application. It is the best option for people who want to begin a career as.NET developers because students who successfully complete it earn a certification and assistance with job placement.
Real-World Projects to Practice Skills
- Student Registration System – Showcases database handling and form validation
- To-Do List Web App – Emphasizes CRUD operations using MVC pattern
- Online Bookstore – Combines user login, product listing, and payment flow
- Weather Dashboard – Uses an external API to display dynamic weather data
- Admin Dashboard – Demonstrates user role-based authentication and analytics
Advantages of Choosing Free Dot Net Training Online Free with Certification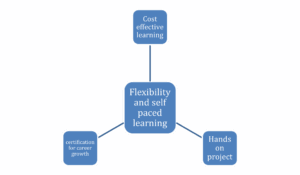
Zero Investment, High Returns
Free courses reduce the entry barrier into tech and offer professional-grade content without any fees.
Learn on Your Terms
Courses are available 24/7, making it easier to study alongside work, college, or other commitments.
Industry-Valued Certificates
Most programs offer verifiable certificates upon successful course completion—great for resumes and interviews.
Project-Based Learning
The best way to learn coding is by doing. These programs prioritize practice through guided exercises and full projects.
Interview Readiness through Dot Net Training Online Free with Certification Training
These training programs are carefully designed to match the types of questions and challenges candidates face in technical interviews. You’ll cover:
i) Programming logic with C# syntax
ii) Web application patterns using ASP.NET MVC
iii) Backend logic using Entity Framework and SQL
iv) API development and deployment strategies
Recognized Certifications after Completing Free Dot Net Training Online Free with Certification Training
- Microsoft .NET Fundamentals
- Microsoft Certified: Azure Developer Associate
- LinkedIn Skill Assessments for C# and ASP.NET
- Marz Technology Dot Net Training online free with certification Developer Certificate
- Combined Free Course + Paid Certification Exam (optional)
Platform Features by Marz Technology
Marz Technology provides structured Dot Net Training online free with certification training both online and offline. Their offerings include:
1.Expert-led sessions with live mentoring
2.Job-oriented projects and real-time case studies
3.Mock interviews, resume building, and GitHub profile reviews
4.100% placement support for qualified learners
5. Access to course materials even after course completion
Frequently Asked Questions:
- What is Dot Net Training online free with certification training online free with certification?
It is a free online course where you learn .NET development and get a certificate after successful completion. - Is it really free?
Yes, many platforms like Microsoft Learn and Marz Technology offer free training. - Do I need prior programming experience?
No, most free courses are beginner-friendly. - How long does the training take?
Typically 4 to 8 weeks, depending on the depth of the course. - Is the certificate valuable for jobs?
Yes, especially when issued by reputed providers like Microsoft or Marz Technology. - Does Marz Technology offer offline classes too?
Yes, they offer both online and offline classes with live mentoring. - Can I access course material after completion?
Yes, most platforms allow lifetime access to study material. - What is MVC in .NET?
MVC (Model-View-Controller) is a design pattern used in ASP.NET for clean architecture and better maintainability. - Is there placement assistance after training?
Yes, institutes like Marz Technology provide 100% placement support. - What kind of projects will I work on?
You’ll build web applications, APIs, and database-integrated solutions similar to real-world projects.
Dot Net Frame Work Training
Understanding Requirements and Program Specifications:
I’ll monitor my progress on the Upskilled Student Portal or training plan and let you know when I’m ready. I will let you or the RTO know if I will be absent or late.
How to Learn:
The core of the.NET Framework is the Common Language Runtime (CLR)! It functions as a virtual machine that executes your code and handles critical functions like thread management, memory management, and security.
Code that is compiled and executed inside the CLR is referred to as Managed Code. if the CLR is not in charge of it, we refer to it as Unmanaged Code.
It is an excellent method of comprehending how everything functions.
Benefits Of Dot Net Core :
-
Robust Windows Integration.
Extensive use of Windows OS technologies, such as registry access, WPF, COM, and Windows Forms.
Perfect for creating Windows-based desktop apps and business software. -
APIs and Rich Libraries.
comprehensive class libraries covering a wide range of topics, including network programming, cryptography, XML handling, file I/O, and more.
reduces the need for third-party libraries, which speeds up development. -
Stable and mature.
It is highly proven and dependable because it is utilized in millions of enterprise applications.
-
Effective Development Resources.
Completely compatible with Visual Studio, it provides top-notch design, profiling, and debugging tools (e.g., WinForms/WPF designer).
-
Interoperability of Languages
supports several languages, including F#, VB.NET, and C#.
Code written in various languages can communicate with one other without any problems thanks to CLR (Common Language Runtime). -
Managed Code and Automatic Memory Management:
Because applications operate in a managed environment, garbage collection (GC) is used to automatically manage memory.
lowers the possibility of pointer-related problems and memory leaks. -
Inverse Compatibility
On the.NET Framework, many older enterprise apps are constructed.
Apps with strong backward compatibility are guaranteed to function normally without significant modifications. -
Exception handling and strong security:
Ideal for important commercial applications, it has extensive security and error-handling capabilities.
Reasons For Course Boot Camp:
Fast Learning: Master .NET in weeks, not months.
Job-Ready Skills: Learn C#, .NET Core, ASP.NET, APIs, and databases.
Hands-On Projects: Build real-world apps to boost your portfolio.
Modern Tech: Focus on the latest .NET (Core/.NET 6+).
Career Opportunities: Become a .NET Developer, Backend or Full-Stack Engineer.
Expert Guidance: Learn from industry pros with mentorship.
Certification: Earn credentials to showcase your skills.
Course Highlights:
compatibility, pre-made class libraries, inherent security measures, Scalability, compatibility across platforms, encouragement of cloud-based development, Numerous dot net programmers, incorporation of further Microsoft technologies, excellent performance
.NET Trainee profile:
- Trained in C#, ASP.NET Core, and Entity Framework
- Hands-on experience in building web applications and REST APIs
- Knowledge of OOP, MVC architecture, and CRUD operations
- Worked with SQL Server and LINQ for data access
- Familiar with Visual Studio, Git, and Postman
- Built mini projects during training (e.g., task manager, login system)
- Understanding of frontend basics (HTML, CSS, JavaScript)
- Exposure to authentication, form validation, and dependency injection
- Trained to work in agile environments with version control
Application:
Multi-Language Support:
The.NET Framework has many advantages, including support for C# and Visual Basic, among other programming languages. You can use the same fantastic libraries and tools regardless of the language you are most comfortable with.
Cross-Platform Compatibility (via .NET Core and Mono):
.NET began on Windows, but with the help of.NET Core and Mono, it has developed to run on a variety of operating platforms. This makes it quite useful for developing applications that are compatible with any platform!
Large and Active Developer Community:
The developer community for the.NET Framework is active and encouraging. It is now simpler than ever to work with others and solve challenges because so many individuals are offering their resources and expertise.
Security Features:
Your applications deserve to be safe and sound! The framework includes a range of security features like code access security and digital signatures to help protect your projects from potential threats and vulnerabilities.
Productivity:
Because of the abundance of pre-built libraries and tools available, .NET facilitates faster development. By doing this, you may avoid becoming mired down in monotonous duties and instead concentrate on developing incredible business logic.
You can use Visual Basic, F#, or C# to construct programs. Code is compiled into a format known as Common Intermediate Language (CIL) after it has been written. To ensure your project runs smoothly, the Common Language Runtime (CLR) then takes over and converts that CIL into machine code.
Advantages of Dot Net Framework:
- Platform Independence:
Applications that use.NET Core (now.NET 5 and later) can run on Linux, macOS, and Windows, guaranteeing cross-platform compatibility. - Language Interoperability:
Supports multiple programming languages like C#, VB.NET and more.
Developers can use different languages within the same application. - Robust Security:
Integrated Code Access Security (CAS) and Role-Based Security.
Provides secure execution and authentication features. - Automatic Memory Management:
The Garbage Collector (GC) automatically manages memory, preventing memory leaks and optimizing performance.
Frequently Asked Question:
- What is the Framework for.NET?
A Microsoft platform for creating and executing Windows programs, including desktop, web, and service-based apps, is the.NET Framework. - Which are the.NET Framework’s primary components?
The Common Language Runtime, or CLR, controls memory, security, and execution. A group of reusable classes and APIs is called the Framework Class Library, or FCL.
Web apps are made with ASP.NET.
NET: For database interaction and data access. - What is the difference between .NET Framework and .NET Core?
Windows-only, the.NET Framework is utilized for desktop and legacy applications.
A cross-platform, quicker, and more contemporary programming platform is.NET Core (.NET 5+). - What is the CLR?
In the.NET environment, the Common Language Runtime manages memory, security, exception handling, and code execution. - What is CTS and CLS?
All the data types used in.NET are defined by the Common Type System (CTS).
The Common Language Specification, or CLS, is a collection of guidelines that languages must adhere to be compatible with.NET. - What is the difference between value types and reference types?
Data is directly stored by value types (such as int and struct).
A reference to the data is stored by reference types (such as class and array). - What is the.NET Framework’s ASP.NET?
The.NET Framework’s web development module, ASP.NET, is used to create dynamic web services and applications.
Asp.Net Web Forms
ASP.NET web forms are used in the construction of various web forms. The Visual Studio includes web forms, which are a component of the ASP.NET web application.
With ASP.NET, you may create code that can be reused elsewhere without having to start from scratch. Working more effectively and saving time are two benefits of reusability for developers.
Report on Web Forms
Web application development is made easier with ASP.NET’s various features and tools. Some of the online form’s features.
Controls for the server.
The Mater Pages.
Protection.
Features of Asp .Net Web:
(i) Event-Driven Programming Model
- Makes use of a desktop application-like event-driven architecture.
- Click, Text Changed, Selected Index Changed, and more events are supported.
(ii) Rich Server Controls
- Among the built-in controls are Dropdown List, Grid View, Button, and Textbox.
- Facilitates the use of third-party UI controls for improved UI design.
(iii) View State Management
- Uses View State to preserve the control state between post backs.
- Assists in form data management without the need for explicit session management.
Applications of Asp .Net Web:
Applied to the development of interactive and responsive websites.
Provides real-time data updates for database-driven applications.
Websites, blogs, and e-learning platforms are a few examples.
Enterprise Applications & Business Solutions
- Suitable for sophisticated business logic and large-scale enterprise applications, it supports multi-tier design for maintainability and scalability.
- CRM (Customer Relationship Management) and ERP (Enterprise Resource Planning) systems are two examples.
E-Commerce & Online Shopping Platforms
- It gives e-commerce sites a safe and expandable environment.
- Shop carts, order management, and payment gateway connection are all supported.
- Auction systems and retail websites like Amazon.
Content Management Systems (CMS)
- Help in developing platforms that facilitate the management and distribution of digital material. For example, ASP.NET is utilized in the development of DNN (DotNetNuke), Sitecore, and Umbraco.
Social Media & Community Portals
- Features like user authentication, messaging, and media sharing are supported. It can be used to create social networking websites with real-time conversation.
- For instance, professional networking sites and discussion forums.
Web APIs & Microservices
- RESTful APIs are made for online and mobile applications using the ASP.NET Core online API.
- Microservices architecture is ideal since it facilitates the exchange of data in JSON and XML formats.
- Examples include IoT applications, third-party integrations, and mobile app backends.
Financial & Banking Applications
- Offers strong authentication and security capabilities like OAuth, JWT, and multi-factor authentication; used for safe banking, financial transactions, and stock trading platforms.
- There are a few examples of Fintech applications, trade platforms, and online banking portals.
Healthcare & Hospital Management Systems
- Facilitates integration with electronic health records (EHRs) and medical equipment, aids in scheduling, billing, and patient record management.
- Telemedicine platforms and hospital management systems are two examples
Government & Public Sector Applications
- Applied to public administration, government services, and citizen portals.
Digital identification platforms, tax filing systems, and e-governance websites are a few examples.
Ideal Candidate for a Trainee Role
- An entry-level developer learning to create dynamic, data-driven online applications with ASP.NET online Forms is known as an ASP.NET Web Forms Trainee.
- To create interactive web applications, the learner must comprehend state management, server controls, and the event-driven model.
- Newly graduated IT and computer science students.
- Basic familiarity with HTML/CSS, SQL, and C#; a desire to learn web development
Skills And Knowledge Areas:
Fundamentals of ASP.NET Web Forms:
- Knowledge of the Page Lifecycle and Event Handling of the ASP.NET architecture.
- Proficiency with Web Forms Controls Dropdown List, Grid View, Textbox, Button)View State, Session, Application, and Cookie State Management.
- Authorization and User Authentication (ASP.NET Identity)
Frontend Development:
- Fundamental JavaScript, HTML, and CSS, Using AJAX to Update Partial Pages
Enhancing the user interface with jQuery or Bootstrap
Database & Data Access:
- fundamental understanding of SQL Server, Using SQL Data Source and Object Data Source for Data Binding with ADO.NET and Entity Framework
Web Development Best Practices:
- Security Procedures for Debugging and Exception Handling (SQL Injection, XSS Prevention)
- Fundamental Understanding of IIS Deployment
Development Tools & Frameworks:
- Visual Studio (used for debugging and development).
- Management Studio for SQL Server (SSMS).
- Source Control (Azure DevOps, GitHub, and Git)
Frequently asked question:
- What is ASP.NET?
Microsoft created the ASP.NET web framework to help developers create contemporary web services and applications. It may be used to construct dynamic web pages and APIs using HTML, CSS, JavaScript, and C#. - What are the different types of ASP.NET applications?
NET Web Forms: an older model based on an event-driven user interface.
Model-View-Controller (MVC) is a pattern for structured development in ASP.NETNET Core: A cutting-edge, cross-platform framework with excellent performance.
One tool for creating RESTful services is the ASP.NET Web API.
ASP.NET Blazor: This uses Web Assembly to enable C# to run in the browser. - What is Blazor in ASP.NET?
Blazor is a new ASP.NET framework that uses Web Assembly to enable C# to run in the browser in place of JavaScript. - How do I deploy an ASP.NET application?
IIS (Internet Information Services) – For Windows hosting.
Azure App Services – Cloud hosting by Microsoft.
Docker Containers – Containerized deployment.
Self-Hosting (Kestrel) – For ASP.NET Core applications. - What databases are supported in ASP.NET?
ASP.NET supports multiple databases,
SQL Server
MySQL
PostgreSQL
MongoDB (NoSQL)
SQLite - How do I secure an ASP.NET Web Application?
Use HTTPS for secure communication.
Implement authentication & authorization (JWT, OAuth, Identity).
Validate input to prevent SQL Injection and XSS attacks.
Use Data Protection API for encryption. - What is View State in ASP.NET Web Forms?
View State is a hidden field used to store page control values between Post backs. It helps maintain state without using sessions or databases but can increase page size. - What are Session and Application State in ASP.NET?
Session State – Stores user-specific data across multiple requests.
Application State – Stores global data shared by all users.
Best React Course in Coimbatore
Introduction to Best React Course in Coimbatore :
A robust open-source JavaScript toolkit called React was created by Facebook specifically for single-page applications to create dynamic and responsive user interfaces. By enhancing code structure and maintainability, this course at Maria Academy in Coimbatore equips you to design reusable user interface elements.
For improved performance and quick rendering, React courses make use of a virtual DOM. Manage complicated application states more easily because to its component-based architecture and unidirectional data flow, which also support JSX, which enables developers to write HTML-like syntax directly within JavaScript.
With support from Meta and a thriving global community, the best React course is a fundamental component of contemporary web development. This course will equip you with the knowledge and abilities to create professional-caliber web apps with assurance.
Project Management in React course:
In React development Course, project management is the process of organizing, planning, and carrying out your best React course projects to guarantee clear architecture, productive teamwork, and seamless development cycles.
Folder structure is the arrangement of elements, pages, resources, and services to improve maintainability and scalability.
State Management Using programs like Zustand, Redux, or the Context API to manage the state of an application.
Routing Using React Router to manage page navigation.
Code management includes using Git for version control, ESLint, and Prettier to ensure that the code is clear and consistent.
Dependency management is the effective use of npm or yarn to manage packages and libraries.
Build Tools To set up and execute React projects, use tools such as Vite, Webpack, or Create React App (CRA).
Testing and Debugging Testing in React ensures components work as expected using tools like Jest and React Testing Library. Debugging involves using browser ,React Developer Tools, and error boundaries to identify and fix issues.
Essential Elements of React course:
Component-based architecture : the best React course makes it possible to create user interfaces using modular and reusable components, improving the scalability and maintainability of code.
JSX, or JavaScript XML, enhances readability and development ease by enabling you to write HTML-like syntax inside JavaScript.
Virtual DOM : React makes use of a Virtual DOM to effectively update just the UI elements that have changed, guaranteeing optimal performance and a seamless user experience.
Unidirectional Data Flow: This type of data flow makes it easy to understand how an application behaves and streamlines state management.
Declarative UI: React does not require human DOM manipulation; instead, it automatically refreshes the user interface in response to changes in the underlying data.
Hooks: Developers can handle state using React hooks like use State and UseEffect ().
What You Will Learn:
Develop Your Front-End Development Skills: Master front-end engineering techniques with an emphasis on using React to create scalable and effective web applications. To improve maintainability and scalability, learn how to design user interfaces with modular and reusable components.
build Up Create-React-App Toolchain: Use the Create React App toolchain to demonstrate how to build up React applications.
Learn to design Reusable Logic: Improve code structure and efficiency by learning to design shared and reusable logic. In order to improve maintainability and scalability, learn how to design user interfaces with modular and reusable components.
Develop Interactive, Data-Driven Web Apps: Build responsive, dynamic, and quick web apps that manage user interactions and real-time data.
Provide a smooth user experience by developing interactive, fluid single-page applications (SPAs).
build Up Create-React-App Toolchain: Use the Create React App toolchain to demonstrate how to build up React applications. Developing dynamic components that communicate with backend services and APIs for real-time data exchange is known as API integration.
Future Scope of React course:
- One of the most well-liked and frequently utilized JavaScript libraries in contemporary web development is React Course.
- It is the preferred option for businesses in the IT sector due to its capacity to create dynamic, scalable, and effective user interfaces.
- React Course is perfect for small and large-scale applications because of its component-based architecture, which guarantees consistency and excellent speed.
- With a robust developer community and an extensive ecosystem of tools, libraries, and tutorials, React keeps developing, giving developers the tools they need to take on new tasks and keep abreast of market developments.
- Because businesses are constantly looking for engineers with expertise in this cutting-edge technology, mastering React gives up a world of lucrative job options.
Frequently Asked Questions (FAQs)
- Does Maria Academy provide placement?
We have excellent relationships with over 700+ top MNCs, including SAP, Oracle, Amazon, HCL, Wipro, Dell, Accenture, Google, CTS, TCS, and IBM.
More than 3500 students were placed last year in India and globally.
Maria Academy conducts development sessions including mock interviews, presentation skills to prepare students to face a challenging interview situation with ease. - Is Maria Academy certification good?
Certification is accredited by every major global company.
Maria Academy is a unique Authorized react course certification. - Work On Live Projects?
Maria Academy in Coimbatore offers coding labs, hackathons, and industry-relevant projects that will provide you practical experience. By allowing you to publish your work on GitHub, develop a solid project portfolio, and confidently showcase your abilities in interviews, this practical exposure greatly improves your chances of getting hired. - Who are the Trainers?
All the instructors at Maria Academy in Coimbatore are seasoned IT specialists with nine to twelve years of work experience. To provide a top-notch, hands-on learning experience, the academy has specially trained these subject matter specialists. - What is React used for in web applications?
A JavaScript package called React is used to create dynamic, interactive, and fast web apps, especially Single-Page apps (SPAs). It enables developers to refresh the user interface without requiring a complete page reload, manage state effectively, and construct reusable UI components. Building scalable, responsive, and contemporary frontends that can easily interface with backend services and APIs is made simple using React. - What is Node Package Manager (npm)?
One essential tool for developing React apps is npm (Node Package Manager). It oversees the dependencies, libraries, and packages needed for your React project. Installing, updating, and managing the tools required to create and maintain React apps is made simple for developers with npm.
Best React Course in Karaikudi
An Introduction to React Course at Karaikudi Maria Academy:
For single-page applications, Maria Academy in Karaikudi offers a great best React course that gives you a strong foundation for developing dynamic and responsive user interfaces.
Facebook’s open source React framework makes it possible for programmers to design reusable UI elements, greatly improving code structure, scalability, and maintainability.
Students will get knowledge on how to use Reacts Virtual DOM to enhance web applications’ functionality and speed in this course. JSX, a syntactic extension that enables programmers to write HTML-like code directly within JavaScript, is also covered in the course.
Project management in React development at Maria Academy in Karaikudi:
project management in React development Course at Maria Academy in Karaikudi ,is to sustain, structure, and organize the development process so that developers have a seamless workflow.
Folder Structure Maria Academy stresses that to arrange parts, resources, services, and pages, a clear and uniform directory structure is essential. This aids developers in keeping their work readable and scalable as they work on it.
State Management: Using Reacts Context API, Zu stand, or Redux, the course would probably cover effective state management strategies that let programmers keep the application’s state consistent throughout.
Principal Aspects of REACT, Architecture Based on Components: Construct contemporary user interfaces by developing reusable, modular components.
JSX (XML for JavaScript) For UI code that is clear and legible, write HTML-like syntax directly in JavaScript.
Performance is enhanced by virtual DOM : which optimizes rendering by only updating modified portions of the real DOM.
Data Flow in One Direction :keeps information moving in a single path, which facilitates state management and debugging.
Declarative User Interface : React automatically refreshes the view when you define UI behaviour based on the state of the application. Use State, use Effect, and other hooks are used to control logic in functional components. Robust Ecosystem To improve workflow, use tools like Next.js, Redux, and React Router.
Support for Multiple Platforms : Create mobile applications with React Native, which takes best React course outside of the browser. Acquire knowledge about front-end development with an emphasis on scalable application architecture at Maria Academy.
What You Will Learn at Maria Academy:
- Create dynamic user interfaces and reusable components. Create data-driven, dynamic, and quick web apps. Learn to use React course to create master Single Page Applications (SPAs).
- To rapidly scaffold and set up React apps, use Create React App (CRA). Use dynamic components to communicate with backend services and APIs. Create interactive forms and common logic. Utilize React Router to implement routing in Spas. Create isomorphic apps, where the client and server run the identical code.
- Use Redux and middleware such as Redux Thunk or Redux Saga to learn state management (optional). Use Jest, Enzyme, and the React Testing Library to test components.
Future Scope of Best React course at Maria Academy, Karaikudi :
Among the most potent and sought-after technologies in contemporary web development is React. Developed by Facebook, it is widely utilized by leading tech organizations to create dynamic, scalable, and high-performing user interfaces for web and mobile apps. The component-based architecture of React enables developers to create reusable user interface elements, which expedites development and simplifies the administration of huge applications.
- The Reasons for Best React Course Bright Future Strong Industry Demand
One of the most marketable talents for developers nowadays is React, which is the primary choice for many businesses creating cutting-edge, scalable online applications. - Structure of Reusable Components
Reusability is encouraged by Reacts modular design, which lessens code duplication, increases consistency, and expedites development cycles. - A Healthy Ecosystem
A thriving worldwide community fosters an expanding ecosystem of frameworks, tools, and libraries such as React Router, Next.js, and Redux, which are perfect for grasping complex ideas. - Employment Prospects
Proficiency with Best React course can lead to lucrative positions like:
Front-End Programmer
Full-Stack Programmer
Developer of React Native Mobile Apps - Development on Multiple Platforms
React developers can further broaden their work options by using React Native to expand their talents to mobile app development for both iOS and Android.
Frequently Asked Questions :
- Does Maria Academy offer help finding a job?
Sure! SAP, Oracle, Amazon, HCL, Wipro, Dell, Accenture, Google, CTS, TCS, and IBM are just a few of the more than 700 leading MNCs with which Maria Academy has solid industry ties. - Is Maria Academy Certification Valuable?
Yes, Maria Academy offers an industry recognized React certification.
It’s aligned with current tech standards and valued by employers.
This certification boosts your resume and job opportunities. - Will I Work on Live Projects at Maria Academy?
Yes, students work on real-time projects and coding labs.
You’ll build a GitHub portfolio and gain hands-on experience.
This practical training prepares you for real-world job roles. - Who are the Trainers?
Maria Academy trainers are professionals with nine to twelve years of expertise in the field. They contribute practical knowledge to the classroom. You’ll get firsthand knowledge from knowledgeable experts. - For what purposes does React get utilized in web applications?
Single-page apps that are dynamic, quick, and interactive are created with React. With reusable parts and real-time updates, it makes UI development easier. Perfect for responsive and contemporary web interfaces. - Do you know what Node Package Manager (npm) is?
React projects require libraries and tools, which are managed by npm. It facilitates project dependency organization, installation, and updating. Necessary for establishing and managing React apps.
Best React Course in Chennai
Introduction to Best React Course:
One of the greatest Best react course courses in Chennai is offered by Maria Academy, which is well known for giving students the know-how to create dynamic, responsive websites.
Focusing on both fundamental ideas and sophisticated methods, this course provides comprehensive instruction in Best react course, one of the most well-liked and potent JavaScript frameworks utilized in contemporary web development.
Students will gain the ability to write HTML-like code directly within JavaScript, work with the virtual DOM for improved efficiency, and construct reusable user interface components.
Everything from fundamental component structures to more intricate features like component lifecycle, state management, and unidirectional data flow is covered in the curriculum. Teachers at Maria Academy give practical instruction and real-world project examples based on their years of industry expertise
What is the project management in best React Course at Chennai
To create dependable, scalable applications, students at Chennai’s Maria Academy receive in-depth instruction on Best react course project management.
Important topics covered in the course include keeping a neat and orderly folder structure, where components, assets, and services are arranged for scalability and ease of navigation.
Using tools like Redux, Zu stand, or the Context API, the curriculum also explores state management to make sure students can handle application data across components.
Students work directly with Best react course Router to manage routing and navigation, and they study code management best practices using Git, ESLint, and Prettier for version control and uniform coding standards.
Maria Academy places a strong emphasis on setting up projects with contemporary build technologies and managing dependencies with npm and yarn .
Key features of Best react Course:
The fundamental elements that make Best react course one of the most potent and well-liked web development libraries are taught to students at Chennai’s Maria Academy.
Best react courses architecture is based on reusable, modular components for creating user interfaces. To speed up and improve development, Maria Academy students learn how to deconstruct complicated user interfaces into smaller, more manageable components.
JSX: Best react course enables programmers to construct HTML-like syntax natively in JavaScript. This enhances readability and guarantees the smooth integration of JavaScript logic—which is extensively covered in the course—with UI code.
Virtual DOM: By updating only the modified portions of the user interface, best react courses Virtual DOM guarantees optimal performance. Students comprehend.
What are the key skills you will acquire in the Best React Course at Maria Academy:
Students will hone their front-end engineering and development abilities through practical application and hands-on study in Maria Academy’s top Best react course course.
You will become an expert at creating modular and maintainable user interfaces by learning how to construct reusable components.
With an emphasis on data-driven, interactive, and high-performance web apps, the course equips you with the skills necessary to create Single-Page apps (SPAs) that offer smooth user experiences.
Discover important ideas such as:
- Learn how to set up and utilize the Create Best react course App toolchain to get your projects off the ground and guarantee a productive development environment.
- Dynamic Component Creation: Develop your skills in building data-driven, dynamic components that communicate with APIs and back-end services to deliver a lively, responsive user experience.
- Ecosystem and Reusable Logic: Develop your ability to write shared You will become an expert at creating modular and maintainable user interfaces by learning how to construct reusable components. With an emphasis on data-driven, interactive, and high-performance web apps, the course equips you with the skills necessary to create Single-Page apps (SPAs) that offer smooth user experiences.
What is the future scope of Best react course, after completing the course at Maria Academy in Chennai:
In the software development industry, Best react course has become one of the most popular and sought-after JavaScript libraries among the many exceptional coding languages available.
Because best react course can be used to design scalable, highly interactive user interfaces (UIs) with reusable components, IT organizations all over the world are actively looking for developers with this code.
This guarantees consistency in the design of your program and improves the development process by making it more efficient and maintainable.
Becoming proficient in Best react course can greatly advance your career, since the need for Best react course specialists is increasing. Fortunately, Maria Academy in Chennai offers a thorough Best react course training that will provide you all the necessary skills, delivered by knowledgeable professors.
Frequently asked question:
- Is placement offered by Maria Academy?
Yes, Maria Academy in Chennai has solid relationships with more than 700 major multinational corporations, such as Google, SAP, Oracle, Amazon, HCL, Wipro, Dell, Accenture, TCS, and IBM. Over 3,500 students have been deployed in India and other countries. To help students confidently prepare for difficult interviews, the academy also hosts development programs, such as simulated interviews and training on presentation skills. - Does Maria Academy offer a decent certification?
Yes, Maria Academy’s accreditation is highly respected because it has been approved by significant international corporations. Additionally, the academy makes sure that students stand out in the job market by offering a special Authorized Best react course Certification. - Will I be involved in active projects?
Yes, coding labs, hackathons, and industry-relevant projects will give you practical experience at Maria Academy. By showcasing your abilities to recruiters, this hands-on experience helps you develop a strong project portfolio, display your work on GitHub, and improve your chances of landing a job. - Who are the trainers?
All the instructors at Chennai’s Maria Academy have worked in the field for at least nine to twelve years and have relevant IT experience. To deliver a top-notch educational experience, the academy has specially trained these subject matter specialists. - What are the uses of Best react course in web applications?
Building dynamic, interactive, and quick web apps—especially single-page applications (SPAs)—is made possible by the JavaScript package Best react course. It enables developers to effortlessly maintain the state of an application, make reusable UI elements, and refresh the user interface without requiring a page reload. For creating modern, scalable, and responsive frontends that work in unison with backend services and APIs, Best react course is the perfect choice.
Best React Course in Pudukkottai
Introduction to React Course:
One of the greatest React courses in Pudukkottai is offered by Maria Academy, which is well known for giving students the know-how to create dynamic, responsive websites.
Focusing on both fundamental ideas and sophisticated methods, this course provides comprehensive instruction in React course, one of the most well-liked and potent JavaScript frameworks utilized in contemporary web development.
Students will gain the ability to write HTML-like code directly within JavaScript, work with the virtual DOM for improved efficiency, and construct reusable user interface components.
Everything from fundamental component structures to more intricate features like component lifecycle, state management, and unidirectional data flow is covered in the curriculum.
Teachers at Maria Academy give practical instruction and real-world project examples based on their years of industry expertise.
What is the project management in react Course at Pudukkottai:
To create dependable, scalable applications, students at Pudukkottai Maria Academy receive in-depth instruction on React project management.
Important topics covered in the course include keeping a neat and orderly folder structure, where components, assets, and services are arranged for scalability and ease of navigation.
Using tools like Redux, Zu stand, or the Context API, the curriculum also explores state management to make sure students can handle application data across components.
Students work directly with React Router to manage routing and navigation, and they study code management best practices using Git, ESLint, and Prettier for version control and uniform coding standards.
Maria Academy places a strong emphasis on setting up projects with contemporary build technologies and managing dependencies with npm and yarn.
Key features of Reacts Course :
The fundamental elements that make React one of the most potent and well-liked web development libraries are taught to students at Pudukkottai Maria Academy. Reacts architecture is based on reusable, modular components for creating user interfaces.
To speed up and improve development, Maria Academy students learn how to deconstruct complicated user interfaces into smaller, more manageable components.
JSX: React enables programmers to construct HTML-like syntax natively in JavaScript. This enhances readability and guarantees the smooth integration of JavaScript logic—which is extensively covered in the course—with UI code.
Virtual DOM: By updating only the modified portions of the user interface, reacts Virtual DOM guarantees optimal performance. Students comprehend. The following are some of the main topics the course covers:
What are the key skills you will acquire in the React course at Maria Academy :
Students will hone their front-end engineering and development abilities through practical application and hands-on study in Maria Academy’s top React course.
You will become an expert at creating modular and maintainable user interfaces by learning how to construct reusable components.
With an emphasis on data-driven, interactive, and high-performance web apps, the course equips you with the skills necessary to create Single-Page apps (SPAs) that offer smooth user experiences.
Discover important ideas such as: Learn how to set up and utilize the Create React App toolchain to get your projects off the ground and guarantee a productive development environment.
Dynamic Component Creation: Develop your skills in building data-driven, dynamic components that communicate with APIs and back-end services to deliver a lively, responsive user experience.
Ecosystem and Reusable Logic: Develop your ability to write shared You will become an expert at creating modular and maintainable user interfaces by learning how to construct reusable components. With an emphasis on data-driven, interactive, and high-performance web apps, the course equips you with the skills necessary to create Single-Page apps (SPAs) that offer smooth user experiences.
What is the future scope of React after completing the course at Maria Academy in Pudukkottai :
In the software development industry, React has become one of the most popular and sought-after JavaScript libraries among the many exceptional coding languages available.
Because React can be used to design scalable, highly interactive user interfaces (UIs) with reusable components, IT organizations all over the world are actively looking for developers with this code.
This guarantees consistency in the design of your program and improves the development process by making it more efficient and maintainable.
Becoming proficient in React can greatly advance your career, since the need for React specialists is increasing. Fortunately, Maria Academy in Pudukkottai offers a thorough React.js training that will provide you all the necessary skills, delivered by knowledgeable professors.
React provides a lively and dynamic development community. Because React.js can be used to design scalable, highly interactive user interfaces (UIs) with reusable components, IT organizations all over the world are actively looking for developers with this code.
This guarantees consistency in the design of your program and improves the development process by making it more efficient and maintainable.
Frequently asked question:
- Is placement offered by Maria Academy?
Yes, Maria Academy in Pudukkottai has solid relationships with more than 700 major multinational corporations, such as Google, SAP, Oracle, Amazon, HCL, Wipro, Dell, Accenture, TCS, and IBM. Over 3,500 students have been deployed in India and other countries. To help students confidently prepare for difficult interviews, the academy also hosts development programs, such as simulated interviews and training on presentation skills. - Does Maria Academy offer a decent certification?
Yes, Maria Academy’s accreditation is highly respected because it has been approved by significant international corporations. Additionally, the academy makes sure that students stand out in the job market by offering a special Authorized React Certification. - Will I be involved in active projects?
Yes, coding labs, hackathons, and industry-relevant projects will give you practical experience at Maria Academy. By showcasing your abilities to recruiters, this hands-on experience helps you develop a strong project portfolio, display your work on GitHub, and improve your chances of landing a job. - Who are the trainers?
All the instructors at best react course in Pudukkottai at Maria Academy have worked in the field for at least nine to twelve years and have relevant IT experience. To deliver a top-notch educational experience, the academy has specially trained these subject matter specialists. - What are the uses of React course in web applications?
Building dynamic, interactive, and quick web apps—especially single-page applications (SPAs)—is made possible by the JavaScript package React. It enables developers to effortlessly maintain the state of an application, make reusable UI elements, and refresh the user interface without requiring a page reload. For creating modern, scalable, and responsive frontends that work in unison with backend services and APIs, React is the perfect choice.
Best React Course In Trichy
An Introduction to Best react Course at Trichy Maria Academy :
For single-page applications, Maria Academy Trichy offers a great Best react course in Trichy that gives you a strong foundation for developing dynamic and responsive user interfaces. Facebook’s open source Best react course in Trichy .framework makes it possible for programmers to design reusable UI elements, greatly improving code structure, scalability, and maintainability.
Students will get knowledge on how to use Best react course in Trichy Virtual DOM to enhance web applications’ functionality and speed in this course. JSX, a syntactic extension that enables programmers to write HTML-like code directly within JavaScript, is also covered in the course. This makes development quicker and easier.
Best react course in Trichy unidirectional data flow and component-based architecture facilitate state management and advanced user interface handling. In the industry, Best react course in Trichy is frequently used.
React Project management in Best react course in Trichy at Maria Academy :
project management in Best react course in Trichy development Maria Academy Trichy is to sustain, structure, and organize the development process so that developers have a seamless workflow.
Folder Structure Maria Academy stresses that to arrange parts, resources, services, and pages, a clear and uniform directory structure is essential. This aids developers in keeping their work readable and scalable as they work on it.
State Management: Using Best react course in Trichy Context API, Zu stand, or Redux, the course would probably cover effective state management strategies that let programmers keep the application’s state consistent throughout.
The goal of project management in Best react course in Trichy development at Maria Academy Trichy is to sustain, structure, and organize the development process so that developers have a seamless workflow.
Principal Aspects of Best react course in Trichy, Architecture Based on Components :
Construct contemporary user interfaces by developing reusable, modular components.
JSX (XML for JavaScript):For UI code that is clear and legible, write HTML-like syntax directly in JavaScript.
Performance is enhanced by virtual DOM: which optimizes rendering by only updating modified portions of the real DOM.
Data Flow in One Direction: keeps information moving in a single path, which facilitates state management and debugging.
Declarative User Interface: Best react course in Trichy automatically refreshes the view when you define UI behaviour based on the state of the application. Use State, use Effect, and other hooks are used to control logic in functional components. Robust Ecosystem To improve workflow, use tools like Next.js, Redux, and Router Best react course in Trichy .
Support for Multiple Platforms: Create mobile applications with Best react Native course in Trichy, which takes Best react course in Trichy outside of the browser.
Acquire knowledge about front-end development with an emphasis on scalable application architecture at Maria Academy.
What You Will Learn at Maria Academy :
Create dynamic user interfaces and reusable components. Create data-driven, dynamic, and quick web apps. Learn to use Best react course in Trichy to create master Single Page Applications (SPAs).
- To rapidly scaffold and set up the react apps, use Create Best react course in Trichy (CRA).
- Use dynamic components to communicate with backend services and APIs.
- Create interactive forms and common logic.
- Utilize react Router to implement routing in SPAs.
- Create isomorphic apps, where the client and server run the identical code.
- Use Redux and middleware such as Redux Thunk or Redux Saga to learn state management (optional).
- Use Jest, Enzyme, and the react Testing Library to test components.
Future Scope of Best react course in Trichy’ at Maria Academy :
- The Reasons for Best react course in Trichy Bright Future Strong Industry Demand
One of the most marketable talents for developers nowadays is Best react course in Trichy, which is the primary choice for many businesses creating cutting-edge, scalable online applications.
- Structure of Reusable Components
Reusability is encouraged by best react course in Trichy modular design, which lessens code duplication, increases consistency, and expedites development cycles.
- A Healthy Ecosystem
A thriving worldwide community fosters an expanding ecosystem of frameworks, tools, and libraries such as Best react course in Trichy Router, Next.js, and Redux, which are perfect for grasping complex ideas.
- Employment Prospects
Proficiency with Best react course in Trichy can lead to lucrative positions like:
Front-End Programmer
Full-Stack Programmer
Developer of react Native Mobile Apps
- Development on Multiple Platforms
Best react course in Trichy developers can further broaden their work options by using Best react course in Trichy Native to expand their talents to mobile app development for both iOS and Android.
Frequently Asked Questions :
- Does Maria Academy offer help finding a job?
Sure! SAP, Oracle, Amazon, HCL, Wipro, Dell, Accenture, Google, CTS, TCS, and IBM are just a few of the more than 700 leading MNCs with which Maria Academy has solid industry ties.
- Is Maria Academy Certification Valuable?
Yes, Maria Academy offers an industry-recognized Best react course in trichy.js certification. It’s aligned with current tech standards and valued by employers. This certification boosts your resume and job opportunities.
- Will I Work on Live Projects at Maria Academy?
Yes, students work on real-time projects and coding labs. You’ll build a GitHub portfolio and gain hands-on experience. This practical training prepares you for real-world job roles.
- Who are the Trainers?
Maria Academy trainers are professionals with nine to twelve years of expertise in the field. They contribute practical knowledge to the classroom. You’ll get firsthand knowledge from knowledgeable experts.
- For what purposes does react get utilized in web applications?
Single-page apps that are dynamic, quick, and interactive are created with Best react course in Trichy. With reusable parts and real-time updates, it makes UI development easier. Perfect for responsive and contemporary web interfaces.
- Do you know what Node Package Manager (npm) is?
Best react course in Trichy projects require libraries and tools, which are managed by npm. It facilitates project dependency organization, installation, and updating. Necessary for establishing and managing react apps.
ASP.NET Core course in Chennai
Introduction to ASP.NET Core course in Chennai:
There are various respected colleges in Chennai that offer comprehensive ASP.NET Core training courses.
The course provides hands-on experience through real-world projects, preparing you to tackle web development issues confidently.
An ASP.NET course equips you with the tools and knowledge to become proficient in building web applications using Microsoft’s robust ASP.NET framework.
The course covers ASP.NET basics and architecture, gradually progressing to advanced topics like data management, security, and performance optimization.
Special features of the ASP.NET Core course in Chennai:
ASP.NET is a constantly growing technology, and this course will keep you up to date on the latest breakthroughs and industry trends, increasing your value in the job market.
Whether you’re a beginner or an experienced developer, the Basics of ASP.NET course caters to a wide range of skill levels and provides a thorough learning experience.
What type of hands-on experience does the ASP.NET Core course provide in Chennai?
- Web application development with ASP.NET
- Create interactive online forms.
- Integration and modification of databases
- Authentication and authorization of users
- Implementation of MVC (Model-View-Controller) architecture
Key Benefits of the ASP.NET Core course in Chennai:
Prepare to enter into the exciting world of ASP.NET!
Microsoft’s web development framework is a powerful tool for building strong and dynamic websites and apps.
Offering an array of tools and features, ASP.NET caters to beginners and seasoned developers. At its core, ASP.NET Overview is a server-side framework ideal for crafting dynamic websites, apps, and services.
Its seamless integration with Microsoft technologies like SQL Server and Azure empowers the creation of scalable, high-performance applications.
ASP.NET stands out for its user-friendly nature. Building interactive web pages, from forms to data-driven apps, becomes a breeze with a range of controls and libraries.
Its drag-and-drop functionality expedites UI development, reducing both effort and errors. Performance is a highlight of ASP.NET.
Scope of ASP.NET Core course in Chennai:
The scope of an ASP.NET Core course in Chennai is highly promising, with several options in web development and beyond. Here’s a look at the size of an ASP.NET course:
Web Development Careers: Completing an ASP.NET course prepares you to create dynamic and interactive web apps. This opens the door to a variety of positions, including web developer, full-stack developer, front-end developer, and back-end developer.
Diverse areas: ASP.NET is used in e-commerce, banking, healthcare, entertainment, and other areas. This diversity broadens your opportunities to work in fields that correspond with your interests.
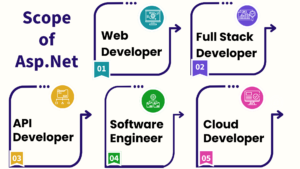
Many software organizations demand ASP.NET Core in Chennai to create web-based solutions for their clients, making you an important member of software development teams.
Corporate Intranets: Large firms frequently use ASP.NET to create internal applications and corporate intranets, providing chances for enterprise-level software development.
Freelancing: If you know ASP.NET and MVC, you can work as a freelance web developer, taking on projects from clients all over the world and enjoying the flexibility that comes with it.
Career Possibilities of Learning the ASP.NET Core course in Chennai:
Maria Academy in Chennai offers placement opportunities as an add-on to every student/professional who has completed our classroom or online training.
With experience, ASP.NET developers take on more complex projects, fostering a sense of professional growth and accomplishment.
ASP.NET developers experience the satisfaction of creating impactful and user-friendly web applications, seeing their work in action, and receiving positive user feedback.
ASP.NET is used by both large and small organizations, offering the chance to work with renowned companies that provide competitive salaries and significant growth prospects.
ASP.NET certification is your ticket to advancing your web development career.
Microsoft’s certification verifies your knowledge of how to use the ASP.NET framework for web applications.
Adding it to your resume enhances your marketability, showcasing your readiness to excel in the field.
Moreover, it unlocks diverse career paths, from web developer to technical lead, due to the high demand for ASP.NET skills.
Frequently asked questions:
1. Does Maria Academy provide placement?
We have excellent relationships with over 700+ top MNCs, including SAP, Oracle, Amazon, HCL, Wipro, Dell, Accenture, Google, CTS, TCS, and IBM.
More than 3500 students were placed last year in India and globally.
Maria Academy conducts development sessions including mock interviews, presentation skills to prepare students to face a challenging interview situation with ease.
2. Is Maria Academy certification good?
Certification is accredited by every major global company.
Maria Academy is a unique Authorized Oracle Partner, Authorized Microsoft Partner, Authorized Pearson Vue Exam Center, Authorized PSI Exam Center, and Authorized Partner Of AWS
3. Work On Live Projects?
The entire ASP.NET training has been built around real-time implementation. You get hands-on experience with industry projects, hackathons & lab sessions, which will help you to build your project portfolio
GitHub repository and showcase to recruiters in interviews, and get placed.
4. Who are the Trainers?
All Maria Academy’s trainers are industry practitioners with at least 9-12 years of relevant IT experience. They are subject matter experts and have been trained by Maria Academy to provide an excellent learning experience.
5. What is a web application?
A normal website is not the same as a web application. Websites are static. The website returns an HTML page when you visit it, without performing any processing to create the HTML page’s contents. Reloading the browser will display the same page. A web application, on the other hand, may give you a different answer each time you visit.
6. What is the NuGet package manager?
Not all code is created from scratch by software developers. They depend on code libraries created by other programmers.
A way for developers to download and utilize pre-existing libraries, sometimes known as packages, must be included in any contemporary development environment.
For instance, the NPM (Node Package Manager) in the JavaScript ecosystem allows developers to locate and utilize libraries created by other JavaScript developers.
If you are seeking for advanced course in .net web application, contact us at Asp.net core training
Dot net full stack developer online course
A Dot NET Full Stack Developer Online Course is designed to teach you both frontend and backend development using Microsoft technologies.
Full-stack developers work on both the client-side (frontend) and server-side (backend) of applications, making them versatile and highly valuable in the job market.
Course Overview
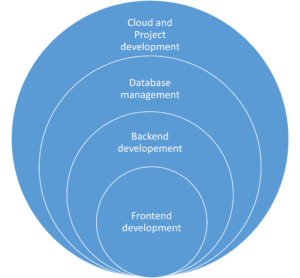
This course typically covers:
Frontend Development
- HTML, CSS, and JavaScript – Basics of web design and interactivity.
- TypeScript – A superset of JavaScript for scalable applications.
- Angular / React – Popular frontend frameworks for building dynamic UI.
- Bootstrap / Tailwind CSS – Styling frameworks to create responsive designs.
Backend Development
- C# Programming – The primary language for .NET development.
- ASP.NET Core / MVC – Framework for building robust web applications.
- RESTful API Development – Creating APIs using .NET Core Web API.
- Entity Framework Core – ORM for database interactions.
Database Management
- SQL Server – Managing and querying databases.
- Stored Procedures & LINQ – Efficient database operations.
Cloud & DevOps (Optional, but beneficial)
- Docker & Kubernetes – Containerization and orchestration.
- CI/CD Pipelines – Automated testing and deployment.
Project Development
- Building a Full-Stack Project – Integrating frontend, backend, and database.
- Version Control with Git & GitHub – Collaboration and code management.
Who Should Take This Dot net developer online Course?
- Beginners with basic programming knowledge.
- Developers looking to specialize in .NET full-stack development.
- IT professionals switching to web development.
Career Opportunities
After completing the course, you can apply for roles such as:
- .NET Full Stack Developer
- Web Developer (C#/.NET)
- Software Engineer
- Backend Developer
Advantages of Dot Net full stack developer online course:
Comprehensive Skill Set
- Gain expertise in both frontend and backend development, making you a versatile developer.
- Learn C#, ASP.NET Core, SQL Server, Angular/React, and cloud technologies in one program.
High Demand & Job Opportunities
- .NET Full Stack Developers are highly sought after in industries like finance, healthcare, and e-commerce.
- Opens doors for roles like .NET Developer, Software Engineer, and Full Stack Developer.
Flexibility & Convenience
- Learn at your own pace with self-paced videos or live instructor-led sessions.
- Access course materials anytime, anywhere.
Hands-on Experience with Real-World Projects
- Work on practical projects, helping you build a strong portfolio.
- Gain experience with GitHub, CI/CD, Docker, and cloud deployment.
Microsoft Ecosystem Integration
- Learn how to integrate .NET with Azure, Microsoft SQL Server, and other Microsoft tools.
- Become proficient in modern enterprise-level application development.
Strong Community & Support
- Join a vast community of .NET developers for networking and learning.
- Get career guidance, resume building tips, and interview preparation.
Scalability & Performance Knowledge
- Learn how to develop scalable and high-performance applications.
- Understand microservices, API development, and enterprise software architecture.
Cost-Effective Learning
- Online courses are affordable compared to traditional degrees.
- Many platforms offer certifications that enhance your resume.
Applications of a Dot NET Full Stack Developer Online Course
A .NET Full Stack Developer Online Course prepares you to build scalable, secure, and high-performance applications.
The skills learned can be applied to various domains, including:
Web Application Development
- Build interactive web applications using ASP.NET Core MVC/Web API with Angular or React.
- Develop e-commerce platforms, blogging websites, and content management systems (CMS).
Enterprise Software Solutions
- Design and develop large-scale enterprise applications for businesses.
- Work on CRM (Customer Relationship Management), ERP (Enterprise Resource Planning), and HRMS (Human Resource Management Systems).
Cloud-Based Applications
- Deploy applications on Microsoft Azure or AWS for global accessibility.
- Implement serverless computing, microservices architecture, and cloud storage solutions.
API Development & Integration
- Develop RESTful APIs using ASP.NET Core Web API.
- Integrate third-party APIs for payment gateways, social media, and authentication.
Database-Driven Applications
- Work with SQL Server, Entity Framework Core, and LINQ for data-driven solutions.
- Build applications requiring real-time data processing, analytics, and reporting.
Fintech & Banking Applications
- Create secure financial applications with role-based authentication.
- Implement payment processing, transaction management, and fraud detection.
Healthcare & E-Governance Solutions
- Develop electronic health records (EHR) systems and hospital management software.
- Work on government portals and citizen services using Dot NET full stack developer online
Mobile App Development (Xamarin/.NET MAUI)
- Build cross-platform mobile applications using .NET MAUI (formerly Xamarin).
- Develop apps for iOS & Android with native-like performance.
High Demand & Job Opportunities
- Dot NET full stack developer online course is widely used in enterprise software, web development, cloud computing, and mobile apps.
- Companies like Microsoft, Accenture, Infosys, TCS, and Deloitte actively hire .NET developers.
- Stable career path with opportunities in various industries (finance, healthcare, e-commerce, gaming, etc.).
Frequently Asked Question:
1. What is the Web?
The Web, also known as the World Wide Web (WWW), is a collection of web pages, images, videos, and other resources connected through link.
2. What is Web Development?
Web development is the process of building websites and web applications. The goal is to create websites that are easy to use and work properly on different devices.
3.What is a website?
A website is a collection of web pages that are connected under a common domain name and can be accessed through the internet.
4. What is the Internet?
The Internet is a vast global network that connects millions of computers, servers, and devices worldwide.
5. What is DOCTYPE?
A doctype or document-type declaration is an instruction that tells the web browser about the markup language in which the current page is written.
6. What are the various heading tags and their importance?
There are 6 levels of headings defined by HTML. These six heading elements are H1, H2, H3, H4, H5, and H6; with H1 being at the highest level and H6 at the least.
Importance of Heading
- Search Engines use headings for indexing the structure and content of the webpage.
- Headings are used for highlighting important topics.
7. What are attributes?
An attribute is used to provide extra or additional information about an element.
- All HTML elements can have attributes. Attributes provide additional information about an element.
- It takes 2 parameters i.e.., name and value. These define the properties of the element and are placed inside the opening tag of the element.
- The name parameter takes the name of the property we would like to assign to the element and the value takes the property value or extent of the property names that can be aligned over the element.
If you are seeking for advanced course in .NET web application, contact us at Asp.net core training
Introduction to Asp.Net core MVC Framework
In this article, I am excited to give you an overview of the Model-View-Controller (MVC) pattern and the ASP.NET Core MVC framework! MVC stands for Model, View and Controller.
ASP.NET Core MVC is a design pattern used to create the architecture. Together, can explore some interesting points about how they work.
Let us dive in!
ASP.NET Core MVC is a web framework for building modern, scalable, and high-performance web applications using the Model-View-Controller (MVC) design pattern.
It is part of ASP.NET Core, an open-source, cross-platform framework developed by Microsoft.
Key features of ASP.NET Core MVC:
Model-View-Controller (MVC) Architecture
- Model: Represents the application’s data and business logic.
- View: Handles the UI and presentation logic.
- Controller: Manages user input, processes requests, and returns responses.
Cross-Platform
- Works on Windows, macOS, and Linux.
- Supports deployment on IIS, Docker, and cloud platforms.
Razor View Engine
- Uses Razor syntax (.cshtml) for dynamic HTML rendering.
- Provides strong typing with @model and @ViewBag.
Routing System
- Uses attribute-based and convention-based routing.
- Example: app.UseEndpoints (endpoints => { endpoints.MapControllerRoute(…); });
Dependency Injection (DI)
- Built-in support for dependency injection to manage services and components.
Tag Helpers & View Components
- Provides Tag Helpers for HTML elements (e.g., <form asp-action=”Login”>).
- View Components enable reusable UI logic.
Benefits of MVC ASP.NET CORE:
Testability
- ASP.NET Core MVC supports unit testing because of its decoupled architecture.
- Dependency Injection (DI) is built-in, making it easier to test individual components.
Cross-Platform Support
- ASP.NET Core is cross-platform, meaning you can deploy applications on Windows, Linux, and macOS.
Performance and Optimization
- ASP.NET Core is faster than traditional ASP.NET due to features like:
- Optimized request processing
- Minimal overhead
- Asynchronous programming support (async/await)
- Built-in caching and middleware support to enhance speed.
Routing Flexibility
- Supports attribute-based routing, making route definitions more readable and manageable.
- Allows customization of URL structures for SEO-friendly URLs.
Built-in Dependency Injection (DI)
- ASP.NET Core MVC includes native DI support, making it easier to manage dependencies and improve modularity.
Security Features
- Built-in authentication and authorization (supports JWT, OAuth, Open ID, Identity, etc.).
- CSRF protection, XSS prevention, and anti-forgery tokens for secure applications.
Tag Helpers and Razor Views
- Tag Helpers make writing HTML in Razor views easier and more maintainable.
- Razor Pages (part of ASP.NET Core) simplify small-scale applications while still benefiting from MVC.
Modular Middleware Pipeline
- Unlike traditional ASP.NET, ASP.NET Core provides a lightweight and configurable request pipeline.
- Middleware can be customized and optimized for specific needs.
Integration with Modern Frontend Technologies
- Works well with React, Angular, Vue.js, and other SPA frameworks.
- Supports Web APIs for RESTful services.
Scalability and Cloud Support
- Easily deployable to cloud environments like Azure, AWS, or Google Cloud.
- Supports microservices and containerization (Docker, Kubernetes).
Open Source and Community Support
- ASP.NET Core is open source and backed by Microsoft and a large community.
- Frequent updates, bug fixes, and improvements.
Role of View in MVC ASP.NET CORE:
Presentation Layer
The View is primarily responsible for displaying the user interface.
It contains HTML, CSS, JavaScript, and Razor syntax (@) for embedding C# code.
Receives Data from Controller
The Controller prepares the data (usually from the Model) and passes it to the View using a View Model or strongly typed model.
Uses Razor Syntax
Razor syntax (@{ }, @Model, @Html.ActionLink, etc.) helps embed C# code inside the View to generate dynamic content.
Does Not Contain Business Logic
The View should not have any complex logic (like database queries or business rules). Instead, it should focus only on rendering data.
Supports Partial Views & Layouts
Reusable UI components can be created using Partial Views (@Html.Partial(), @Html.RenderPartial()).
A consistent UI structure can be maintained using Layout Views (_Layout.cshtml).
Helps in Client-Side Interactions
Views can include JavaScript, jQuery, or AJAX to enhance the user experience.
Frequently Asked Questions:
What is MVC in ASP.NET?
MVC (Model-View-Controller) is a software design pattern used for developing web applications by separating concerns into three components:
- Model – Manages data and business logic.
- View – Handles the UI presentation.
- Controller – Manages user input and interacts with the Model and View.
What is the difference between MVC and Web API?
| Feature | MVC | Web API |
| Purpose | Builds web applications with Views (HTML) | Builds RESTful services (JSON/XML) |
| Return Type | View (HTML) or JSON | JSON or XML |
| Routing | Uses routes.MapRoute() | Uses config.Routes.MapHttpRoute() |
| Controllers | Controller base class | ApiController base class |
What are the advantages of using MVC in ASP.NET?
- Separation of concerns – Code is clean and well-organized.
- Testability – Supports unit testing due to the separation of logic.
- Scalability – Easily extendable and maintainable.
What is a Partial View in MVC?
A Partial View is a reusable view component (like a header, footer, or sidebar) that can be included in other views.
Example of Partial View Usage:
CsharpCopyEdit@Html.Partial(“_Header”)
What is the difference between ViewBag, ViewData, and TempData?
| Feature | ViewBag | ViewData | TempData |
| Type | Dynamic | Dictionary | Dictionary |
| Lifetime | Current request | Current request | Available across multiple requests (e.g., redirects) |
| Requires Type Casting? | No | Yes | Yes |
What is Dependency Injection in ASP.NET MVC?
Dependency Injection (DI) used to inject dependencies (services, repositories, etc.) into controllers instead of creating them manually.
Conclusion
MVC in ASP.NET provides a structured, flexible, and scalable framework for modern web applications. It improves performance, testability, and maintainability, making it an ideal choice for enterprise applications.
- The View in MVC is all about rendering UI.
- It receives data from the Controller and displays it.
- Razor is used to dynamically generate HTML.
If you are seeking for advanced course in .NET web application, contact us at Asp.net core training
ASP.NET MVC filters
ASP.NET MVC filters are powerful tools that enable developers to include cross-cutting concerns in their applications. These concerns include logging, authentication, authorization, error handling, and others. Filters offer a simple and modular approach to adding functionality that can be applied globally, to specific controllers, or even to individual actions. In this article, we will look at the various types of filters available in ASP.NET MVC, as well as their use cases and how to effectively implement them.
Types of Filters in ASP.NET MVC:
ASP.NET MVC supports a variety of filters, each with a specific purpose, the types of filters in ASP.NET MVC are.
Authorization Filters
Action Filters
Result Filters
Exception Filters
Authorization Filters:
Purpose: Manage authorization logic, ensuring that users have permission to access certain resources.
Common Usage: Determine whether a user is authenticated or if they have specific roles or permissions.
Eg:
public class CustomAuthorizationFilter : AuthorizeAttribute
{
protected override bool AuthorizeCore(HttpContextBase httpContext)
{
// Custom authorization logic
return httpContext.User.Identity.IsAuthenticated;
}
}
Action Filters:
Purpose: Run code before and after an action method is executed.
Common Usage: Logging, performance measurement, and input validation.
Eg:
public class LogActionFilter : ActionFilterAttribute
{
public override void OnActionExecuting(ActionExecutingContext filterContext)
{
// Code to execute before the action runs
Log("Action Method Executing");
}
public override void OnActionExecuted(ActionExecutedContext filterContext)
{
// Code to execute after the action runs
Log("Action Method Executed");
}
private void Log(string message)
{
// Logging logic
Debug.WriteLine(message);
}
}
Result Filters:
Purpose: Run code before and after the action result is executed.
Common usage: Modifying the result and logging.
Eg:
public class CustomResultFilter : ResultFilterAttribute
{
public override void OnResultExecuting(ResultExecutingContext filterContext)
{
// Code to execute before the result runs
Log("Result Executing");
}
public override void OnResultExecuted(ResultExecutedContext filterContext)
{
// Code to execute after the result runs
Log("Result Executed");
}
private void Log(string message)
{
// Logging logic
Debug.WriteLine(message);
}
}
Exception Filters:
Purpose: Handle exceptions raised by action methods.
Common usage: Logging exceptions and returning custom error views or messages.
Eg:
public class CustomExceptionFilter : FilterAttribute, IExceptionFilter
{
public void OnException(ExceptionContext filterContext)
{
// Handle the exception
LogException(filterContext.Exception);
// Optionally set the result to a custom error view
filterContext.Result = new ViewResult
{
ViewName = "Error"
};
filterContext.ExceptionHandled = true;
}
private void LogException(Exception exception)
{
// Logging logic
Debug.WriteLine(exception.Message);
}
}
Applying Filters:
Filters can be applied in various ways:
Globally: Applied to all controllers and actions in the application.
public class FilterConfig
{
public static void RegisterGlobalFilters(GlobalFilterCollection filters)
{
filters.Add(new HandleErrorAttribute());
filters.Add(new CustomAuthorizationFilter());
}
}
Controller-Level: Applied to all actions within a specific controller.
[CustomAuthorizationFilter]
public class HomeController : Controller
{
public ActionResult Index()
{
return View();
}
}
Action-Level: Applied to a specific action method.
public class HomeController : Controller
{
[LogActionFilter]
public ActionResult Index()
{
return View();
}
}
Custom Filters
Custom filters allow you to encapsulate specific behaviors that can be used throughout your application. To create a custom filter, either implement the filter interface or inherit from the base class.
Conclusion:
ASP.NET MVC filters are critical for handling cross-cutting concerns in a clean and maintainable manner. Understanding and utilizing the various types of filters can help you improve the functionality, security, and reliability of your applications. Filters, whether used globally, at the controller level, or on specific actions, provide a versatile way to intercept and process requests and responses, making them an essential tool in any ASP.NET MVC developer’s toolkit.
Best Training Institute in Chennai with Placement Assistance
Over the last decade, the IT industry has grown at an exponential rate. The software product industry in India is expected to reach $500 billion by 2030. The expansion of the IT industry has inevitably led to an increase in job opportunities in the field.
Why do so many people want to work in IT?
The main reason for the IT job boom is the pay. IT jobs offer a luxurious lifestyle. Additionally, there are numerous job opportunities available. Despite the recession, IT companies are always looking for new employees. If you have the skills that are required, it’s easy to advance. Additionally, the work environment is great. IT companies have a 5-day workweek. The company is flexible and allows for work in various industries.
However, a high-paying job means intense competition. To get a job and advance in your career, you must possess exceptional skills.
People those who want an IT job are looking for the best Software Training Institute to advance their professional lives.
Why is Chennai the best place for IT jobs?
Chennai is one of India’s business hubs. Although Chennai has a diverse business community, the IT industry dominates. Chennai is overflowing with IT firms and employees. So, Chennai is the best place to work as an IT professional.
How to choose a best training institute in Chennai with placement assistance?
In today’s competitive job market, obtaining the necessary skills and training is critical for securing rewarding employment. For many aspiring professionals in Chennai, enrolling in a reputable training institute that offers placement assistance is the first step toward a successful career. With so many options, selecting the best training institute can be challenging. In this article, we have listed the most important factors to consider when looking for the best training institute in Chennai that offers placement assistance too
- Define Your Career Goals: Before starting your search, consider your career goals and aspirations. Determine the specific industry or field you want to work in, as well as the skills required to succeed in that domain. This clarity will allow you to narrow your options and focus on institutes that provide relevant training programs.
- Research on Institutes: Find the Chennai training institutions that will help you achieve your professional objectives by conducting in-depth research. Make use of internet resources, peruse reviews, and ask experts in your network for recommendations. Consider elements like the institute’s standing, accreditation, faculty qualifications, curriculum, and facilities.
- Faculty Expertise: A major factor in the success of training initiatives is the calibre of the faculty. Examine the credentials, professional background, and pedagogical approaches of the institute’s instructors. A faculty of seasoned experts can provide insightful analysis and useful advice to improve your educational experience.
- Course Curriculum: Make sure the institute’s course offerings cover the most recent developments in technology and industry trends by evaluating them. For the development of skills, a thorough curriculum that blends theoretical knowledge with real-world application is necessary. Seek out institutions that provide certifications pertinent to the industry as well as chances for internships or practical projects.
- Infrastructure and Facilities: To evaluate the institute’s infrastructure and facilities, stop by or browse their website. Your learning experience can be greatly improved by a well-equipped training centre with contemporary amenities, computer labs, libraries, and interactive classrooms. Consider elements like accessibility to transportation, location, and the availability of online resources.
- Placement Assistance: The institute’s history of providing placement assistance is one of the most important factors to consider. Seek out institutions that can brag of a high placement rate for their students and partnerships with top businesses. Find out about the jobs available to graduates, the companies the institute partners with, and the placement process.
- Post-Training Support: Find out what kind of post-training support services the institute offers, like career counselling, interview preparation, and resume building. Your chances of finding work after the program are improved greatly if the training facility provides continued assistance to its graduates.
- Financial Aspects: Consider the training program’s expense and compare it to the possible return on investment in terms of future earning potential and career advancement. To make the training more affordable, investigate any financial aid, scholarships, or instalment plans that the institute may offer.
- Student Testimonials and Reviews: Lastly, get input from both current and former institute students to learn more about their educational experiences and placement results. Sincere evaluations and recommendations can offer insightful viewpoints and assist you in making a well-informed choice.
In conclusion, it’s important to carefully consider a number of factors when searching for the best training insititute in Chennai that offers placement assistance. These include your career goals, the reputation of the facility, its placement history, the faculty’s experience, the course curriculum, its infrastructure, and its post-training support services. Through careful investigation and careful consideration of your options, you can select an institution that will provide you with the training and education required to be successful in your chosen industry.
If you need any Training / Technical Support in ASP.NET / SQL / PYTHON software programs, Contact +91 90427 10472
Understanding Encapsulation and Abstraction in C#
Two fundamental ideas in the field of object-oriented programming (OOP)—abstraction and encapsulation—are essential to creating reliable and maintainable software systems. Though they are not unique to C#, these ideas are central to the language’s architecture and are widely used in its framework and libraries. Let’s explore the meaning of abstraction and encapsulation in C# and how they help write cleaner code.
Encapsulation
A key component of object-oriented programming (OOP) in C# is encapsulation, which is the grouping of data and methods (or behaviours) that manipulate the data into a single unit called a class. Encapsulation provides controlled access to an object’s internal state through well-defined interfaces, like properties and methods, while shielding it from external manipulation and access.
Access Modifiers
Access modifiers in C# are used to manage a program’s types and members’ visibility and accessibility. By limiting the amount of access that other program components have to the encapsulated data and methods, these modifiers are essential to the encapsulation process.
- public: Any other code within the same assembly or another assembly that references it can access the member.
- private: Only members of the same class or struct may access this member.
- Protected: The member can be accessed by derived classes and by other members of the same class or struct.
- Internal: Only those in the same assembly can access the member.
- safe internal: The member can be accessed through derived classes or within the same assembly.
Properties
In C#, properties provide regulated access to a class’s private fields by encapsulating them. They guarantee data integrity by enabling data validation and manipulation prior to access or modification.
public class Person
{
private string name;
public string Name
{
get { return name; }
set
{
if (!string.IsNullOrEmpty(value))
{
name = value;
}
else
{
throw new ArgumentException("Name cannot be empty");
}
}
}
}
Methods
Methods contain an object’s behaviour. They have the ability to act or perform operations on the internal state of the object and return results.
public class Calculator
{
public int Add(int a, int b)
{
return a + b;
}
}
Advantages of Encapsulation
- Data Hiding: Encapsulation ensures data integrity by preventing unauthorized manipulation and concealing an object’s internal state from external access.
- Abstraction: By encapsulating an object, developers can concentrate on its behaviour’s key components rather than worrying about the intricacies of its internal implementation.
- Modularity: By combining related data and methods into a single unit, encapsulation encourages modularity and makes the codebase simpler to comprehend and manage.
- Code Reusability: Encapsulation makes code reuse easier by offering clearly defined interfaces that let objects be used in various contexts without needing to be modified.
To summarize, encapsulation in C# is a powerful mechanism for developing robust and maintainable software systems by hiding objects’ internal complexity and providing controlled access to their state and behaviour via well-defined interfaces. It encourages code organization, reuse, and dependability, making it a critical concept in modern software development.
Abstraction
A key component of object-oriented programming (OOP) in C# is abstraction, which is displaying only an object’s essential features while concealing the intricate implementation details of a system. It enables developers to concentrate on an object’s functionality rather than its implementation. Creating a blueprint for objects with shared traits and behaviours can be accomplished through abstraction, all without having to define each object’s precise implementation.
Abstract Classes and Methods
Abstract classes and methods are commonly utilized in C# to accomplish abstraction. A class that lacks the ability to be instantiated directly and that might include one or more abstract methods that are declared but not implemented is known as an abstract class. Specific functionality is meant to be implemented by derived classes through the use of abstract methods.
public abstract class Shape
{
public abstract void Draw(); // Abstract method
}
public class Circle : Shape
{
public override void Draw()
{
// Implementation for drawing a circle
}
}
public class Rectangle : Shape
{
public override void Draw()
{
// Implementation for drawing a rectangle
}
}
Interfaces
Interfaces are another tool in C#’s toolkit for achieving abstraction. A contract that classes can implement is defined by an interface. It has no implementation details and only method signatures, properties, events, or indexers. All of the members defined in an interface must have implementations available in any class that implements that interface.
public interface IShape
{
void Draw(); // Method signature
}
public class Circle : IShape
{
public void Draw()
{
// Implementation for drawing a circle
}
}
public class Rectangle : IShape
{
public void Draw()
{
// Implementation for drawing a rectangle
}
}
Benefits of Abstraction
- Flexibility: By defining common interfaces and behaviors that multiple classes can implement, abstraction makes it possible to write extensible and flexible code.
- Code Reusability: Developers can promote code reusability by defining abstract classes or interfaces, which allow code to be reused across various application components.
- Maintenance: By enabling modifications to be made to the underlying implementation without impacting the external interface accessible to other areas of the codebase, abstraction makes maintenance easier.
- Encapsulation: Since encapsulation exposes only the functionalities that are absolutely necessary while hiding the internal workings of an object, abstraction and encapsulation frequently go hand in hand.
In conclusion, abstraction in C# offers a strong tool for encouraging code reuse, controlling complexity, and creating modular, maintainable software systems. By delegating the specific implementation details to the individual classes that inherit from abstract classes or implement interfaces, it allows developers to concentrate on creating concise and clear interfaces.
Benefits of Abstraction and Encapsulation
- Modularity: Objects can be treated as black boxes, allowing changes to be made to one part of the system without affecting others.
- Code Reusability: Abstraction enables the creation of generic components that can be reused across different parts of the application.
- Security: Encapsulation prevents unauthorized access to sensitive data and provides a controlled interface for interacting with it.
- Maintainability: By hiding implementation details, abstraction and encapsulation make code easier to understand, debug, and maintain.
In conclusion, abstraction and encapsulation are essential principles in C# programming that promote code organization, flexibility, and reliability. By properly abstracting functionality and encapsulating data, developers can create robust and scalable software systems that are easier to understand, maintain, and extend.
Dot Net Web API Online class
Introduction to Dot Net Web API:
Microsoft offers a framework called Dot Net Web API (Application Programming Interface) that allows developers to create HTTP services that are accessible to a variety of clients, such as web browsers, mobile devices, and Internet of Things gadgets. It is a component of the broader.NET framework and is made especially to make use of the ASP.NET technology stack to facilitate the development of RESTful (Representational State Transfer) APIs. A Web API is fundamentally a group of HTTP endpoints, or URIs, that receive requests over HTTP and respond with HTTP. These endpoints enable clients to carry out CRUD (Create, Read, Update, Delete) operations on data; they typically correlate to resources or actions within your application.
Why Should You learn Dot Net Web API Online:
Learning Dot Net Web API is not only beneficial, but also necessary for both experienced and novice developers in the modern digital world. Proficiency in developing strong APIs using Microsoft’s.NET framework has become a valuable skill set in the tech industry due to the growing demand for web-based apps and services.
Enrolling in an online Dot Net Web API course could be your ticket to success, regardless of your level of experience with programming. Beginners looking to get started or professionals looking to advance your knowledge should both benefit from this course. These are the reasons why:
- Extensive Curriculum: An excellent online course will provide a thorough curriculum that addresses every facet of developing Dot Net Web APIs. You will delve deeply into the nuances of creating scalable and secure APIs, from comprehending RESTful principles to putting authentication and authorization into practice.
- Practical Training: Getting your hands dirty is the best way to become an expert at Dot Net Web API. Interactive tutorials, coding exercises, and real-world projects are common features of online classes that let you put your newly acquired knowledge to use in a real-world situation. This approach to learning through experience guarantees that you will not only understand theoretical ideas but also become proficient in writing code and resolving real-world problems.
- Flexible Schedule: One of the main benefits of taking classes online is being able to set your own hours. All types of learners—full-time, working professionals, and those with demanding schedules—are able to access course materials and take part in lectures at their own convenience and pace. With this flexibility, the limitations of traditional classroom-based learning are removed, allowing you to successfully balance your academic goals with other obligations.
- Professional Advice: Taking an online course gives you access to knowledgeable instructors who have years of experience developing Dot Net Web APIs. These instructors offer insightful advice, direction, and mentorship throughout your learning process by bringing their extensive knowledge and professional experience to the virtual classroom. Their knowledge guarantees that you will obtain excellent instruction and remain current with the newest trends and best practices in API development.
- Community Support: Students who take online classes frequently establish a thriving online community with a shared love of technology. In addition to improving your educational experience, interacting with other students in discussion boards, group projects, and cooperative activities opens up networking opportunities and strengthens bonds within the tech community.
What Our Training Provides:
- Comprehensive Curriculum: Our training covers the entire breadth of .NET and web API, from fundamental ideas to advanced topics, preparing you for real-world projects.
- Hands-on tasks: Gain practical experience by completing real-world tasks and applying what you’ve learned during the course.
- Flexibility: Our online approach allows you to learn at your own pace, accommodating your hectic schedule.
- Interactive Learning: Participate in interactive workshops, discussions, and Q&A sessions to better your comprehension and obtain answers to any issues you may have.
- Professional Teachers: Learn from industry experts with extensive .NET programming experience and receive valuable insights.
Who should take the Course:
- IT specialists seeking professional development.
- Aspiring programmers
- Web Designers
- Software Developers
Conclusion:
In conclusion, anyone hoping to succeed in the software development industry would be well advised to take up a Dot Net Web API online course. Gaining expertise in Dot Net Web API opens up a world of opportunities in the rapidly changing technology landscape, regardless of your goals—creating your own web applications, advancing your career, or starting a new professional journey.
Why then wait? Enroll in an online course on Dot Net Web API now to start the process of learning this crucial skill set, which will launch your career to new heights.
If you need any Training / Technical Support in DOTNET & SQL Contact +91 90427 10472
Understanding Microsoft Azure Fundamentals
Microsoft Azure has become a prominent platform in the cloud computing space, providing a wide range of services to individuals, companies, and organizations globally. It is becoming more and more important for businesses to grasp the foundations of Microsoft Azure as they move their operations to the cloud. The purpose of this article is to give a general overview of Azure, including its essential features, advantages, and the reasons behind its rise to prominence in the cloud computing industry.
What is Microsoft Azure?
Microsoft offers a full-featured cloud computing platform called Microsoft Azure. Computing, storage, networking, databases, machine learning, Internet of Things (IoT), and other services are among the many that it provides. With Azure, users can create, launch, and maintain services and applications via Microsoft’s extensive global data centre network.
Key Components of Microsoft Azure:
- Compute: For high-performance computing (HPC) workloads, Azure offers a variety of computing options, such as virtual machines (VMs), containers, serverless computing with Azure Functions, and Azure Batch.
- Storage: Blob Storage for unstructured data, File Storage for cloud file sharing, Queue Storage for messaging between application components, and Disk Storage for virtual machines (VMs) are just a few of the scalable storage options that Azure provides.
- Networking: Users can establish virtual networks, link load balancers to Azure, connect on-premises data centers to Azure, and guarantee secure communication by utilizing Azure VPN Gateway and Azure ExpressRoute features.
- Databases: Azure offers a range of database services, such as Cosmos DB for globally distributed NoSQL databases, Azure SQL Database for relational databases, Azure Database for MySQL and PostgreSQL, and services like Azure Synapse Analytics and Azure Cache for Redis.
- Identity and Access Management (IAM): Microsoft’s cloud-based identity and access management service, Azure Active Directory (Azure AD), enables users to safely log in and access resources.
- AI and Machine Learning: To create, train, and implement machine learning models, Azure provides AI and Machine Learning services like Azure Machine Learning, Azure Cognitive Services, and Azure Databricks.
- Internet of Things (IoT): Services like Azure IoT Central offer an end-to-end IoT application platform, while Azure IoT Hub facilitates safe and scalable connectivity between IoT devices and the cloud.
- Developer Tools: For continuous integration, delivery, and testing, Azure offers a comprehensive range of developer tools and services, such as Azure DevOps, Visual Studio Team Services, and Azure DevTest Labs.
Benefits of Microsoft Azure:
- Scalability: Azure enables companies to adjust their resource levels in response to demand, guaranteeing peak efficiency and optimum performance.
- Global Reach: Azure allows businesses to deploy applications closer to their users for lower latency and an enhanced user experience. Azure has data centers situated in various regions of the world.
- Security and Compliance: Azure guarantees data protection and regulatory compliance across a range of industries by adhering to industry-standard security practices and compliance certifications.
- Cost-effectiveness: Azure provides pay-as-you-go pricing options that spare companies from up-front capital costs by letting them pay only for the resources they really use.
- Integration: Azure offers a seamless ecosystem for application development and management by integrating with other Microsoft products and services, as well as third-party tools and technologies.
Conclusion:
As a key player in the cloud computing space, Microsoft Azure enables enterprises to grow, innovate, and completely reinvent themselves. For people and companies hoping to take full advantage of cloud computing, knowing the foundations of Azure is crucial. Azure is still the go-to option for cloud computing solutions in a variety of industries thanks to its extensive service portfolio, global presence, and dedication to security and compliance.
If you need any Training / Technical Support in DOTNET & SQL Contact +91 90427 10472
Caching in ASP .NET Core:
Introduction:
Effective data caching techniques are critical to improving the performance of web applications in the modern digital environment, where speed and scalability are critical requirements. The robust caching features of Microsoft’s open-source, cross-platform ASP.NET Core framework can greatly increase the scalability and responsiveness of web applications. We’ll examine the advantages, methods for implementation, and best practices of caching in ASP.NET Core in this article.
The Advantages of Caching in ASP.NET Core:
Caching stores frequently accessed data temporarily, reducing the need to retrieve it from its original source repeatedly. In ASP.NET Core, caching provides several advantages, including:
- Enhanced Performance: Caching lowers the latency involved in retrieving data from its original source by keeping frequently accessed data in memory, giving users faster response times.
- Decreased Database Load: By providing cached data rather than querying the database for each request, caching helps reduce the strain on the database server and increase system scalability.
- Improved Scalability: ASP.NET Core apps are more responsive and scalable when they use caching to manage more concurrent users and requests without sacrificing performance.
Types of Caching in ASP.NET Core:
Different caching mechanisms that meet different needs and scenarios are supported by ASP.NET Core. Several frequently utilized types of caching include:
- In-Memory Caching: This technique keeps data in the memory of the application so that it is easily accessible to queries made later. For storing small to medium-sized data sets that are accessed frequently, this kind of caching is appropriate.
- Distributed Caching: With distributed caching, data that has been cached can be shared between several applications or even between various web farm servers. Support for distributed caching with providers like Redis, SQL Server, or NCache is integrated into ASP.NET Core.
- Response Caching: This technique allows the entire HTTP response to be cached, including the status codes, HTTP headers, and HTML content that is generated. For content that can be cached at the HTTP level and is static or semi-static, this kind of caching is perfect.
Implementing Caching in ASP.NET Core:
Developers can take the following actions to take advantage of caching in ASP.NET Core:
- Configure Caching Services: Use the AddMemoryCache() or AddDistributedMemoryCache() methods to register caching services for either distributed or in-memory caching in the dependency injection container of the ASP.NET Core application.
- Install Caching Middleware: To enable response caching, add caching middleware to the application’s request processing pipeline by either implementing custom middleware for more granular control or by using the UseResponseCaching() method.
- Decorate Cached Resources: To define caching policies, such as cache duration, cache location, and cache profiles, decorate controller actions or Razor pages with caching attributes like [ResponseCache].
Best Practices for Caching in ASP.NET Core:
The following best practices should be taken into consideration in order to optimize the advantages of caching while avoiding typical pitfalls:
- Use Caching Wisely: Only store in cache data that is likely to be frequently retrieved or computed at a high cost. Refrain from over-caching or caching frequently changing volatile data.
- Track Cache Performance: To guarantee optimal cache performance and avoid memory-related problems, track cache hit rates, eviction rates, and memory usage.
- Use Cache Invalidation: Use cache expiration policies or manual cache invalidation mechanisms, among other cache invalidation techniques, to guarantee that data in the cache is accurate and current.
Conclusion:
Caching is a potent method for enhancing ASP.NET Core applications’ responsiveness, scalability, and performance. Developers can greatly lower latency, lessen database load, and improve user experience by utilizing caching mechanisms like in-memory caching, distributed caching, and response caching. To optimize its advantages while averting any potential downsides, caching must be used sparingly and in accordance with best practices. Because caching is a fundamental component of optimization strategies, ASP.NET Core applications can easily scale to meet the demands of contemporary online environments while delivering lightning-fast performance.
Dotnet Course in Chennai with Placement
Unlocking Your DOTNET Software Development Potential:
Do you want to learn about versatile and powerful software development with DOTNET and SQL? There’s no need to look any further! Our Maria Academy is designed to equip you with the skills and knowledge needed to succeed in the fast-paced world of application development.
About DOTNET (.NET):
Microsoft’s.NET framework is a powerful and widely used framework for creating a wide range of applications, including desktop, web, mobile, and cloud solutions. The demand for skilled.NET developers is growing as the technology industry evolves.
About SQL:
SQL, or Structured Query Language, is a programming language designed specifically for managing and manipulating relational databases. It contains commands for querying data, inserting records, updating information, and building database structures. SQL is required for interacting with databases in a variety of applications, as it allows for structured and organized data storage, retrieval, and manipulation. Its syntax is the same across all database management systems, making it a universal database communication language. Whether you’re a developer, data analyst, or database administrator, you’ll need a solid understanding of SQL.
Are you curious about the continued demand for.NET?
You don’t need to search any farther! One of the most widely used web application development frameworks for building dynamic websites is.NET, an open-source web framework. It should come as no surprise that experts with past experience in this field are in high demand today given the industry’s bright future growth prospects. Maintain your.NET proficiency to stay on top of developments!
The.NET framework offers programming guidelines for developing a variety of applications, including web and mobile ones. Numerous programming languages are supported, such as C#, VB.NET, C++, F#, and others. So, code is crucial when working with.NET. Keep trying new things and learning to become a proficient.NET developer!
The main framework for creating Windows-based applications is called.NET. This is because Windows comes with a local framework called.NET that makes it simpler for programmers to create applications. In addition, a lot of programmers find that building web applications in.NET is simpler than in Java.
It is commonly known that the.NET Framework can establish an extremely secure environment for applications. To provide the highest level of protection, it has a range of security features. The integrated Windows authentication system is one of these mechanisms, which makes it simple for developers to create safe and secure applications. The application’s overall security is increased by this authentication system, which guarantees that only authorized users can access it.
Additionally, a collection of cryptography classes that are necessary for safeguarding sensitive data are included in the.NET Framework. Data security is increased by these classes, which make encryption and decryption possible. These cryptography courses can be used by developers to create robust encryption algorithms that efficiently safeguard data both in transit and in storage. This guarantees that private information stays that way and is not accessible to unauthorized parties.
Therefore, the.NET Framework’s many security features allow developers to prioritize data protection and reduce potential security risks when creating applications.
Why Should You Take .NET Online Training?
Cross-Platform Development: .NET Core enables developers to create applications for Windows, Linux, and macOS.
Excellence in Web Development: ASP.NET, a component of the.NET framework, is a leading technology for creating robust and dynamic web applications.
Versatility: Because.NET allows for the creation of a wide range of applications, it is a popular framework for a variety of projects.
Industry Importance: Many large enterprises and organizations rely on.NET to develop scalable and secure applications, creating numerous job opportunities.
What Our Training Provides:
Comprehensive Curriculum: Our training covers all aspects of.NET, from fundamental concepts to advanced topics, preparing you for real-world projects.
Hands-on Projects: Gain practical experience by completing real-world projects and applying what you’ve learned throughout the course.
Flexibility: Our online format allows you to learn at your own pace, accommodating your hectic schedule.
Interactive Learning: To improve your comprehension and get answers to any questions, participate in interactive sessions, debates, and Q&A sessions.
Professional Teachers: Learn from industry experts with extensive.NET development experience and gain valuable insights.
Who should take:
IT specialists seeking professional development.
Aspiring programmers
Web Designers
Software Developers
Come Grow Your Career with Us!
Start the process of developing into a proficient.NET developer. Your key to developing the abilities that employers are seeking is our.NET Online Training in Chennai. Are you ready to take charge of your software development career? Enroll immediately!
For.NET training and technical assistance, call +91 90427 10472.
Learn Python for Data Analysis
INTRODUCTION:
Python is an interpreted, object-oriented, high-level programming language. It is simple to learn and code in. It also has a large variety of libraries that are useful for analytics and complex calculations.
Python has become a well-known programming language in the field of data analysis. Because of its remarkable library selection, scalability, and flexibility, Python continues to be the preferred option.
The largest companies in the world are looking for data analysts, as data analysis has become one of the highest-demand careers globally.
Python provides modules and packages, improving program flexibility and code reuse. Python has applications across many sectors including:

DATA:
A collection of information obtained through measurements, study, analysis, or observation is called data. Data in digital format can be processed and transferred. Data is in many forms of information that are often formatted in a specific way. Data could be in any form, some types of data are geographical, cultural, scientific, financial, natural, transport, statistical, and meteorological data.
DATA ANALYSIS:
Data analysis is the process of obtaining insights from data to help make better business decisions.
Data analysis means investigating, cleansing, changing, and organizing data to gather information and help in decision-making. Being a data analyst, you will analyse huge data sets, find hidden patterns, and convert numbers into useful information.
It is the systematic application of statistical and/or logical tools to explain and show, condense conclude, and evaluate data.
It can take many forms, depending on the question you’re going to answer. We can say that there are four different types of data analysis:
- Descriptive Analysis
- Diagnostic Analysis
- Predictive Analysis
- Prescriptive Analysis
DATA ANALYST:
A person who collects and evaluates data to address a particular issue is known as a data analyst. In addition to spending a lot of time with data, the profession also requires communicating findings.
A data analyst examines data to discover critical insights about a company’s consumers and how the data may be used to address problems. They also share this information with company leaders and other stakeholders.
Here we can summarize the work of a data analyst in a simple way using a diagram:

A data analyst is someone who has the skills and knowledge to transform raw data into information and insights that can be used to make business choices.
There are many types of data analysts in this tech world. We want to list a few of them below:
- Business Analyst,
- Business Intelligence Analyst,
- Operations Research Analyst,
- Medical and Health Care Analyst,
- Market Research Analyst
- Quantitative Analyst,
- IT System Analyst,
- Financial Analyst, …. many more.
STEPS TO BECOME A DATA ANALYST:
If you want to become a data analyst, you must understand the two most significant skills: technical skills and soft skills. Let’s briefly explore the technical skills required to become a data analyst.
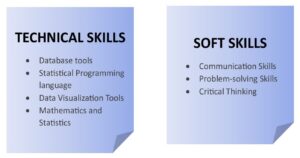
Technical Skills:
If you want to learn more about the data analyst’s technical skills, continue reading a few sentences. You have focused on the crucial four abilities needed for a data analyst.
- Database Tools:
SQL is commonly used for data analysis in large businesses and is considered one of the most crucial tools for analysts. SQL is also used by software developers for software development.
It is a common choice among data analysts since the code is easy to read and understand. It can also be used to modify and update data.
On the other hand, we have to learn Microsoft Excel for data analysis. The most important application for a data analyst to learn is Excel, which is the industry standard for data analysis.
With built-in pivot tables, they are without a doubt the most popular analytic tool available. This all-in-one data management tool makes it simple to import, analyze, clean, evaluate, and display your data.
- Statistical Programming Language:
Learning a statistical programming language, such as Python or R, will allow you to modify enormous amounts of data and solve complex equations.
We recommend you choose the programming language which is Python because Python is versatile and it is easy to learn and code.
When it comes to data analysis, Python is an accepted standard in fields like math, business, science, and engineering.
Popularity among data analysts is due to its flexibility, broad libraries, and simple syntax. Python’s ability to rapidly generate and manage data structures is one of its most popular uses.
Its dynamic typing and dynamic binding, along with its high-level built-in data structures, make it an excellent choice for data analysis.
- Data Visualization Tools:
The process of graphical data representation in the form of heat maps, charts, infographics, sparklines, geographic maps, or statistical graphs is known as data visualization.
You may easily communicate your findings to others by creating interactive charts, graphs, and dashboards with the use of data visualization tools such as PowerBI and Tableau.
PowerBI is an excellent choice for data visualization because it is simple to use and connects easily with other Microsoft products.
This makes it an excellent tool for companies that use Microsoft Office. Tableau is another popular alternative, with a large user base and a diverse set of capabilities.
By learning a data visualization tool, you will be able to produce interactive and fascinating visuals that will assist you in better understanding your data and communicating your results to others, making you an important asset to any data-driven company.
- Mathematics and Statistics:
Understanding the fundamentals behind what data tools do can greatly benefit your business. An in-depth knowledge of statistics and math can help you choose which methods are most suited to solving a certain problem, detect mistakes in your data, and better understand the results.
Understanding statistics is being able to sort through large amounts of data to extract high-level insights. Probability distributions, statistical characteristics, and Bayesian statistics are among the most common statistical topics to understand.
CONCLUSION:
In short, data analysis is a great career path with high demand and exciting chances. Data analysts play a crucial role in collecting, analyzing, and communicating insights that drive informed business decisions. Whether you’re just starting or wishing to improve your career, mastering abilities in mathematics, statistics, and data technologies is important. As we complete this comprehensive guide, it is clear that the demand for professional data analysts continues to increase, creating a landscape full of opportunities for those prepared with the necessary expertise.
Authentication and Authorization in ASP.NET:
Introduction:
ASP.NET includes robust mechanisms for handling authentication and authorization in web applications, ensuring resource security. Authentication is the process of verifying a user’s identity, whereas authorization entails granting or denying access to specific resources based on the authenticated user’s permissions. This article delves into the fundamentals of ASP.NET authentication and authorization, focusing on best practices and key components.
Authentication in ASP.NET:

Forms Authentication:
Forms Authentication in ASP.NET is a mechanism that allows you to authenticate users using their credentials (such as a username and password) via a web form. It entails creating a login page where users enter their credentials, validating those credentials, and issuing an authentication ticket (usually in the form of a cookie) after successful authentication. This authentication ticket is then used to identify the user for future requests.
Here is a step-by-step guide for implementing Forms Authentication in ASP.NET:
Step 1: Configure Authentication in “web.config”: In your web application’s “web.config” file, configure the authentication mode to Forms and specify the login page. “loginUrl” – Specifies the URL of the login page. “timeout” – Sets the expiration time for the authentication ticket in minutes.
Step 2: Create a Login Page: Create a login page where users can enter their credentials. You can use standard HTML controls or ASP.NET controls for the username and password input fields.
Step 3: Authenticate Users: In the code-behind of the login page (Login.aspx.cs), validate the user credentials. If the credentials are valid, issue an authentication ticket using “FormsAuthentication.SetAuthCookie()”.
Step 4: Secure Pages: Use the “Authorize” attribute on pages or controllers that should only be accessible to authenticated users.
With these steps, you can add Forms Authentication to your ASP.NET application. If users attempt to access secured resources without authentication, they will be redirected to the login page, and their authentication ticket will be used to identify them across subsequent requests.
Windows Authentication:
Windows Authentication in ASP.NET is a feature that uses the underlying Windows operating system’s security framework to verify user identity. When the client and server are both a part of the same Windows domain, this authentication technique is frequently used in intranet scenarios. Users that use Windows Authentication don’t need to enter different credentials because they are automatically authenticated using their Windows credentials.
Here is a comprehensive tutorial on configuring Windows Authentication in an ASP.NET application.
Step 1: Configure Authentication in “Web.config”: In your web application’s “web.config” file, set the authentication mode to “Windows” within the <system.web> section. This configuration informs ASP.NET to use Windows Authentication.
Step 2: Set Authorization Rules: Specify authorization rules in the <system.web> section to control access to specific pages or directories. For example, to allow all authenticated users. This configuration allows any authenticated user to access the resources.
Step 3: Enable Windows Authentication in IIS: Ensure that Windows Authentication is enabled in Internet Information Services (IIS):
Open IIS Manager –> Select your site –> In the Features View, double-click “Authentication” –> Enable “Windows Authentication” and disable other authentication methods if not needed.
Step 4: Implement Authorization in Code (Optional): If you need more fine-grained control over authorization, you can use the “WindowsPrincipal” class in your code-behind files.
Step 5: Test the Application: Run your application, and it should automatically prompt users to authenticate using their Windows credentials. The application will then grant or deny access based on the configured authorization rules.
Step 6: Keep in mind that intranet scenarios, in which the application server and users are within the same Windows domain, are optimal for the use of Windows Authentication. Other authentication techniques like Forms Authentication or ASP.NET Core Identity might be more appropriate if users are accessing the application via the internet or from different domains.
Identity Providers and OAuth:
Identity Providers (IdPs) are third-party services that verify users and give applications access to their personal data. Users can use their existing login credentials from these providers to access your application. Examples include Twitter, Microsoft, Facebook, Google, and so on.
OAuth is an open standard for access delegation that supports various flows, including the client credentials flow, implicit flow, and authorization code flow. It is frequently used for token-based authentication. It enables your application to ask an Identity Provider for access tokens on a user’s behalf and receive them.
When a user clicks the “Login with Google” button (or any other provider), your application directs them to the Identity Provider’s login page. After successful authentication, the Identity Provider sends the user back to your application with an authorization code or access token.
Integrating Identity Providers and OAuth into your ASP.NET application (particularly ASP.NET Core) simplifies user authentication, reduces the need for users to create new accounts, and improves the overall user experience. It is critical to adhere to the specific implementation guidelines provided by each Identity Provider with which you intend to integrate, as OAuth flows and configuration requirements may differ.
Authorization in ASP.NET:
Role-Based Authorization:
Role-based authorization in ASP.NET allows you to restrict access to specific parts of your application based on predefined roles. This allows you to specify which users can perform specific actions or access specific resources. Role-based authorization assigns users to one or more roles, and access to specific features or pages is granted based on those roles.
Here’s a guide for implementing role-based authorization in ASP.NET.
Step 1: Define Roles: Roles represent groups of users with similar permissions. You need to define roles in your application, and users will be assigned to these roles. You can define roles programmatically or use a database to store roles.
Step 2: Assign Roles to Users: In your user management system (this could be part of your registration or admin interface), assign roles to users.
Step 3: Configure Role-Based Authorization: In your application, you can use the “[Authorize]” attribute along with the “Roles” property to control access to specific controllers or actions.
Step 4: Check Roles in Code: Inside your controller actions or views, you can also check the user’s roles programmatically.
Step 5: Secure Views: You can secure views based on roles by using the “User.IsInRole” method.
Role-based authorization in ASP.NET provides a way to restrict access.Implementing role-based authorization in ASP.NET allows you to control access to various parts of your application based on the roles assigned to users. This method is especially useful for applications with multiple user roles and levels of access permissions.
In addition to role-based authorization, policy-based authorization provides more granular control. Policies enable you to encapsulate complex authorization logic.
Claims-Based Authorization:
Claims-based authorization in ASP.NET enables you to make access control decisions based on a user’s claims. Claims represent specific attributes or characteristics of the user and may include information such as roles, email addresses, or custom data. This approach offers a flexible and granular method for managing authorization in your application.
Here’s a guide for implementing claims-based authorization in ASP.NET:
Step 1: Understanding Claims: In ASP.NET, a claim is a piece of information about the user, typically represented as key-value pairs. Examples of claims include user roles, email addresses, or any other custom information relevant to your application.
Step 2: Assign Claims to Users: Claims are assigned to users during the authentication process. You can include claims when creating or updating the user’s identity. ASP.NET provides the “ClaimsIdentity” class for this purpose.
Step 3: Configure Claims-Based Authorization: In your application, you can use the “[Authorize]” attribute along with the “User.HasClaim” method to control access based on claims.
Step 4: Define Policies: You can define policies in your application’s startup configuration. Policies encapsulate authorization logic and can include requirements based on claims.
Step 5: Check Claims in Code: Inside your controller actions or views, you can check the user’s claims programmatically.
Step 6: Secure Views: You can secure views based on claims by using the “User.HasClaim” method.
Implementing claims-based authorization in ASP.NET allows you to make access control decisions based on the user’s specific attributes or characteristics. This method is especially useful when you require fine-grained control over authorization and want to assign different sets of attributes to different users.
Policy-Based Authorization:
Policy-based authorization, which was introduced in ASP.NET Core, allows you to define complex access control policies.
Policies encapsulate authorization logic and can be applied to controllers or action methods via the Authorize attribute.
Best Practices:
Secure Password Storage:
Use secure password hashing algorithms like bcrypt or Argon2 to store passwords securely.
Implement password policies to enforce strong passwords.
Two-Factor Authentication (2FA):
Encourage or enforce the use of two-factor authentication for an additional layer of security.
Regularly Review and Update Access Controls:
Periodically review and update roles, claims, and access control policies.
Remove unnecessary privileges to minimize the attack surface.
Logging and Monitoring:
Implement logging to track authentication and authorization events.
Monitor logs for suspicious activities and potential security breaches.
Conclusion:
Proper authentication and authorization are critical for developing secure and reliable ASP.NET applications. Understanding available authentication methods and implementing effective authorization strategies allows developers to create applications that protect sensitive data and provide a seamless user experience while maintaining a strong security posture. Staying up to date on security best practices and ASP.NET community updates is critical for adapting to evolving security challenges.
How to Host DOTNET site in IIS
what is IIS?
IIS, or Internet Information Services, is a web server software developed by Microsoft for hosting and serving web applications and websites. It is an integral part of the Windows Server operating system and is widely used for deploying and managing web-based applications on the Microsoft platform.
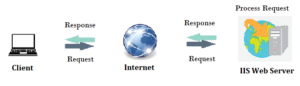
Key features of IIS include:
Web Server Functionality: IIS serves as a powerful web server, handling HTTP and HTTPS requests. It supports various web technologies, including HTML, CSS, JavaScript, and different server-side scripting languages like ASP.NET.
Application Hosting: IIS is designed to host and manage web applications and services built on the Microsoft technology stack, such as ASP.NET, .NET Core, and PHP. It also supports classic ASP (Active Server Pages).
Security: IIS provides robust security features, including authentication, authorization, and SSL/TLS support for encrypting data in transit. It allows administrators to control access to websites and applications based on user roles and permissions.
Scalability: IIS is scalable and can handle a large number of concurrent connections. It supports load balancing and can be configured to distribute incoming requests across multiple servers for improved performance and reliability.
Management Tools: IIS comes with a user-friendly management interface, known as IIS Manager, which allows administrators to configure and manage web server settings, applications, and security features. It also supports remote administration.
Logging and Monitoring: IIS generates logs that provide detailed information about web server activity, helping administrators troubleshoot issues and analyze performance. Additionally, administrators can use performance monitoring tools to track server metrics.
Extensibility: IIS is extensible and supports the integration of various modules and extensions. This allows developers and administrators to add custom functionality, such as URL rewriting, compression, and caching.
FTP Server: In addition to its web server capabilities, IIS includes a built-in FTP (File Transfer Protocol) server, allowing users to transfer files to and from the server.
IIS is a versatile and widely used web server that caters to a broad range of web hosting needs, from simple static websites to complex dynamic web applications. It is a crucial component for organizations leveraging Microsoft technologies in their web development and hosting environments.
Hosting a .NET site in Internet Information Services (IIS) – Introduction:
Hosting a .NET site in Internet Information Services (IIS) is a crucial step in deploying web applications built on the .NET framework. IIS provides a robust and scalable platform for hosting, managing, and securing web applications. This step-by-step guide will walk you through the process of hosting a .NET site in IIS.
Step-by-Step Guide on How to Host a .NET Site in IIS:
Step 1: Install IIS on the Server:
Before hosting a .NET site in IIS, ensure that IIS is installed on the server. You can install IIS through the Windows Features menu. Go to Control Panel -> Programs -> Turn Windows features on or off, and then select Internet Information Services.
Step 2: Install the Appropriate .NET Runtime:
Ensure that the server has the correct version of the .NET runtime installed to support your .NET application. You can download and install the necessary runtime from the official Microsoft website.
Step 3: Publish the .NET Application:
Publish your .NET application using Visual Studio or the command line. This process generates the necessary files for deployment. Choose the appropriate publish settings, including the target framework and deployment configuration.
Step 4: Create a New IIS Site:
Open the IIS Manager and create a new site for your .NET application. Right-click on “Sites” and choose “Add Website.” Enter a unique site name, set the physical path to the location where you published your .NET application, and assign a port number and host name if necessary.
Step 5: Configure Application Pool:
Create a new application pool or use an existing one for your .NET site. Ensure that the application pool is configured to use the correct version of the .NET runtime and is set up with the necessary permissions.
Step 6: Adjust Security Settings:
Review and adjust the security settings for your site. Configure authentication, authorization, and SSL settings based on your application’s requirements. Ensure that the necessary permissions are granted to the application pool identity.
Step 7: Test Your Site:
After configuring IIS, test your .NET site by navigating to the specified URL in a web browser. Ensure that all pages and functionalities work as expected. Monitor the IIS logs for any errors or issues.
Step 8: Monitor and Maintain:
Regularly monitor the performance of your .NET site in IIS. Use tools like Performance Monitor to analyze server metrics and address any performance bottlenecks. Keep the server and IIS components up to date with the latest security patches and updates.
Conclusion:
Hosting a .NET site in IIS involves several essential steps, from installing IIS and the correct .NET runtime to configuring application pools and security settings. Following this step-by-step guide will help you successfully deploy and manage your .NET web application in a secure and scalable environment.
Full Stack Dot NET Developer Course Online
Introduction
Full Stack.NET Developers play an important role in creating end-to-end solutions by seamlessly integrating front-end and back-end technologies using the Microsoft.NET framework. With the convenience of online courses, aspiring developers can begin their journey to master the complexities of Full Stack.NET development. This article serves as a guide, delving into the key components and benefits of online courses designed to develop skilled Full Stack.NET developers.
A Comprehensive Approach to Understanding Full Stack.NET Development
Using Microsoft’s.NET technologies, full stack.NET development includes both front-end and back-end development. For server-side development, it requires knowledge of languages like C# and ASP.NET, and for client-side development, frameworks like Angular or React. A wide range of topics are covered in online courses designed specifically for Full Stack.NET Developers, guaranteeing a well-rounded skill set.
Key Features of Online Full Stack.NET Courses:
Full Stack.NET Developers must have a strong understanding of C#. Online courses frequently begin with in-depth C# programming modules that cover topics such as object-oriented programming, data types, and control structures.
Courses cover ASP.NET MVC (Model-View-Controller), a framework for developing scalable and maintainable web applications. Students learn about routing, controllers, views, and data models while gaining practical experience in developing robust server-side applications.
Full Stack.NET Front-end developers must be knowledgeable about these technologies. HTML, CSS, and JavaScript are frequently used in online courses, as are popular front-end frameworks such as Angular and React. This allows developers to create interactive and user-friendly interfaces.
Database integration is a critical component of full stack development. The courses cover SQL for database management as well as ORM (Object-Relational Mapping) tools such as Entity Framework, which allow developers to interact with databases seamlessly.
Full Stack.NET Developers frequently create and consume APIs (Application Programming Interfaces). Online courses teach students how to create RESTful APIs, which allow different web application components to communicate with one another.
Source Control and Deployment:
Version control systems (such as Git) and deployment strategies are critical for application collaboration and release. Courses provide insights into Git workflows and deployment techniques, allowing developers to manage projects more efficiently.
Benefits of Online Full Stack .NET Development Courses:
Flexibility:
Online courses allow students to balance their studies with other commitments. Asynchronous learning materials, like video lectures and interactive assignments, cater to a variety of learning styles.
Hands-On Projects:
Practical application is critical to skill development. Many online courses include hands-on projects and real-world scenarios, allowing students to put theoretical knowledge into practice.
Community Support:
Forums and discussion boards are common features of online platforms that foster a sense of community. Learners can connect with their peers, share their experiences, and ask for help from instructors and other students.
Industry-Relevant Content:
Reputable online courses are created with input from industry experts. They keep up with the latest trends and technologies, ensuring that students learn skills that are relevant to today’s job market needs.
Conclusion: Shaping Future Full Stack .NET Developers
Starting the journey to become a Full Stack.NET Developer with online courses provides a flexible and comprehensive learning experience. Aspiring developers can expect to learn how to design, implement, and maintain fully functional web applications, making them valuable assets in the ever-changing web development landscape. Individuals who are dedicated and take the right online course can turn their coding passion into a rewarding career as a Full Stack.NET Developer.
If you need any Training / Technical Support in DOTNET & SQL Contact +91 90427 10472
Python in Web Development
INTRODUCTION:
Python web development is a popular and adaptable option for creating dynamic websites and web apps. A wide range of frameworks, modules, and tools are available for Python, which makes development easier and enables programmers to design scalable and effective web solutions.
It comprises designing, developing, and maintaining websites with a range of functions and uses by utilizing a variety of technologies, programming languages, and tools.
At its foundation, web development includes two essential aspects:
1. Front-end development
2. Back-end development
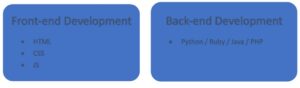
Front-end Development:
The visual and interactive components of a website that visitors interact with directly are the focus of front-end development. Using tools like HTML (Hypertext Markup Language), CSS (Cascading Style Sheets), and JavaScript, entails developing the layout, designing the user interface (UI), and implementing the visual components.
Back-end Development:
On the other hand, back-end development works with a website’s server-side functionality. It entails developing the architecture and logic needed to process data, manage database interactions, and maintain the operation of the website. Programming languages like Python, Ruby, Java, or PHP are used by back-end developers to create the server-side parts of websites.
WEB DEVELOPMENT USING PYTHON:
The process of developing websites and web applications with the Python programming language is known as Python web development. Python is a widely used and adaptable programming language that is well-known for its ease of use, readability, and extensive library and framework ecosystem.
Python is used by developers to construct server-side logic for web applications. This involves processing HTTP requests and responses, data storage and retrieval, business logic implementation, and dynamic content rendering.
SEVERAL ADVANTAGES TO USE PYTHON IN WEB DEVELOPMENT:
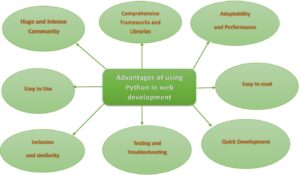
- Huge and Intense Community:
The Python community is large and vibrant, with many developers contributing to its development and providing assistance. Many tools, frameworks, and resources designed expressly for web development are available from the community. Python is a strong option for web development because of its wealth of community-driven tools and resources, which provide answers to a variety of needs.
- Comprehensive Frameworks and Libraries:
Python has a robust ecosystem of frameworks and tools that make web development chores easier. One of the most well-liked web frameworks for Python, Django, offers a sophisticated and comprehensive toolkit for creating intricate web applications. It is designed using the Model-View-Controller (MVC) architectural paradigm and comes pre-configured with features like URL routing, database ORM (Object-Relational Mapping), and authentication. Another lightweight and adaptable micro-framework that gives developers more control over the components and structure of an application is Flask. These frameworks, as well as others like Pyramid and Bottle, give web development a strong base and increase productivity.
- Adaptability and Performance:
Python is well-known for being performant and scalable, which makes it ideal for managing online applications with heavy traffic. Python frameworks like Django and asyncio can effectively manage concurrent requests and optimize server resources thanks to innovations like asynchronous programming. Furthermore, Python’s integration features make it simple to integrate with other languages, allowing programmers to use high-performance C or C++ libraries as necessary.
- Easy to read and use:
Python’s syntax is intended to be simple to understand and write, focusing on code readability and maintainability. Its simple syntax enables developers to express concepts in fewer lines of code, making development faster and more efficient. Python’s simplicity allows both new and experienced developers to work easily and collaboratively.
- Inclusion and Simplicity:
Python is adaptable for web development and interfaces with other technologies with ease. It supports a wide range of databases, including NoSQL databases like MongoDB and SQL-based databases like MySQL, PostgreSQL, and SQLite.
- Testing and Troubleshooting:
Python has strong testing frameworks that make developing and running tests for web applications easier, such unittest and pytest. Integrated development environments (IDEs) and pdb are two of the efficient debugging tools that enable developers to locate problems and solve them fast.
- Quick Development:
Python’s emphasis on productivity and simplicity makes it possible for developers to create web apps rapidly. Pre-built modules and libraries are readily available, allowing developers to take advantage of pre-existing solutions rather than having to start from scratch. Time-to-market is critical for startups and small-scale ventures, where this speedy development strategy is very helpful.
WEB DEVELOPMENT FRAMEWORKS IN PYTHON:
Python offers several web frameworks to suit different needs and preferences. The following are a few well-known Python web development frameworks:
- Django
- Flask
- Pyramid
- Bottle
- CherryPy
- Tornado
WEB DEVELOPMENT LIBRARIES IN PYTHON:
Python web development provides an abundance of tools and frameworks to improve productivity and improve the development process. The following libraries & tools are frequently used in Python web development:
- Jinja2
- Pydantic
- Redis-py
- PyJWT
- Flask-WTF
- Flask-SQLAlchemy
- Celery
- SQLAlchemy
- Pillow
- Beautiful Soup
- Requests
ROADMAP FOR PYTHON WEB DEVELOPMENT:
A road map for using Python to construct websites that highlights the main ideas and procedures involved:
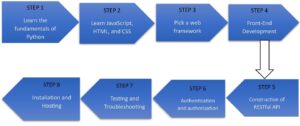
- Learn the fundamentals of Python:
Learn the syntax, data types, control structures, and functions that are essential to Python programming. To begin started, you can consult books or internet guides.
- Learn JavaScript, HTML, and CSS:
Get a fundamental knowledge of web technologies, like JavaScript for client-side interactivity, CSS for styling, and HTML for markup. These are required to understand and design websites.
- Pick a web Framework:
Choose a Python web framework based on the needs of your project. A few well-liked choices are Pyramid, Flask, and Django.
- Front-end Development:
Develop your web development abilities by being familiar with well-known front-end frameworks and modules like Angular, Vue.js, and React.
- Construction of RESTful API:
Create APIs that provide data and functionality to other apps or front-end interfaces using the web framework of your choice.
- Authentication and Authorization:
Learn how to use the built-in capabilities or extensions of your web framework to develop secure user registration, login, and access control techniques.
- Testing and Troubleshooting:
Become an expert at testing your websites. Find out more about end-to-end, integration, and unit testing. To write and run tests, use tools such as pytest, Python’s Selenium, or the testing frameworks included with your preferred web framework.
- Installation and Hosting:
Find out how to put your web application on a cloud platform or web server. Gain an understanding of ideas like scalability, security considerations, deployment automation, and server setup. For hosting web applications, platforms like Heroku, AWS, or PythonAnywhere are frequently utilized.
CONCLUSION:
Python is a powerful language that is well-suited for web development, which involves developing websites and web apps. Because of its ease of use, readability, and robust environment, Python is a great option for web development projects. Python offers a strong basis for web development, making it possible for programmers to create feature-rich, scalable websites quickly.
Exposing the Web Applications’ Synergy between Frontend and Backend Development
Introduction:
Frontend and backend development are two essential parts of the intricate and team-based process that goes into creating modern web applications. These two elements combine flawlessly to provide a thorough user experience. The roles, duties, and cooperation between frontend and backend developers in building robust and intuitive web applications will be discussed in this article.
Frontend Development:
User Interface (UI) Design:
Creating the user interface that users interact with is the main focus of frontend development. HTML, CSS, and JavaScript are used by frontend developers to organize content, style elements, and incorporate interactivity into web pages. The objective is to produce a layout that is visually appealing and intuitive, improving the user experience as a whole.
Client-Side Logic:
Frontend developers can implement client-side logic with JavaScript and well-known frameworks like React, Angular, and Vue.js. Managing state, processing user input, and dynamically updating the user interface in response to user input are all included in this. These frameworks make it easier to create single-page applications (SPAs) that offer a more responsive and seamless user experience.
Cross-Browser Compatibility:
Web applications need to function properly on various browsers and devices, which is the responsibility of frontend developers. In order to provide a consistent look and feel regardless of the user’s device or browser, they take compatibility, responsiveness, and user experience into account.
Performance Optimization:
One of the main duties of frontend developers is to optimize the performance of web applications. To improve the application’s overall speed and responsiveness, they concentrate on cutting down on resource consumption, optimizing page load times, and putting strategies like code splitting and lazy loading into practice.
Backend Development:
Server-Side Logic:
Backend development focuses on the application’s server side. Backend developers implement business logic, handle requests, and communicate with databases using server-side programming languages like Python, Java, Node.js, or Ruby. They take care of things like data validation, authorization, and authentication.
Database Management:
Effective data archiving and retrieval is a vital component of backend development. Working with databases, backend developers make sure that data integrity, query optimization, and database design are all done correctly. Among the popular databases are MongoDB, PostgreSQL, and MySQL.
API Development:
Application Programming Interfaces, or APIs, are made by backend developers to facilitate communication between the frontend and backend. APIs facilitate smooth integration and data flow between the client and server by defining the guidelines and protocols for data exchange.
Security:
One of the main concerns for backend developers is security. They put in place safeguards like encryption, secure authentication, and authorization processes to preserve private information and guarantee the web application’s overall security.
Collaboration and Synergy:
Although backend and frontend developers concentrate on different parts of the development process, good teamwork is essential. The smooth interaction of the frontend with the backend and the seamless flow of data between the client and server are ensured by the two teams’ communication. Well-defined APIs, version control systems, and collaboration tools are essential for promoting this kind of cooperation. https://www.softwaretraininginchennai.com/blog/?s=full+stack
Conclusion:
The synergy between frontend and backend development is crucial in the fast-paced world of web development to produce feature-rich, high-quality web applications. Backend developers construct the reliable framework that supports the application, while frontend developers design captivating user interfaces. A smooth and delightful user experience is the outcome of these two domains’ successful cooperation. The landscape of contemporary web applications is being shaped by the ongoing interdependence of frontend and backend development as technology advances.
If you need any Training / Technical Support in DOTNET & SQL Contact +91 90427 10472
Stock Market Basics: A Beginner’s Guide
Introduction:
The stock market is a fascinating and complex entity that has a significant impact on the global economy. Investors, both experienced and inexperienced, buy and sell stocks, bonds, and other financial instruments to capitalise on opportunities and achieve financial objectives. For those who are new to investing, understanding the fundamentals is critical. This article aims to provide a comprehensive overview of the stock market, including its fundamentals, key players, investment strategies, and the factors that influence its volatility.
What is the Stock Market?
At its core, the stock market is a marketplace where buyers and sellers exchange ownership of companies. Stocks represent ownership shares, and purchasing one makes you a partial owner of the company.
Important Players:
Investors are people or organizations that purchase and sell stocks.
Brokers: Help investors execute stock trades.
Listed Companies: Exchanged publicly, holding companies that sell investors shares.
Regulators: Organizations in charge of monitoring and controlling market activity to guarantee equity and openness.
Stock Types:
Common Stocks: Grant ownership and the ability to vote in a company.
Preferred Stocks: Grant special rights, such as dividend payments ahead of time to common stockholders.
Buying and Selling Stocks:
Brokerage Accounts: To purchase and sell stocks, investors utilize brokerage platforms.
Market Orders: Complete deals at the going rate in the market.
Limit Orders: Establish a predetermined amount for purchase or sale.
Investment Methodologies:
Investing for the long term involves holding stocks and watching a company’s growth over time.
Buying and selling within a single trading day to profit from brief price fluctuations is known as day trading.
Finding cheap equities with room to grow over the long term is known as value investing.
Market Volatility:
Price-Influential Factors: Stock prices are influenced by economic indicators, corporate performance, and international events.
Economic indicators such as unemployment rates, GDP, and inflation have an impact on market sentiment.
Earnings reports, product launches, and changes in management can all have an impact on stock prices.
Global Events: Political instability, natural disasters, and geopolitical tensions all have an impact on market stability.
Risks and Reward:
Risk Management: Diversification and research help to reduce risks.
Potential Rewards: Stocks have historically provided higher returns than other investment options.
Dividends:
Distribution of Profits: Certain businesses distribute their profits to their shareholders in the form of dividends.
Dividend Yield: The annual dividend income as a percentage of the stock price.
Market Indices and Performance:
Understanding Indices: Monitor the performance of specific groups of stocks.
Bull and Bear Markets: Bull markets indicate rising prices, while bear markets indicate declining prices.
Continuous Learning:
Stay Informed: Keep up with financial news and updates.
Educational Resources: Use books, online courses, and reputable financial websites to expand your knowledge.
Role of Technology:
Algorithmic trading involves automated systems that execute trades based on predefined criteria.
Online trading platforms make it easier for individual investors to participate.
Conclusion:
Investors find the stock market dynamic and rewarding. Understanding these fundamental concepts provides a solid foundation for making informed investment decisions. Remember that patience, research, and a long-term perspective are essential for success in the stock market. Always seek advice from financial professionals and continue to educate yourself in order to adapt to the ever-changing market landscape.
If you want to learn the stock market from the basics, contact +91 90427 10472.
Comparing Java, C#, and Python: A Top N Comparison
Java, C#, and Python are three popular programming languages, each with distinct strengths, use cases, and features. Here’s a brief overview of the main differences between Java, C#, and Python.
Syntax:
- Java: Java uses a syntax similar to C++ and C. It enforces strict typing, and the syntax is intended to be readable and simple.
- C#: C# syntax is influenced by C++ and Java, but it incorporates features such as properties and events. It is primarily used for Windows development and works well within the Microsoft ecosystem.
- Python: Python is well-known for its clean and readable syntax. It uses indentation to indicate code blocks, which makes it visually distinct. Python focuses on code readability and simplicity.
Typing System:
- Java: Java is statically typed, which means that variable types must be declared before compilation.
- C#: C# is statically typed, like Java, and requires explicit type declarations.
- Python: Python is dynamically typed, which provides more flexibility by determining variable types at runtime.
Platform and Ecosystem:
- Java: The “Write Once, Run Anywhere” (WORA) principle underpins Java’s platform independence. It has a large ecosystem of libraries and frameworks and is popular for enterprise applications and Android development.
- C#: C# is inextricably linked to the Microsoft ecosystem, as it is widely used in Windows development and applications. It is the primary language for creating applications using the .NET framework.
- Python: Python is a versatile programming language with strong applications in web development, data science, artificial intelligence, and automation. It has a large collection of libraries and frameworks.
Memory Management:
- Java: Java manages memory automatically, which makes it easier for developers because they don’t have to deallocate or allocate memory explicitly.
- C#: C#, like Java, relies on garbage collection for memory management.
- Python: Python also uses automatic memory management, which is handled by a garbage collector.
Use Cases:
- Java: Commonly used in enterprise-level applications, Android app development, and large-scale systems.
- C#: Typically used for Windows applications, web development with ASP.NET, and game development with Unity.
- Python: Popular in web development (Django, Flask), data science (NumPy, Pandas), machine learning (TensorFlow, PyTorch), and automation.
Community and Popularity:
- Java: Java has a large and mature community with a long history, making it one of the most widely used languages.
- C#: C# has a strong community, particularly within the Microsoft ecosystem, and is widely used in enterprise settings.
- Python: Python has a thriving and diverse community, and it is one of the most popular programming languages worldwide.
Learning Curve:
- Java: Moderate learning curve, particularly for beginners. Strongly typed nature may necessitate more explicit code.
- C#: The learning curve is similar to Java, but with additional features such as LINQ.
- Python: The syntax is readable and concise, making it suitable for beginners.
Concurrency and Multithreading:
- Java: robust multithreading and concurrency support thanks to features like the java.util.concurrent package.
- C#: supports concurrency with the help of async/await features.
- Python: Parallelism may be constrained by Global Interpreter Lock (GIL), but asynchronous programming is possible with libraries like asyncio.
Performance:
- Java: generally has good Just-In-Time (JIT) compilation performance.
- C#: Performs competitively, especially when using the .NET runtime’s optimizations.
- Python: Because it’s interpreted, it’s typically slower than Java and C#, but compiled extensions can help with performance-critical tasks.
Integration with Other Technologies:
- Java: smooth interaction across a range of platforms and technologies.
- C#: outstanding compatibility with the Microsoft stack of technologies.
- Python: good compatibility with AI frameworks, data science tools, and web technologies.
In conclusion, the decision between Python, C#, and Java is based on the developer’s experience and preferences as well as the requirements of the project and the target platform. Every language has its advantages and works well for various kinds of applications.
Exploring New Development Trends in .NET and .NET Core
Introduction:
The field of software development is always changing, and the .NET ecosystem has seen significant shifts recently. Several trends in the .NET and .NET Core frameworks have emerged as developers adjust to new technologies and industry demands. In this piece, we examine the significant patterns that are influencing .NET development both now and in the future.
.NET 8 and Unified Platform:
Microsoft’s journey towards a unified platform is furthered with the release of .NET 8, which combines the best features of Xamarin, .NET Core, and .NET Framework. By offering a single codebase for applications targeted at various platforms, including Windows, Linux, macOS, iOS, Android, and more, this unified platform streamlines the development process.
.NET MAUI for Cross-Platform App Development:
Cross-platform application development is increasingly utilizing .NET MAUI (Multi-platform App UI) as the preferred framework. Developers can use a single codebase to create applications that run on Windows, macOS, Android, and iOS by utilizing .NET MAUI. This improves code reuse and streamlines the development process.
Blazor and Web Assembly:
With the release of Blazor Web Assembly, Blazor—the framework for creating interactive web applications with C# and .NET—has undergone development. This makes it possible to run C# code directly within a browser, providing client-side web developers with a strong substitute for JavaScript. Blazor’s Web Assembly integration has become popular for generating rich client-side experiences.
Serverless Computing with Azure Functions:
With Azure Functions setting the standard, serverless computing has become widely used in .NET development. With Azure Functions, developers can create scalable, event-driven applications without having to actively manage server infrastructure. This pattern is consistent with the industry-wide move toward microservices and serverless architectures.
Microservices Architecture and gRPC:
Microservices are still a popular architectural pattern, and gRPC has become the standard for microservices-to-microservices communication. Because of gRPC’s effectiveness, language-neutrality, and bidirectional communication support, it’s becoming more and more common in .NET Core projects to create scalable and effective microservices.
Entity Framework Core Advancements:
The ORM framework for .NET, Entity Framework Core, has been continuously improved. Better performance, new features, and more flexibility in data mapping and querying are all advantageous to developers. Entity Framework Core continues to be an essential part of the .NET ecosystem as businesses aim for effective data access.
DevOps Integration and CI/CD Practices:
The incorporation of DevOps practices into .NET development workflows has become commonplace. Continuous Integration/Continuous Deployment (CI/CD) pipelines automate testing, build processes, and deployment, resulting in faster and more reliable software delivery.
AI and Machine Learning in .NET:
Artificial intelligence and machine learning capabilities are increasingly being integrated into .NET applications. .NET developers can use ML .NET, an open-source framework, to seamlessly integrate machine learning models into their applications. This trend reflects the increasing demand for intelligent, data-driven solutions.
Containerization and Docker:
Containerization with Docker has become a standard in .NET development. Docker containers make it easy to package, deploy, and scale applications, which developers appreciate. Container orchestration tools such as Kubernetes help to streamline the management of containerized .NET applications.
Conclusion:
The .NET and .NET Core ecosystems are thriving and constantly evolving to meet the needs of modern software development. As developers embrace trends such as .NET 6, cross-platform development with .NET MAUI, serverless computing, microservices architecture, and emerging technologies such as Blazor Web Assembly, they position themselves to create scalable, efficient, and creative solutions. Staying informed about these trends enables developers to make informed decisions and prepares them for the exciting developments that lie ahead in the world of .NET.
Begin your Journey Today,
for Training, Contact via Call/WhatsApp :+91 90427 10472
How to Get Ready for a Python Interview
Python has become one of the most popular programming languages, and its widespread use in a variety of industries has resulted in an increased demand for skilled Python developers.
Getting ready for a Python interview requires technical preparation, problem-solving practice, and strategic planning. Here’s a step-by-step guide that will help you prepare effectively.
Understand the Job Requirements:
Begin by carefully reviewing the job description and requirements. Determine the key skills and technologies that the employer is looking for, and tailor your preparation accordingly.
Review Python Basics:
Make sure you understand the fundamental Python concepts, such as data types, loops, conditional statements, functions, and basic file operations. Prepare to write clean, efficient Python code.
Data Structures and Algorithms:
Brush up on basic data structures (lists, dictionaries, and sets) and algorithms. Practice coding challenges on platforms such as LeetCode, HackerRank, and CodeSignal. Concentrate on time and space complexity analysis.
Object-Oriented Programming (OOP):
Understand OOP concepts like encapsulation, inheritance, and polymorphism. Prepare to apply these concepts to real-world problems and explain their significance.
Python Libraries and Frameworks:
Familiarize yourself with Python libraries and frameworks that are relevant to your role. For example, if the job requires web development, learn about Flask or Django. If it involves data science, be familiar with Pandas, NumPy, and scikit-learn.
Database Knowledge:
Review basic SQL queries and learn how Python interacts with databases through libraries such as SQLAlchemy and Django ORM. Understand the differences between various database types and when to use them.
Web Technologies (if applicable):
If the job requires web development, brush up on your HTML, CSS, and JavaScript skills. Learn how Python integrates with front-end technologies and how to build RESTful APIs.
Testing and Debugging:
Practice with testing frameworks such as unittest and pytest. Be familiar with Python debugging tools and techniques like pdb. Recognize the significance of writing testable and debuggable code.
Version Control:
Refresh your understanding of Git and GitHub. Understand basic commands, branching strategies, and how to effectively collaborate with version control.
Soft Skills and Behavioral Questions:
Prepare for soft-skills and behavioral questions. Prepare to discuss your problem-solving approach, teamwork, communication skills, and previous experiences. To structure your responses, follow the STAR method (Situation, Task, Action, Result).
Mock Interviews:
Conduct mock interviews with a friend, mentor, or on online platforms that provide interview practice. To boost your confidence and communication skills, practice real-world interview scenarios.
Review Your Resume:
Prepare to discuss any past projects or experiences listed on your resume. Highlight your accomplishments, obstacles overcome, and the impact of your contributions.
Stay Updated:
Keep up with the latest Python development trends, updates, and best practices. Follow industry blogs, attend webinars, and join relevant forums.
Ask Questions:
Prepare thoughtful questions for the interviewer. This demonstrates your interest in both the company and the position. Questions about the team, projects, and corporate culture are frequently well received.
Final Preparations:
In the days leading up to the interview, review key concepts, practice coding challenges, and get plenty of sleep. Make sure you have a reliable internet connection and a quiet, well-lit environment for the virtual interview.
Remember, preparation is essential for success in a Python interview. Approach each question confidently, demonstrate your problem-solving abilities, and communicate clearly. Good luck!
Begin your Journey Today,
for Training, Contact via Call/WhatsApp :+91 90427 10472
How to Get Ready for a Dotnet Interview
Microsoft’s Dotnet framework is widely used for developing robust and scalable applications. Preparing for a Dotnet interview, whether you’re a seasoned developer or a recent graduate, necessitates a thorough understanding of the framework, its components, and best practices. In this article, we’ll go over key areas to concentrate on and offer practical advice to help you succeed in your Dotnet interview.
Understand the Fundamentals:
Before moving on to more advanced topics, make sure you understand fundamental concepts like Common Language Runtime (CLR), Common Type System (CTS), and Common Intermediate Language (CIL). Examine object-oriented programming principles, which are essential for Dotnet development.
Master Core Technologies:
C# Language Proficiency:
C# is the primary language used in Dotnet development, so brush up on it. Prepare to show your understanding of language features, inheritance, polymorphism, and exception handling.
ASP Dotnet and ASP Dotnet Core:
Learn the distinctions between ASP Dotnet and ASP Dotnet Core. Understand the MVC (Model-View-Controller) architecture, as well as routing and middleware.
ADO Dotnet and Entity Framework:
It is critical to have a solid understanding of ADO Dotnet for data access and Entity Framework for object-relational mapping. Prepare to talk about database connectivity, LINQ, and data modelling.
Explore Web Technologies:
Web API and RESTful Services:
Learn how to create and use Web APIs. Learn RESTful principles as well as how to design and implement scalable services.
Front-End Development:
Learn about front-end technologies such as HTML, CSS, and JavaScript. Knowledge of JavaScript frameworks such as Angular or React can be advantageous.
Look into Testing and Debugging in Depth:
Unit Testing:
Understand the significance of unit testing and be acquainted with testing frameworks such as NUnit or xUnit. Understand how to write efficient unit tests for your code.
Debugging Skills:
Demonstrate your ability to efficiently troubleshoot and debug code. Understand how to use Visual Studio’s debugging tools.
Explore Cloud Services:
Azure Services:
Many businesses use Microsoft Azure to host and manage applications. Understand Azure services such as Azure App Service, Azure Functions, and Azure SQL Database.
Security Best Practices:
Authentication and Authorization:
Learn about various authentication mechanisms such as OAuth and OpenID Connect. Understand how to use role-based access control (RBAC) to secure applications.
Secure Coding Practices:
Understand common security flaws and best practices for writing secure code. Learn how to defend against common threats such as SQL injection and cross-site scripting (XSS).
Keep Up with the Latest Trends:
Latest versions updates:
Keep yourself updated on the latest versions of Dotnet, including Dotnet Core and be aware of new features and improvements.
Containerization and Microservices:
Learn about Docker containerization and the concept of microservices. Learn how these architectural patterns can benefit Dotnet applications.
Behavioral and Problem-Solving Questions:
Soft Skills:
Be prepared to answer behavioral questions about your communication, teamwork, and problem-solving abilities.
Coding Challenges:
Exercise your coding skills by solving algorithmic and real-world problems. LeetCode and HackerRank, for example, provide a variety of Dotnet-related challenges.
Conclusion:
Getting ready for a Dotnet interview necessitates a mix of technical knowledge, practical skills, and problem-solving abilities. You’ll be well-equipped to impress your interviewers and land that Dotnet development role if you focus on the key areas mentioned above and stay up to date on the latest trends. Best wishes!
Begin your Journey Today,
for Training, Contact via Call/WhatsApp :+91 90427 10472
Overview of C# and DotNet
Introduction:
The synergy between C# and the DotNet framework has become a cornerstone for building a wide range of applications, from desktop software to web services and cloud-based solutions, in the realm of software development. In this article, we’ll look at the capabilities, features, and versatility that C# and DotNet bring to the table, making them a dynamic programming duo.
C#: A Versatile and Modern Language:
A Quick Overview of C#:
Microsoft C# (pronounced “C sharp”) is a modern, object-oriented programming language. It combines the best features of C and C++ with the simplicity of Java, making it an excellent choice for developers looking for a powerful and expressive programming language.
Object-Oriented Paradigm:
C# adheres to the principles of object-oriented programming (OOP), emphasizing encapsulation, inheritance, and polymorphism. This enables developers to write modular, maintainable code, resulting in more efficient software design.
Type Safety and Memory Management:
C# is a statically-typed language, which means that variable types are known at compile time, reducing the likelihood of runtime errors. Automatic memory management via the garbage collector improves the language’s robustness.
Asynchronous Programming:
C# simplifies asynchronous programming with the introduction of the async and await keywords. This is especially important when developing responsive applications that can handle concurrent tasks without blocking.
DotNet: A Unified Development Platform
Introduction to the DotNet Framework:
Microsoft’s DotNet framework is a comprehensive platform for developing, deploying, and running applications. It provides a consistent development environment for a wide range of applications, including web, mobile, desktop, cloud, and gaming.
Common Language Runtime (CLR):
The Common Language Runtime (CLR), which manages the execution of DotNet programs, is at the heart of the DotNet framework. It has functions like automatic memory management, exception handling, and security.
Unified Type System:
The DotNet framework has a unified type of system in which all types, whether built-in or user-defined, derive from a single root (System.Object). This unity promotes interoperability and code reuse across the DotNet ecosystem’s various languages.
Extensive Class Library:
DotNet includes a large class library with pre-written code for common programming tasks. The Base Class Library (BCL) is a library that simplifies development by providing a wide range of functionalities without the need to reinvent the wheel.
Building Applications with C# and DotNet:
Desktop Applications with WPF:
C# is frequently used to develop Windows Presentation Foundation (WPF) applications, which allow for the creation of feature-rich and visually appealing desktop software.
Web Development with ASP DotNet:
ASP DotNet, a component of the DotNet framework, allows developers to use C# to create dynamic and scalable web applications. ASP DotNet provides a strong framework for developing APIs and full-stack web applications.
Cross-Platform Development with DotNet Core and DotNet 5/6/7:
Recent DotNet ecosystem advancements, such as DotNet Core and the subsequent DotNet 5, DotNet 6, and DotNet 7, have expanded C#’s capabilities to embrace cross-platform development. Developers can now create applications that run on Windows, macOS, and Linux.
Mobile App Development with Xamarin:
C# is used in mobile app development by Xamarin, a framework that allows developers to create cross-platform mobile apps for iOS, Android, and Windows using a single codebase.
Conclusion:
C# and DotNet are modern software development pillars, providing a versatile and unified platform for developing a wide range of applications. Whether you are an experienced developer or just starting out, exploring the capabilities of C# and DotNet opens up a world of possibilities. The continuous evolution of these technologies ensures that developers have the tools they need to stay ahead of the ever-changing software development landscape. Remember that the journey is just as rewarding as the destination as you delve deeper into the worlds of C# and DotNet.
Have fun coding!
Begin your Journey Today,
for Training, Contact via Call/WhatsApp :+91 90427 10472
Key Features of Python
Introduction:
Python is a versatile and powerful programming language that has grown in popularity due to its ease of use, readability, and breadth of applications. Let’s look at some of Python’s key features that contribute to its widespread adoption and success.
Readable and Simple Syntax:
Python’s syntax is intended to be clean and readable, making learning and writing code simple for beginners.
Indentation, rather than braces, promotes code readability and enforces a consistent coding style.
Extensive Standard Library:
Python includes a large and diverse standard library that includes ready-to-use modules and packages for a variety of tasks.
The standard library includes file I/O, networking, databases, data manipulation, and other features, reducing the need for external dependencies.
Versatility:
Python is a versatile language that is used in a wide range of domains, including web development, data science, machine learning, automation, scientific computing, and others.
Because of its adaptability, developers can easily switch between different application domains.
Interpreted and Dynamically Typed:
Python is an interpreted and dynamically typed language, which means that code can be executed line by line, making development and debugging easier.
The nature of dynamically typed code enables developers to write flexible and adaptable code without specifying variable types.
Object-Oriented Programming (OOP):
Python supports object-oriented programming principles, allowing developers to structure code with classes and objects.
Encapsulation, inheritance, and polymorphism are OOP features that improve code organization and reusability.
Community and documentation:
Python has a large and active developer community that contributes to its growth and improvement.
Developers can easily find resources and solutions to problems thanks to the extensive documentation, tutorials, and community forums.
High-Level Language:
Python is a high-level language that abstracts low-level details and has a simple and expressive syntax.
This abstraction frees developers from having to deal with complex system-level details.
Cross-Platform Compatibility:
Python is cross-platform and can run on a variety of operating systems, including Windows, macOS, and Linux.
This feature ensures that Python code can be easily executed and deployed across multiple environments without needing to be modified.
Excellent Integration Support:
Python integrates seamlessly with other languages and technologies, making it a popular choice for developing complex systems and applications.
It is compatible with languages such as C, C++, and Java, as well as technologies such as RESTful APIs.
Large Ecosystem of Libraries and Frameworks:
Python has a large ecosystem of third-party libraries and frameworks that cater to specific needs.
Popular libraries like NumPy, Pandas, TensorFlow, Django, Flask, and others contribute to the Python ecosystem’s richness.
Rapid Development and Prototyping:
Rapid development and prototyping are made possible by Python’s simplicity and high-level abstractions.
Python is ideal for projects with short deadlines because developers can quickly convert ideas into working code.
Community-Driven Development:
Python’s development is driven by the community, with an open-source model that encourages collaboration and contributions from developers all over the world.
Python is constantly updated and improved to ensure that it remains a modern and relevant programming language.
In conclusion, Python’s key characteristics, such as readability, a large standard library, versatility, and strong community support, make it an excellent choice for a wide range of applications. Python’s ease of use and diverse capabilities make it a valuable language in the world of programming, whether you’re a beginner or an experienced developer.
Begin your Journey Today,
for Training, Contact via Call/WhatsApp :+91 90427 10472
Dependency Injection in ASP.NET Core
Building Modular and Testable Applications with Dependency Injection in ASP.NET Core
Introduction:
A key component of developing ASP.NET Core applications that encourages modularity, maintainability, and testability is dependency injection, or DI. In this post, we’ll examine the foundations of dependency injection in ASP.NET Core, as well as its advantages and practical uses for developing organized and expandable applications.
Understanding Dependency Injection:
Dependency injection is a design pattern that assists in the management of dependencies among various components in a software system. It refers to the technique of supplying the objects that a class requires (its dependencies) from outside rather than creating them within the class itself in the context of ASP.NET Core. This method makes classes more modular and testable.
Benefits of Dependency Injection in ASP.NET Core:
1. Modular Code: By injecting dependencies into classes, each class can concentrate on its own functionality without being tethered to the implementation details of its dependencies. As a result, the code becomes more modular and maintainable.
2. Testability: Dependency injection makes unit testing easier by allowing developers to replace real implementations of dependencies with mock or test implementations. This facilitates the isolation and testing of individual components.
3. Extensibility: It is easier to extend an application’s functionality with dependency injection by introducing new components or swapping out existing ones. This is especially useful when evolving and scaling an application.
Implementing Dependency Injection in ASP.NET Core:
1. Service Registration:
Services in ASP.NET Core are registered at application startup in the dependency injection container. Services can be added to the container via the ‘ConfigureServices’ method in the ‘Startup’ class.
public void ConfigureServices(IServiceCollection services)
{
services.AddTransient<IMyService, MyService>();
// Add more services...
}
‘IMyService’ is the interface in this example, and ‘MyService’ is the matching implementation. ‘Transient’ means that each time a request is made, a new instance of ‘MyService’ is created.
2. Constructor Injection:
Use the constructor of a class to inject dependencies into it. The necessary dependencies are automatically provided by the DI container when a class instance is created.
public class MyController : Controller
{
private readonly IMyService _myService;
public MyController(IMyService myService)
{
_myService = myService;
}
// Controller actions...
}
3. Using Dependency Injection in Middleware:
Dependency injection can also help middleware components in the ASP.NET Core request processing pipeline. The ‘Invoke’ method can have services injected into it.
public class MyMiddleware
{
private readonly RequestDelegate _next;
private readonly IMyService _myService;
public MyMiddleware(RequestDelegate next, IMyService myService)
{
_next = next;
_myService = myService;
}
public async Task Invoke(HttpContext context)
{
// Use _myService...
await _next(context);
}
}
Scopes and Lifetimes of Services:
Several service lifetimes, such as ‘Transient’, ‘Scoped’, and ‘Singleton’, are supported by ASP.NET Core. Managing the lifespan of service instances requires an understanding of these lifetimes.
1. Transient: Whenever an instance is requested, a new one is created.
2. Scoped: Each request generates a single instance. Within the parameters of an HTTP request, it is shared.
3. Singleton: For the duration of the application, only one instance is created.
Best Practices for Dependency Injection in ASP.NET Core:
1. Choose Constructor Injection: For improved readability and maintainability, inject dependencies via the constructor.
2. Employ Interfaces: Write code that checks against interfaces as opposed to specific implementations. This encourages testability and flexibility.
3. Avoid the Service Location Anti-Pattern: Avoid the ‘ServiceLocator’ pattern, which involves retrieving services directly from the container within a class.
4. Register Services as Interfaces: When registering services, use interfaces rather than concrete implementations.
services.AddTransient<IMyService, MyService>();
Conclusion:
Dependency injection is a powerful design pattern that improves the design, testability, and maintainability of ASP.NET Core applications significantly. Developers can create modular, extensible, and testable applications by leveraging the built-in dependency injection container. Understanding dependency injection principles is critical for developing robust and scalable ASP.NET Core applications.
Database Access in ASP.NET Core using Entity Framework Core
Introduction:
Many web applications depend on database access, which is made easier and more efficient in ASP.NET Core by Entity Framework Core (EF Core). In this post, we’ll examine the foundations of Entity Framework Core and how ASP.NET Core applications can use it to achieve effective and adaptable database access.
Overview of Entity Framework Core:
Entity Framework Core is an object-relational mapping (ORM) framework that enables.NET objects to be used by developers to communicate with databases. Instead of working directly with SQL queries, it allows developers to work with databases using a high-level, object-oriented API.
Entity Framework Core’s key features include:
Model-First Approach: Use C# classes to define your data model, and EF Core will create the corresponding database schema.
LINQ Support: When querying databases, use Language-Integrated Query (LINQ), which makes it easier to express database queries in C# syntax.
Database Migrations: EF Core supports database migrations, allowing for simple schema changes and updates as your application evolves.
Cross-Platform Compatibility: EF Core is designed to work with various database providers, giving you the option of using SQL Server, MySQL, SQLite, and others.
Setting Up Entity Framework Core in ASP.NET Core:
Install the NuGet package for Entity Framework Core:
Install the NuGet package Entity Framework Core in your ASP.NET Core project:
dotnet add package Microsoft.EntityFrameworkCore
Configure Database Provider: Select a database provider (for example, SQL Server) and install the appropriate provider package:
dotnet add package Microsoft.EntityFrameworkCore.SqlServer
Configure the database provider using the ConfigureServices method in your Startup.cs file:
public void ConfigureServices(IServiceCollection services)
{
services.AddDbContext<ApplicationDbContext>(options =>
options.UseSqlServer(Configuration.GetConnectionString("DefaultConnection")));
}
Create DbContext:
Make a class that derives from DbContext in order to create DbContext. This class defines DbSet properties for every entity and represents the database context.
public class ApplicationDbContext : DbContext
{
public DbSet<User> Users { get; set; }
// Add more DbSet properties for other entities
}
Configuring the Connection String: Open the appsettings.json file and set the database connection string there.
{
"ConnectionStrings": {
"DefaultConnection": "YourConnectionString"
},
// Other configurations...
}
Working with Entities and DbContext:
Defining Entities:
Make classes in C# that correspond to your entities. EF Core will map to database tables using these classes.
public class User
{
public int Id { get; set; }
public string UserName { get; set; }
public string Email { get; set; }
// Other properties...
}
CRUD Operations:
In your application code or controllers, use the DbContext to perform CRUD operations:
public class UserController : ControllerBase
{
private readonly ApplicationDbContext _context;
public UserController(ApplicationDbContext context)
{
_context = context;
}
[HttpGet]
public ActionResult<IEnumerable<User>> GetUsers()
{
return _context.Users.ToList();
}
[HttpPost]
public ActionResult<User> AddUser([FromBody] User newUser)
{
_context.Users.Add(newUser);
_context.SaveChanges();
return newUser;
}
// Implement other CRUD operations (Update, Delete) as needed...
}
Database Migrations:
With EF Core, you can use migrations to change the structure of your database. To create and implement migrations, execute the following commands:
dotnet ef migrations add InitialCreate
dotnet ef database update
To establish the initial database schema and implement the modifications, these commands produce SQL scripts.
Conclusion:
Entity Framework Core offers a strong and adaptable ORM framework while streamlining database access in ASP.NET Core. Without requiring in-depth SQL knowledge, developers can effectively interact with databases by defining entities, setting up a DbContext, and using LINQ for querying. EF Core provides a dependable and efficient method for database access in ASP.NET Core, regardless of the size of your project—from a small application to a large enterprise system.
Web API with ASP.NET Core using MVC
Creating a web API with ASP.NET Core using the MVC (Model-View-Controller) pattern entails creating controllers to handle HTTP requests, models to represent data, and routes for the API. A step-by-step guide to creating an MVC web API with ASP.NET Core is provided below.
Step 1 Install the Necessary Software
Check that your machine has the.NET SDK installed.
Step 2 Create a New ASP.NET Core MVC Web API Project
Run the following commands in a terminal or command prompt
dotnet new mvc -n MyMvcWebApi
cd MyMvcWebApi
This will create a new ASP.NET Core MVC project called MyMvcWebApi and navigate to its directory.
Step 3 Explore the Project Structure
Launch your preferred IDE and open the project. Controllers, Models, and Views are among the folders in the project structure.
Controllers In this section, you will define your API controllers.
Models To represent your data, you can create model classes.
Views Although views are not required for an API, this folder is included in the standard MVC structure.
Step 4 Create a Model
To represent your data, create a model class. Create a file called Item.cs in the Models folder, for example
public class Item
{
public int Id { get; set; }
public string Name { get; set; }
}
Step 5 Establish a Controller
Add a new file to the Controllers folder, such as ItemsController.cs, to create a controller
using Microsoft.AspNetCore.Mvc;
using System.Collections.Generic;
namespace MyMvcWebApi.Controllers
{
[Route(api[controller])]
[ApiController]
public class ItemsController ControllerBase
{
private static ListItem _items = new ListItem
{
new Item { Id = 1, Name = Item 1 },
new Item { Id = 2, Name = Item 2 },
new Item { Id = 3, Name = Item 3 }
};
GET apiitems
[HttpGet]
public ActionResultIEnumerableItem Get()
{
return _items;
}
GET apiitems1
[HttpGet({id})]
public ActionResultItem Get(int id)
{
var item = _items.Find(i = i.Id == id);
if (item == null)
return NotFound();
return item;
}
POST apiitems
[HttpPost]
public ActionResultItem Post([FromBody] Item newItem)
{
newItem.Id = _items.Count + 1;
_items.Add(newItem);
return CreatedAtAction(nameof(Get), new { id = newItem.Id }, newItem);
}
PUT apiitems1
[HttpPut({id})]
public IActionResult Put(int id, [FromBody] Item updatedItem)
{
var existingItem = _items.Find(i = i.Id == id);
if (existingItem == null)
return NotFound();
existingItem.Name = updatedItem.Name;
return NoContent();
}
DELETE apiitems1
[HttpDelete({id})]
public IActionResult Delete(int id)
{
var itemToRemove = _items.Find(i = i.Id == id);
if (itemToRemove == null)
return NotFound();
_items.Remove(itemToRemove);
return NoContent();
}
}
}
Step 6 Run the Program
Enter the following command at the command prompt or terminal
dotnet run
The URL for your API will be http://localhost:5000 or https://localhost:5001. Open an API testing tool such as Postman:
GET Request: To retrieve items, open https://localhost:5001/api/items.
POST Request: To add a new item, submit a POST request with a JSON body to https://localhost:5001/api/items.
PUT Request: To update an item, submit a PUT request with a JSON body to https://localhost:5001/api/items/1.
DELETE Request: To delete an item, send a DELETE request to https://localhost:5001/api/items/1.
Step 7 Explore and Extend
To improve your web API, investigate additional ASP.NET Core MVC features like middleware, authentication, dependency injection, and model binding. Depending on the needs of your application, you can handle various HTTP methods, define more models, and add more controllers.
Developing ASP.NET Core MVC Web Applications:
Introduction:
Creating dynamic and interactive web pages using the ASP.NET Core framework is required when developing ASP.NET Core MVC (Model-View-Controller) web applications. Model, View, and Controller (MVC) is a design pattern that divides an application into three main components: Model, View, and Controller. ASP.NET Core MVC is a lightweight, cross-platform, open-source framework for building modern, scalable web applications.
Here is a step-by-step tutorial for creating ASP.NET Core MVC web applications:
1. Install Prerequisites:
As your development environment, install Visual Studio or use Visual Studio Code.
Install the.NET SDK from the Microsoft website:
https://dotnet.microsoft.com/download
2. Create a new ASP.NET Core MVC project as follows:
Open Visual Studio and choose “Create a new project.”
Select “ASP.NET Core Web App” and then “ASP.NET Core with MVC” as the template.
Configure the project parameters and then click “Create.”
3. Understand the Project Structure:
Look into the project structure to learn about the key components:
Controllers: Controllers are responsible for handling user input and orchestrating interactions between the model and the view.
Views: Present information to the user and collect user input.
Models: Represent the application’s data and business logic.
4. Define Models:
Model classes should be created to represent the data entities in your application.
Data annotations can be used to validate data and define metadata.
public class Product
{
public int Id { get; set; }
[Required]
public string Name { get; set; }
public decimal Price { get; set; }
}
5. Create Controllers:
To handle user requests and interact with models, create controllers.
Define controller actions to respond to specific HTTP requests.
public class ProductController : Controller
{
public IActionResult Index()
{
// Retrieve and return a list of products
return View(products);
}
public IActionResult Details(int id)
{
// Retrieve a specific product by id and return it
return View(product);
}
}
6. Develop Views:
To define the presentation layer, create view files (.cshtml).
To display dynamic content, use Razor syntax to embed C# code within HTML.
@model List<Product>
<h2>Product List</h2>
<ul>
@foreach (var product in Model)
{
<li>@product.Name - $@product.Price</li>
}
</ul>
7. Configure Routing:
Define routes in the Startup.cs file to map URLs to controller actions.
app.UseEndpoints(endpoints =>
{
endpoints.MapControllerRoute(
name: "default",
pattern: "{controller=Home}/{action=Index}/{id?}");
});
8. Handle Form Submissions:
In controllers, use the HttpPost attribute to handle form submissions.
[HttpPost]
public IActionResult Create(Product product)
{
// Validate and save the new product
return RedirectToAction("Index");
}
9. Implement Data Access:
To interact with databases, use Entity Framework Core or other data access technologies.
10. If desired, include authorization and authentication:
Authenticate and authorize users in accordance with the specifications of your application.
11. Test Your Application:
Run your application locally and verify various scenarios to test it.
12. Publish Your Application:
Publish your ASP.NET Core MVC application to a cloud platform or hosting environment.
Note: Always refer to the official ASP.NET Core documentation for more information on each stage of development: https://docs.microsoft.com/en-us/aspnet/core/
Microservices Architecture with DOTNET Core
Introduction:
The ability of microservices architecture to break down large, monolithic applications into smaller, independent services has led to widespread adoption. This article delves into the design principles and implementation strategies for developing microservices with DOTNET Core, Microsoft’s versatile and powerful framework.
Understanding Microservices Architecture:
Microservices is a design style in which an application is made up of loosely coupled, independently deployable services. Each service is intended to carry out a specific business function and communicates with other services via well-defined APIs.
Design Principles:
1. Single Responsibility Principle (SRP): Each microservice should be responsible for a single business capability. This ensures ease of use and maintainability.
2. Decentralized Data Management: Databases belong to microservices. Because of this decentralization, dependencies are reduced and each service is free to select the database technology that best meets its needs.
3. Inter-Service Communication: APIs are used by services to communicate with one another, and they frequently use lightweight protocols such as HTTP/REST or messaging queues. This allows for independence and flexibility in technology stack selection.
4. Fault Tolerance and Resilience: Create services that are resistant to failure. To handle faults gracefully, use mechanisms such as circuit breakers and retries.
5. Continuous Integration and Deployment (CI/CD): Use CI/CD techniques to automate the processes of building, testing, and deployment. This guarantees the delivery of microservices quickly and consistently.
6. Scalability: Microservices can be scaled independently based on demand. By horizontally scaling instances, you can design services to handle varying levels of load.
Implementation with DOTNET Core:
1. Service Development: For each microservice, create a separate DOTNET Core project. Build web APIs with ASP DOTNET Core and consider high-performance communication technologies like gRPC.
2. API Gateway: Set up an API Gateway to manage and route requests to the proper microservices. In Azure, tools such as Ocelot and API Gateway can be used.
3. Service Discovery: To dynamically locate and call services, use service discovery tools such as Consul or Eureka. This is critical for dealing with the fluid nature of microservices.
4. Containerization: Use Docker to containerize each microservice. This ensures consistency across environments and makes deployment easier.
5. Orchestration with Kubernetes: Use Kubernetes to orchestrate and manage containers. Kubernetes makes it easier to deploy, scale, and manage microservices.
6. Logging and Monitoring: Consolidate logging and monitoring. Tools such as the ELK stack (Elasticsearch, Logstash, Kibana) or Application Insights can provide insights into the behavior of microservices.
7. Security: Implement an all-encompassing security strategy. Utilize OAuth for authentication, JWT for token-based authorization, and HTTPS for secure communication.
8. Testing: For each microservice, perform unit testing, integration testing, and end-to-end testing. In this context, tools like xUnit, NUnit, and Postman can be useful.
9. Database Management: Select databases based on the needs of the microservices. Accept polyglot persistence and think about SQL and NoSQL databases.
10. Event-Driven Architecture: Think about using event-driven patterns with message brokers such as RabbitMQ or Apache Kafka. Asynchronous communication between microservices is enabled by events.
Conclusion:
Using DOTNET Core to build microservices necessitates adhering to architectural principles that prioritize independence, scalability, and maintainability. Developers can create a robust microservices ecosystem that meets the demands of modern, scalable applications by using a containerized and orchestrated approach. The combination of DOTNET Core and microservices unleashes the power of agile development, rapid deployment, and efficient scaling, enabling organizations to deliver resilient and scalable applications in today’s dynamic computing landscape.
Begin your journey today, for Training / Technical Support,
Contact via Call/WhatsApp :+91 90427 10472
Python Online Course at Singapore
In the vibrant tech hub of Singapore, where innovation and technology are at the forefront, Python programming has emerged as a key skill in high demand. Aspiring developers and professionals alike are seeking quality Python online courses to enhance their programming prowess.
In this article, we’ll look at some of Python’s most notable features and real-world applications, along with the factors that have contributed to its growing popularity among programmers.
Readability and Simplicity: Python’s syntax prioritises readability and simplicity, which lowers the cost of programme creation and maintenance. Python is a great language for beginners to understand programming principles without getting bogged down by complicated syntax rules because of its clear and simple syntax.
Flexibility: One of Python’s most notable qualities is its flexibility. Because it supports both object-oriented and procedural programming paradigms, it can be used in a variety of application domains. Python is a preferred language for many different kinds of tasks, including web development, data research, and machine learning programmes.
Large Libraries: The standard library of Python is very large and covers a lot of topics, including file I/O, databases, networking, and more. Additionally, a sizable library and framework collection of third parties is hosted via the Python Package Index (PyPI). Because there are so many resources available, developers can use pre-written code to expedite the development process.
Web Development: Django and Flask are only two of the many web development frameworks available in Python. These frameworks make it easier to create scalable and reliable web applications. Django, for instance, encourages quick development and adheres to the “Don’t Repeat Yourself” (DRY) concept.
Data Science and Machine Learning: Python has risen to prominence as the language of choice for data scientists and machine learning practitioners. NumPy, pandas, and scikit-learn are strong libraries for data manipulation, analysis, and machine learning. Python’s popularity in the field of data science can be attributed to its simple syntax and widespread community support.
Cross-Platform Compatibility: Python is naturally cross-platform, which means that programmes written in Python may run on a variety of operating systems with minimum adjustments. This functionality improves application portability and simplifies deployment across several settings.
Support from the Community: Python’s robust and welcoming community is critical to its success. Through forums and online communities, the community actively contributes to the language’s growth, generates valuable resources, and provides support. This collaborative setting promotes learning and innovation.
Educational Tool: Python is a great language for teaching because of its readability and ease of learning. Python is widely used in colleges and universities to teach students programming ideas, making the transition from non-coding to coding easy for newcomers.
In conclusion, Python’s wide range of applications demonstrates its versatility, understandability, and community support. For programmers of all experience levels, from beginners learning the basics to seasoned pros working on difficult projects, Python offers a stable and scalable environment. Python’s status as a foundational language in the programming community is expected to remain intact as technology advances.
Explore the Potential of Python with Maria Academy:
At Maria Academy, we take great pride in providing interesting lessons. Our enthusiastic teachers will examine contemporary problems and provide practical solutions. What sets us apart is our commitment to practical programming, which allows students to progress through exercises. Our trainers have at least five years of experience in the industry, so you can be sure of that.
More-over We offer virtual instruction as Flexibility, low tuition, and a wide range of academic options are all provided by online courses.
Begin your journey today, for Training / Technical Support,
Contact via Call/WhatsApp :+91 90427 10472
Learn DOTNET Core Online
Overview of DOTNET Core: A Contemporary Framework for Cross-Platform Development
Microsoft created the free, open-source, cross-platform DOTNET Core framework to help developers create contemporary, scalable applications. With its modular design and lightweight architecture, it offers a substantial departure from the conventional DOTNET Framework and supports a broad variety of application kinds. We’ll go over the main benefits and features that make DOTNET Core a desirable option for developers in this introduction.
Principal attributes:
1. Cross-Platform Interoperability: With the help of DOTNET Core, programmers can create and execute apps for Windows, Linux, and macOS. For contemporary development scenarios, where applications must be deployed on various environments, cross-platform support is essential.
2. High-performance and modular: Because DOTNET Core is modular by design, developers can include only the parts that are required for their application. Its modularity makes it perfect for microservices and cloud-native apps because it reduces footprint and speeds up startup times.
3. Community-driven and Open Source: The framework is being developed as an open-source project to encourage community contributions and collaboration. This openness encourages transparency and creativity while guaranteeing that developers can take an active role in the framework’s evolution.
4. Combined Platform for Various Tasks: Cloud-native microservices, cross-platform desktop apps with Xamarin, and web development with ASP DOTNET Core are just a few of the workloads that can be combined into one cohesive platform with DOTNET Core. Because of its adaptability, developers can use the same set of tools and libraries for various kinds of applications.
5. Modern Development Practices Support: DOTNET Core supports contemporary development practices such as Docker containerization, continuous integration and deployment (CI/CD), and microservices architecture. These characteristics make it ideal for developing and deploying scalable, cloud-ready applications.
6. Comparative Versioning: In contrast to the conventional DOTNET Framework, side-by-side versioning is supported by DOTNET Core. This enables applications to use the version of the runtime and libraries that they were built with by allowing multiple versions to coexist on the same machine.
DOTNET Core components include:
1. DOTNET Core Runtime: The Common Language Runtime (CLR) and Just-In-Time (JIT) compilation are two of the runtime’s key components that are required to run DOTNET Core applications.
2. Core Libraries for.NET: These libraries offer common functionality for applications built with DOTNET Core. They consist of networking, file I/O, data structures, and algorithms, among other things.
3. ASP DOTNET Core: A cross-platform, high-performance framework for creating contemporary, cloud-based, and internet-connected apps is called ASP DOTNET Core. It’s frequently utilized for creating microservices, APIs, and web apps.
4. Entity Framework Core: An open-source, lightweight, and extensible object-relational mapping (ORM) framework is called Entity Framework Core. It makes working with databases using C# objects easier for developers by streamlining persistence and data access.
Getting Started:
Setting up your development environment, starting a new project, and learning the core principles of ASP DOTNET Core are the first steps in getting started with the framework. Here is a step-by-step tutorial to get you started with ASP DOTNET Core web application development.
Step 1: Install Prerequisites
Make sure the following is installed on your computer before you begin:
a.) DOTNET SDK: The DOTNET SDK can be downloaded and installed from the official DOTNET website: Get the DOTNET SDK here.
b.) Code Editor: Select a code editor for your project. Although Visual Studio Code is a well-liked option, you are free to use any other code editor of your choosing.
Step 2: Create a New Project for ASP DOTNET Core
To start a new ASP DOTNET Core project, launch a terminal or command prompt and type the following commands:
# Create a new folder for your project
mkdir MyFirstAspNetCoreApp
cd MyFirstAspNetCoreApp
# Create a new ASP DOTNET Core web application
dotnet new web -n MyFirstAspNetCoreApp
Step 3: Explore the Project Structure
Go to the project folder and examine the project hierarchy. Important documents and directories consist of:
Program.cs: Program.cs is the application’s entry point.
Startup.cs: Startup.cs is responsible for configuring the application’s services and middleware.
wwwroot: Static files (CSS, JavaScript, images) are stored in the wwwroot directory.
Controllers: The controllers that handle requests are listed here.
Views: This collection contains the views that define the user interface.
Models: Contains the data models that the application employs.
Step 4: Run the Program
To build and run the application, use the following command:
dotnet run
Navigate to https://localhost:1001 (or http://localhost:1002) in a web browser. The default ASP DOTNET Core welcome page should appear.
Step 5: Make a Simple Modification
In your code editor, open the project. There is an action method called Index in the Controllers/HomeController.cs file. Modify the ViewBag’s content.Message to another entity. As an example:
public IActionResult Index()
{
ViewBag.Message = “Hello, ASPDOTNETCore!”;
return View();
}
When you save the file, the web application will reload with your changes.
Step 6: Also, Understand the Fundamentals
Explore the following fundamental concepts:
Routing: Learn about URL routing in ASP DOTNET Core. Route configurations can be found in the Startup.cs file.
Views and Razor Pages: Discover how to make views with Razor syntax. Static files can be found in the Views and wwwroot folders.
Dependency Injection: Learn how to configure dependency injection in ASP DOTNET Core. For service registration, look in the Startup.cs file.
Middleware: Discover the elements of middleware and how the Startup.cs file configures them.
As you gain more familiarity with the fundamentals of ASP DOTNET Core development, you should also think about exploring more complex subjects like database access, authentication, and deployment.
Begin your journey today, for Training / Technical Support, Contact +91 90427 10472
Learn Java Online
Starting Java: A Comprehensive Guide for Beginners
Java, a powerful and versatile programming language, has long been a fixture in the software development landscape. Java is an excellent choice for both novice and experienced developers due to its platform independence, object-oriented paradigm, and robustness. This article is intended to be a gentle introduction to the fundamentals of Java programming, covering key concepts, syntax, and the fundamental building blocks that serve as the foundation of this widely used language.
Java has been a well-liked option for developers creating everything from mobile applications to enterprise-level systems because of its “write once, run anywhere” mentality. If you’ve never used Java before, this tutorial will take you through the first steps of setting up your environment and writing your first Java program.
How to Install the JDK (Java Development Kit):
You have to install the JDK before you can begin writing Java code. Take these actions:
To obtain the most recent JDK version, go to OpenJDK or the official Oracle website.
Launch the installer and adhere to your operating system’s on-screen directions.
Once the installation is complete, modify the JDK installation directory by setting the JAVA_HOME environment variable.
Configuring the IDE (Integrated Development Environment):
Even though a basic text editor can be used to write Java code, using an IDE can greatly improve your development experience. NetBeans, Eclipse, and IntelliJ IDEA are a few of the well-known Java IDEs. To set IntelliJ IDEA up, do the following steps:
From the official website, download and install IntelliJ IDEA Community Edition.
Launch IntelliJ IDEA and select the relevant JDK version.
Select the “Hello World” template when starting a new project.
How to Write Your First Java Program:
Now that your environment has been configured, let’s write a simple “Hello, World!” program to ensure that everything is working properly.
// HelloWorld.java
public class HelloWorld
{
public static void main(String[] args)
{
System.out.println(“Hello, World!”);
}
}
Name the file HelloWorld.java and save it.
To compile the program, launch a command prompt or terminal, go to the directory where your file is located, and type:
javac HelloWorld.java
If there are no errors, execute the program as follows:
java HelloWorld
Congratulations! You’ve just finished writing and running your first Java program.
How to Understand the “Hello, World!” Program:
public classHelloWorld : Creates a HelloWorld class.
The program’s entry point is public static void main(String[] args). It is the point at which the program begins to run.
System.out.println(“Hello, World!”); : The string “Hello, World!” is printed to the console.
The Fundamental Structure:
Classes are used to organize Java programs. Each class represents a different aspect of your program. Here’s an example of a simple Java program structure:
public class MyFirstProgram
{
public static void main(String[] args)
{
// Your code goes here
}
}
public class MyFirstProgram: Declares the MyFirstProgram class. The keyword public indicates that the class can be accessed from other classes.
public static void main(String[] args): The main method, from which the program executes. In a Java application, this signature is always present.
Comments
The compiler ignores comments, which are used to annotate your code. They can be either single or multi-line.
// This is a single-line comment
/*
This is a multi-line comment.
It can span multiple lines.
*/
Comment your code to make it more readable and understandable for yourself and others.
Variables and Data Types:
Variables are used to store data in Java. Each variable has a data type that specifies what type of data it can store.
int age = 33; // Integer data type
double price = 10.75; // Double-precision floating-point data type
char grade = ‘S’; // Character data type
String name = “RAM”; // String data type
boolean isJavaFun = true; // Boolean data type
In Java, data types include int, double, char, String, and boolean. =: The assignment operator.
Statements and Semicolons:
Statements in Java are instructions that perform actions. Semicolons are used to end statements.
int x = 1; // Variable declaration statement
System.out.println(x); // Method call statement
x = x + 1; // Assignment statement
A statement’s end is indicated by the semicolon ;.
Code Blocks:
Code blocks combine several statements into one group. Curly braces {} define them.
public class addition
{
public static void main(String[] args)
{
// Start of the main method block
int a = 25;
int b = 75;
int sum = a + b;
System.out.println(“Sum: ” + sum);
// End of the main method block
}
}
Whitespace:
Although whitespace is not sensitive in Java, it is essential for code readability. To improve the visual appeal of your code, use indentation and spaces.
public class Demo
{
public static void main(String[] args)
{
int a = 51;
int b = 100;
if (a < b)
{
System.out.println(“a is less than b”);
}
}
}
Becoming an expert Java programmer starts with understanding Java’s syntax. More complex syntax and ideas will come up as you learn more about Java development. Develop your skills, try new things, and add to your knowledge gradually to become a self-assured Java developer. Have fun with coding!
Begin your journey today, for Training / Technical Support, Contact +91 90427 10472
Learn Python Online in India
Introduction:
Python is a dynamic and flexible programming language that has become a major force in the field of software development. Both novice and experienced developers choose it for its ease of use, readability, and large library. We’ll examine Python’s salient characteristics and practical uses in this piece, as well as the reasons behind its rise to prominence in the programming community.
Readability and Simplicity: Python’s syntax prioritises readability and simplicity, which lowers the cost of programme creation and maintenance. Python is a great language for beginners to understand programming principles without getting bogged down by complicated syntax rules because of its clear and simple syntax.
Flexibility: One of Python’s most notable qualities is its flexibility. Because it supports both object-oriented and procedural programming paradigms, it can be used in a variety of application domains. Python is a preferred language for many different kinds of tasks, including web development, data research, and machine learning programmes.
Large Libraries: The standard library of Python is very large and covers a lot of topics, including file I/O, databases, networking, and more. Additionally, a sizable library and framework collection of third parties is hosted via the Python Package Index (PyPI). Because there are so many resources available, developers can use pre-written code to expedite the development process.
Web Development: Django and Flask are only two of the many web development frameworks available in Python. These frameworks make it easier to create scalable and reliable web applications. Django, for instance, encourages quick development and adheres to the “Don’t Repeat Yourself” (DRY) concept.
Data Science and Machine Learning: Python has risen to prominence as the language of choice for data scientists and machine learning practitioners. NumPy, pandas, and scikit-learn are strong libraries for data manipulation, analysis, and machine learning. Python’s popularity in the field of data science can be attributed to its simple syntax and widespread community support.
Cross-Platform Compatibility: Python is naturally cross-platform, which means that programmes written in Python may run on a variety of operating systems with minimum adjustments. This functionality improves application portability and simplifies deployment across several settings.
Support from the Community: Python’s robust and welcoming community is critical to its success. Through forums and online communities, the community actively contributes to the language’s growth, generates valuable resources, and provides support. This collaborative setting promotes learning and innovation.
Educational Tool: Python is a great language for teaching because of its readability and ease of learning. Python is widely used in colleges and universities to teach students programming ideas, making the transition from non-coding to coding easy for newcomers.
In summary, Python’s extensive use in a variety of fields is evidence of its adaptability, comprehensibility, and community support. Python provides a stable and scalable environment for programmers of all skill levels, from novices learning the fundamentals to seasoned professionals working on challenging projects. Python’s significance is expected to endure as technology develops, securing its status as a fundamental language in the programming community.
Discover Python’s Potential with Maria Academy:
We at Maria Academy are proud of our engaging instruction. Our passionate instructors will explore real-world issues and offer workable answers. Our dedication to practical programming, which enables students to advance their abilities through exercises, is what makes us unique. You may be confident that our trainers have at least five years of expertise in the field.
The complete Python learning process is covered by our painstakingly designed curriculum. There will be opportunities for you to demonstrate your programming abilities through assignments and tests on a regular basis. We promise that by the time the training is over, you’ll be confident enough to handle real-world situations.
Begin your journey today, for Training / Technical Support, Contact +91 90427 10472
View in SQL
View in SQL
A view in SQL is a virtual table created from the results of a SELECT query. Views simplify complex queries, encapsulate logic, and provide an abstraction layer over the underlying tables. They can be used to present data in a more meaningful or secure manner than querying the underlying tables directly. Here’s a quick rundown of how to create and use views in SQL:
Creating a View:
The CREATE VIEW statement is used to create a view. The fundamental syntax is as follows:
| CREATE VIEW view_name AS
SELECT column_name_1, column_name_2, … FROM table_name WHERE condition; |
For example, let us create a new table called studentdata using the syntax shown below.
| create table studentdata(
sno int, sname varchar(100), slocaction varchar(100), smothertongue varchar(100)); |
Insert some records as well using the syntax shown below.
| insert into studentdata values(1, ‘RAM’, ‘CHENNAI’, ‘TAMIL’)
insert into studentdata values(2, ‘RAJ’, ‘CHENNAI’, ‘HINDI’) insert into studentdata values(3, ‘RAVI’, ‘HYDERABAD’, ‘TELUGU’) insert into studentdata values(4, ‘RAJESH’, ‘HYDERABAD’, ‘TAMIL’) insert into studentdata values(5, ‘RAJIV’, ‘CHENNAI’, ‘TELUGU’) |
Select query syntax can be used to display the table records.
| SELECT * FROM studentdata |
Create a view using the syntax shown below.
| CREATE VIEW TN AS
SELECT * FROM studentdata WHERE slocaction = ‘CHENNAI’ |
Using a View:
After you’ve created a view, you can query it like a regular table with the following syntax:
| SELECT * FROM view_name |
With reference to the given example,
| SELECT * FROM TN |
Updating a View:
You can use the ALTER VIEW statement to update views:
| ALTER VIEW view_name AS
SELECT column_name_1, column_name_2, … FROM table_name WHERE condition; |
In Microsoft SQL Server, you can use the CREATE OR ALTER VIEW statement to replace an existing view or create a new one. This is similar to the CREATE OR REPLACE VIEW syntax found in other database systems. Using the preceding example:
| ALTER VIEW TN AS
SELECT * FROM studentdata WHERE smothertongue = ‘TAMIL’ |
Dropping a View:
The DROP VIEW statement is used to remove a view:
| DROP VIEW employee_view; |
Thinking back to the earlier illustration:
| DROP VIEW TN |
Multiple Views:
Views enable you to create a virtual table in a relational database based on the results of a SELECT query. You can use JOIN operations in your SELECT statement to combine data from multiple tables in a view. Here’s a general guide to creating a view with multiple tables:
Consider the following scenario: you have two tables: customers and orders. The customers table contains information about customers, and the orders table contains information about the orders that these customers have placed.
| — Sample customers table
CREATE TABLE customers ( CustomerId INT PRIMARY KEY, CustomerName VARCHAR(50), Email VARCHAR(50) ); — Sample orders table CREATE TABLE orders ( OrderId INT PRIMARY KEY, CustomerId INT, OrderDate DATE, TotalAmount DECIMAL(10, 2), FOREIGN KEY (CustomerId) REFERENCES customers(CustomerId) ); |
Let us also insert some sample records into both tables using the insert query:
| INSERT INTO customers VALUES (1, ‘RAM’, ‘ram@mail.com’)
INSERT INTO customers VALUES (2, ‘RAJ’, ‘raj@mail.com’) INSERT INTO customers VALUES (3, ‘RAVI’, ‘ravi@mail.com’) INSERT INTO orders VALUES (101, 1, ‘2023/11/02’, 10000) INSERT INTO orders VALUES (102, 2, ‘2023/11/03’, 12000) |
Check it out with the following select query:
| SELECT * FROM customers
SELECT * FROM orders |
Let’s now create a view that combines data from both tables:
| CREATE VIEW CustomerOrderView AS
SELECT c.CustomerId, c.CustomerName, c.Email, o.OrderId, o.OrderDate, o.TotalAmount FROM customers c JOIN orders o ON c.CustomerId = o.CustomerId; |
The CustomerOrderView view is created in this example by selecting specific columns from both the customers and orders tables. The JOIN clause is used to join rows from both tables using the CustomerId column in common.
After you’ve created the view, you can query it like any other table:
| SELECT * FROM CustomerOrderView |
Remember that the exact syntax can change based on the database management system (SQL, PostgreSQL, MySQL, etc.) you are using. Depending on the system you are working with, modify the SQL statements as necessary.
DOTNET Online Training in Chennai
Unleashing Your DOTNET Software Development Potential
Do you want to learn about versatile and powerful software development – DOTNET & SQL? There is no need to look any further! Our Maria Academy is intended to provide you with the skills and knowledge required to thrive in the fast-paced field of application development.
About DOTNET (.NET)
Microsoft’s .NET framework is a robust and widely used framework for developing a wide range of applications, from desktop and web applications to mobile and cloud solutions. The demand for skilled .NET developers is increasing as the technology industry evolves.
About SQL
SQL, or Structured Query Language, is a programming language that is standardized for managing and manipulating relational databases. It includes commands for querying data, inserting records, updating information, and creating database structures. SQL is required for interacting with databases in a variety of applications, allowing for the structured and organized storage, retrieval, and manipulation of data. Its syntax is consistent across various database management systems, making it a universal database communication language. A solid understanding of SQL is essential in the world of data management and application development, whether you’re a developer, data analyst, or database administrator.
Why Should You Take .NET Online Training?
Versatility: Because .NET supports the development of a wide range of applications, it is a popular framework for a wide range of projects.
Industry Importance: Many large enterprises and organizations rely on .NET to build scalable and secure applications, resulting in many job opportunities.
Cross-Platform Development: .NET Core allows developers to create applications that run on Windows, Linux, and macOS.
Excellence in Web Development: ASP.NET, a component of the .NET framework, is a leading technology for developing powerful and dynamic web applications.
What Our Training Provides:
Comprehensive Curriculum: Our training covers the entire scope of .NET, from fundamental concepts to advanced topics, ensuring you’re ready for real-world projects.
Hands-on Projects: Gain practical experience by working on real-world projects and applying what you’ve learned throughout the course.
Flexibility: Our online format allows you to learn at your own pace, working around your hectic schedule.
Interactive Learning: To improve your comprehension and get answers to any questions, participate in interactive sessions, debates, and Q&A sessions.
Professional Teachers: Learn from professionals in the field who have a great deal of .NET development experience and gain insightful advice.
Who Needs to take:
IT Specialists Seeking Professional Development
Aspiring Programmers
Web Designers
Software Developers
Join Us to Advance Your Career!
Begin your journey to becoming a skilled .NET developer. Our .NET Online Training in Chennai is your ticket to mastering the skills that industry leaders are looking for. Are you prepared to shape your future in software development? Enroll right away!
for Training / Technical Support in .NET, Contact +91 90427 10472
DOTNET Online Training in Coimbatore
SQL and .NET (sometimes spelled DOTNET) are two separate technologies that are commonly utilized in software development. SQL, which stands for Structured Query Language, is a powerful computer language that was created primarily for maintaining and manipulating relational databases. It provides a standardized approach for developers to accomplish operations including accessing data, entering records, updating information, and designing database structures.
.NET, on the other hand, is a framework developed by Microsoft for building various types of applications, including desktop, web, and mobile applications. It provides a comprehensive set of libraries and tools for developers to build, deploy, and run applications. .NET supports multiple programming languages, including C#, F#, and Visual Basic, and it includes a runtime, a set of libraries, and development tools.
While SQL is primarily focused on working with databases and managing data, .NET is a broader framework that covers a wide range of application development aspects. However, it’s common for developers to use SQL in conjunction with .NET when building applications that require interaction with a database.
In a typical scenario, a .NET application may use SQL to store and retrieve data from a relational database. This interaction is often facilitated by using an Object-Relational Mapping (ORM) framework, such as Entity Framework, which is a popular component of the .NET ecosystem. Entity Framework allows developers to work with databases using object-oriented principles, making it easier to integrate database operations into .NET applications.
Do you want to know if.NET is still in demand?
There is no need to look any further! .NET is an open-source web framework that is one of the most popular web application development frameworks for creating dynamic websites. With such promising future growth potential, it’s no surprise that professionals with prior experience in this industry are in high demand today. Keep your.NET skills sharp to stay ahead of the curve!
.NET is a framework that provides programming principles for creating a wide range of applications, from web-based to mobile-based. It supports a variety of programming languages, including C#, VB.NET, C++, F#, and others. So, when working with.NET, code is essential. Continue to experiment and study to become a skilled.NET developer!
.NET is the primary framework for developing Windows-based applications. This is due to the fact that.NET is a local framework bundled with Windows that makes it easier for programmers to construct applications. Furthermore, many programmers find it easier to construct web applications in.NET than in Java.
The.NET Framework’s ability to create a highly secure environment for applications is well known. It includes a variety of security mechanisms to ensure maximum protection. One of these mechanisms is the built-in Windows authentication system, which enables developers to create secure and safe applications with ease. This authentication system ensures that only authorized users have access to the application, improving its overall security.
Furthermore, the.NET Framework includes a set of cryptography classes that are essential for protecting sensitive data. These classes enable encryption and decryption, which improves data security. Developers can use these cryptography classes to implement strong encryption algorithms that effectively protect data during transmission and storage. This ensures that confidential data remains private and out of reach of unauthorized individuals.
As a result, by incorporating a wide range of security features, the.NET Framework enables developers to prioritize data protection and mitigate potential security risks when developing applications.
“Unlock Your True Potential with Maria Academy – Unleashing Excellence through Education”
Are you ready to elevate your skills and achieve your goals? Look no further than Maria Academy, the leading training institute dedicated to nurturing talent and empowering individuals to reach their full potential. Our team of seasoned professionals, industry experts, and passionate educators is committed to providing exceptional learning experiences that pave the way for success.
Discover a wide range of courses tailored to meet the demands of today’s competitive market. From professional development programs, technical certifications, to specialized workshops, Maria Academy offers comprehensive training solutions that equip you with the knowledge and skills needed to excel in your chosen field.
Join our vibrant community of learners and engage in interactive sessions that foster collaboration, critical thinking, and innovation. At Maria Academy, we believe in providing more than just theoretical knowledge; we strive to ignite your passion, creativity, and confidence, enabling you to thrive in any professional setting.
Take the first step towards a brighter future. Enrol now at Maria Academy and embark on a transformative educational journey that will shape your career and change your life.”
With Maria Academy’s online course, you can unlock a world of career opportunities in SQL, C#, and Dot Net Technology. Whether you’re an experienced programmer looking to expand your knowledge or a beginner venturing into object-oriented programming, our C#.NET course will take you to the next skill level. Our team of experienced instructors will guide you through the intricacies of C#, helping you discover its limitless potential.
But that’s not all – we also offer comprehensive SQL training to transform you into a proficient database professional. Even advanced engineers can benefit from refreshing their knowledge with our SQL courses. And it’s not just for engineers; business analysts can also capitalize on the opportunity to learn about emerging trends and markets.
At Maria Academy, we take pride in our interactive training sessions. Our enthusiastic trainers will delve into real-world problems and provide practical solutions. What sets us apart is our commitment to hands-on programming, allowing students to improve their skills through practical exercises. Rest assured; our trainers have a minimum of five years of industry experience.
Our meticulously crafted curriculum covers the entire C# learning process. You’ll have the chance to put your programming skills to the test with practical exams and periodic exercises. By the end of the training, we guarantee that you’ll be able to tackle real-world scenarios with confidence.
When it comes to placement assistance, course quality, syllabus coverage, and practical application, we stand tall as the premier C#.NET Training Provider in India. Choose us and unlock your true programming potential.
Validation in ASP.NET MVC
Validation is an essential component of any web application, including those created with ASP.NET MVC. It guarantees that data given by users is correct, secure, and satisfies the relevant standards. ASP.NET MVC includes numerous means for performing validation, and I’ll go over some of the major principles and strategies for creating validation in ASP.NET MVC.
1. Model Validation: A basic method for validating data entered into a form is model validation. It entails adding characteristics that specify validation criteria to your model classes through annotation. The most prevalent qualities consist of:
[Required]: Indicates the necessity of a certain attribute.
[StringLength]: Indicates a string property’s minimum and maximum length.
[Range]: Indicates a possible range of values for a numerical attribute.
[RegularExpression]: Uses a regular expression pattern to validate a property.
[Compare]: Compare to ensure two properties of a model has same value.
[DataType(DataType.Password)] : converts the text mode to password mode.
Here’s an example of how to apply the following attributes:
public class Student
{
[Required]
public string FirstName { get; set; }
[StringLength(50, MinimumLength = 3)]
public string LastName { get; set; }
[Range(18, 100)]
public int Age { get; set; }
[RegularExpression(@”^[a-zA-Z0-9]*$”, ErrorMessage = “Invalid characters”)]
public string Username { get; set; }
[Required]
[DataType(DataType.Password)]
public string Password { get; set; }
[Compare(“Password”)]
public string ConfirmPassword { get; set; }
}
2. Client-Side Validation: Based on the validation characteristics added to your model properties, ASP.NET MVC can produce client-side validation code. This gives users immediate feedback in their web browsers before they submit the form. You must add the essential JavaScript libraries, such as jQuery Validation, in your project to enable client-side validation.
3. ModelState: ASP.NET MVC automatically populates the ModelState object with validation errors after a form is submitted. If there are any validation failures, you can check ModelState.IsValid and display error warnings to the user.
Here’s an example of how to apply the following attribute:
[HttpPost]
public ActionResult Create (Student model)
{
if (ModelState.IsValid)
{
// Process the data and save it.
return RedirectToAction(“Success”);
}
return View(model);
}
4. Displaying Validation Errors: The @Html.ValidationMessageFor and @Html.ValidationSummary helper methods can be used to display validation errors in your views. These show error warnings for either the entire model or just a subset of its properties.
Here’s an example of how to apply the following attribute:
@Html.ValidationSummary()
@Html.LabelFor(model => model.FirstName)
@Html.EditorFor(model => model.FirstName)
@Html.ValidationMessageFor(model => model.FirstName)
5. Custom Validation: By implementing the IValidatableObject interface or by deriving from ValidationAttribute and defining custom validation attributes, you can establish custom validation rules. You can use this to provide unique validation logic for your models.
6. Remote Validation: Remote validation allows you to execute server-side validation checks without requiring a complete page postback. To accomplish this, use the [Remote] attribute in conjunction with a controller action.
7. Anti-Forgery Token (CSRF Protection): Anti-forgery tokens must be included in your forms to guard against Cross-Site Request Forgery (CSRF) attacks. In your forms, you can utilize the @Html.AntiForgeryToken() helper method and validate it on the server with the [ValidateAntiForgeryToken] property.
These are the main ASP.NET MVC validation features. By employing these methods, you may guarantee that user-submitted data is secure and legitimate, assisting in preserving the application’s integrity.
Data Access in ASP.NET MVC
Data access in ASP.NET MVC refers to the process of retrieving, updating, and modifying data from a database or other data sources for use in a web application. There are various ways to accomplish data access in ASP.NET MVC, and the technology you choose generally relies on the requirements and design of your application. Here are some popular data access methods in ASP.NET MVC:
1. Entity Framework (EF): Microsoft’s Entity Framework is a prominent Object-Relational Mapping (ORM) framework. It enables you to work with your data by abstracting the underlying database using highly typed.NET objects. Entity Framework requires you to define your data model as C# classes, and Entity Framework will construct the SQL queries needed to interface with the database.
Follow these steps to get started with Entity Framework in ASP.NET MVC:
a. Use NuGet to install Entity Framework.
b. Create a DbContext-derived data context class.
Create entity classes to represent database tables.
Interact with your data using LINQ queries.
2. ADO.NET: ADO.NET is a lower-level data access technology that allows you to work directly with databases using data providers. ADO.NET can be used to make database connections, run SQL queries, and retrieve data. While it gives you greater power, it often requires you to write more code than Entity Framework.
You can utilize ADO.NET in ASP.NET MVC by following these general steps:
a. Use SqlConnection to create a database connection.
b. Using SqlCommand, create and run SQL queries or stored procedures.
c. To get data, use SqlDataReader or any data reader.
3. Dapper: Dapper is an ADO.NET-based lightweight Object-Relational Mapping (ORM) library. By offering a quick and simple method to map database records to C# objects without the complexities of Entity Framework, it streamlines data access.
You may use Dapper in ASP.NET MVC by following these steps:
a. Use NuGet to install Dapper.
b. Create SQL queries, then execute them using Dapper’s extension methods and map the results to objects.
4. Web API and HTTP Services: In some cases, you might be able to receive data from remote servers using web APIs or HTTP services rather than directly accessing a database. To send HTTP queries to external APIs and use the results in your MVC application, you can use libraries like as HttpClient.
You can use HTTP services and web APIs in the following ways:
a. Create controller actions that send HTTP queries.
b. Create C# objects by deserializing the XML or JSON answers.
Selecting the best approach for data access security, error management, and performance optimization is crucial, regardless of the data access method you use. A clean and maintainable architecture should also be achieved by keeping your data access code distinct from your controllers and views. For example, you can encapsulate data access functionality in repositories or services.
Routing in ASP.NET MVC
Routing is a basic element in ASP.NET MVC that governs how URLs are mapped to controller actions in your application. It specifies how incoming requests are handled, as well as which controller and action methods are used to generate the answer. Routing is required when creating clean, user-friendly URLs for your web application.
The following are the main elements and ideas around routing in ASP.NET MVC:
Route Table: The routing configuration in ASP.NET MVC is normally set up in the ‘RouteConfig’ class in your project’s ‘App_Start’ folder. A set of route definitions is stored in the ‘RouteConfig’ class. The ‘MapRoute’ method is used to add these route definitions to the ‘RouteTable.Routes’ collection.
Route Definitions: A route specification contains the URL pattern, the default settings, as well as the controller and action to be executed when a specific URL is matched. An example of a route definition is as follows:
routes.MapRoute(
name: “Default”,
url: “{controller}/{action}/{id}”,
defaults: new { controller = “Home”, action = “Index”, id = UrlParameter.Optional }
);
In this case, the route matches URLs like /Home/Index and delivers them to the controller and action methods defined.
Route Parameters: You can include placeholders like {controller}, {action}, and {id} in the URL pattern encased in curly brackets in the route definition. The arguments indicated by these placeholders are those that will be taken from the URL and provided to the relevant action method. As demonstrated in the last example, the route parameters may also have default values.
Route Constraints: To limit the values that can be entered for route parameters, you can apply restrictions. To guarantee that only numerical values match the route, you can, for example, stipulate that the id parameter must be an integer.
Route Handling: The routing system looks at the URL in an HTTP request and attempts to match it with one of the route definitions in the route table. In the event that a match is discovered, the relevant controller and action are called using the URL’s extracted arguments.
Attribute Routing: ASP.NET MVC allows attribute routing in addition to convention-based routing (as demonstrated in the RouteConfig example). With attribute routing, you may use attributes to define routing information directly on your controller activities. This gives individual actions greater routing flexibility and control.
As an example of attribute routing, consider the following:
[Route(“products/details/{id}”)]
public ActionResult Details(int id)
{
// Action logic here
}
You can have detailed control over the URL structure for every action method with attribute routing.
In summary, routing is an essential component of ASP.NET MVC because it makes it possible to construct RESTful web applications, organize controllers and actions more effectively, and produce neat, SEO-friendly URLs. When routing is set up correctly, requests are routed to the right controller actions, which provide the user the right response.
Controllers in ASP.NET MVC
Controllers in ASP.NET MVC (Model-View-Controller) are critical in accepting incoming HTTP requests, processing them, and sending appropriate responses to the client. Controllers are in charge of regulating the application’s flow, communicating with models and views, and handling user input. Here are some important points to remember regarding controllers in ASP.NET MVC:
Controllers’ Role: Clients, usually web browsers, send requests over HTTP to controllers. They use the request URL and HTTP verb (GET, POST, etc.) to identify the action method to do. The logic for handling user input, making choices, and coordinating with models and views to produce a response is included in controllers.
Controller Naming Convention: In ASP.NET MVC, controllers usually have names that conclude in “Controller.” HomeController, DefaultController, and UserController are a few examples.
Action Methods: Action methods, which are public methods that respond to certain HTTP requests, make up controllers. The HTTP verbs that action methods respond to are indicated by characteristics like [HttpGet] or [HttpPost]. In order to render the answer, they must process user input, interact with models (data access), and choose the right view.
Routing: Routing is used by the ASP.NET MVC framework to map incoming URLs to controllers and associated action methods. The RouteConfig.cs file is frequently used to define the default route settings.
Parameters and Model Binding: Parameters from the URL, form data, query string, or other sources can be passed to action methods. Model binding is used by ASP.NET MVC to automatically connect incoming data to method parameters.
ActionResult: Action methods will either return an ActionResult or a derived class such as ViewResult, RedirectResult, or JsonResult. The type of answer given to the client is determined by the result type.
Dependency Injection: It is common practice to inject services and dependencies into controllers to make them more tested and manageable.
Filters:
To provide behavior and manage the execution flow of action methods, controllers can be decorated with filters such as permission filters or action filters.
Testing: Unit testing is a useful tool for verifying that controllers operate as intended. Mocking frameworks are frequently used to test controller activities and simulate HTTP requests.
RESTful Controllers: RESTful APIs can be developed with ASP.NET MVC, in which controllers manage the HTTP verbs GET, POST, PUT, and DELETE to carry out CRUD actions on resources.
In summary, controllers are an essential component of the ASP.NET MVC architecture and are in charge of managing the flow control and main logic of the application.
Here’s a simple ASP.NET MVC controller example:
_____________________________________________________________
| public class HomeController : Controller
{ public ActionResult Index() { // Logic to retrieve and display a list return View(); } [HttpGet] public ActionResult Create() { // Logic to create a new data in a form return View(); } [HttpPost] public ActionResult Create(HomeViewModel model) { // Process form submission and create a new data // Redirect to the list or show validation errors } } |
_____________________________________________________________
Views in ASP.NET MVC
Introduction to Views in MVC:
Views are a fundamental component of the ASP.NET MVC (Model-View-Controller) program that are responsible for presenting data to users. Views are used in ASP.NET MVC to construct the user interface with which users interact with a web application. Views are commonly used to present data to consumers and collect user input.
Here are some important points to remember regarding views in ASP.NET MVC:
Separation of Concerns: ASP.NET MVC encourages concern separation by splitting the application into three primary components: Model, View, and Controller. Views are responsible for rendering the user interface and should focus on presentation concerns, while the Model and Controller handle business logic and data processing, respectively.
Razor Syntax: The Razor view engine, which enables you to combine HTML with C# or VB.NET code to dynamically build the content that will be transmitted to the user’s browser, is commonly used to create views in ASP.NET MVC. The @ sign in Razor syntax is used to incorporate C# code inside HTML markup.
Strongly Typed Views: ASP.NET MVC views have the option to be strongly typed, which identifies them as belonging to a certain model class. This relationship makes it easier to show and work with data by enabling you to access model attributes directly in the view using Razor syntax.
Layouts: Layout pages can be used by views to define a common framework for different views inside the application. This allows you to maintain a uniform look and feel across your online application. Layout pages are often composed of the standard HTML structure, headers, footers, and navigation menus.
Partial Views: Partial views are a method of dividing large views into smaller, reusable components. They are important for developing modular and maintainable user interfaces since they may be rendered within other views.
HTML Helpers: ASP.NET MVC comes with HTML helpers that make it easier to generate forms and HTML elements inside of views. With the aid of these helpers, you may produce HTML code that complies with the model and routing setup of the application.
ViewModels: Apart from models, you can also construct view models, which are objects for data transfer that are specifically designed to meet the requirements of a view. View models give the view all the information it needs to render by combining data from one or more models.
View Engines: While Razor is the most generally used view engine in ASP.NET MVC, you can also utilize Web Forms view engine and custom view engines depending on your tastes and requirements.
ViewBag and ViewData: ViewBag and ViewData are two techniques for transferring information from the controller to the view. ViewData is a dictionary-like container, while ViewBag is a dynamic object. They are often used when you wish to transmit data to the view that is not included in the model.
In summary, views in ASP.NET MVC are in charge of displaying a web application’s user interface. Their dynamic content is rendered using a blend of Razor and HTML syntax. They support partial views for modularization, layout pages for consistency, and strongly typing. In an ASP.NET MVC application, views are essential to achieving a clear separation of concerns.
Model in ASP.NET MVC
Introduction to Model in MVC:
In the Model-View-Controller (MVC) architectural pattern, the “Model” is the core component responsible for representing the application’s data and implementing the business logic required for managing and processing that data. The Model plays a crucial role in separating concerns and organizing the structure of an application. It encapsulates the data and provides methods and operations to manipulate and interact with it. By doing so, the Model ensures that the data remains independent of the user interface and the user actions. This separation allows for easier maintenance, scalability, and reusability of the application. Additionally, the Model is responsible for enforcing data integrity and implementing validation rules to ensure the consistency and correctness of the data. It acts as the central hub for data-related operations, such as retrieving, updating, and deleting data, as well as performing complex calculations and transformations. Overall, the Model in MVC serves as the backbone of the application, providing a reliable and efficient way to manage and process data while promoting a clean and organized architecture.
Here is a detailed explanation of the Model in MVC in several areas:
Business Logic: The business logic of the application is contained in the Model. It includes all of the procedures, algorithms, and rules that control the handling and modification of data. It carries out any necessary computations or data transformations, enforces validation, and guarantees data integrity.
Data Management: The data in the application is managed by the Model. Numerous sources, including databases, web services, external APIs, and in-memory data structures, may provide this data. The logic for retrieving, storing, and manipulating data from many sources is encapsulated in the Model.
Data Representation: You specify the data structure that the application uses in the Model. Creating classes or objects to represent entities in the domain of your application is usually required for this. Database tables, data transfer objects (DTOs), and domain entities are frequently mapped to these types.
Data Access: Working with databases and other data storage systems is part of the data access that the Model manages. To carry out tasks like inserting, updating, deleting, and querying data, it interfaces with the database. Object-Relational Mapping (ORM) frameworks like Entity Framework or libraries like Hibernate are utilized in many contemporary MVC applications to make data access easier.
Data Validation: The Model is in charge of verifying that the data complies with certain limitations and guidelines. To guarantee data quality and integrity, data validation techniques can include custom validation algorithms, data type validation, and mandatory field checks.
Separation of Concerns: The separation of concerns is a fundamental principle of MVC. Both the View and the Controller are separated from the Model. This separation enables each component to be developed, tested, and maintained independently, making the program more modular and maintainable.
Event Handling: The Model can incorporate event handling in particular instances. When data changes, it can alert other portions of the program (Views and Controllers). This approach is also known as the “observable” or “publish-subscribe” pattern.
Testing: Since models include the essential data operations and business logic, they are very testable. Independent of the user interface, you can create unit tests to verify that your business logic and data manipulation are sound. An important benefit in software development is this.
UI-Agnostic: Models are UI-agnostic, which means they don’t care how the user interacts with the data or how it is presented to them. Because of this separation, you may modify the user interface without changing the business logic or underlying data.
In summary, the Model in the Model-View-Controller (MVC) architectural pattern is the crucial component responsible for representing and managing the data and business logic of an application. It plays a pivotal role in the development of robust, maintainable, and organized software by effectively separating concerns and fostering a modular architecture. By encapsulating the data and implementing the necessary business rules, the Model ensures the integrity and consistency of the application’s data. It acts as the central hub for data manipulation, validation, and storage, providing a reliable foundation for the overall functionality of the software. Additionally, the Model facilitates the decoupling of the user interface (View) and the application logic (Controller), enabling independent development and testing of these components. Through its role in the MVC pattern, the Model promotes code reusability, scalability, and maintainability, ultimately contributing to the overall success of the software development process.
Setting up a Basic MVC Project in ASP.NET
There are various phases involved in creating a simple ASP.NET MVC (Model-View-Controller) project. Model-View-Controller (MVC) is a design pattern that divides an application into three interrelated components: Models, Views, and Controllers. This split aids in code organisation and maintainability. Here’s a step-by-step tutorial for creating a simple ASP.NET MVC project:
step 1 – Install Visual Studio:
Install Visual Studio, a popular programming environment for ASP.NET apps, if you haven’t already. The free Community edition can be downloaded from the Microsoft website.
step 2 – Create a New Project:
Make a new ASP.NET project first:
Launch Microsoft Visual Studio.
Click on “File” > “New” > “Project…”
Choose “ASP.NET Web Application” from the “Create a new project” window, then click “Next.”
step 3 – Choose Project Template:
Choose the “ASP.NET Core Web Application” template from the “New Project” dialog box. You have the option to select the target framework, name your project, and designate a location. Press “Create.”
step 4 – Configure Your Project:
Click “Create a new ASP.NET framework web application” in the dialog box.
Choose the project template “Web Application (Model-View-Controller)”.
Select “Create” from the menu.
step 5 – Understanding the Framework:
Controllers: Your controller classes are stored in this folder.
Models: This is the location for your model classes.
Views: The views (HTML templates) for your application are stored in this folder.
wwwroot: This is the location for static files such as CSS, JavaScript, and pictures.
step 6 – Create a New Model Class:
Create a new class in your MVC project for your model. You may do this by right-clicking on the “Models” folder in Visual Studio (or your preferred IDE) and selecting “Add” > “Class.” or “using ado.net data entity model method”.
step 7 – Create a Controller:
You may add a new controller to your MVC project by right-clicking the Controllers folder, selecting “Add” > “Controller,” and then following the wizard to construct a basic controller with actions.
step 8 – Create Views:
Create subfolders for your controller actions in your MVC project’s Views folder (e.g., “Home” for the HomeController). Create Razor views (.cshtml files) for your activities within these subfolders.
step 9 – Configure Routing:
The Startup.cs file configures the default routing for ASP.NET MVC. In the Configure function, you can map URLs to controller actions by configuring routes.
step 10 – Run the Program:
Use the Debug menu or press F5 to launch your application. This will start a web server and show your application on a web browser.
step 11 – Test Your MVC Application:
By visiting the relevant URLs, you can access the actions that you created. As an illustration, if your HomeController has an action called “Index,” you can get it at http://localhost:port/Home/Index.
A simple ASP.NET MVC application setup is shown here. Models, controllers, views, and more intricate routing can all be added to this base as your project requires it. To get additional functionality, you can combine different libraries and frameworks with Entity Framework and utilize it to work with databases.
MVC framework in ASP.NET
Introduction to MVC (Model-View-Controller) in ASP.NET:
MVC (Model-View-Controller) is a common architectural paradigm for constructing online applications in ASP.NET. It provides a structured and organized approach to web application development by dividing the application into three interconnected components: the Model, the View, and the Controller. This separation of concerns makes the codebase easier to manage and maintain, promotes code reusability, and improves overall application adaptability.
Let’s take a closer look at each component:
Model: The Model represents the data and business logic of the application. It contains the data on which your application runs as well as the rules that govern that data. It is in charge of retrieving and storing data from a database or other data sources, as well as carrying out data-related tasks.
View: The View is in charge of rendering the user interface and displaying data to the user. Views in an ASP.NET MVC application are normally built in HTML, but they can also contain embedded code (Razor syntax) to show dynamic content. Views are retained as independent files, making the display layer easier to handle.
Controller: The Controller functions as a go-between for the Model and the View. It processes user requests, interacts with the Model to retrieve or change data, and then selects the appropriate View to show the response to the user. It contains the application’s logic for handling HTTP requests and is the starting point for the majority of user interactions.
Main advantages and characteristics of ASP.NET MVC use:
Separation of Concerns: MVC requires a distinct division of responsibilities, which facilitates application understanding, maintenance, and expansion. Developers are able to work independently on various components because to this separation.
Reusability: MVC improves code reusability and reduces redundancy by allowing models, views, and controllers to be often reused in other application components.
Testability: MVC allows for independent unit testing of each component, which improves code quality and facilitates more effective debugging.
Flexibility: MVC enables developers to add to and modify some areas of the program without compromising the functionality of the other sections. It is now simpler to adjust to evolving needs as a result.
Support for Multiple View Engines: ASP.NET MVC offers flexibility in how you render your views by supporting a number of view engines, such as Razor and Web Forms.
Usually, you use one of the MVC project templates to create a project in Visual Studio to begin working with MVC in ASP.NET. Models, views, and controllers are all built up in the fundamental framework of your application by using these templates. After that, you may construct on top of this base by defining your views for data display, writing controller actions for user requests, and defining your data models.
In conclusion, MVC is an effective architectural pattern that encourages the creation of web applications in ASP.NET using an organized methodology. Because of its many benefits for code organization, maintainability, and testability, it is a well-liked option among developers creating ASP.NET web applications.
Learn ASP.NET Online
Introduction to ASP.NET
Microsoft created ASP.NET, which stands for Active Server Pages.NET. Thousands of organizations have utilized Microsoft ASP.NET to construct sophisticated, dynamic websites. It is a strong tool for programmers and developers that work on the development of rich and dynamic web apps and websites. ASP.NET is a Microsoft.NET Framework feature that is not limited to script languages; it may also be used by programmers. Microsoft’s Active Server Page was developed in response to the growing need for dynamic webpages.
It includes a Feature library with various ready-to-use methods and web controls for building applications from the ground up. Microsoft often modifies it to stay current with trends. ASP.NET is well-known for its advantages over alternative online development models, in addition to being a pioneering platform. It benefits both the organizations that use it and the developers who take ASP.NET classes.
In the fast-paced world of software development, knowing the most recent technologies and frameworks is critical. NET is one such technology that has seen enormous progress throughout time. As businesses strive to digitize their processes, the demand for knowledgeable.NET developers has skyrocketed. There are numerous online.NET courses available to meet this need and equip potential developers. The article explores into the area of online.NET courses, underlining their benefits, important components, and potential to boost your career.
Professionals with ASP.NET expertise benefit from things like:
capable to develop applications with ASP.NET.
Thanks to its complementary design and extensive toolkit, the ASP.NET framework provides wonderful features like drag-and-drop server controls and automated deployment, among others.
less time is spent coding and more time is spent creating large online apps.
The combination of HTML and source code makes it easy to construct and maintain websites.
Find lucrative career opportunities as a developer.
Spend less time and effort writing extra code for complex and large-scale applications to save down on development costs.
All students and freshmen interested in using the Microsoft platform to create modern desktop, web, and service-oriented applications are encouraged to take this course.
Pros of Online.NET Courses
The following are advantages for students taking online.NET classes:
Flexibility: With online courses, you may customize your education to fit your schedule and establish your own pace for learning.
Accessibility: No matter where you live in the world, you can access excellent.NET classes.
Interaction: A typical component of online platforms is discussion boards, which allow students to interact with teachers and peers and foster a collaborative learning environment.
Comprehensive Curriculum: Since respectable online courses offer a wide range of.NET topics, you can be confident that you’ll obtain a well-rounded education.
Practical Experience: A lot of courses incorporate practical activities and projects that let you put theory into practice in real-world settings.
All students and freshmen interested in using the Microsoft platform to create modern desktop, web, and service-oriented applications are encouraged to take this course.
To enroll in this course, there are no prerequisites.
Why should I study ASP.NET at Maria Academy (Marz Technologies)?
With more than five years of experience, we have taught ASP.NET online to students all around the world. We have also conducted online training courses in India and other nations. Our knowledgeable instructors will walk you through the process of creating and launching a dynamic website using the ASP.NET tools.
For beginners and intermediate developers, this course module offers practical experience covering everything from installing and setting up Visual Studio for Web and SQL Server Express to creating web form pages.
You will learn about C# programming, advanced C# ideas, OOPs concepts, database design with SQL Server,.NET and.NET Core, and other subjects.
In addition, you will learn how to establish a live project from Microsoft MVPs and Technical Consultants, as well as how to use Visual Studio 2019 for.NET programming.
We provide a variety of training options, such as corporate training, one-on-one training, and live instruction.
Our Fundamental Course Module:
DOTNET Online Training in Bangalore
SQL and .NET (pronounced as DOTNET) are two distinct technologies that are frequently used in software development. SQL, short for Structured Query Language, is a powerful programming language specifically designed for managing and manipulating relational databases. It provides developers with a standardized way to perform tasks such as querying data, inserting records, updating information, and creating database structures.
On the other hand, .NET is a versatile software development framework that offers a wide range of tools and libraries for building applications on various platforms. This framework allows developers to create and run applications on different operating systems, including Windows, macOS, and Linux. .NET offers a rich set of features, including a common language runtime (CLR), which enables code written in different programming languages to be executed seamlessly.
While SQL primarily focuses on database management and manipulation, .NET provides a comprehensive platform for developing complete software solutions. By combining both SQL and .NET, developers can build complex applications that efficiently interact with databases and provide a user-friendly interface across multiple platforms. Whether it is working with data or developing complete applications, SQL and .NET play crucial roles in the software development landscape.
Are you wondering if .NET is still in demand?
Look no further! .NET is an open-source web framework and one of the most leading web application development frameworks used to create dynamic websites. With high growth prospects in the future, it’s no surprise that people with prior experience in this field are in high demand today. Stay ahead of the curve by keeping your .NET skills sharp!
.NET is a framework that offers programming guidelines for developing a wide range of applications, from web to mobile-based applications. It works with several programming languages including C#, VB.NET, C++, F#, and more. So, yes, coding is required when working with .NET. Keep exploring and learning to become a skilled .NET developer!
.NET is the preferred choice for building windows-based applications. This is because .NET is a local framework included in windows, making it easier for programmers to build applications. Additionally, many programmers find building web applications in .NET easier as compared to Java.
The ability of the .NET Framework to create a highly secure environment for applications is well-known. It provides various security mechanisms that ensure optimal protection. One of these mechanisms is its built-in Windows authentication system, which allows developers to effortlessly create secure and safe applications. This authentication system guarantees that only authorized users can access the application, thereby enhancing its overall security.
Moreover, the .NET Framework also offers a set of cryptography classes that are indispensable for safeguarding sensitive information. These classes provide encryption and decryption capabilities that enhance data security. By utilizing these cryptography classes, developers can implement strong encryption algorithms to effectively protect data during transmission and storage. This ensures that confidential data remains confidential and inaccessible to unauthorized individuals.
Consequently, by incorporating a comprehensive range of security features, the .NET Framework gives developers the ability to prioritize data protection and mitigate potential security risks when building applications.
“Unlock Your True Potential with Maria Academy – Unleashing Excellence through Education”
Are you ready to elevate your skills and achieve your goals? Look no further than Maria Academy, the leading training institute dedicated to nurturing talent and empowering individuals to reach their full potential. Our team of seasoned professionals, industry experts, and passionate educators is committed to providing exceptional learning experiences that pave the way for success.
Discover a wide range of courses tailored to meet the demands of today’s competitive market. From professional development programs, technical certifications, to specialized workshops, Maria Academy offers comprehensive training solutions that equip you with the knowledge and skills needed to excel in your chosen field.
Join our vibrant community of learners and engage in interactive sessions that foster collaboration, critical thinking, and innovation. At Maria Academy, we believe in providing more than just theoretical knowledge; we strive to ignite your passion, creativity, and confidence, enabling you to thrive in any professional setting.
Take the first step towards a brighter future. Enrol now at Maria Academy and embark on a transformative educational journey that will shape your career and change your life.”
With Maria Academy’s online course, you can unlock a world of career opportunities in SQL, C#, and Dot Net Technology. Whether you’re an experienced programmer looking to expand your knowledge or a beginner venturing into object-oriented programming, our C#.NET course will take you to the next skill level. Our team of experienced instructors will guide you through the intricacies of C#, helping you discover its limitless potential.
But that’s not all – we also offer comprehensive SQL training to transform you into a proficient database professional. Even advanced engineers can benefit from refreshing their knowledge with our SQL courses. And it’s not just for engineers; business analysts can also capitalize on the opportunity to learn about emerging trends and markets.
At Maria Academy, we take pride in our interactive training sessions. Our enthusiastic trainers will delve into real-world problems and provide practical solutions. What sets us apart is our commitment to hands-on programming, allowing students to improve their skills through practical exercises. Rest assured; our trainers have a minimum of five years of industry experience.
Our meticulously crafted curriculum covers the entire C# learning process. You’ll have the chance to put your programming skills to the test with practical exams and periodic exercises. By the end of the training, we guarantee that you’ll be able to tackle real-world scenarios with confidence.
When it comes to placement assistance, course quality, syllabus coverage, and practical application, we stand tall as the premier C#.NET Training Provider in India. Choose us and unlock your true programming potential.
Full Stack .NET Developer
Full Stack .NET Developer
What is Full Stack .NET Development and who is Full Stack .NET Developer?
Microsoft introduced the.NET framework in 2002 as an open-source tool for full stack developers, but it is also regarded by many as a set of programming rules for web application development.
Although it was originally built to operate on Windows, it was initially viewed as an alternative to Java and PHP. However, its various platforms can be used on a variety of operating systems. The general framework has the advantage of supporting a wide range of programming languages, including C#, Visual Basic, and F#.
The fact that .NET is incredibly user-friendly for full stack developers is one of its key advantages. Its enormous library collection is also one of its key strengths, in addition to its seamless language compatibility. As an open-source technology, it has a sizable community of software developers that have made a wide range of features and capabilities readily accessible for any project involving a web application. It has been heavily utilized in particular for creating web pages and applications.
.NET is also frequently referred to as a web API development platform. It can therefore be used by full stack developers to support both front-end and back-end requirements.
If you’re wondering what a full stack .NET developer is, you’ve come to the correct spot.
The .NET framework is one of several useful tools for developing mobile and web applications. It was published alongside the ASP.NET server-side web app framework; ASP.NET MVC (Model, View, Controller) is a web application framework.
A full stack .NET developer is a software engineer who is knowledgeable about every part of the.NET development platform. This comprises the front-end and back-end of.NET applications, as well as associated technologies such as databases, online services, and user interfaces.
Full stack .NET developers may see an idea through to its completion and are frequently in charge of the full development process. As a result, they must be well-versed in both the business area and the technical specifics of the .NET platform.
Full stack.NET engineers are in high demand since they can give end-to-end solutions to modern enterprises. If you want to be a full stack.NET developer, you should concentrate on learning C# and ASP.NET.
What Skills Do You Need to Become a Full-Stack .NET Web Developer?
To become a full-stack .NET web developer, you must have a varied set of talents that include both front-end and back-end development, as well as a solid understanding of the .NET framework. The following are the major skills and knowledge areas you will require:
Programming Languages:
C#: The primary language for.NET development is C#. You should be well-versed in its syntax and functionality.
Web Development:
HTML/CSS: To create the structure of web pages and style them, you must grasp HTML and CSS.
JavaScript: Front-end development requires JavaScript. You should be able to utilise it to build interactive web applications.
Front-End Frameworks:
ASP.NET Core MVC: This is a well-known framework for developing web apps on the.NET platform.
JavaScript Frameworks: Knowledge of front-end frameworks such as Angular, React, or Vue.js can be advantageous.
Back-End Development:
ASP.NET Core Web API: This is essential for developing the backend of your web applications, as well as handling HTTP requests and maintaining data.
Entity Framework: A popular ORM (Object-Relational Mapping) tool for.NET database development.
Databases:
SQL: Knowing SQL is required for dealing with relational databases such as SQL Server, PostgreSQL, or MySQL.
Database Design: Understanding database design principles and normalization is essential.
Version Control:
Proficiency with version control systems such as Git for monitoring changes in your codebase and team collaboration.
Web Services:
Knowledge of RESTful APIs, including how to construct and utilize them.
If necessary, knowledge of SOAP and other web service protocols.
Testing:
Unit testing and integration testing are crucial for assuring application reliability.
Deployment and DevOps:
Knowledge of tools such as Docker and containerization.
Pipelines for continuous integration and continuous deployment (CI/CD).
Authentication and Authorization:
Understand how to protect authentication and authorization systems in your applications.
Security:
Knowledge of common security flaws and best practises for safeguarding web applications.
Front-End Tools:
Familiarity with front-end development technologies such as Webpack, Babel, or TypeScript.
Cloud Services (optional):
Knowledge of cloud platforms such as Azure, AWS, or Google Cloud can help you host and scale your apps.
Soft Skills:
Problem-solving skill: The ability to recognise and resolve complicated challenges.
Communication: Effective communication skills are required for working with team members and stakeholders.
Adaptability: Because the technology landscape is constantly changing, being open to learning new technologies is essential.
Project Management (basic):
Understanding project management approaches such as Agile will assist you in working effectively inside development teams.
UI/UX Design (basic):
The development of user-friendly apps can benefit from having a basic understanding of user interface (UI) and user experience (UX) design.
Continuous learning and keeping up with the newest technologies and developments in web development and the .NET ecosystem are requirements for becoming a full-stack .NET web developer. You must also build projects and acquire real-world experience if you want to improve your abilities.
Learn SQL online
Learn SQL online
In our increasingly digital economy, SQL abilities are highly valued. The demand for skilled experts to analyse all that data is increasing along with the number of companies gathering customer information.
An average learner should be able to acquire the fundamentals of SQL and begin using SQL databases in roughly two to three weeks. But you’ll need to become pretty fluent with them before you can start employing them successfully in everyday situations, and that takes time.
SQL is not a conventional programming language, where you would create a series of instructions that would be executed in a specific order. Instead, SQL is a “declarative” language, which means that when you write a query for it, you declare the data you want to get as a result but don’t specify how you want to get it.
SQL is commonly used to create, search for, change, and delete database entries. The more time you invest as a SQL practitioner, the more efficiently and creatively you can use the platform to find the answers your organisation need from the sea of data that is now available.
As we switch between applications, websites, and social media platforms every day, we leave a data trail that is mined by businesses for a variety of purposes. The lack of data analysts, however, renders raw data meaningless.
These experts organise and examine massive data collections using programming languages like SQL. They can then turn this information and correlations into business insights, which in turn can aid organisations in expanding their operations. Every second that goes by, this mountain of data gets bigger, and so does the need for SQL experts. That is the reason why SQL is so common and popular.
SQL is one of the most widely used programming languages in the world. It is used in a range of professions, such as Database administration, Data science, Software engineering, Business analytics and Journalism.
SQL proficiency is required for anyone who deals with data. This language is used by many domains and disciplines to communicate with relational databases.
SQL’s versatility is intended to allow you to query a database in a variety of ways using English-based commands. Because SQL is the most commonly used database language, practically every organisation that needs to store relational data, including big firms like Facebook, Amazon, Google, Uber, Netflix and etc rely on SQL.
SQL is utilised in many different sectors and professions. SQL is still a popular choice for software applications today because it is used by many relational database management systems. SQL offers a wide range of professional applications due to its adaptability and flexibility.
Most programming languages are only used for programming. SQL, on the other hand, is unusual in that it has applications that go beyond standard programming. SQL is used by those in sales and marketing to conduct queries on datasets, which allows them to recognise sales trends and track the success of various marketing campaigns. SQL also has uses in the finance sector. SQL is used by financial analysts to sort through vast amounts of financial data in order to save time. SQL is handy for dealing with vast amounts of structured data.
Top Reasons to Learn SQL:
SQL
- is simple to learn.
- is an effective troubleshooting tool.
- is incredibly flexible and standardised.
- makes it easier to mine your data.
- makes it simple to combine data sets from many sources.
- can handle enormous data sets.
- puts important information at your fingertips.
- demand is at an all-time high.
- developers earn a good living.
If you want to learn SQL, the good news is that there are currently a variety of in-person and online learning alternatives accessible for learners of all levels. We have a Training Centre in Karaikudi for people who like to study in a classroom setting. Furthermore, for individuals who prefer virtual learning, we provide online SQL courses, which are a terrific option. All courses include live tuition from a SQL professional.
.NET One Day Workshop at Karaikudi
A Deep Dive into the World of .NET: Unveiling the Karaikudi Workshop
In the heart of Tamil Nadu, amidst the rich cultural heritage and vibrant traditions, the town of Karaikudi stood witness to a technological marvel that unfolded on a day of immense learning and networking. The “.NET One Day Workshop” was an event that not only brought together enthusiasts and professionals from the realm of software development but also paved the way for knowledge exchange and skill enhancement. This blog takes you on a journey through the intricacies of the workshop while delving into the significance of data backup in the realm of .NET.
Unveiling the Workshop
The “.NET One Day Workshop” held in Karaikudi was a convergence of minds eager to grasp the nuances of the .NET framework, a versatile and powerful platform for building applications. Organized by a collaborative effort of local tech communities, the workshop was geared towards catering to a diverse audience – from students aspiring to enter the software industry to seasoned developers keen on expanding their skill set.
The day commenced with an inaugural address that highlighted the importance of continuous learning in the rapidly evolving world of technology. Distinguished speakers from various domains shared their insights, setting the tone for the knowledge-packed day ahead. The agenda covered a range of topics:
Introduction to .NET:
A comprehensive overview of the .NET framework, its components, and its relevance in contemporary software development.
Building Applications with C#:
A deep dive into C#, one of the primary programming languages for developing .NET applications. Attendees were exposed to its syntax, data structures, and object-oriented principles.
Web Development with ASP.NET:
A session focusing on ASP.NET, which enables the creation of dynamic web applications. Participants learned about web forms, MVC architecture, and the role of server-side scripting.
Data Persistence and Backup:
A crucial segment that emphasized the significance of data backup in software applications, ensuring data integrity, security, and disaster recovery.
The Significance of Data Backup
In the era of information, data stands as the backbone of virtually every software application. Whether it’s a user’s preferences in a mobile app or financial records in an enterprise system, data forms the core of functionalities. However, with great power comes the responsibility of safeguarding this data against various threats such as hardware failures, cyberattacks, and human errors. This is where data backup steps in as a savior.
- Data Integrity and Recovery
Data loss can be catastrophic, potentially resulting in financial losses, legal ramifications, and loss of trust among users. Backup solutions ensure data integrity by creating copies of essential information at regular intervals. In case of data corruption or loss, these backups act as recovery points, enabling developers to restore the application to a previous state.
- Disaster Recovery
Natural disasters, hardware failures, or even simple human errors can disrupt the availability of applications. Data backup plays a pivotal role in disaster recovery, allowing organizations to rebuild their applications and services with minimal downtime.
- Security Measures
In the digital age, cybersecurity is of extreme importance. Regular backups can mitigate the damage caused by ransomware attacks or other malicious activities. If a system is compromised, having a backup ensures that attackers can’t hold the data hostage.
- Testing and Development
Backed-up data can be a valuable resource for testing and development purposes. Developers can use copies of real data to create realistic testing scenarios or build new features without risking the integrity of the production environment.
- Compliance and Regulations
Many industries are bound by regulations that mandate data retention and security. Backup strategies that align with these regulations help organizations avoid penalties and legal complications.
Workshop Insights: Data Backup in .NET
As the “.NET One Day Workshop” progressed, the segment on data persistence and backup resonated deeply with the participants. The workshop shed light on how the .NET framework offers several mechanisms to implement effective data backup strategies:
- Database Backups
Databases are at the heart of most applications, housing critical data. .NET supports various database systems like SQL Server, MySQL, and PostgreSQL. These databases often provide built-in mechanisms for automated backups and recovery.
- Version Control
While version control systems like Git are primarily associated with source code management, they indirectly contribute to data backup. By maintaining a history of code changes, version control systems provide a level of data recovery in case of accidental code loss or errors.
- Cloud Solutions
Cloud platforms offer scalable and reliable options for data backup. Azure Backup, for instance, provides services for backing up data, applications, and virtual machines directly from the Azure portal.
- Application State Management
In web applications, maintaining the application’s state is crucial for user experience. .NET offers techniques to persist user sessions and application states, ensuring a seamless experience even after server restarts.
Beyond the Workshop: Empowered Developers
The “.NET One Day Workshop” not only imparted technical knowledge but also fostered a sense of community and collaboration among attendees. The insights gained from the workshop extended beyond the event itself, as participants returned to their workplaces and projects armed with newfound skills and perspectives.
As technology continues to advance, data will remain the cornerstone of innovation. Understanding the significance of data backup and integrating it into the software development lifecycle is an imperative for developers in the .NET ecosystem. The workshop in Karaikudi served as a stepping stone towards this awareness, inspiring participants to embrace robust backup strategies and elevate the quality and resilience of their applications.
In conclusion, the “.NET One Day Workshop” held in Karaikudi was a testament to the thirst for knowledge and growth within the developer community. As the participants left the event with a wealth of insights, they carried with them not only the technical know-how but also a deeper appreciation for the importance of data backup in the realm of .NET. This workshop was not just a one-day affair; it ignited a continuous journey of learning, exploration, and innovation.
Online .NET Course
Introduction
Knowing the most recent technologies and frameworks is crucial in the quick-paced world of software development. One such technology that has shown tremendous growth over time is.NET. The need for knowledgeable.NET developers has increased as firms continue to digitize their processes. Numerous online.NET courses are offered to satisfy this need and equip prospective developers. This essay explores the world of online.NET courses, highlighting their advantages, essential elements, and potential to advance your career.
The Evolution of .NET
Microsoft created the flexible and potent framework known as.NET. It enables developers to create a wide variety of applications, including desktop, web, and cloud-based programmes. Over time, .NET has developed into a strong ecosystem with numerous parts, such as:
- .NET Framework: The first version of.NET, which was primarily used for Windows applications.
- .NET Core: An open-source, cross-platform version of.NET that evolved into.NET 5 and then.NET 6.
- NET: A framework for using .NET to create web apps.
- NET Core: the ASP.NET’s high-performance, cross-platform alternative.
- Entity Framework: A database interaction framework based on object-relational mapping.
Advancing Your Career with .NET Skills
The knowledge gained from .NET courses can lead to a wide range of job prospects, including:
- Software Developer: Use .NET Core to create cross-platform apps, interact with APIs, and implement user interfaces.
- Web Developer: develop dynamic web applications, integrate databases, and develop responsive user interfaces using ASP.NET Core.
- Cloud Developer: Create cloud-native applications with .NET on platforms such as Microsoft Azure.
- Game Developer: Use .NET for game creation using engines such as Unity.
- Enterprise Solutions Developer: Create and deploy strong enterprise-level applications to improve corporate processes.
Our Training Institute – Maria Academy
With our online course, you can broaden your career opportunities in SQL, C#, and .NET Technology.
We will enthusiastically teach you SQL, C# & .NET. Our trainers will be more interactive, addressing real-world problems and providing solutions. Students will be able to improve their programming skills through hands-on programming. Trainers must have a minimum of six years of experience. The curriculum was created to cover the entire C# learning process. A practical test and periodic exercises will be provided to help students improve their programming skills. By the end of the training, you should be able to provide a solution for a real-world scenario using your programming skills.
In terms of placement, course, syllabus, and practical, we are the best C# .NET Training Providers in India.
We provide .NET Courses both offline (at Chennai and Karaikudi) and online (all over the world).
Benefits of Online .NET Courses
Online.NET classes have the following benefits for learners:
- Flexibility: You may set your own pace for learning and organise your education around your schedule with online courses.
- Accessibility: You can access top-notch.NET classes from anywhere in the world, irrespective of your location.
- Interaction: Discussion forums are a common feature of online platforms, giving students the opportunity to connect with peers and teachers and promote a collaborative learning environment.
- Comprehensive Curriculum: You may be sure that you’ll receive a well-rounded education because reputable online courses cover a wide range of.NET topics.
- Hands-on Experience: Many courses include hands-on exercises and projects that allow you to apply theoretical concepts to real-world situations.
Key Components of an Online .NET Course
- Introduction to .NET: A comprehensive course starts with an overview of the .NET ecosystem, its history, and its relevance in the modern software development landscape.
- Programming Fundamentals: Courses delve into programming languages like C# and cover foundational concepts such as variables, data types, control structures, and more.
- Web Development: For those interested in web applications, courses teach ASP.NET or ASP.NET Core for creating dynamic and responsive web applications.
- Database Integration: Courses often cover Entity Framework for seamless database interactions, including querying and data manipulation.
- Project Work: Practical projects allow you to build real-world applications, applying the skills and concepts you’ve learned throughout the course.
- Deployment and DevOps: Modern development practices emphasize deployment and DevOps. Some courses introduce you to tools and methodologies for continuous integration and deployment.
Conclusion
It is impossible to overestimate the value of ongoing education in today’s technologically advanced environment. Regardless of your existing level of knowledge, online.NET courses offer a practical and efficient way to pick up useful skills. A career in software development can be lucrative and enjoyable if you register in an online.NET course, regardless of your level of programming expertise or desire to broaden your skill set.
Areas, Partial Views and Child Actions in ASP.NET MVC
Developers may organise their applications, build modular components, and improve code reuse by using Areas, Partial Views, and Child Actions in ASP.NET MVC. Let’s examine each of these ideas and how to employ them successfully:
Areas in ASP.NET MVC:
A huge ASP.NET MVC application can be divided up into manageable portions using areas. Within the application, each region represents a different functional area. You may designate several locations for the administration, user dashboards, or public-facing pages, for instance.
Right-click the project, pick “Add,” and then select “Area” from the context menu to create an area. Following that, you can give the region a name and designate a folder structure for it. It will have separate folders for its controllers, views, and models.
Areas facilitate better concern segregation and simplify the upkeep of sophisticated programmes.
Partial Views in ASP.NET MVC:
In order to display a portion of HTML content and C# code in various views throughout the application, partial views are reusable components.
You can build a partial view by adding a new view to the “Views” folder (or a subfolder) and naming it something like “_PartialView.cshtml.”
You can render a partial view within another view using the @Html.Partial or @Html.RenderPartial methods, passing the partial view’s name as an argument.
Child Actions in ASP.NET MVC:
Child actions are controller methods that return partial views. They come in handy when you need to render different elements of a view independently.
To create a child action, define a method in a controller that returns a PartialViewResult. You can use the ChildActionOnly attribute to ensure that the method can only be called as a child action and not directly as an HTTP request.
In your main view, you can call the child action using the @Html.Action or @Html.RenderAction methods, passing the name of the child action and any required parameters.
Advantages of utilising areas, partial views, and child actions
Utilizing areas, partial views, and child actions in ASP.NET MVC provides several advantages that can significantly enhance the development process and improve the overall architecture of your application. Here are some key benefits of using these features:
Modularity and Reusability:
Areas allow you to divide a large application into smaller functional sections, promoting modularity and separation of concerns. Each area can have its own set of controllers, views, and models, making it easier to manage and maintain specific features.
Partial views encapsulate reusable components, such as navigation bars, headers, footers, or widgets. Once created, you can include them in multiple views across the application, reducing duplication of code and promoting reusability.
Organization and Maintainability:
By structuring your application with areas, you create a clear organization that improves code maintainability and makes it easier for developers to navigate and understand the application’s structure.
Partial views and child actions help to decompose complex views into smaller, manageable components. This separation of concerns leads to cleaner code and makes it easier to maintain and update specific parts of a page independently.
Code Separation and Readability:
Areas encourage the separation of different functional parts of the application, reducing code coupling and increasing code readability.
Partial views and child actions enable you to separate the presentation logic from the main view, enhancing the readability and maintainability of the code.
Code Reusability and DRY Principle:
Areas, partial views, and child actions promote the “Don’t Repeat Yourself” (DRY) principle, allowing you to reuse code across different areas or views.
Instead of duplicating code for common UI components, you can create partial views once and then use them in multiple views, reducing development effort and avoiding inconsistencies.
Performance Optimization:
By utilizing child actions, you can optimize the rendering of complex views by rendering specific parts of a page separately, reducing the overall load time and enhancing user experience.
Partial views can help optimize rendering performance by allowing you to cache the output of specific components that are unlikely to change frequently.
Enhanced Testing and Debugging:
The use of areas allows for better isolation and targeted testing of specific functional sections, making unit testing and debugging more focused and effective.
Partial views and child actions can be tested independently, making it easier to verify the correctness of individual components.
In summary,, the strategic use of areas, partial views, and child actions in ASP.NET MVC not only fosters reusability, performance optimisation, and increased testing capabilities but also enhances code organisation and maintainability. Building scalable, stable, and modular web applications that are simpler to maintain and develop over time is made possible by these qualities.
Example
Consider the following scenario:
Assume you have an e-commerce site with distinct sections for the product catalogue and the user dashboard. You can construct partial views for common elements such as navigation, headers, and footers and then reuse them across several views inside each section. You can also call a child action in the header partial view to display the user’s shopping basket.
You may improve the flexibility and maintainability of your ASP.NET MVC application by efficiently utilising Areas, Partial Views, and Child Actions, resulting in a more organised and efficient development process.
Click here , if you look out for training in Asp.net Core and other Dot Net technology.
Routing in ASP.NET
Routing in ASP.NET is the process of sending HTTP requests to the appropriate controller. Whether a request should be forwarded to the controller for processing or not is up to the MVC middleware. This choice is made by the middleware based on the URL and some configuration data.
In other words, routing in ASP.NET is a mechanism that allows you to define URL patterns and map them to specific resources or handlers in your web application. It enables you to create clean, user-friendly URLs that are more meaningful and descriptive than traditional query-string based URLs.
Routing is an essential part of the ASP.NET MVC (Model-View-Controller) framework and the newer ASP.NET Core framework, although the concept remains similar across both technologies.
Routing’s main goal is to separate your web application’s physical file structure from its URL structure. In the past, URLs in web applications were linked to particular physical server files (for example, a particular.aspx page). However, routing gives you more flexibility when defining the URLs for your web application since it allows you to specify URL patterns and link them to controllers and actions (in MVC) or endpoints (in ASP.NET Core).
To address various scenarios and requirements, ASP.NET MVC supports a number of different forms of routing. The primary routing types that ASP.NET MVC supports are listed below:
Conventional Routing: In ASP.NET MVC, conventional routing is the default routing method. The mapping of URL segments to names of controller and action method uses a pattern-based technique. A URL pattern typically looks like this: “controller/action/id,” where “controller” and “action” stand in for the names of the controller and action method, respectively. It is possible to omit the “id” parameter.
Here’s a basic example of routing in ASP.NET MVC:
| // In the RouteConfig.cs file (MVC) public static void RegisterRoutes(RouteCollection routes) { routes.IgnoreRoute(“{resource}.axd/{*pathInfo}”); routes.MapRoute( name: “Default”, url: “{controller}/{action}/{id}”, defaults: new {controller = “Home”, action = “Index”, id = UrlParameter.Optional } ); } |
In this example, a default route is defined with a pattern like “{controller}/{action}/{id}”. When a user visits a URL like “example.com/Home/Index”, the routing system will map it to the “Index” action method in the “HomeController” within the MVC application. The “id” parameter is optional and can be omitted in the URL.
ASP.NET Core uses a similar concept of routing, but the syntax and configuration are slightly different. Here’s a basic example of routing in ASP.NET Core:
| // In the Startup.cs file (ASP.NET Core) public void Configure(IApplicationBuilder app, IWebHostEnvironment env) { // Other middleware configurations… app.UseRouting(); app.UseEndpoints(endpoints => { endpoints.MapControllerRoute( name: “default”, pattern: “{controller=Home}/{action=Index}/{id?}” ); }); } |
In this example, the UseRouting() method is called to enable routing, and then MapControllerRoute() is used to define the default route pattern.
Routing plays a crucial role in creating clean and SEO-friendly URLs, improving the maintainability of your web application, and supporting more structured and organized code through the proper separation of concerns.
Attribute Routing: Using attributes, you may build routes directly on the controller and action methods. This method gives you more fine-grained control over single action routing and allows you to build unique routes for individual actions. When you have non-conventional URL patterns or want more descriptive URLs, attribute routing comes in handy.
In ASP.NET MVC, here’s an example of attribute routing:
| // Controller with attribute routing [RoutePrefix(“products”)] public class ProductController : Controller { [Route(“”)] public ActionResult Index() { // Action logic } [Route(“{id}”)] public ActionResult Details(int id) { // Action logic } } |
Area Routing: Areas are used in ASP.NET MVC to partition related portions of a web application into different modules. Controllers, views, and models can be customised for each region. Area-specific routing can be used with areas to control routes inside that specified area. When dealing with large and complex applications, this helps to maintain clean and organised code.
Custom Route Constraints: Custom route constraints let you specify extra requirements that a route must meet in order to be accepted as a match. Implementing the IRouteConstraint interface enables you to create unique route constraints. For instance, you can build a custom constraint to guarantee that the “id” argument adheres to a particular format or fits within a given range.
Catch-All Routes: Any URL that doesn’t match one of the other defined routes is matched using catch-all routes. When dealing with specific URL patterns that don’t suit the typical route patterns, this is useful.
With these multiple routing systems in ASP.NET MVC, you may handle a variety of URL patterns, create custom routes, and set up your application’s URLs anyway you see fit.
How to get a DOTNET Job abroad from India?
First approach is, do your own research and get ideas to grab the Job. This article will give you some ideas on how to start your job search.
Below are the ways to grab the job opportunity.
- Networking
- Get opportunity based on Language skills
- Get Job based on your technical skills
- Pick good MNC companies in Offshore and travel abroad
- Register in portals like monster.com, LinkedIn
- Study and get placed in abroad.
Networking
Networking is the key to grab any good opportunity. If you have any of your friends, relatives working in countries Dubai, Singapore and others, you can ask them to refer you for interview. Networking and Association takes you to big places where you can’t reach alone.
If you are an experience guy in Dot net, engage with the peoples in Dot net community. There are lot of Dot net communities created by Microsoft, find their channels in Facebook, LinkedIn, meetup.com and join them. Some of the community names are mentioned below.
- Microsoft Azure User Group – Chennai
- Pune User Group
- Dot net Bangalore
- Kerala Microsoft Technology Meetup
Joining the community will give more exposure to the latest updates in technologies and also network with the experts. The community groups set up monthly technology meetup, that help peoples in the community to have a face to face connect. If you are a good speaker, you can take some technology seminars in the meet up and increase your visibility.
Get opportunity based on Language
There are few countries like Japan, Germany, China who prefer the candidates with good language skills. Japan prefers language certified candidates even though you are good in technology. Japanese language Proficiency Test has five levels N1, N2, N3, N4 and N5. The easiest level is N5 and the most difficult level is N1. In case you look out for a job in Japan, then studying these certifications will surely be an advantage.
Similar to Japanese language, German language also has its own scope in Job market. Even if you don’t have the proficiency to speak in German, holding a certificate will improve your chance to get a job in Germany. The level of competence in German is as below,
- Levels A1 and A2
- Levels B1 and B2
- Levels C1 and C2
Levels A1 and A2 – These levels provide the basic level of German language.
Levels B1 and B2 – You will learn German at an advanced level
Levels C1 and C2 – You will master German at this level
For Chinese, Hanyu Shuiping kaoshi is an international standardized exam which tests and rates Chinese language proficiency. HSK certification will improve your probability for job search in China.
Get Job based on your technical skills
Always work on the trending technologies in software. Keep upskilling even in case if you work on old technology. Most of the onsite openings look out for trending technology.
Some of the recent trending technology in dotnet are as below,
- Big Data with sql server
- Asp.net Core
- Tableau with sql server
- Data Science
- Artificial Intelligence
- Selenium with C# .net
First, the overseas company look out for the candidate in local for any job opportunity. If they can’t find any talent for that technology in local country, then they start their search in foreign country.
Being on the latest technology will increase your demand in the foreign job market. Recruiter in nearest country to India like UAE, Malaysia, Singapore extend their job search to India once they can’t find the right talent. Recruitment is mainly based on supply and demand. If the supply for the talent is not available within the country for a trending technology, then the demand rises and the recruiter starts looking outside country.
Pick good MNC companies in Offshore and travel abroad
Lot of companies in Chennai and Bangalore sends their employees to onsite for work. The company will take care of your visa process and place you in work in onsite. Every project in software works with few offshore resources and one or two onsite resources. The offshore company have the capability to arrange for your visa based on the project requirement. The only harder thing, you should be chosen as the onsite resource by your manager.
If your manager recognizes you as the skillful talent, then this is the easiest way to travel abroad.
Register in portals like monster.com, LinkedIn
Register your resume in portals like Monster.com, LinkedIn. Foreign Recruiters looks out in these portal to hire candidates. Monster provides you a lot of job opportunities in Singapore and Malaysia.
Naukri provides you job opportunity in Dubai and other overseas countries. Update your resume with recent technology and certification details. Nowadays, few companies in Oman walks down to India and arrange Job interviews. You can also attend skype interviews from Singapore, Malaysian companies.
Linked in optimization also increase your visibility to the foreign recruiters to hire you. You can even apply for jobs in Linked in and keep connected with the recruiters.
Study and then get placed in abroad
Upskilling and Cross skilling are the unique ways to grab the job opportunity in abroad. You can contact us on +91 – 90427 10472 if you look out to upskill yourself in Microsoft technologies.
Alternative approach is to join a professional 2 year course in abroad. It is quite costly and also a long term process.
Study in abroad and get yourself placed in foreign countries. You can study MS, PhD, engineering, diploma courses in countries like Canada, Australia, USA and get foreign exposure. Some countries allow you to do part time job while in study visa.
Once you complete your course, the companies will give you priority in their job opportunity as you studied in local universities.
Click here , if you look out for training in Asp.net Core and other Dot Net technology.
Three Tier Architecture in MVC
Three Tier (Three Layer) Architecture
With a three-layer design, the project is divided into three layers: the user interface layer, the business layer, and the data layer (database), where we divide the UI, logic, and data into three groups. If a user wants to switch the user interface from a Windows computer to a smartphone, he or she simply needs to alter the UI layer; all other layers are unaffected. Like this, if a user wishes to change a database, he simply needs to update the data layer; everything else stays the same.
The widely used three-tier (or three-layer) architecture is a way to organise the codebase. This architecture divides the codebase into three distinct levels, each with a unique set of duties:

Presentation layer: This is the application’s user interface, which shows the user the features and data of the programme.
Business logic (or Application) layer: The business logic that powers the application’s essential features is contained in this layer. as processing the data moving between the other two layers and making judgements, calculations, and evaluations.
Data access layer (or Data) layer: To save and recover application data, this layer communicates with databases.
Advantages of using three-tier architecture are:
Accelerated development: Reducing product time to market and enabling developers to use the most current tools and layer appropriate languages.
Improved scalability: By deploying apps on many levels, each tier may always be scaled separately.
Improved Reliability: By using several tiers, you may execute additional components of your application on other servers and employ results that have been cached to improve reliability and availability.
Enhance security: By using a well-designed application layer as a private firewall to help avoid receptive weaknesses like SQL injection.
The package of different layers is as follows.
- Presentation Layer – controller package
- Business Logic Layer – service package
- Data Access Layer – repository package
Three Layer Architecture using MVC Sample:
Create an empty MVC web application project with Project name “WebApp” and solution name “TLA”. This WebApp project is the presentation layer.
In Solution TLA, add a new project to create business logic à Class library (.net framewok) à name the project as BusinessLayer.
Again, in Solution TLA, add a new project to create data access à Class library (.net framewok) à name the project as DataBaseLayer.
Add BusinessLayer & DataBaseLayer as reference in “WebApp”.
Add BusinessLayer as reference in “DataBaseLayer”.
In sql server explorer, add a new database with name “MYDB” and create a table with name “Registration”.
| CREATE TABLE [dbo].[Registration]( [RegId] [int] IDENTITY(1,1) NOT NULL, [FullName] varchar NULL, [Address] varchar NULL, [Gender] varchar NULL, [City] varchar NULL, [DoB] [date] NULL, [Cno] varchar NULL, PRIMARY KEY CLUSTERED ([RegId] ASC) |
In “DataBaseLayer”, add the model file using “ado.net entity data model”.
Once model is created, copy the connection string from app.config of “DataBaseLayer” and paste it in web.config of “WebApp”.
In “BusinessLayer”, create a class file with name “RegistrationModel” and replace with below snippet.
| public class RegistrationModel { public int RegId { get; set; } public string FullName { get; set; } public string Address { get; set; } public string Gender { get; set; } public string City { get; set; } public Nullable DoB { get; set; } public string Cno { get; set; } } |
In “DataBaseLayer”, add a new folder with name “DBOperation”, in it, add a class file with name “ManageRegistration” and replace with below snippet.
| public class ManageRegistration { public void AddReg(RegistrationModel regModel) { using (var DB = new MYDBEntities()) { Registration Reg = new Registration() { FullName = regModel.FullName, Address = regModel.Address, Gender = regModel.Gender, City = regModel.City, DoB = regModel.DoB, Cno = regModel.Cno }; DB.Registrations.Add(Reg); DB.SaveChanges(); } } } |
Then add EntityFramework.dll and EntityFramework.SqlServer.dll references in “WebApp”.
So now the business layer and data layer has been completely created.
Now, in WebApp (i. e. in presentation layer), add a new controller with name “Home controller” and replace with below snippet.
| public class HomeController : Controller { // GET: Home public ActionResult Index() { return View(); } ManageRegistration ManageReg = new ManageRegistration(); [HttpPost] public void AddReg(FormCollection Form) { RegistrationModel registrationModel = new RegistrationModel() { FullName = Form["txtName"], Address = Form["txtAddress"], Gender = Form["rdbGender"], City = Form["txtCity"], DoB = Convert.ToDateTime(Form["txtDoB"]), Cno = Form["txtCno"] }; ManageReg.AddReg(registrationModel); Response.Write("Saved"); } } |
Add index view with empty without model and put the below html and ajax snippet in it
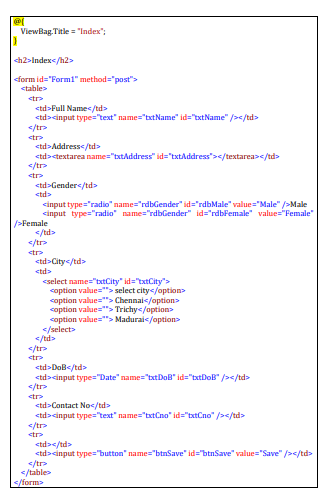
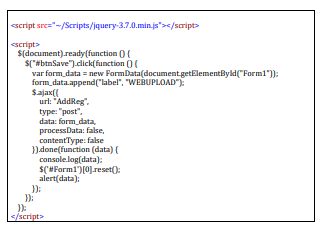
Run the program
Solid Principles in C#.net
In C#, the SOLID principles are a set of guidelines that help developers design software that is modular, maintainable, and extensible. SOLID is an acronym that stands for:
S – Single Responsibility Principle (SRP)
O – Open-Closed Principle (OCP)
L – Liskov Substitution Principle (LSP)
I – Interface Segregation Principle (ISP)
D – Dependency Inversion Principle (DIP)
Single Responsibility Principle (SRP):
A class should have only one reason to change. It states that a class should have only one responsibility or job. This principle helps to keep classes focused, maintainable, and easier to understand.
| public interface INotificationService { void SendNotification(string message); } public class EmailNotificationService : INotificationService { public void SendNotification(string message) { // Code to send an email notification } } public class SMSNotificationService : INotificationService { public void SendNotification(string message) { // Code to send an SMS notification } } public class NotificationSender { private readonly INotificationService _notificationService; public NotificationSender(INotificationService notificationService) { _notificationService = notificationService; } public void SendNotification(string message) { _notificationService.SendNotification(message); }} |
In this example, the FileManager class has the responsibility of reading and saving files, while the FileParser class is responsible for parsing files. Each class has a single responsibility, making it easier to understand and maintain.
Open-Closed Principle (OCP):
Software entities (classes, modules, functions, etc.) should be open for extension but closed for modification. This principle encourages designing modules that can be extended without modifying their existing code, reducing the risk of introducing bugs and making it easier to add new features.
| public abstract class Shape { public abstract double CalculateArea(); } public class Rectangle : Shape { public double Width { get; set; } public double Height { get; set; } public override double CalculateArea() { return Width * Height; }} public class Circle : Shape { public double Radius { get; set; } public override double CalculateArea() { return Math.PI * Radius * Radius; }} |
In this example, the Shape class is open for extension, as new shapes can be added by creating new subclasses of Shape. The existing code is closed for modification, as the Shape class and its existing subclasses do not need to be changed when adding new shapes.
Liskov Substitution Principle (LSP):
Objects of a superclass should be able to be replaced with objects of their subclass without breaking the behavior of the system. In other words, derived classes should be substitutable for their base classes, and they should honor the contracts defined by the base class.
| public class Vehicle { public virtual void Start() { Console.WriteLine(“Starting the vehicle”); } } public class Car : Vehicle { public override void Start() { Console.WriteLine(“Starting the car”); } } public class Motorcycle : Vehicle { public override void Start() { Console.WriteLine(“Starting the motorcycle”); } } |
In this example, the Car and Motorcycle classes are subclasses of Vehicle, and they can be substituted for Vehicle without breaking the behavior of the system. The Start method is overridden in each subclass, providing specific implementations for starting a car and starting a motorcycle.
Interface Segregation Principle (ISP):
Clients should not be forced to depend on interfaces they do not use. This principle encourages the creation of small, specific interfaces instead of large general-purpose interfaces. It helps to avoid forcing clients to implement methods they don’t need and promotes decoupling and flexibility.
| public interface IOrder { void ProcessOrder(); } public interface IShipping { void ShipOrder(); } public class OnlineOrder : IOrder, IShipping { public void ProcessOrder() { Console.WriteLine(“Processing online order”); } public void ShipOrder() { Console.WriteLine("Shipping online order"); }} public class OfflineOrder : IOrder { public void ProcessOrder() { Console.WriteLine(“Processing offline order”); } } |
In this example, we have two interfaces: IOrder and IShipping. The OnlineOrder class implements both interfaces, as it can process an order and ship it. The OfflineOrder class only implements the IOrder interface because it doesn’t involve shipping. This segregation of interfaces ensures that classes only depend on the methods they actually need.
Dependency Inversion Principle (DIP):
High-level modules should not depend on low-level modules; both should depend on abstractions. Abstractions should not depend on details; details should depend on abstractions. This principle promotes loose coupling between modules, promotes modular design, and enables easier testing and maintainability.
| public interface INotificationService { void SendNotification(string message); } public class EmailNotificationService : INotificationService { public void SendNotification(string message) { // Code to send an email notification } } public class SMSNotificationService : INotificationService { public void SendNotification(string message) { // Code to send an SMS notification } } public class NotificationSender { private readonly INotificationService _notificationService; public NotificationSender(INotificationService notificationService) { _notificationService = notificationService; } public void SendNotification(string message) { _notificationService.SendNotification(message); }} |
In this example, the NotificationSender class depends on the INotificationService interface rather than concrete implementations. This allows different notification services to be injected at runtime, promoting loose coupling. The high-level module (NotificationSender) depends on the abstraction (INotificationService) rather than the low-level modules (EmailNotificationService, SMSNotificationService).
By adhering to these principles, developers can create code that is easier to understand, maintain, and modify, leading to more robust and scalable software systems.
C# Web API
C# Web API
Asp.net Web API is a framework that is provided by Microsoft and used to create HTTP services.
ASP.NET Web API is an easy-to-build HTTP web service. To reach a range of clients, including browsers, mobile applications, desktop applications, and IOTs.
The Asp.net web API has two layers.
1.client layer
2.server layer
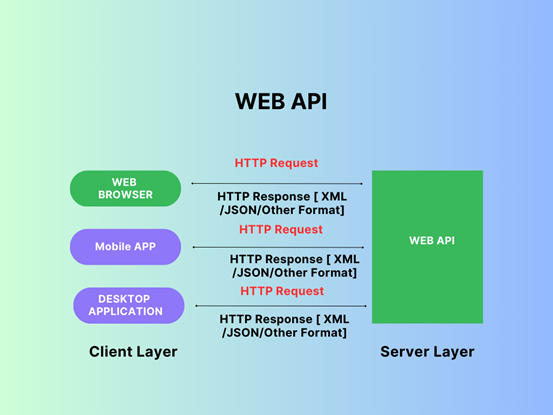
It is accessed by a wide range of clients, including web browsers, mobile applications, and desktop applications, when the client layer makes a request to the web API to get an output response in different formats like JSON or XML.
| Http Request = http://servername/apiname?id=101 Http Response = {“Name”,ABC,”Age”:”54”} |
| What is HTTP? HTTP – Hyper Text Transfer Protocol means the user gets a different device to get a request, but the output gets the same response server, also called HTTP. HTTP Is used more than providing web page and also strong foundation for the developing API. HTTP is a essential and pervasive protocol |
Why to choose ASP.NET Web API?
- Web API is light weight framework for API Development
- Web API has built-in support for standard formats like JSON and XML., and Other Formats.
- Web API is a Content Negotiation
- c#.net Web API maps HTTP Verbs to method names
Features of Web API
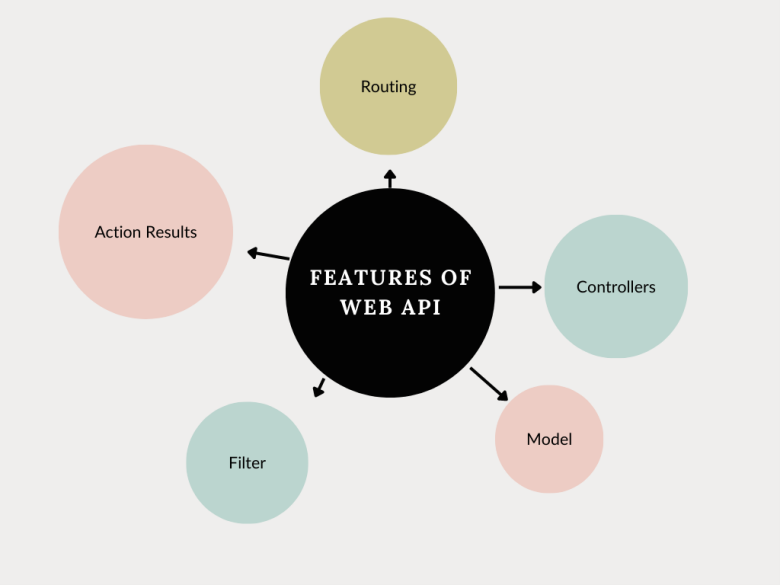
| Filter: It gives filters to the web application. Action Result: It can keep the action logos client, such as information recovery. Routing: It makes a difference in routing through different APIs. Controller: It gives useful capabilities to the web application. Model: It gives the basic capabilities of the web application. |
Types of Web API in C#
- public
- partner
- private
- Composite
Public APIs
A public API is open and available for use by outside developers or businesses; its application, Data, will develop and offer a public API. also called public APIs or external APIs.
Partner APIs
Partner APIs can interface the internal client information system with those outside groups no other APIs are allowed. APIs are generally stronger authentication, authorization, and security machines.
private APIs
Private APIs are used by enterprises to connect system and data APIs for internal use at certain security levels.
Composite APIs
Composite APIs generally combine two or more APIs’ interdependent operations. Composite APIs sometimes improve speed and performance.
C# Web API Sample Programming
Open Visual Studio 2019 > Click Create a new project > Alt+s > ASP.NET Web Application (.NET Framework) > ProjectName ASP.NET MVC Web API
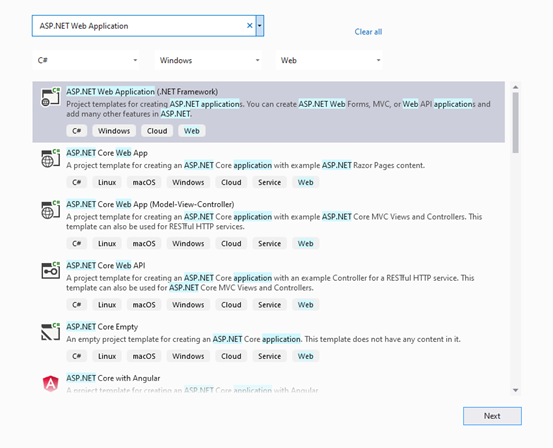
Create a new Models.cs Application Snapshot as below ,
Models Folder Right click > Add > Click Class > Reference Name Empolyee.cs
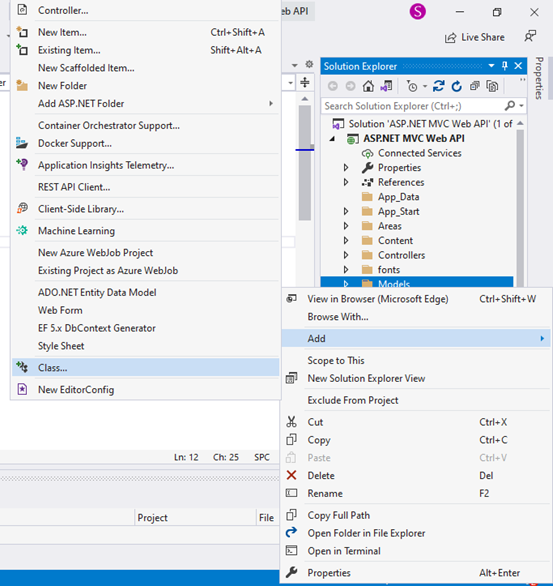
Replace the Empolyee.cs Class with below snippet,
| using System; using System.Collections.Generic; using System.Linq; using System.Web; namespace ASP.NET_MVC_Web_API.Models { public class Empolyee { public int ID { get; set; } public string Name { get; set; } public DateTime JoiningDate { get; set; } public int Age { get; set; } } } |
Controller Folder Right click > Add > Click Controller > Click Web API
> Click Web API 2 Controller Empty> ControllerName EmpolyeeController.cs
Create a new Controller.cs Application Snapshot as below
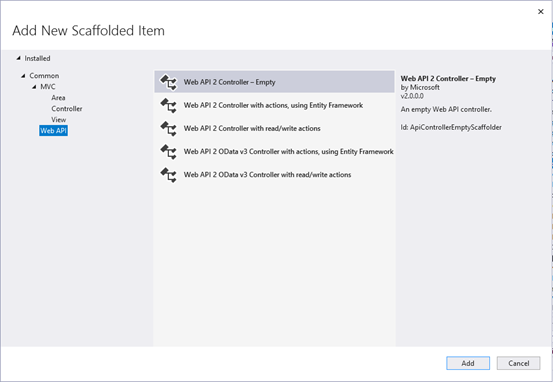
Replace the EmpolyeeController.cs With below Snippet ,
| using System; using System.Collections.Generic; using System.Linq; using System.Web.Http; using ASP.NET_MVC_Web_API.Models; namespace ASP.NET_MVC_Web_API.Controllers { public class EmpolyeeController : ApiController { Empolyee[] employees = new Empolyee[] { new Empolyee { ID = 1, Name = “sam”, JoiningDate = DateTime.Parse(DateTime.Today.ToString()), Age = 29 }, new Empolyee { ID = 2, Name = “Balu”, JoiningDate = DateTime.Parse(DateTime.Today.ToString()), Age = 36 }, new Empolyee { ID = 3, Name = “Michel”, JoiningDate = DateTime.Parse(DateTime.Today.ToString()), Age = 22 } }; public IEnumerable<Empolyee> GetAllEmployees() { return employees; } public IHttpActionResult GetEmployee(int id) { var employee = employees.FirstOrDefault((p) => p.ID == id); if (employee == null) { return NotFound(); } return Ok(employee); } } } |
Run the Application and Replace the Url

Output :
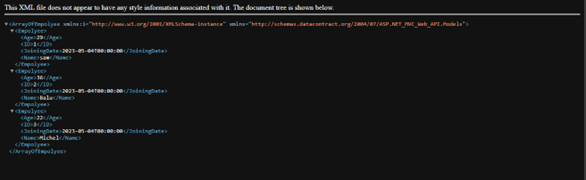
SQL Job Support in India
SQL Overview:
SQL is a database management language that includes database creation, database deletion, fetching data rows, modifying, and deleting data rows, and so on.
SQL stands for Structured Query Language, and it is a computer language used to store, manipulate, and retrieve data from relational databases. SQL was created by IBM Computer Scientists in the 1970s and was adopted as a standard by the American National Standards Institute (ANSI) in 1986 and the International Organization for Standardization (ISO) in 1987.
SQL is the industry standard for communicating with Relational Database Systems. SQL is the Standard Database Language used by all Relational Database Management Systems (RDMS) such as MySQL, MS Access, Oracle, Sybase, Informix, Postgres, and SQL Server.
Data is everything nowadays. To comprehend this, you must be familiar with data management. SQL is a language that can be used to understand databases. SQL (Structured Query Language) is the name given to a language used to communicate with databases. The SQL language can be used to edit, pull, and add information to a database. SQL is the foundation of relational databases. More information is available in our SQL online job support.
SQL is widely used because it provides the following benefits:
Users can
- access data stored in relational database management systems.
- describe the data.
- define and manipulate data in a database.
- create and delete databases and tables.
- create views, stored procedures, and functions in a database.
- assign permissions to tables, procedures, and views.
- embed SQL modules, libraries, and pre-compilers within other languages.
SQL Job Assistance:
Do you require SQL Job Support? If you are having trouble completing daily tasks at work due to a lack of practical SQL knowledge, you are most likely looking for an online job support service, which is considered to be the most effective and simplest solution these days. ‘Job Support Online’ offers the best on-the-job support services. No matter what kind of issues you are having with your project tasks, our top IT experts will assist you in dealing with and solving each and every issue on your own. We excel at providing the best on-the-job support services. What exactly are you waiting for? Call today for the best SQL on-the-job support services from anywhere in the world.
Why should you hire our SQL server job support team?
We offer the most effective SQL server job support services. We have built a team of highly experienced and professional IT consultants over the years to provide the best on-the-job support services. Every expert on our team has over a decade of experience in the IT industry, provides professional job support services, and can assist you in completing tasks at your job on time. We aim to provide expert job support to all IT freshers, but we understand that money may be an issue for some. As a result, we charge low prices to make our on-site support services affordable. Furthermore, we work hard to provide the best job support services possible.
Our SQL project assistance programme:
We offer full-time on-the-job support in both online and offline.
We will assign you an expert IT professional to conduct the demo session.
First and foremost, you must explain everything about your project and the technologies used in it to our expert IT professional, and if he/she is satisfied, we will agree to provide you with job support services.
Our IT professionals assist you in managing complex projects on the job.
Fees for job support are non-refundable. So please only pay the fees if you are likely that you require job support services.
Please call us at +91-90427 10472 or +91-95851 77725 for more information on job support and SQL training.
Stored Procedure in SQL Server
- A stored procedure is a precompiled and stored database object that contains a set of SQL statements and procedural logic that can be executed as a single unit. It can be used in a database management system to simplify complex queries and database operations. It is a prepared SQL code that you can save, so the code can be reused over and over again. Stored procedures help improve performance and security, as well as simplify the code.
Here’s a basic example of a stored procedure that accepts two input parameters and returns the sum of those two numbers:
| CREATE PROCEDURE AddNumbers @n1 INT, @n2 INT AS BEGIN SET NOCOUNT ON; SELECT @n1 + @n2 AS ‘Sum’; END |
In this example, CREATE PROCEDURE is used to define the name of the procedure (AddNumbers) and its input parameters (@n1 and @n2). The AS keyword is used to begin the code block for the stored procedure.
SET NOCOUNT ON is used to prevent the count of the number of rows affected by the stored procedure from being returned.
The code block then calculates the sum of the two input parameters and returns the result using the SELECT statement.
Once the stored procedure is defined, it can be executed by calling its name:
| EXEC AddNumbers 2, 3; |
This will return the result 5 as the sum of 2 and 3.
Stored Procedure in a Basic CRUD Operation
Now, let us have an idea about using stored procedure in a basic CRUD operation sample.
Let us create a database as follows:
| Create database Company |
Then create a table in the corresponding database.
| CREATE TABLE Employee( EmpCode int, EmpName nchar(100), EmpAge int, EmpSal int) |
Inserting data into a table: This stored procedure inserts a new employee record into a table named Employee:
| CREATE PROCEDURE AddEmployee @EmpCode int, @EmpName nchar(100), @EmpAge int, @EmpSal int AS BEGIN SET NOCOUNT ON; INSERT INTO Employee(EmpCode, EmpName, EmpAge, EmpSal) VALUES (@EmpCode, @EmpName, @EmpAge, @EmpSal); END |
On executing the above snippet, a stored procedure to add the details in the table will be created.
Now, by calling the below query, the table will get added the following 5 datas.
| EXEC AddEmployee 1, ‘TOM’, 25, 30000 EXEC AddEmployee 2, ‘RAM’, 25, 30000 EXEC AddEmployee 3, ‘RAJA’, 26, 32000 EXEC AddEmployee 4, ‘SIVA’, 26, 32000 EXEC AddEmployee 5, ‘GOPI’, 25, 30000 |
Retrieving data from a table: This stored procedure retrieves all the rows from a table named Employee:
| CREATE PROCEDURE GetEmployees AS BEGIN SET NOCOUNT ON; SELECT * FROM Employee; END |
On executing the above snippet, a stored procedure to get the employee details from the table will be created.
Then by simply calling the below query, the datas stored in the table can be retrieved.
| EXEC GetEmployees |
Updating data in a table: This stored procedure updates an existing employee record in a table named Employee:
| CREATE PROCEDURE UpdateEmployee @EmpCode int, @EmpName nchar(100), @EmpAge int, @EmpSal int AS BEGIN SET NOCOUNT ON; UPDATE Employee SET EmpName = @EmpName, EmpAge = @EmpAge, EmpSal = @EmpSal WHERE EmpCode = @EmpCode; END |
On executing the above snippet, a stored procedure to update the details in the table will be created.
Now, by calling the below query, the data with “EmpCode =1” in the table can be updated with new data as follows.
| EXEC UpdateEmployee 1, ‘Jerry’, 26, 32000 |
Deleting data from a table: This stored procedure deletes an existing employee record from a table named Employee:
| CREATE PROCEDURE DeleteEmployee @EmpCode int AS BEGIN SET NOCOUNT ON; DELETE FROM Employee WHERE EmpCode = @EmpCode; END |
On executing the above snippet, a stored procedure to delete the details in the table will be created.
Now, by calling the below query, the data with “EmpCode=1” in the table can be deleted
| EXEC DeleteEmployee 1 |
These are just a few examples, and there are many more possibilities for what you can do with stored procedures.
SQL & C# Dot Net – Online Training in India:
SQL and DOT NET Technologies:
SQL and DOT NET are two distinct technologies that are frequently used in software development. SQL is an abbreviation for Structured Query Language, a programming language used to manage and manipulate relational databases. DOT NET is a software development framework that allows you to create and run applications on a variety of platforms, including Windows, macOS, and Linux.
SQL is widely used in relational databases such as MySQL, Oracle, and Microsoft SQL Server to manage data. SQL allows developers to use a standardised syntax to create, modify, and query databases. SQL allows for a wide range of operations, such as data insertion, deletion, modification, and retrieval. SQL is also used to analyse data, report on it, and gather business intelligence.
DOT NET is a well-known software development framework that is used to create desktop, web, and mobile applications. DOT NET provides a set of libraries, tools, and runtime environments that simplify the development, testing, and deployment of applications. DOT NET supports a variety of programming languages, including C#, F#, and Visual Basic, and it can be used to create applications for a variety of platforms, including Windows, macOS, Linux, and mobile devices.
SQL and DOT NET, when used together, can provide powerful solutions for managing and manipulating data in applications. For example, a DOT NET application can use SQL to manage its data in a relational database, making it easier to store and retrieve data. Furthermore, DOT NET includes a set of libraries and tools that make it easier to integrate with SQL databases, allowing developers to create applications that can handle large amounts of data while also supporting complex data analysis and reporting.
Future of DOT NET:
Dot Net has a broad scope, and its future appears bright. Dot net is the future of Windows and other operating systems development.
It is a comprehensive framework for developing large enterprise-scale and scalable software applications.
Dot Net is a modern, flexible, fast, and secure technology that integrates well with other technologies.
Our Training Institute – Maria Academy
With our online course, you can broaden your career opportunities in SQL, C#, and Dot Net Technology.
A C# course can take you to the next skill level whether you are an experienced programmer looking to expand your skills and knowledge or you are just getting started in object-oriented programming. Discover what you can do with C# by learning from experienced instructors at Maria Academy.
Our experts will provide you with the SQL training you require to become a database professional. This course is also ideal for advanced engineers who need to refresh their knowledge. SQL courses aren’t just for engineers; they’re also for business analysts who need to learn about new trends and markets.
We will enthusiastically teach you SQL, C# & DOT NET. Our trainers will be more interactive, addressing real-world problems and providing solutions. Students will be able to improve their programming skills through hands-on programming. Trainers must have a minimum of six years of experience. The curriculum was created to cover the entire C# learning process. A practical test and periodic exercises will be provided to help students improve their programming skills. By the end of the training, you should be able to provide a solution for a real-world scenario using your programming skills.
In terms of placement, course, syllabus, and practical, we are the best C#.NET Training Providers in India.
“c++” is the result of the evolution of “c.” C++’s evolution continues. C# is a modern, dependable, and robust programming language. C#.net works with the Microsoft.NET framework. Delegates, Interface, and Abstraction are just a few of the cool features that have propelled C#.net to the top of the world. C# has inherited the best characteristics of its forefathers, including C, C++, and Java. Because of their best features, C# continues to be the solution provider for various hypothetical problems. C#.net was derived from various object-oriented programming extracts.
OOPs Concepts
OOPs Concepts:
It is a programming paradigm that focuses on the use of objects to represent data and behaviors in software applications.
It is based on the concept of “classes” and “objects”.
The main principles of OOPs are Encapsulation, Inheritance, Polymorphism & Abstraction
Classes:
A class is a blueprint for creating objects. It defines the properties and methods that an object of that class will have. For example, a class called “Person” might have properties such as “name”, “age”, and “gender”, and methods such as “walk” and “talk”.
In C#, classes are a fundamental building block of object-oriented programming (OOP). A class is a blueprint or a template that defines the structure and behaviour of a particular type of object.
Here’s an example of a class in C#:
public class Person
{
public string Name { get; set; }
public int Age { get; set; }
public string Address { get; set; }
public void PrintDetails()
{
Console.WriteLine($”Name: {Name}, Age: {Age}, Address: {Address}”);
}
}
In this example, we have defined a class called Person that has three properties: Name, Age, and Address. These properties are defined using auto-implemented properties, which are shorthand for defining a private field and public getter/setter methods.
The PrintDetails method is a behaviour of the Person class. It is a public method that can be called on an instance of the Person class to print out the person’s details.
To create an instance of the Person class and set its properties, we can do the following:
Person person = new Person();
person.Name = “John”;
person.Age = 30;
person.Address = “123 Main St.”;
And to call the PrintDetails method on the person instance:
person.PrintDetails(); // Output: Name: John, Age: 30, Address: 123 Main St.
In this way, classes in C# allow us to define the structure and behaviour of our objects and create instances of those objects with specific properties and methods.
Objects:
An object is an instance of a class. It represents a specific instance of the class and has its own set of values for the properties defined by the class. For example, an object created from the “Person” class might have a name of “John”, an age of 25, and a gender of “Male”.
In C#, an object is an instance of a class. When we create an instance of a class using the new keyword, we are creating an object of that class.
Here’s an example of creating an object of the Person class we defined earlier:
Person person = new Person();
In this example, person is an object of the Person class. We can access its properties and call its methods using the dot notation:
person.Name = “John”;
person.Age = 30;
person.Address = “123 Main St.”;
person.PrintDetails(); // Output: Name: John, Age: 30, Address: 123 Main St.
Each object of a class has its own set of properties and can have different values for those properties. For example, we can create another object of the Person class with different values for its properties:
Person person2 = new Person();
person2.Name = “Jane”;
person2.Age = 25;
person2.Address = “456 Elm St.”;
person2.PrintDetails(); // Output: Name: Jane, Age: 25, Address: 456 Elm St.
In this way, objects in C# allow us to create multiple instances of a class, each with its own set of properties and values. We can use these objects to represent real-world entities or concepts in our programs and manipulate them by calling their methods and accessing their properties.
Encapsulation:
One of the key features of OOP is encapsulation, which is the concept of bundling data and methods that operate on that data within a single unit. This makes it easier to manage and maintain the code and helps to prevent the data from being accessed or modified by code outside of the class.
Encapsulation is one of the core principles of object-oriented programming (OOP) and refers to the practice of bundling data and the methods that operate on that data within a single unit, called a class, and restricting access to the inner workings of that class from the outside world.
In C#, encapsulation is achieved through access modifiers, which are keywords that determine the level of access that other code has to a particular class member (i.e., fields, properties, methods). C# provides four access modifiers:
public: The member is accessible from any code.
private: The member is accessible only within the same class.
protected: The member is accessible within the same class and any derived classes.
internal: The member is accessible within the same assembly.
Here’s an example of using encapsulation to hide the implementation details of a Person class:
public class Person
{
private string name;
private int age;
private string address;
public string Name
{
get { return name; }
set { name = value; }
}
public int Age
{
get { return age; }
set { age = value; }
}
public string Address
{
get { return address; }
set { address = value; }
}
public void PrintDetails()
{
Console.WriteLine($”Name: {Name}, Age: {Age}, Address: {Address}”);
}
}
In this example, the fields name, age, and address are marked as private, which means they can only be accessed from within the Person class. However, we’ve also defined public properties Name, Age, and Address that provide access to these fields from outside the class. By using properties, we can control the access to the fields and add logic to the getter/setter methods if necessary.
The PrintDetails method is also a public method that can be called from outside the class to print out the person’s details. However, it does not provide direct access to the internal fields.
By using encapsulation in this way, we can ensure that the internal state of a class is not accidentally or intentionally modified from outside the class, and that changes to the internal implementation of the class do not affect the external code that uses it.
Inheritance:
Inheritance allows a new class to be based on an existing class, inheriting its properties and methods. This can save time and effort in development, as the new class can reuse the code of the existing class.
Inheritance is another core principle of object-oriented programming (OOP) and refers to the ability of a class to inherit properties and behaviours from a parent class. In C#, inheritance is achieved through the : symbol followed by the name of the parent class.
Here’s an example of using inheritance to create a Student class that inherits from the Person class:
public class Student : Person
{
public int GradeLevel { get; set; }
public string SchoolName { get; set; }
public void PrintSchoolInfo()
{
Console.WriteLine($”School: {SchoolName}, Grade: {GradeLevel}”);
}
}
In this example, the Student class inherits from the Person class using the: symbol. This means that the Student class has access to all of the public and protected members of the Person class, including its fields, properties, and methods.
In addition to the inherited members, the Student class defines two new properties, GradeLevel and SchoolName, and a new method, PrintSchoolInfo.
We can create an object of the Student class and set its properties just like we did with the Person class:
Student student = new Student();
student.Name = “John”;
student.Age = 15;
student.Address = “123 Main St.”;
student.GradeLevel = 9;
student.SchoolName = “High School”;
And we can call methods from both the Person and Student classes on the student object:
student.PrintDetails(); // Output: Name: John, Age: 15, Address: 123 Main St.
student.PrintSchoolInfo(); // Output: School: High School, Grade: 9
By using inheritance in this way, we can reuse code from existing classes and create more specialized classes that add new properties and behaviours on top of the existing ones. It also allows us to create a hierarchy of related classes, where each class builds on the properties and behaviours of the classes above it in the hierarchy.
Polymorphism:
Polymorphism allows objects of different classes to be treated as if they are of the same class, by using a common interface. This makes it easier to write code that works with multiple objects, as the code can be written to work with the interface rather than the specific classes.
Polymorphism is another core principle of object-oriented programming (OOP) and refers to the ability of objects of different classes to be used interchangeably in the same context. In C#, polymorphism is achieved through inheritance and interfaces.
There are two main types of polymorphism in C#: compile-time polymorphism and runtime polymorphism.
Compile-time polymorphism, also known as method overloading, refers to the ability of a method to have multiple definitions with different parameter lists. The correct method to call is determined at compile time based on the number and types of arguments passed to the method.
Here’s an example of method overloading in C#:
public class Calculator
{
public int Add(int x, int y)
{
return x + y;
}
public float Add(float x, float y)
{
return x + y;
}
}
In this example, the Calculator class defines two Add methods with different parameter types (int and float). Depending on the arguments passed to the Add method, the compiler will choose the appropriate overload at compile time.
Runtime polymorphism, also known as method overriding, refers to the ability of a subclass to provide a different implementation of a method that is already defined in its parent class. The correct method to call is determined at runtime based on the type of the object that the method is called on.
Here’s an example of method overriding in C#:
public class Animal
{
public virtual void MakeSound()
{
Console.WriteLine(“The animal makes a sound.”);
}
}
public class Dog : Animal
{
public override void MakeSound()
{
Console.WriteLine(“The dog barks.”);
}
}
In this example, the Animal class defines a virtual MakeSound method that can be overridden by its subclasses. The Dog class overrides the MakeSound method and provides a different implementation that prints “The dog barks.” to the console.
We can create objects of both the Animal and Dog classes and call the MakeSound method on them:
Animal animal = new Animal();
Dog dog = new Dog();
animal.MakeSound(); // Output: The animal makes a sound.
dog.MakeSound(); // Output: The dog barks.
By using polymorphism in this way, we can write code that is more flexible and adaptable to different types of objects, without having to know the exact type of the object at compile time. This makes our code more modular and easier to maintain over time.
Abstraction:
Abstraction is the concept of hiding unnecessary details and complexity from the user, while still providing the necessary functionality. This can make the code easier to use and maintain, as well as improve performance.
Abstraction is a core principle of object-oriented programming (OOP) that refers to the ability to hide the implementation details of a class from the outside world and expose only the relevant features and behaviours through a simplified interface. In C#, abstraction is achieved using abstract classes and interfaces.
An abstract class is a class that cannot be instantiated directly and can only be used as a base class for other classes. It may contain abstract methods, which are declared but not implemented in the abstract class. The subclasses of an abstract class must implement all its abstract methods to be instantiated.
Here’s an example of an abstract class in C#:
public abstract class Shape
{
public abstract float GetArea();
}
In this example, the Shape class is declared as abstract, which means that it cannot be instantiated directly. It contains an abstract GetArea method, which is declared but not implemented in the abstract class.
Subclasses of the Shape class must provide their own implementation of the GetArea method in order to be instantiated. Here’s an example of a Rectangle class that extends the Shape class and implements the GetArea method:
public class Rectangle : Shape
{
public float Width { get; set; }
public float Height { get; set; }
public override float GetArea()
{
return Width * Height;
}
}
In this example, the Rectangle class extends the Shape class and provides its own implementation of the GetArea method, which calculates the area of a rectangle based on its width and height.
An interface is a contract that specifies a set of methods and properties that a class must implement. It does not contain any implementation code, but rather defines a set of public members that must be implemented by any class that implements the interface.
Here’s an example of an interface in C#:
public interface IPlayable
{
void Play();
void Pause();
void Stop();
}
In this example, the IPlayable interface defines three methods (Play, Pause, and Stop) that must be implemented by any class that implements the interface.
Classes that implement the IPlayable interface must provide their own implementation of these three methods. Here’s an example of a MediaPlayer class that implements the IPlayable interface:
public class MediaPlayer : IPlayable
{
public void Play()
{
Console.WriteLine(“Playing…”);
}
public void Pause()
{
Console.WriteLine(“Paused.”);
}
public void Stop()
{
Console.WriteLine(“Stopped.”);
}
}
In this example, the MediaPlayer class implements the IPlayable interface and provides its own implementation of the Play, Pause, and Stop methods. Any class that implements the IPlayable interface can be used interchangeably with the MediaPlayer class in any context that requires an IPlayable object.
By using abstraction in this way, we can create classes that are more flexible, modular, and easier to maintain over time. We can also create a hierarchy of related classes and interfaces that define a set of common behaviours and features that can be reused and extended in different contexts.
Securing ASP.NET Core web application with Identity Framework
Securing ASP.NET Core web application with Identity Framework:
Web application security is more important than ever in today’s world. Identity Framework is one of the tools and features available in ASP.NET Core for securing web applications. Identity Framework is a membership system that provides the user interface, APIs, and features required for the creation and management of user accounts.
In this article, we’ll go over how to use Identity Framework to secure your ASP.NET Core web application.
Step 1: ASP.NET Core Web Application Creation:
The first step is to build an ASP.NET Core web app. You can accomplish this by taking the following steps:
Launch Visual Studio and select “New Project.”
Click “Next” after selecting “ASP.NET Core Web Application.”
Select a project template (such as MVC, Web API, or Razor Pages) and click “Create.”
Step 2: Identity Framework Installation:
Following the creation of the ASP.NET Core web application, the Identity Framework must be installed. You can accomplish this by including the following package in your project:
Microsoft.AspNetCore.Identity.EntityFrameworkCore
You can install this package using the NuGet Package Manager or by adding the following line to your.csproj file:
<PackageReference Include=”Microsoft.AspNetCore.Identity.EntityFrameworkCore” Version=”2.2.0″ />
Step 3: Identity Framework Configuration:
The following step is to set up Identity Framework. You can accomplish this by including the following code in the Startup.cs file’s ConfigureServices method:
services.AddIdentity<IdentityUser, IdentityRole>()
.AddEntityFrameworkStores<ApplicationDbContext>()
.AddDefaultTokenProviders();
This code instructs Identity Framework to use the IdentityUser and IdentityRole classes as the user and role entities, respectively, as well as the ApplicationDbContext as the database context.
Step 4: Database Creation:
The database will be created next. You can do this by running the following command in the Package Manager Console:
Update-Database
This command will populate the database with the necessary tables.
Step 5: Implement of Authentication and Authorization
The final step is to put authentication and authorization in place. This is accomplished by appending the [Authorize] attribute to the controllers or actions that require authorization. Policies can also be used to implement more complex authorization requirements.
Identity Framework’s SignInManager and UserManager classes can be used to implement authentication.
In Conclusion, we have discussed how to use Identity Framework to secure your ASP.NET Core web application in this article. We went over the steps for developing an ASP.NET Core web application, installing and configuring the Identity Framework, creating the database, and implementing authentication and authorization. You can create a secure ASP.NET Core web application that protects your users’ data and privacy by following these steps.
Differences between ASP.NET Core and ASP.NET Framework
ASP.NET Core and ASP.NET Framework are both web application frameworks developed by Microsoft, but there are some significant differences between the two. Here are some of the key differences between ASP.NET Core and ASP.NET Framework:
- Open-source and community-driven: ASP.NET Core is open-source and community-driven, with contributions from developers around the world. ASP.NET Framework is also open-source, but Microsoft is the primary contributor.
- Cross-platform support: ASP.NET Core is designed to be cross-platform and can run on Windows, macOS, and Linux. ASP.NET Framework, on the other hand, is designed to run only on Windows.
- Modular design: ASP.NET Core has a modular design, with a lightweight and customizable architecture that allows developers to choose only the components they need. ASP.NET Framework has a monolithic design and includes a large set of pre-built components, which can result in larger and slower applications.
- Performance: ASP.NET Core is optimized for performance and can handle a larger number of requests per second than ASP.NET Framework. This is due to its lightweight design, which reduces overhead and allows it to run more efficiently.
- Dependency Injection: ASP.NET Core includes built-in support for Dependency Injection, which makes it easier to manage dependencies and improve code maintainability. ASP.NET Framework does not include built-in support for Dependency Injection, although it is possible to implement it using third-party libraries.
- Target platforms: ASP.NET Core is designed to target multiple platforms, including cloud, mobile, and desktop, while ASP.NET Framework is primarily targeted at web applications.
In summary, ASP.NET Core and ASP.NET Framework are both powerful web application frameworks, but they have some significant differences in terms of cross-platform support, open-source and community-driven development, modular design, performance, and target platforms. The choice between the two depends on the requirements of the project and the preferences of the developer.
Differences between ASP.NET Web Forms and ASP.NET MVC
ASP.NET Web Forms and ASP.NET MVC are two popular frameworks for building web applications in ASP.NET. Although both are built on the same platform and provide similar functionality, they have some key differences that set them apart. Here are some of the main differences between ASP.NET Web Forms and ASP.NET MVC:
- Separation of Concerns: ASP.NET Web Forms allows mixing of markup (HTML) and code (C# or VB.NET) in the same file, which can make it difficult to maintain the code. ASP.NET MVC separates the markup and code into different files, which makes it easier to maintain the code.
- Architecture: ASP.NET Web Forms uses a Page Controller architecture, where a single page contains all the code to handle the request and response. ASP.NET MVC, on the other hand, uses a Front Controller architecture, where a controller handles all the requests and responses for a group of pages.
- Testability: ASP.NET MVC is more testable than ASP.NET Web Forms, as it separates the code and markup, making it easier to write automated tests.
- URL Routing: ASP.NET Web Forms does not have built-in URL routing support, which can make it difficult to create search engine friendly URLs. ASP.NET MVC has built-in support for URL routing, which makes it easier to create clean and search engine friendly URLs.
- View State: ASP.NET Web Forms uses View State to maintain the state of controls on the page. This can result in large amounts of data being sent back and forth between the server and client, which can impact the performance of the application. ASP.NET MVC does not use View State, which can improve the performance of the application.
In summary, both ASP.NET Web Forms and ASP.NET MVC are powerful frameworks for building web applications in ASP.NET. The choice between them depends on the requirements of the project and the preferences of the developer. If you need more control over the markup and want to create search engine friendly URLs, ASP.NET MVC may be the better choice. If you need a rapid application development tool and are comfortable with the Page Controller architecture, then ASP.NET Web Forms may be the better choice.
ENTITY FRAMEWORK
What is Entity Framework?
We (developers) used to frequently write ADO.NET code or Enterprise Data Access Block in Dot NET 3.5 to save or retrieve application data from the underlying database. Microsoft has provided a framework called “Entity Framework” to automate all these database-related activities for your application. Entity Framework is a Microsoft-supported open-source ORM framework for.NET applications. It enables developers to work with data using objects of domain-specific classes without focusing on the underlying database tables and columns where this data is stored.
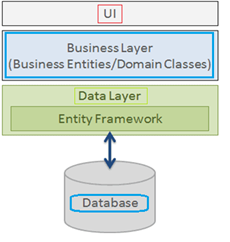
Entity Framework in C#:
In this article, we will see how to use Entity Framework in C# applications using Visual Studio. The examples in this and likely future articles will use C# under Win Forms, but as previously stated, this choice will not affect a different intended use that the developer may reasonably request.
ORM in C#:
Optical mark recognition (also called optical mark reading or OMR) is the process of using hardware, software, or both to capture fields, for example, marks on documents such as multiple-choice questions, questionnaires with true or false fields, and other document forms.
Types of ORM Fields:

There are numerous types of OMR fields, but this section will give an overview of some of the most common ones. There can be shapes like squares, circles, and ovals.
Why Entity Framework in .NET Applications?
Entity Framework is an ORM tool, and ORM tools are primarily used to boost developer productivity by eliminating the redundant task of performing CRUD operations against a database in a.NET application.
Entity Framework can generate the necessary database commands for doing the database CRUD operation, i.e., can generate select, insert, update, and delete commands for us.
While working with Entity Framework, we can perform different types of operations on the domain objects (basically classes representing database tables) using LINQ to entities.
Entity Framework will generate and execute the SQL command in the database and then store the results in the instances of your domain objects so that you can do different types of operations on the data.
Prerequisites to Learn Entity Framework:
To fully benefit from this Entity Framework Course, you should have a basic understanding of C# as well as any database such as SQL Server, Oracle, or MySQL. It is recommended that you install the.NET Framework, Visual Studio, and SQL Server on your computer.
Advantages of Entity Framework:
Productivity:
Entity Framework can take up to 35 percent of the entire application code. It makes the developer’s life easier than ever. Despite its limitations, the designer integrated into Visual Studio dramatically simplifies the mapping process.
Maintainability:
Since you have fewer lines of code to fetch data from the database, the fewer lines of code you have to maintain.
Performance:
The complexity of ORM introduces an obvious slowdown in performance. In the entity framework first request to fetch data is a little bit slow but after that is fast to fetch data from the database.
Transactions:
ORM does all possible automation as transactions while querying the data or storing the data periodically. We can also customize transaction management practices to make the most of it out of the entity framework.
ASP.NET Core:
ASP.NET Core – Introduction
ASP.NET Core is a free and open-source platform for creating high-performance online applications. It was meant to be lightweight, modular, and highly scalable, making it a popular choice for developers looking to construct online applications rapidly and effectively. In this post, we’ll look at ASP.NET Core and why it’s such a popular choice for developing online apps.
As the successor to the ASP.NET framework, ASP.NET Core was originally published in 2016. One of the key aims of ASP.NET Core was to build a cross-platform framework that could operate on Windows, Linux, and macOS. This was accomplished by building ASP.NET Core as a modular system, with various components that could be added or deleted as needed.
One of the most important characteristics of ASP.NET Core is its ability to operate on many platforms. The usage of.NET Core, a cross-platform version of the.NET runtime, enables this. This implies that developers may create web applications with the same codebase and run them on multiple operating platforms without changing anything.
Support for current web development approaches is another aspect of ASP.NET Core. ASP.NET Core has support for major client-side frameworks including Angular, React, and Vue. This enables developers to design complex, responsive web apps that deliver an excellent user experience.
ASP.NET Core also provides outstanding speed and scalability. The framework is intended to be quick and efficient, with low memory utilisation and quick startup times. It also has caching and load balancing features, making it simple to expand web applications to meet huge traffic.
ASP.NET Core includes a large ecosystem of tools and frameworks in addition to these functionalities. This includes Microsoft Visual Studio, a popular IDE for developing web applications, as well as a variety of open-source modules for everything from authentication to database access.
Overall, ASP.NET Core provides a strong framework for developing contemporary online apps. It is a popular choice among developers because to its support for cross-platform development, current web development methods, and good performance and scalability. If you want to develop online apps fast and effectively, ASP.NET Core is a great option.
Advantages on ASP.NET Core:
ASP.NET Core is a cutting-edge, cross-platform web development framework that has several benefits over other web development frameworks. In this post, we’ll look at some of the primary benefits of developing websites using ASP.NET Core.
Open-Source and Community-Driven:
ASP.NET Core is an open-source framework with a big and active development community. This implies that there are several libraries and tools available to assist developers in creating more efficient web apps. It also implies that there is an abundance of community assistance, such as online forums, blogs, and tutorials.
Cross-Platform Support:
One of the most significant advantages of ASP.NET Core is its ability to operate on different platforms, including Windows, Linux, and macOS. The usage of.NET Core, a cross-platform version of the.NET runtime, enables this. This enables developers to create web applications with the same codebase and run them on multiple operating systems with no modifications.
High Performance:
ASP.NET Core is intended to be quick and efficient, with low memory utilisation and quick startup times. It has a lightweight and modular design, allowing for increased performance and scalability. This makes it a good choice for developing online apps that must manage large traffic and respond quickly.
Modern Web Development Practices:
Modern web development approaches, such as client-side frameworks like Angular, React, and Vue, are embedded into ASP.NET Core. This enables developers to design responsive and dynamic web apps that deliver an excellent user experience. Tag helpers, which ease the process of creating HTML forms, and middleware, which provides a flexible and composable approach to handle requests, are also included in ASP.NET Core.
Security:
ASP.NET Core has a number of security capabilities that aid in the protection of online applications against typical threats like as cross-site scripting (XSS) and cross-site request forgery (CSRF). Built-in HTTPS support and the ability to encrypt sensitive data are among these features. It also contains login and authorisation tools that make controlling access to various portions of a web application simple.
In conclusion, ASP.NET Core provides several benefits for online development, including cross-platform compatibility, high performance, current web development standards, security features, and an active and friendly community. If you want to create contemporary, high-performance online apps, ASP.NET Core is a great option.
Microsoft SharePoint:
Microsoft SharePoint:
Microsoft SharePoint is a web-based collaboration system that enables corporate teams to collaborate using workflow applications, “list” databases, other web elements, and security features. SharePoint also enables the organisation using the platform to manage information access and streamline workflows between business units.
Microsoft SharePoint is a platform for document management and collaboration that aids a business in managing archives, documents, reports, and other content that is essential to its operational procedures. Enterprise content management features of SharePoint are beneficial to businesses in all sectors and in every division within a company.
SharePoint configuration is done through a web browser. It offers most of its features through web applications and a web user interface (UI). SharePoint is used to monitor analytics, create, and remove sites, enable, and disable product features, edit content, and site layout, and create and delete sites.
SharePoint Online: There are numerous additional integration options available with other cloud services in the Microsoft Cloud version of SharePoint, called SharePoint Online. With an Office 365 or Microsoft 365 licence, it functions in combination with many of the other services Microsoft provides.
The most recent version of SharePoint is 2019. The version of SharePoint that is included with Office 365 is called SharePoint Online. For businesses who prefer to retain their data in-house for compliance or security concerns, Microsoft also provides an on-premises version.
SharePoint Server: SharePoint Server is a programme that runs on a local machine within a corporate network, such as an internal web server. It gives you more control over teams and groups, as well as additional site customization. If the intranet is hosted behind a local firewall, it may also provide additional security. Because SharePoint Server is hosted locally, it necessitates additional hardware, additional administration, and manual updates. As a result, SharePoint Server is typically used for enterprise applications that require more customization and security.
SharePoint App: Apps in Microsoft SharePoint are integrations that add features to the platform’s standard collaboration spaces. Some apps are included with the platform out of the box, but many others add features and options that are not included with the standard SharePoint platform. These can range from a library where users can store and share documents and files to calendar plug-ins and powerful workflow apps like Nintex, which make it easy to perform many repeatable logical actions in SharePoint.
Benefits of Using SharePoint:
SharePoint boosts the productivity and visibility of information workers in all industries, large and small. SharePoint’s features revolve around an intranet-based cross collaboration experience that enables secure sharing, content management, and workflow collaboration, among other things.
SharePoint is an easy-to-maintain website-based collaboration platform that business users can understand at a basic level. It is also infinitely customizable and massively scalable, so businesses can use it in a variety of ways to increase productivity and return on investment.
You can use Microsoft SharePoint on your PC, Mac, or mobile device to:
-
Create intranet sites, including pages, document libraries, and lists.
-
Add web parts to your content to make it more personalised.
-
Use a team or communication site to display important visuals, news, and updates.
-
Discover, follow, and search for sites, files, and people throughout your organisation.
-
Workflows, forms, and lists can help you manage your daily tasks.
-
Sync and save your files to the cloud so that anyone can securely collaborate with you.
-
With the mobile app, you can stay up to date on the latest news while on the go.
Partial View in MVC – ASP.NET
Partial View in MVC:
In ASP.NET MVC, a partial view is a special view that renders only a portion of the view content. It’s similar to a web form application’s user control. Partial can be reused in different views. It aids us in reducing code duplication. To put it another way, a partial view allows us to render a view within the parent view.
The partial view is implemented with its own copy of the parent view’s ViewDataDictionary object, so that the partial view can access the parent view’s data. The parent view’s data is unaffected if we change this data (ViewDataDictionary object). When related data that we want to render in a partial view is part of our model, we generally use the Partial rendering method of the view.
A partial view is a Razor markup file (.cshtml) without a @page directive that renders HTML output within the rendered output of another markup file.
When developing an MVC app, where markup files are called views, or a Razor Pages app, where markup files are called pages, the term partial view is used. This topic refers to MVC views and Razor Pages pages as markup files in general.
Difference between view and partial view in MVC: View is a complete markup that may include a master view (or master page) with all the design(s), whereas partial view is only a portion of the page or a small markup that does not include a master page. It is primarily used as a user control in mvc and can be applied to multiple views.
When to use partial views
Partial views are a useful technique when:
- Large markup files should be divided into smaller parts. i.e. There is a benefit to working with each logical item separately in a partial view when working with a large, sophisticated markup file that is divided into numerous logical sections. Because the markup only provides references to partial views and the overall page structure, it is possible to handle the code in the markup file.
- Reduce the amount of common markup content that is duplicated across markup files. i.e. When the same markup elements are used in multiple markup files, a partial view consolidates the markup content into a single partial view file. When the markup in the partial view is changed, the rendered output of the markup files that use the partial view is updated.
Note:
Partial views should not be used to keep common layout elements in place. _Layout.cshtml files should contain common layout elements.
When complex rendering logic or code execution is required to render the markup, do not use a partial view. Use a view component instead of a partial view in such cases.
How to Declare partial views
The names of partial views frequently begin with an underscore (_). This naming convention is optional, but it aids in visually distinguishing partial views from views and pages.
A partial view is a.cshtml markup file that is kept in the Views folder (MVC) or Pages folder(Razor Pages) but does not contain a @page directive
A controller’s ViewResult in ASP.NET Core MVC can return a full view or a partial view. A PageModel can return a partial view in Razor Pages that is represented as a PartialViewResult object. The Reference a partial view section goes over rendering and referencing partial views.
Dot Net Job Support in Chennai, India
Dot Net Job Support
Microsoft’s Dot Net framework is one of its products. Dot Net allows us to create applications such as web applications, mobile applications, and Windows-based applications. This Dot Net framework is used by many organisations to build applications. Many organisations are looking for candidates who have hands-on experience with Dot Net. Marz Technologies, one of our sister concern of Maria Academy, is a group of software professionals with extensive experience in Dot Net Technology, and we offer the best real-time Dot Net projects by experts from Tamil Nadu, India, at a reasonable cost.
Dot Net is an open-source development environment. When comparing Java web frameworks, ASP.Net is far ahead in terms of speed. Dot Net will be a single unified platform for developing applications that will run on all OS platforms as well as devices such as IoT, VLSI, and so on. We provide Dot Net Online Job Support via all mediums such as Zoom, Google Meet, Team Viewer, Webex and so on.
Why do we require Dot Net Online Job Support?
Every software project has a set timeline and its own set of technical challenges. The technical challenges could be the result of a technological upgrade or an increase in project complexity. Freshers with little programming experience land their dream job, only to be confronted with technical challenges and project deadlines. This is when they require job support services from a team of skilled professionals. Job support is beneficial at any stage of your career because even experienced professionals are sometimes unable to complete an assignment on time and with quality due to technical complexity. At that time, everyone requires a mentor who can guide them through their assignment and provide a practical solution.
Who should get Dot Net Online Job Support from us?
Dot Net software developers, Dot Net web developers, freshers, students, experienced IT professionals, and anyone else from around the world who wants to learn and work on Dot Net technology can contact us for mentoring. Marz Technologies offers Dot Net Training by industrial experts from India at a low cost. We will provide certification and tutorials upon completion of the Dot Net course. There are numerous Dot Net job openings in multinational corporations around the world. This is an excellent time for students who want to pursue a career in the Dot Net field. Our consultants will provide Dot Net Project support from start to finish, and you can contact us at any time with questions about Dot Net online project. You can learn everything from the basics to the advanced level here. So that you can handle other related projects with confidence and on time.
Our Dot Net Job Support Methodology:
Contact us via call or WhatsApp message requesting Dot Net Job support.
Within 24 hours, we will schedule a demo with our Dot Net Job Support consultant.
The first session will be a demo session in which you can tell our consultant about your project and what kind of assistance is needed.
Before the second session, payment for the requested support period must be made.
We will assist you to complete the Job and the work will be kept private.
We would also appreciate your assistance in understanding your project so that we can better assist you.
C#.NET – MVC Training in Chennai – Maria Academy
C#.NET :
Maria Academy will teach you C# with enthusiasm. Trainers will be more interactive, addressing real-world issues and solutions. Hands-on programming will be provided to help students improve their programming skills. Trainers will have at least six years of experience. The syllabus has been designed to cover the entire C# learning process. To improve programming skills, a practical test and periodic exercises will be provided. With your programming skills, you should be able to provide a solution for a real-world scenario by the end of the training.
We are the best C#.NET Training Providers in Chennai, in terms of placement, course, syllabus, and practical. The evolution of “c” leads to “c++.” The evolution of c++ continues. C# is a modern, robust, and dependable programming language. C#.net is compatible with the Microsoft.NET framework. Cool features like Delegates, Interface, and Abstraction have propelled C#.net to the top of the world. C# has adopted the best features of its forefathers, such as C, C++, and Java. C# remains the solution provider to various hypothetical problems due to their own best features. C#.net was derived from various extracts of object-oriented programming.
C# has the object-oriented programming fundamentals of encapsulation, inheritance, polymorphism, and abstraction. Divide and conquer applies not only to King Makers but also to C# programmers. By learning C# with us, you will have a clear understanding of where the IT industry is using C#.NET. C#.net will provide a plenty of features for breaking down complex and enterprise problems into logical small units. These logical small units have then been reused in various scenarios to deal with the problem. Classes and objects have played an important role in c# and are important fundamentals of OOP. These will be defined in detail, as will the correlation of the objects. Generics, Delegates, and other important features will be covered, as well as hands-on programming. The main habits that lead to competitiveness with other programming languages are garbage collection, versioning support, and improved security. Every real-world object is capable of answering a large number of questions. Every real-world object will be solved by our C#.
MVC:
We are also the Chennai’s best MVC Training Institute. We specialize in C#, ASP.NET, SQL Server, MVVM, WCF, WPF & Silverlight, LINQ & Entity Framework, DOT NET Live Projects, ASP.NET MVC, and Design Pattern training. Learn about ASP.NET Model View Controller (MVC4) App Development to get started developing enterprise web applications, discover new MVC features, and prepare for Exam 70-486 Certification. MVC training course content is exclusively designed with Fundamentals to Advanced Concepts in mind. This MVC course is specifically designed to provide complete practical MVC training in accordance with the Microsoft Official Curriculum (MOC).
We also handle Training Sessions at Karaikudi & Pudukottai
Stored Procedure – SQL
Stored Procedure:
A stored procedure is a collection of Structured Query Language (SQL) statements with a unique name that are stored as a group in a relational database management system (RDBMS) to be reused and shared by multiple programmes.
Stored procedures can access or modify data in a database, but they are not tied to a specific database or object, which provides several benefits.
So, if you have a SQL query that you write repeatedly, save it as a stored procedure and simply call it to execute it.
Additionally, you can send parameters to a stored procedure, allowing it to take action based on the value(s) of the passed parameters.
Advantages of Using Stored Procedures:
An essential layer of protection is added by a stored procedure between the user interface and the database. Because end users can add or modify data but not develop procedures, it enables security through data access controls. Since data is entered consistently while using a stored procedure, data integrity is maintained. Because statements in a stored method just need to be written once, productivity is increased.
Stored procedures are preferable to embedding queries in a graphical user interface (GUI). When a problem arises in an application, it is easier to troubleshoot because stored procedures are modular. Stored procedures are also tuneable, so there is no need to change the GUI source code to improve its performance. It is simpler to code stored procedures than it is to build a query using a GUI.
When using stored procedures, network traffic between clients and servers can be reduced Because commands are performed as a single batch of code. This implies that only the call to run the procedure—rather than each individual line of code—is delivered across a network.
Stored Procedure in SQL Server:
SQL Server stored procedures can accept input parameters and return multiple values of output parameters; stored procedures in SQL Server programme statements to perform database operations and return a status value to a calling procedure or batch.
Except when a read-only (resource database) is utilised, user-defined procedures can be created in user-defined databases or in all system databases. They are created using Microsoft’s T-SQL or Transact-SQL. There are two sorts of temporary procedures: local and global, both of which are kept in Temporary database. While global procedures are visible to any user once they are generated, local procedures are only available to the user connection that is active at the time. Physically, system procedures are kept in a hidden resource database that comes with SQL Server. They can be found in a user-defined database as well as each system’s SYS schema.
Stored Procedure Syntax in SQL:
Syntax To Create Stored Procedure:
CREATE PROCEDURE Procedurename
AS
SQL STATEMENT
GO;
Syntax To Execute Stored Procedure:
EXEC Procedurename;
Various types of stored procedures Server SQL:
System Defined Stored Procedure: SQL Server already has these stored procedures defined. These are physically stored in a hidden SQL Server Resource Database and logically appear in each user-defined and system-defined database’s sys schema. The sp_ prefix is used to begin this procedure. As a result, we avoid using this prefix when naming user-defined procedures.
Extended Procedure: Extended procedures interface with external programmes to perform various maintenance tasks. These extended procedures are stored in the Master database and begin with the xp_ prefix. Essentially, these are used to automatically call programmes on the server from a stored procedure or a trigger run by the server.
User-Defined Stored Procedure: The user creates these procedures for his or her own actions. Except for the Resource database, these can be created in any system database or in a user-defined database.
CLR Stored Procedure: CLR stored procedures are a type of procedure that is based on the.net framework’s CLR (Common Language Runtime). CLR procedure integration was introduced with SQL Server 2008, allowing procedures to be coded in.NET languages such as C#, Visual Basic, and F#. I’ll go over the CLR stored procedure later.
Selenium Automation Testing with C#
Automation Testing:
Due to the increasing demand for effective software products, each software development team must conduct several tests before to releasing the finished product onto the market. Before a software product is launched, test engineers work hard to find any flaws or bugs, yet deployed software is always flawed. Even with the best manual testing procedures, there is always a chance that the finished software product will have a flaw or won’t be able to satisfy the needs of the end user. The best approach to improve the efficacy, efficiency, and coverage of your software testing is through automation testing.
Automation testing employs specialised tools to automate the execution of manually designed test cases without the involvement of humans. Automation testing tools can access test data, control test execution, and compare actual results to expected results. As a result, detailed test reports of the system under test are generated.
Automation testing on an application includes both functional and performance tests.
Selenium:
Selenium is a vital automation testing tool because it supports a wide range of programming languages, including Java, Python, C#, Ruby, Perl, and PHP and to automate test scripts in a variety of browsers, including Google Chrome, Firefox, Safari, Internet Explorer, and Opera, on a variety of operating systems, including Windows, Mac, and Linux.
Selenium is a popular open-source Web UI (User Interface) automation testing suite.
Selenium can be used to automate functional tests and is compatible with automation testing tools like Maven, Jenkins, and Docker to achieve continuous testing. It can also be used in conjunction with tools like TestNG and JUnit to manage test cases and generate reports.
Selenium Tool Suite:
Selenium is a software suite, that supports automation testing in various ways and is not a single tool. It is made up of four major components, which are as follows:
• Selenium Integrated Development Environment (Selenium IDE)
• Selenium Remote Control (Selenium RC)
• WebDriver
• Selenium Grid
Selenium IDE:
Selenium IDE is a Firefox extension that allows test scripts to be recorded and played back. Testers can export recorded scripts in a variety of languages, including HTML, Java, Ruby, RSpec, Python, C#, JUnit, and TestNG. These exported scripts can be used in Selenium RC or Web driver.
The scope of the Selenium IDE is limited, and the generated test scripts are not very robust or portable.
Selenium RC:
The Selenium RC (officially deprecated by selenium) framework enables testers to create automated web application UI tests in any of the supported programming languages. It also includes an HTTP proxy server, which convinces the browser that the web application being tested is from the domain specified by the proxy server.
Selenium RC is comprised of two parts.
• RC Server for Selenium (acts as a HTTP proxy for web requests)
• Client for Selenium RC (library containing your programming language code)
Selenium RC was very effective for testing complex AJAX-based web user interfaces as part of a Continuous Integration System.
Web Driver:
The successor to Selenium RC, Selenium Web Driver (Selenium 2), is by far the most important component of the Selenium Suite. Selenium Web Driver offers a programming interface for creating and running test cases. Test scripts are written to identify web elements on web pages and then perform desired actions on those elements.
Selenium Web Driver is much faster than Selenium RC because it makes direct calls to web browsers. To interact with the web browser, RC requires the use of an RC server. Since WebDriver calls the methods of different browsers directly, we have a separate driver for each browser. Some of the most popular web drivers are:
• Mozilla Firefox Driver (Gecko Driver)
• Google Chrome Driver
• Internet Explorer Driver
• Opera Driver
Selenium Grid:
Selenium Grid is another important component of Selenium Suite that allows us to run our tests on multiple machines against multiple browsers at the same time. In other words, we can run our tests on multiple machines running different browsers and operating systems at the same time.
To achieve parallel execution of test scripts, Selenium Grid employs the Hub-Node Architecture. The Hub is the network’s master, while the nodes are its slaves. The Hub manages the execution of test scripts on various network nodes.
C# programming language:
C# is an object-oriented programming language that is pronounced C-sharp and runs on the.Net framework.
The CLR, or Common Language Runtime, is built to run the C# programming language.
C# is also known as a structured programming language since it allows us to segment programmes using functions.
The benefits of C# for automation testing are
• C# is useful for automation testing because it allows the automation test engineer to create an application on the.Net framework using Visual Studio. As C# IDE is Visual Studio, it provides a faster development and debugging experience than Java’s Eclipse.
• C# is a programming language that supports Selenium binding, this language binding will also be updated in combination with the Java code.
• C# has many built-in functions that speed up development.
ASP.NET Training in Malaysia & Singapore
ASP.NET Training in Malaysia & Singapore
Why to learn ASP.NET?
ASP.NET stands for Active Server Pages.NET, it was developed by Microsoft. Microsoft ASP.NET has been used by thousands of businesses to create professional, dynamic websites. It is a powerful tool designed for programmers and developers working on the creation of rich and dynamic web applications and websites. ASP.NET is a Microsoft.NET Framework feature that is not limited to script languages, Programmers can make use of it. Microsoft’s Active Server Page was created to meet the demand for dynamic websites. It has a Feature library with several ready-to-use functions and web controls to create applications from scratch. Microsoft updates it frequently to keep it current with trends. Aside from being a pioneering platform, ASP.NET is well-known for its advantages over other web development models. It has advantages for both organizations that use it and developers who take ASP.NET classes.
Professionals with an ASP.NET knowledge has advantages such as:
- Capable of creating ASP.NET applications.
- The ASP.NET framework offers fantastic capabilities like drag-and-drop server controls, automated deployment, etc. thanks to its complementing design and large toolset.
- Spends less time for coding and more time for developing huge web applications.
- It is simple to create and manage web sites since the HTML and source code are combined.
- Obtain rich developer job opportunities.
- Reduce development expenses by spending less time and energy on extra code for complicated and large-scale applications.
Who should attend: This course is recommended for all students and freshmen who are interested in creating contemporary desktop, online, and service-oriented applications on the Microsoft platform.
Prerequisites: No prerequisites are needed to enroll in this course.
Why to learn ASP.NET from Maria Academy?
We are in this training field for more than 5 years; we have carried out online training in ASP.NET in Singapore and Malaysia. Also, we have carried out online training sessions in other countries also. Our well experienced tutors will show how to use the ASP.NET tools to develop and deploy a dynamic website.
Our course module provides hands-on practice for beginning and intermediate developers, covering everything from installing and configuring Visual Studio for Web and SQL Server Express to designing web form pages.
You will gain knowledge of.NET and.NET Core, C# programming, advanced C# principles, OOPs concepts, database design using SQL Server, and other topics.
Additionally, you will learn how to use Visual Studio 2019 for.NET development and how to create Live Project from Microsoft MVPs and Technical Consultants.
We provide several training alternatives, including live instruction, one-to-one and corporate training.
Our Basic Couse Module:
- Introduction to .NET Framework and its Architecture
- C# Language Fundamentals
- Microsoft SQL Server
- Creating ASP.NET Pages
- Programming in ASP.NET
- ASP.NET MVC training
Software Testing
Testing:
The process of testing involves running a program to look for errors. The software must be error-free to function properly. The software will be free of all errors if testing is successful.
Guidelines for Testing:
- The client requirements should be met by all testing.
- software should be tested by a third party.
- It is not possible to conduct elaborative testing. Because we need the least amount of testing possible based on the application’s risk assessment.
- All tests should be planned before they are carried out.
- Test small parts first, then progress to larger parts.
Types of testing:
- Manual Testing
- Automatic Testing
Manual Testing:
Manual testing is a method of software testing in which test cases are executed manually rather than using an automated tool. Manual testing is one of the most fundamental testing processes because it can trace both visible and hidden software defects. All test cases are manually executed by the tester from the perspective of the end user. Test case reports are manually created.
Types of Manual Testing
o White Box Testing – Developers perform white box testing, which involves checking every line of code before passing it to the Test Engineer. Because the code is visible to the developer during testing, it is also known as white box testing.
o Black Box Testing – The Test Engineer performs black box testing to ensure that an application or software meets the needs of the customer or client. The code is not visible while testing, which is why it is referred to as black-box testing.
o Gray Box Testing – Gray box testing is a hybrid of white box and black box testing methods. It can be done by someone who is familiar with both coding and testing. Gray box testing is used when a single person performs both white box and black box testing for an application.
Why is Manual Testing preferred?
- It doesn’t require any programming knowledge and easy to learn for new testers.
- It ensures that the software is a hundred percent bug-free and a cost-effective method
- It is used to test GUI designs that change dynamically
- The Tester interacts with software as a real user
Drawbacks of Manual Testing:
- It generally requires a large amount of human resources and a very time consuming method.
- It does not test for all aspects of testing.
Automatic Testing
Automated testing is a technique in which the tester writes their own scripts and uses appropriate software or an automation tool to test the software.
It is a manual process that has been automated. It Allows repetitive tasks to be completed without the intervention of a Manual Tester.
Automation Testing Process:
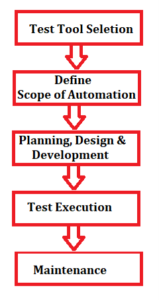
Some Popular Automation Tools are Selenium, QTP, TestNG, etc
Advantages of Automation Testing:
- Simplifies the execution of test cases
- Increases the Reliability of Tests
- Minimizes Human Interaction
- It saves both time and money.
- increases the number of tests covered
Selenium automation testing:
Selenium is a free (open source), popular automated web application testing framework. It is a browser-based automation framework that simulates and automates user actions. Selenium is a collection of tools that serve a variety of Selenium automation testing needs. Selenium automation testing is a test that is run using the Selenium framework.
Selenium Test Scripts can be written in a variety of programming languages, including Java, C#, and Python.
Selenium is simple to install on platforms such as Windows, Linux, Solaris, and Macintosh. Furthermore, it supports operating systems (OS) for mobile applications such as iOS, Windows Mobile, and Android.
Selenium supports Internet Explorer, Mozilla Firefox, Google Chrome, and Safari browsers.
Selenium can be used to automate functional tests and is compatible with automation testing tools like Maven, Jenkins, and Docker to achieve continuous testing. It can also be used in conjunction with tools like TestNG and JUnit to manage test cases and generate reports.
Negotiation in Project Management:
Negotiation in Project Management:
Negotiation is a process by which people get into an agreement by avoiding arguments. A good negotiator should always look for a Win – Win situation. Negotiation is the important management skill for any Project manager as they spent most of their time in communication with stakeholders.
Negotiations can occur at any point in the project’s lifecycle and can be formal or informal.
Some basic negotiation skills are
- High Emotional Intelligence
- Good Listening and Communication
- Planning Negotiation Strategy
Project Managers’ Golden Rules to begin as a negotiator
You don’t get what you deserve in business; you get what you negotiate for.
Negotiation success is directly related to the amount preparation that precedes the negotiation.
Prepare Ahead of Time and Know Exactly What You Want. You should have a communication plan before starting the negotiation.
Conflicts are inevitable in meaningful negotiation. People who want to avoid conflict is mostly the loser in any Negotiation.
A good negotiation starts with building rapport with the other party.
Negotiation Processes:
The process of negotiation can be divided into the following phases:
- Planning: The gathering of all relevant information required for the discussion.
- Debate: The key issues are examined and discussed here.
- Proposal: The development of the proposal as a solution to the problem presented
- Revision: This can include negotiating compromises prior to formalizing an agreement.
Achieving a Win-Win Outcome:
Almost all negotiations yield the best results when both parties leave with a positive feeling about achieving their objectives i.e., is a win-win outcome.
This ideal situation can be accomplished by the four keys:
- Avoid focusing your negotiation on a single issue.
- Don’t assume you understand the other party’s requirements.
- Recognize that the other party does not have the same needs and desires as you.
- Believe point number two in your heart.
Some Successful Business Negotiation Strategies:
- Be always ready.
- Listen and understand the issues of other party’s issues and their point of view.
- Begin the negotiation by making a highball or lowball offer.
- Set a deadline for your offer.
- Be respectful and professional throughout the
- Show that you’re paying attention by using mirroring.
- Body language can be used to send messages.
- Recognize the dynamics of the deal.
- The best alternative for a negotiated agreement should be accepted.
- You should be ready to “play poker” and to walk
- Avoid using the unwise tactic of “continuous conceding” when
- Don’t focus only on the opportunity in front of you and ignore other
- Don’t get too focused on a single issue.
- Determine who really makes the
- Never take a deal at face value
- Make the proper inquiries.
- Create a Letter of Intent or Term Sheet to represent your agreement.
- Obtain the assistance of the best advisors and attorneys.
- Always create the initial version of the contract.
- Remember that time is the enemy of many deals.
- Always Strive for a win-win situation.
Join the Best SharePoint Framework Training Courses Online
Are you interested in learning the Sharepoint framework to build competitive apps for your business clients? If yes, you need to join the best Sharepoint framework online training programs or certification courses offered by the best IT institutions in Chennai, India. The city is full of reputed IT training and learning institutions, where students will get the best education in all kinds of IT courses like software, dot net framework, JavaScript, HTML, XML, SharePoint framework, and so on. The students will get good theoretical sessions and live training classes at the top institutions in Chennai. Also, the students will learn basic to advance concepts of desired IT subjects from subject matter experts available at IT institutions in Chennai.
What is SharePoint Framework?
SharePoint framework is client-side programming that is used to develop and provides full support to the clients to develop user-friendly web pages and run them well. Also, this framework helps in developing pages that will be easy to access, responsive, and mobile-friendly as well. The contents developed using SharePoint will run inside the context of a SharePoint page.
You can deploy extensions to SharePoint pages that help to access it online. Also, you can use JavaScript tools and libraries to develop customized SharePoint pages. You can learn how to use the SharePoint framework for developing useful client-side pages under the best SharePoint framework training and courses available at the best IT colleges and learning centers in Chennai, India.
SharePoint Framework Training in Chennai
Are you aspiring to become a successful SharePoint framework developer, you should join the best SharePoint framework training in top IT colleges and institutions in Chennai. At the best institutions, you will get proper guidance and practical training on SharePoint application development and learn the right programming skills for the same. The students can join the regular and part-time courses for SharePoint framework from online or offline mode from trusted IT institutions in Chennai. The students seeking to join Spfx online training, need to contact the best software training institutions in Chennai. Such institutions will provide the best arrangements for distant students to join Spfx framework courses through online classes that will be conducted by trained faculty or IT professionals.
Before you join SharePoint framework training or courses in Chennai-based institutions, you should check some valid points as follows:
- You should join the best SharePoint framework training at the authorized or government-accredited IT institutions only. Also, you may take a look at the reputation and previous track record of the learning institute which should be impressive too.
- Check for availability of certification and diploma level SharePoint framework courses and live training classes available at the best IT institutions in Chennai.
- Make sure, you find the best faculty or tutors for learning the SharePoint framework course. There should be experienced faculty for teaching the SharePoint syllabus at the institution. Hence, the students will get the right guidance about SharePoint frame development and application programming to develop useful apps for business clients.
- There should be a practical session for Spfx framework training online from websites of top institutions in Chennai.
- Finally, you should check for SharePoint framework course fees and training costs at the IT institutions.
Thus, you need to acknowledge all the points before enrolling in the SharePoint framework courses or training programs in Chennai.
4 Things to Check Before Joining Dotnet Courses and Training in Chennai
Your search for the best dotnet training institutions in India will end in Chennai. The city is a hub of many reputed IT training and learning centres, where global students do visit to enroll in the best IT courses and live training classes that help them understand the IT technologies and trending programming languages from scratch with practical training on live projects. Hence, it attracts global students to enroll in the short-term or long-term I.T. courses in the best-known IT training centres in Chennai and learn the best IT programming skills from the industry’s best tutors. Nowadays, there is a great demand seen for dotnet training in Chennai, which is a premium course offered by the leading IT training centres in the city. The IT students willing to learn the basic to advance concepts of dotnet language or work on live projects should join the best .net training courses in top institutions in Chennai.
Before enrolling in the best dotnet training courses in Chennai, you should check for some important things about the training centre and its courses as follows:
- Recognition of Training Institution
You should join the .net training online or offline in a Chennai-based IT institution, which has legal recognition from the education authority in the city. Moreover, you should check some other authentication proofs of the institution such as website, online reviews, reputation, previous records, address, physical setup, contact details, and more. Make sure, you find all the details about the IT training centre or institute in Chennai valid to trust.
- Best dotnet Courses and Syllabus
You should not check for the best dotnet online training classes and courses available at the trusted IT training centres in Chennai. At the best .net training institutions in the city, you will get complete learning and training sessions for basic to advance concepts of dotnet programming that will be based on industry rules. Also, you will learn the syllabus of dotnet topics that will cover .net programming, dotnet framework, and more. It is not all, you will get practical training on live dotnet training projects that will help you get practical training to work on corporate projects. You will get all such learning about dotnet programming at the top .net training centres in Chennai from expert tutors. So, interested students may join the short or long-term dotnet training courses in the best IT institutions in Chennai.
- Experienced Dotnet Faculties
You should join the dotnet courses and training classes in the best IT learning institutions in Chennai where you will get guidance from the industry’s expert .net faculties and trainers. The expert dotnet tutors in Chennai will help you understand every simple to complex dotnet programming concept and will guide how to design .net frameworks and websites based on the .net programming language. The trained faculties in the centres will navigate you at each step of dotnet training sessions to make you an expert dotnet programmer.
- Fees for Dotnet Courses
It is necessary to compare the fees of dotnet online courses and training classes for certification and diploma level courses. Make sure, the institution does charge reasonably for all sorts of dotnet courses as per industry rules.
Thus, above are some key things to check before joining dotnet courses and training classes in Chennai-based IT institutions wisely.
SQL Server Joins
SQL JOIN
The statement JOIN is used to combine the rows of two or more tables based on a common column.
The different types of JOIN statement used in SQL are
- INNER JOIN or JOIN – combines the data that matches in both tables.
- LEFT JOIN or LEFT OUTER JOIN – combines all the datas of left table with the datas from right table that matches.
- RIGHT JOIN or RIGHT OUTER JOIN – combines all the datas of right table with the datas from left table that matches.
- FULL JOIN or FULL OUTER JOIN – combines all the datas either from left or right table whenever there is a match found.
Let us consider an example:
Create a database with a name “StudentResults”
create database StudentResults
Create a table “studentdetails” with following snippet
CREATE TABLE studentdetails (
regno int,
LastName varchar(255),
FirstName varchar(255),
age int,
dummyno int
);
Let us consider the following datas in table “studentdetails”

Create another table “result” with the snippet
CREATE TABLE result (
dummyno int,
marks int,
result varchar(10)
);
Let us consider the following datas in table “result”

INNER JOIN:
Inner Join is the most simplest Join. When inner join keyword is used in two tables, it will create a resulting table with combining the rows of both the tables until the condition is satisfied
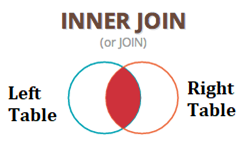
For the above considered example, when inner join statement is used as follows
SELECT studentdetails.regno, studentdetails.FirstName, studentdetails.LastName, studentdetails.age, result.marks, result.result
FROM result
INNER JOIN studentdetails
ON studentdetails.dummyno=result.dummyno;
The resulting table will be

LEFT JOIN:
Left join is also called as Left outer join. When left join keyword is used in two tables, it will create a resulting table with combining all the datas of left table with the datas from right table that matches.
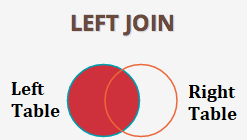
For the considered example, when left join statement is used as follows
SELECT studentdetails.regno, studentdetails.FirstName, studentdetails.LastName, studentdetails.age, result.marks, result.result
FROM studentdetails
LEFT JOIN result
ON studentdetails.dummyno=result.dummyno
ORDER BY studentdetails.regno;
The resulting table will be
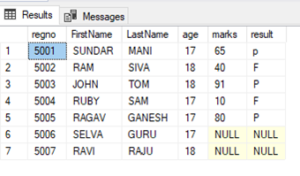
RIGHT JOIN:
Right join is also called as right outer join. When right join keyword is used in two tables, it will create a resulting table with combining all the datas of right table with the datas from left table that matches.
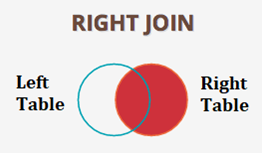
For the considered example, when right join statement is used as follows
SELECT studentdetails.regno, studentdetails.FirstName, studentdetails.LastName, studentdetails.age, result.marks, result.result
FROM studentdetails
RIGHT JOIN result
ON studentdetails.dummyno=result.dummyno
ORDER BY studentdetails.regno;
The resulting table will be
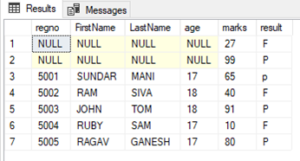
FULL JOIN:
Full join is also called as Outer join. When full join keyword is used in two tables, it will create a resulting table with combining all the datas either from left or right table whenever there is a match found.
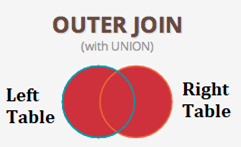
For the considered example, when full join statement is used as follows
SELECT studentdetails.regno, studentdetails.FirstName, studentdetails.LastName, studentdetails.age, result.marks, result.result
FROM studentdetails
FULL OUTER JOIN result
ON studentdetails.dummyno=result.dummyno
ORDER BY studentdetails.regno;
The resulting table will be
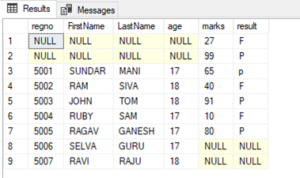
ASP.NET Vs ASP.NET Core
ASP.NET:
ASP.NET is a basic web development tool designed and developed by Microsoft, it is used to create windows applications, websites, and web services. There are around 60 programming languages available on the ASP.NET platform, among which VB.Net and C# are mostly used.
ASP.NET Core
ASP.NET Core is a new version of ASP.NET, which was also released by Microsoft. It is a free, open source, general-purpose development tool used to develop modern cloud-based software applications on Windows or Linux or mac operating systems. It was launched as a version of ASP.NET (i. e ASP.NET 5) and later it was renamed as ASP.NET Core.
Table: difference between ASP.NET and ASP.NET Core:
|
ASP.NET |
ASP.NET Core |
|
Only some components of the ASP.NET Framework are open source.
|
ASP.NET Core is completely a free and open-source tool.
|
|
It runs only on ASP.NET Framework.
|
It runs on ASP.NET Core and ASP.NET Framework. |
|
Performance is good.
|
Performance is very high than ASP.NET.
|
|
ASP.NET Framework is compatible only with the Windows operating system.
|
ASP.NET Core is compatible with various operating systems — Windows, Linux, and Mac OS.
|
|
It Supports Web-Forms, MVC and Web API.
|
It supports MVC, Web API and web pages of ASP.NET Core2.0. but does not support Web-Forms.
|
|
C#, VB, and many other languages can be used.
|
C# and F# languages are only supportable.
|
|
All major versions supported.
|
Supports Visual Studio core from version 3 to current version.
|
|
Whenever we modify or update a code, we need to re-compile the program.
|
Whenever we modify or update a code, the Core Browser refresh will compile and execute the program itself, So no need to re-compile it again.
|
|
It is not suitable for any mobile application development. But used for the development of both desktop and web applications.
|
It is not suitable for desktop application development, but suits well for development of web, windows mobile and windows store. In case of mobile applications, it can be used on devices which work on android and windows OS, Xamarin’s tools is used to configure such mobile applications.
|
|
It is installed as a single package for Windows OS.
|
As it is cross-platform, it is packaged and installed individually depending on the operating system used.
|
|
ASP.NET Framework is heavy for Command Line Interface (CLI).
|
ASP.NET core gives a lightweight CLI.
|
|
Code access security is available for security purposes.
|
No such security features available.
|
Summary:
If your application
- is to be designed to run only on Windows
- uses only the technologies of ASP.NET framework and if it does not support the technology of ASP.NET Core
- is already running on ASP.NET Framework
Then it is better to choose ASP.NET Framework.
If you are
- developing a new application and have a choice to choose between ASP.NET Core or ASP.NET Framework
- Targeting for microservices applications
- in need of a tool with features such as cross-platform, high performance, and scalability
Then ASP.NET Core is best choice.
The ASP.NET Core has the following advantages in comparison to ASP.NET Framework
- Open Source
- Cross-Platform
- High Performance
- Multiple development platform
- Multi environmental modes
Subquery in SQL
Query: A query is a request for data or information from one or more tables of a database.
Sub Query: In SQL language, we can place a Query inside another Query. This Query which is placed inside another query is called as subquery, also known as Nested Query
Subqueries can be used with SELECT, UPDATE, INSERT, DELETE statements along with the equality operator or comparison operator such as =, >, =, <= and Like operator.
Subquery must be enclosed in parentheses.
An ORDER BY command cannot be used in a subquery, but the main query can use an ORDER BY. The GROUP BY command can be used instead of ORDER BY in a subquery.
Subquery – SELECT Statement
Consider a Query
Select * from StudentDetails
When this query when executed, selects all rows of the table
Now consider an example with subquery Select
Select * from StudentDetails
where ID in (Select ID from StudentDetails where Percentage > 90);
When this set of queries gets executed,
Always the subquery gets executed first, selects the ID from StudentDetails table whose percentage is greater than 90, And then the outer query gets executed later, selecting the ID equal to the result of subquey
Subquery – INSERT Statement
Now consider an example with subquery Insert
Insert into StudentDetails_new
Select * from StudentDetails where ID in (Select ID from StudentDetails );
Here a new table with StudentDetails_new is created with the same structure as StudentDetails table, now to copy the datas of StudentDetails table to StudentDetails_new table , insert statement can be used.
Subquery – UPDATE Statement
Now consider an example with subquery update
update StudentDetails
Set mark = mark + 5
Where mark in (Select mark from StudentDetails where mark >= 91);
Here in the table StudentDetails, the mark can be updated with a bonus of 5 marks for those who have scored mark of 91 and above using this update statement.
Subquery – DELETE Statement
Now consider an example with subquery delete
Delete from StudentDetails
Where mark in (Select mark from StudentDetails where mark < 50);
Here in the table StudentDetails, the datas with marks less than 50 can be removed using delete statement.
SQL Constraints
SQL Constraints
Constraints are the rules that can be applied on the type of data in a table. i.e, it can be used to limit the type of data that can go into a table.
Constraints can be used either when the table is created, or after the table is created.
It can be either applied to a column in a table or to the whole table.
The constraints used in SQL are:
- NOT NULL
- UNIQUE
- PRIMARY KEY
- FOREIGN KEY
- CHECK
- DEFAULT
- CREATE INDEX
NOT NULL: if this constraint is used in any column, then it will not allow NULL values in that particular column anymore.
Eg:
CREATE TABLE StudentDetail (
ID int NOT NULL,
Name varchar(250) NOT NULL,
Branch varchar(250) NOT NULL
);
In this command, all the columns are specified with NULL Constraint, so all the columns will allow NULL data in it.
UNIQUE: if this constraint is used in any column, then it does not allow to repeat any data or value inn that particular column anymore.
Eg:
CREATE TABLE StudentDetail (
ID int NOT NULL UNIQUE,
Name varchar(250) NOT NULL,
Branch varchar(250) NOT NULL
);
In this command, all the ID column is specified with UNIQUE Constraint, so that the ID cannot be repeated with same data.
PRIMARY KEY: This constraint uniquely identifies each record in a table or column and also does not allow NULL data in it.
Eg:
CREATE TABLE StudentDetail (
ID int,
Name varchar(250) ,
Branch varchar(250),
PRIMARY KEY (ID)
);
In this command, the PRIMARY KEY Constraint is specified for ID, so that the ID cannot be repeated with same data, also ID cannot be NULL data.
FOREIGN KEY: The FOREIGN KEY Constraint references a row in another table, here, the table with the foreign key Constraint is called as the child table, and the table with the primary key is called the parent table.
Eg:
Parent Table::
CREATE TABLE StudentDetail (
ID int,
Name varchar(250) ,
Branch varchar(250),
PRIMARY KEY (ID)
);
Child Table::
CREATE TABLE Marks (
Mark int NOT NULL,
Subcode int NOT NULL,
ID int,
PRIMARY KEY (Mark),
FOREIGN KEY (ID) REFERENCES StudentDetail(ID)
);
Here the “Mark” of a student in the “Table Marks” refers to the “ID” of the student in the “Table StudentDetail”.
CHECK: The CHECK Constraint validates condition for new value.
Eg:
CREATE TABLE StudentDetail (
ID int NOT NULL,
Name varchar(250) NOT NULL,
Branch varchar(250) NOT NULL,
CHECK (Branch=’CSE’)
);
In this command, the CHECK Constraints, allows only the CSE as Branch.
DEFAULT: This Constraint is used to set a default value for any particular column, if any value is not specified.
Eg:
CREATE TABLE StudentDetail (
ID int NOT NULL,
Name varchar(250) NOT NULL,
Branch varchar(250) DEFAULT ‘CSE’,
);
In this command, the DEFAULT Constraints, fills the Branch as CSE in default when Branch is not specified.
CREATE INDEX: This Constraint is used to speed-up the process, i.e it can create and retrieve any data from the database more quickly.
Eg:
CREATE TABLE StudentDetail (
ID int NOT NULL,
Name varchar(250) NOT NULL,
Branch varchar(250) NOT NULL
);
CREATE INDEX ix_Branch
ON StudentDetail (Branch);
Here, in the table StudentDetail, the CREATE INDEX command creates an index ix_Branch using the Branch column.
SQL – Programming language
Database:
A database is an organized collection of structured information stored electronically in a computer system. It is controlled by a database management system (DBMS). A database most often contains one or more tables. Each table is identified by a name, the tables contain records with data.
SQL
SQL stands for Structured Query Language.
SQL is a standard language for relational database management system. Unlike Excel, SQL can handle over one million fields of data easily. SQL queries are more flexible than MS Excel formulas.
SQL is widely used in data science and analytics. SQL can be used in all modern relational database management systems like SQL Server, Oracle, mysql, etc.
SQL allows to
- Create new databases, tables and stored procedures.
- Insert, update, delete or retrieve any data from databases.
- Execute queries in a database.
SQL commands is classified as below:
- DDL Commands
- DML Commands
- DQL Commands
- TCL Commands
- DCL Commands
DDL Commands (Data Definition language) – used to define the database schemas, i.e. to create / modify / delete database structures.
- Create – Command is used to create database, tables, and views.
- Drop – Used to drop databases.
- Alter – It is used to alter the structure of the table and databases
- Truncate – It is used to completely remove all records from a table
- Comment – used to add comment in data dictionary
- Rename – used to rename an existing object in database
DML Commands (Data Manipulation Language) – used to manipulate the data present in database.
- Insert: used to insert data into a table
- Update: it updates existing data within a table
- Delete: it deletes all records from a table
DQL Commands (Data Query Language) – used to perform queries on data within scheme objects.
- Select: used to retrieve the data from the database
TCL commands (Transaction Control Language) – Used to maintain consistency of the database and to manage the transactions made by the DML commands.
- Commit: used to permanently save any transaction into the database.
- Rollback: it restores the database to last saved state.
- Savepoint: used to temporarily save a transaction
DCL Commands (Data Control Language) – Used to control access to data stored in a database.
- Grant: allows to perform specified tasks by specified users.
- Revoke: cancels the previously granted or denied permissions.
Top Reasons to Join the SharePoint Framework Trainings in Chennai, India
Do you want to learn about the SharePoint framework to build a useful model for customization on the SharePoint platform? If yes, you should join the best SharePoint framework training program or spfx online training courses offered by the leading IT institutions in the world. You will find many IT training institutions, where you will find skilled SharePoint training faculties and trainers. They specialize in developing useful SharePoint applications and frameworks which are useful for client-side solutions and support the SharePoint UX too. You will find some top-notch IT training and software learning institutions in Chennai, India. At the recognized software learning institutions in Chennai, you will find skilled software trainers and faculties, which can help students to understand the concepts of the SharePoint framework and provide live training facilities as well. So, you can join the basic to advance level SharePoint framework course or training program from trusted IT institutions in Chennai and become a SharePoint frame developer in the future.
Why Join Sharepoint Framework Training and Courses in India?
If you are keen to learn about the SharePoint framework from scratch, you are advised to enrol in the best SharePoint framework learning courses and training programs in India-based IT institutions. For betterment, you can approach the leading IT and software learning centres in Chennai. The city is a hub of some reputed software learning and training institutions, where students do like to join the short-term and long-term software courses and training programs as well. Also, you will witness some good scope to learn new-edge IT technologies, digital marketing, and software training programs at the trusted IT institutions in Chennai, India.
Here are some key reasons, which woo global students to join the SharePoint framework in Chennai based institutions:
- Recognized IT and Software Institutions
In Chennai, you will find many recognized IT and software learning institutions, which offer a wide variety of software courses and training programs for global students. The courses offered by such institutions are valid and have good recognition in major institutions in the world. If you will join and pass the SharePoint framework training programs and courses from top IT and software learning centres in Chennai, you will get the first recommendation to get hired by top IT companies in the world.
- Online Learning Programs
During this pandemic time, many students are studying online and covering up their courses and software training through remote classes. You will also get the best spfx online training and learning facilities from websites of leading IT and software learning institutions in Chennai, India. No matter where you reside in the world, you can continue your SharePoint frame learning and training process by joining online SharePoint framework classes offered by IT institutions in Chennai.
- Skilled Faculty and Trainers
In the reputed IT and software training institutions in Chennai, you will find the industry’s best SharePoint frame training experts and faculties who can guide all basic to advance level concepts of the SharePoint framework. The experts will give you a thorough knowledge and practical training about how SharePoint frameworks for client-side solutions help online customers to interact with business websites and take avail themselves of their benefits.
- Affordable Fees
You can join the basic to advance level SharePoint frame training programs in top IT institutions in Chennai at affordable fees. But, you need to check the website of the institution first and grab all details about the course and its fee structure in advance.
Thus, you may consider all the above points to join the SharePoint framework classes and training programs in Chennai, India.
5 Points to Check Before Enrolling in Dot Net Courses and Training in Chennai
Do you want to learn the basic to advance level dot Net syllabus to become a proficient dot Net developer in the future? If yes, you should join the best dot Net training programs or courses offered by the leading software learning and training institutions in Chennai. In the city, you will find many reputed software training and course institutions, where students can join a variety of software courses and training programs in different IT languages like dot Net, Java, XML, HTML, CSS, and more. Among all such courses, many students are joining the dot Net training and courses in Chennai-based institutions. Nowadays, there is huge demand seen for dot Net developers in the I.T. industry. The students have good command over dot Net language and its coding skills, they can get high salary jobs in the top I.T. companies in India and abroad as well. Hence, it is a good career option for tech-savvy to join the best dot Net training programs and courses available at the recognized software institutions in Chennai.
If you are willing to join the best dot Net courses in Chennai, you need to check some relevant points about the institution and its dot Net training program as follows:
- Recognition of Institution
It is advised to join the dot Net training program or courses in Chennai-based institutions which have government recognition first. Make sure, the software learning institute has a good reputation in the industry and has a proven track record of providing good and career-oriented software courses and dot Net training or live project programs for fresher and experienced candidates.
- Best Dot Net Courses and Training Programs
You should check with an IT or software institution in Chennai that provides the best industry-based dot Net courses and training programs for students. Make sure, the institution provides the best courses and training programs for dot Net language to learn from scratch and enhance programming skills too. Besides, the syllabus of dot Net courses should include all basic to advance lessons of the language to guide the main framework of the software development life cycle to the students.
- Training on Live Projects
At the best software institutions in Chennai, India, you will get the opportunity to get training on the live dot Net projects. However, it will help the students to explore good coding skills and practice them well to use on live dot Net software projects under the guidance of trained dot Net trainers and developers.
- Experienced Dot Net Faculty and Trainers
You should also check with software learning institutions in Chennai that it includes the best dot net faculties and trainers in the industry. Make sure, the faculty and trainers have a vast knowledge of all types of dot Net lessons and courses to guide the students. Also, they must be experienced in teaching dot Net courses to the students and help them in live training projects too.
- Dot Net Course Fees
Finally, you should compare the fee structure of dot Net courses and training programs at the top software learning institutions in Chennai. You should join the dot Net course in the best institution which provides such courses at affordable charges.
Thus, you need to check all the above points before joining the dot Net training courses or getting services of the dot Net freelancers in Chennai, India.
Find the Best Power Platform Training Courses in Chennai Based Institutions
Do you want to automate your business process? If yes, you need to use the latest business management apps and software that are designed to support businesses to manage all kinds of works related to operations, administration, clients support, and more. In case, you do not know how to use such apps and customize their functionality by changing their source code. Do not worry, you should use Microsoft’s power apps which are the best tools for all level businesses to streamline their business works without learning to code. However, many business professionals and students are joining the best power platform training and certification programs from reputed IT and management institutions. You can also join the best short-term or certification courses of power platform course online from sites of reputed intuitions in Chennai, India.
What is Microsoft Power Platform?
Microsoft Power Platform course enables you to learn how to resolve complex business issues using a single app without any coding. This brilliant business platform is designed by Microsoft to small support businesses which are unaware of the latest technologies and afford expensive business staff to hire. They can use this powerful platform to streamline their business workflow and automate its process to get all works done right. This is a Microsoft project, which requires no coding experience or technical hand to use.
Nowadays, many students are joining the best power app platform training courses online in Chennai-based institutions. If you are seeking to join such a course too, you should go online and navigate sites of reputed and government accredited IT and management study institutions and colleges in Chennai.
What can you learn by joining a power platform training course online in Chennai?
- By joining the best power platform training courses onlinein Chennai-based institutions, you will get a brief knowledge about this Microsoft product. The students will get the guidance of skilled IT trainers and coders, who will guide how to develop user-friendly and functional Android iOS apps using power platform tools.
- Moreover, the students will learn to develop a secure app that facilitates businesses to store business data, create a workflow, and easy retrieval of data from the store too. Besides, you will also learn how to create a flow using interfaces of power platform automate app and implement Azure AI Builder.
- Thepower platform apps give you the flexibility to learn the way of working with new technology apps and streamline business workflow and data storage for good management of work.
- The students will get guidance about power platform courses and training from experienced trainers and IT professionals in the city. Also, the learners will study management skills and techniques to utilize power platform apps for the betterment of business flow.
If you are keen to learn about this Microsoft product, you should join the best power platform training online in Chennai-based institutions now. You should join such courses from recognized and renowned IT institutions in the city. Hence, it is necessary to check with all credentials and online reviews about institutions or colleges in advance.
Project Management Professional Certification Online Training Chennai
Are you looking to join the best project management professional courses online in India? If yes, you should contact the best management and IT course institutions operating in Chennai, India. In the city, you will find many reputed and verified management colleges or institutions, where you will find the best management courses up to certification, diploma, and degree level. Hence, your decision to join the project management professional certification training courses in Chennai will be right, if you enrol for it from a trusted institution in the city. But, it is recommended to join any management or IT course online in Chennai from websites of recognized institutions only.
Due to Covid-19, it’s been a difficult time for students to go to the schools and institutions for study. However, the trend of online study for students and work from home for employees has to be followed by everyone. At present, many management students in Chennai have started the online PMP certification training courses for students to join the new training classes and sessions online from their websites. The students seeking to join the best PMP training and management courses join online, they should check websites of leading management course institutions in Chennai. On their portals, you will find the best courses for project management professional certification (PMP) and their details to join online. So, interested students can join the PMP certification courses in Chennai and training programs online from trusted institutions in the city.
Advantages of Joining project management professional certification training online in Chennai:
There are several advantages of joining the project management professional certification training courses online in Chennai. Let’s take a look at those advantages as follows:
- Recognized Institutions
In Chennai, you will find the best government-approved management and IT institutions, which have accreditation certificates issues the education department in the city. Also, the management institutions have good online reviews, a proven service track record, and a reputation in the industry as well. Hence, the types of courses and training provided by the institutions have recognition all over the world.
- Best Management Study and Training Programs
At the trusted management colleges and institutions in Chennai, you will find reliable and authentic PMP courses online and training programs too. The project management professional courses are designed to educate students about the standard duties of a management professional and develop skills to handle the management works of an organization. The institutions in Chennai will also provide practical training sessions for students to educate and perform management duties in the right way.
- PMP Courses for All Levels
The reputed management institutions and colleges in Chennai provide all-level PMP management courses for global students. Now, you can join the PMP courses for a certification level, diploma, and degree level online from websites of any recognized management college or institution in Chennai. Also, you will get online classes and training sessions from the industry’s best management professionals. Thus, you can study the best courses and lessons in online PMP courses and training programs offered by the best institutions in Chennai.
Thus, above are some key advantages of joining the best project management professional training and courses in Chennai-based institutions.
Free dotnet training in chennai
Following are the criteria for the selection of candidates.
- Bright graduates who got good score (75%) from their schooling to till their graduation.
- We offer .net training at free of cost.
- Neccesary soft copy for documents need to be sent for evidence
- No hidden charges applied.
- There will be a screening interview to shortlist.
Excluding the above criteria, candidate can be considered based on financial situation. The selected candidate is expected to complete the 40 hrs training and should not discontinue.
whats app – +919042710472 to enroll yourself if you match the criteria.
ASP.NET INTERVIEW QUESTIONS AND ANSWERS
Posted by Ganesan – +919042710472
1. What is ASP.NET? Why ASP.NET?
ASP.NET is a .NET web technology or server-side technology. To develop a web application by using .NET. we must use a .NET web technology called ASP.NET and a .NET language called C# .NET.
2. What do you mean by server-side technology?
The code which is executing within the WEB SERVER is called as SERVER-SIDE CODE.
Server-side code we can implement by using server-side technologies.
Ex: ASP, ASP.NET, JSP, PHP
Using server-side technology, we can develop server-side web pages.
3. What do you mean by client-side technology?
The code which is executing within the WEB BROWSER is called as CLIENT-SIDE CODE.
Client-side code we can implement by using side technologies.
Ex: HTML, CSS.
4. What are the programming techniques will be supporting by ASP.NET?
ASP.NET will support two programming techniques. They are,
1. In page technique
2. Code behind technique.
5. How can you pass values between ASP.NET pages?
Different techniques to move data from one form to another are:
1. Query string
2. Cookies
3. Session state
4. Application state
5. Cross page post back
6. Context.Handler object
6. Explain about validation controls in ASP.NET?
There are 6 validator controls.
1. Required field control
2. Compare validator
3. Range validator
4. Regular Expression validator
5. Custom validator
6. Validation summary
7. When we will go for custom validator control?
Whenever our validation requirement is unable to achieve with the help of existing validation controls then we have to go for custom validator control.
8. How to access information about a user’s locale in ASP.NET?
User’s locale information can be accessed through System.Web.Page.Culture property.
9. In ASP.NET page life cycle events which will fire first?
Page_Prelnit
10. What are the life cycle events of ASP.NET?
- Application level
- Control level
- Page level.
Angularjs CRUD operation with Asp.net MVC
Create a table in local Sql express with below script,
| CREATE TABLE [dbo].[EmployeeDetail] ( [EmployeeId] INT IDENTITY (1, 1) NOT NULL, [EmployeeName] NVARCHAR (MAX) NULL, [Age] INT NOT NULL, CONSTRAINT [PK_dbo.EmployeeDetail] PRIMARY KEY CLUSTERED ([EmployeeId] ASC) ); |
Create a New Asp.net MVC Project in Visual Studio as below,
File –> New Project
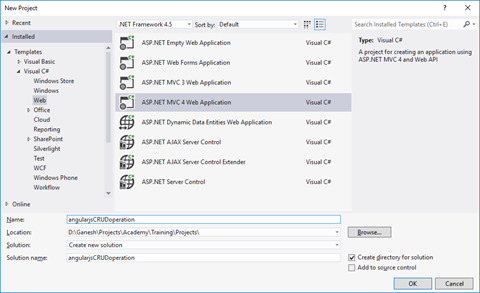
Right click on References and Click Manage Nuget Packets.Install AngularJS in Nuget Packet as shown,
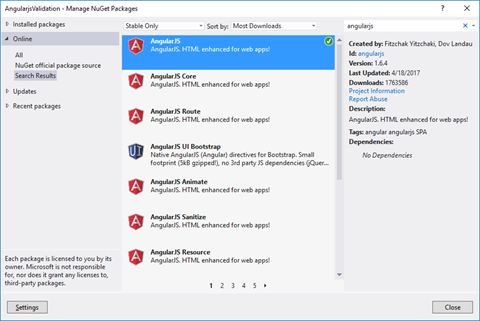
Click on Install. AngularJs scripts will be added as shown in Solution explorer.

Add the below code in BundleConfig.cs,
| bundles.Add(new ScriptBundle(“~/bundles/angular”).Include( “~/Scripts/angular.js”, “~/Scripts/angular-route.js” )); |
Add the below script reference in _Layouts.cshtml,
| @Scripts.Render(“~/bundles/angular”) |
Create a EmployeeModel.cs class in Model with below code,
| [Table(“EmployeeDetail”)] public class EmployeeModel { [Key] public int EmployeeId { get; set; } public string EmployeeName { get; set; } public int Age { get; set; } } |
Replace the User context in AccountModels.cs with the below code,
| public class UsersContext : DbContext { public UsersContext() : base(“DefaultConnection”) { } public DbSet<UserProfile> UserProfiles { get; set; } public DbSet<EmployeeModel> EmployeeDetails { get; set; } } |
Add EmployeeController class file in Controller Folder and add the below,
| namespace angularjsCRUDoperation.Controllers { public class EmployeeController : Controller { private UsersContext db = new UsersContext(); // // GET: /Employee/Index public ActionResult Index() { return View(); } public JsonResult GetEmployee() { return Json(db.EmployeeDetails.ToList(), JsonRequestBehavior.AllowGet); } // // GET: /Employee/Details/5 public ActionResult Details(int id = 0) { EmployeeModel employeedetail = db.EmployeeDetails.Find(id); if (employeedetail == null) { return HttpNotFound(); } return View(employeedetail); } // // GET: /Employee/Create public ActionResult Create() { return View(); } // // POST: /Employee/Create [HttpPost] public string Create1(EmployeeModel employeedetail) { if (ModelState.IsValid) { db.EmployeeDetails.Add(employeedetail); db.SaveChanges(); return “success”; } return “success”; } public ActionResult Edit(string id) { return View(); } // // GET: /Employee/Edit/5 public JsonResult Edit1(string id) { EmployeeModel employeedetail = db.EmployeeDetails.Find(Convert.ToInt32(id)); return Json(employeedetail, JsonRequestBehavior.AllowGet); } // // POST: /Employee/Edit/5 [HttpPost] public string UpdateEmp(EmployeeModel employeedetail) { if (ModelState.IsValid) { db.Entry(employeedetail).State = EntityState.Modified; db.SaveChanges(); return “Success”; } return “Failure”; } // // GET: /Employee/Delete/5 public ActionResult Delete(int id = 0) { EmployeeModel employeedetail = db.EmployeeDetails.Find(id); if (employeedetail == null) { return HttpNotFound(); } return View(employeedetail); } // // POST: /Employee/Delete/5 [HttpPost, ActionName(“Delete”)] [ValidateAntiForgeryToken] public ActionResult DeleteConfirmed(int id) { EmployeeModel employeedetail = db.EmployeeDetails.Find(id); db.EmployeeDetails.Remove(employeedetail); db.SaveChanges(); return RedirectToAction(“Index”); } protected override void Dispose(bool disposing) { db.Dispose(); base.Dispose(disposing); } } } |
Add Employee folder in Views and create Create.cshtml, Edit.cshtml and Index.cshtml as shown below in
Solution Explorer.
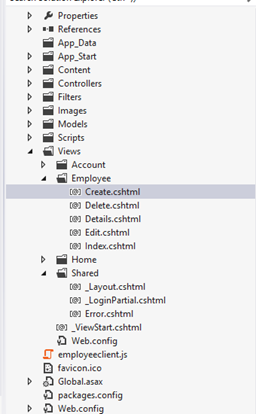
Put below code in Create.cshtml,
| @{ ViewBag.Title = “Create”; } <h2>Create</h2> @using (Html.BeginForm()) { <div ng-app=”empApp” class=”container”> <div ng-controller=”EmployeeController”> <div> <p class=”divHead”>{{Action}} Employee</p> <table> <tr> <td><b>Id</b></td> <td> <input type=”text” disabled ng-model=”EmployeeId” /> </td> </tr> <tr> <td><b>Name</b></td> <td> <input type=”text” ng-model=”EmployeeName” /> </td> </tr> <tr> <td><b>Age</b></td> <td> <input type=”text” ng-model=”Age” /> </td> </tr> <tr> <td colspan=”2″> <input type=”button” class=”btnAdd” value=”Save” ng-click=”AddUpdateEmployee()” /> </td> </tr> </table> </div> </div> </div> } <div> @Html.ActionLink(“Back to List”, “Index”) </div> @section Scripts { @Scripts.Render(“~/bundles/jqueryval”) @Scripts.Render(“~/employeeclient.js”) } |
Put below code in Edit.cshtml,
| @model angularjsCRUDoperation.Models.EmployeeModel @{ ViewBag.Title = “Edit”; } <h2>Edit</h2> @using (Html.BeginForm()) { <div ng-app=”empApp” class=”container”> <div ng-controller=”EditController”> <div> <p class=”divHead”>{{Action}} Employee</p> <table> <tr> <td><b>Id</b></td> <td> <input type=”text” disabled ng-model=”EmployeeId” /> </td> </tr> <tr> <td><b>Name</b></td> <td> <input type=”text” ng-model=”EmployeeName” /> </td> </tr> <tr> <td><b>Age</b></td> <td> <input type=”text” ng-model=”Age” /> </td> </tr> <tr> <td colspan=”2″> <input type=”button” class=”btnAdd” value=”Save” ng-click=”AddUpdateEmployee()” /> </td> </tr> </table> </div> </div> </div> } <div> @Html.ActionLink(“Back to List”, “Index”) </div> @section Scripts { @Scripts.Render(“~/bundles/jqueryval”) @Scripts.Render(“~/employeeclient.js”) } |
Put below code in Index.cshtml,
| @{ ViewBag.Title = “Index”; } <h2>Index</h2> <p> @Html.ActionLink(“Create New”, “Create”) </p> @section scripts{ @Scripts.Render(“~/employeeclient.js”) } <div ng-app=”empApp” class=”container”> <br /> <br /> <input type=”text” placeholder=”Search Student” ng-model=”searchEmployee” /> <br /> <div ng-controller=”EmployeeController”> <table class=”table”> <tr> <td>Employee id</td> <td>Employee Name</td> <td> Age </td> </tr> <tr ng-repeat=”r in students | filter : searchEmployee”> <td>{{r.EmployeeId}}</td> <td>{{r.EmployeeName}}</td> <td> {{r.Age}} </td> <td> <input type=”button” ng-click=”editEmployee(r)” class=”btnAdd” value=”Edit” /> </td> </tr> </table> </div> </div> |
Create a js File employeeclient.js in the root of the project and put below code,
| var empApp = angular.module(’empApp’, []) empApp.controller(‘EmployeeController’, function ($scope, EmployeeService) { getStudents(); function getStudents() { $scope.students = []; EmployeeService.getStudents() .then(function (studs) { $scope.students = studs.data; } , function (error) { $scope.status = ‘Unable to load customer data: ‘ + error.message; alert(“failure”); console.log($scope.status); }); } $scope.AddUpdateEmployee = function () { debugger; var Employee = { EmployeeId: $scope.EmployeeId, EmployeeName: $scope.EmployeeName, Age: $scope.Age }; var getAction = $scope.Action; var getData = EmployeeService.AddEmp(Employee); getData.then(function (msg) { getStudents(); alert(msg.data); $scope.divEmployee = false; }, function () { alert(‘Error in adding record’); }); } $scope.editEmployee = function (employee) { debugger; window.location.href = ‘/Employee/Edit?id=’ + employee.EmployeeId; } }); empApp.factory(‘EmployeeService’, [‘$http’, function ($http) { var EmployeeService = {}; EmployeeService.getStudents = function () { return $http.get(‘/Employee/GetEmployee’); }; // Add Employee EmployeeService.AddEmp = function (employee) { var response = $http({ method: “post”, url: “/Employee/Create1”, data: JSON.stringify(employee), dataType: “json” }); return response; } return EmployeeService; }]); empApp.controller(‘EditController’, function ($scope, EditService) { var me = getUrlVars()[“id”]; editEmployee(me); function editEmployee(Id) { debugger; // window.location.href = ‘/Employee/Edit?id=’ + Id; var getData = EditService.getEmployee(Id); getData.then(function (emp) { $scope.EmployeeId = emp.data.EmployeeId; $scope.EmployeeName = emp.data.EmployeeName; $scope.Age = emp.data.Age; $scope.Action = “Update”; $scope.divEmployee = true; }, function () { alert(‘Error in getting records’); }); } $scope.AddUpdateEmployee = function () { debugger; var Employee = { EmployeeId: $scope.EmployeeId, EmployeeName: $scope.EmployeeName, Age: $scope.Age }; var getAction = $scope.Action; var getData = EditService.updateEmp(Employee); getData.then(function (msg) { alert(msg.data); $scope.divEmployee = true; }, function () { alert(‘Error in adding record’); }); } }); empApp.factory(‘EditService’, [‘$http’, function ($http) { var EditService = {}; // get Employee By Id EditService.getEmployee = function (employeeID) { var response = $http({ method: “post”, url: “/Employee/Edit1”, params: { id: employeeID } }); return response; } // Update Employee EditService.updateEmp = function (employee) { var response = $http({ method: “post”, url: “/Employee/UpdateEmp”, data: JSON.stringify(employee), dataType: “json” }); return response; } return EditService; }]); // Read a page’s GET URL variables and return them as an associative array. function getUrlVars() { var vars = [], hash; var hashes = window.location.href.slice(window.location.href.indexOf(‘?’) + 1).split(‘&’); for (var i = 0; i < hashes.length; i++) { hash = hashes[i].split(‘=’); vars.push(hash[0]); vars[hash[0]] = hash[1]; } return vars; } |
Solution Explorer looks like below,
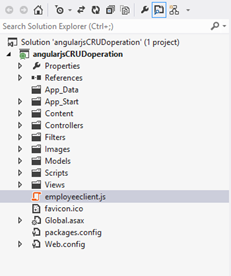
Run the solution,
OUTPUT as below,
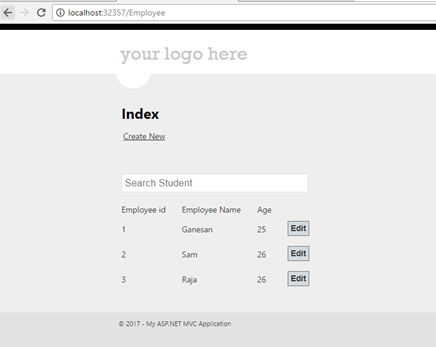
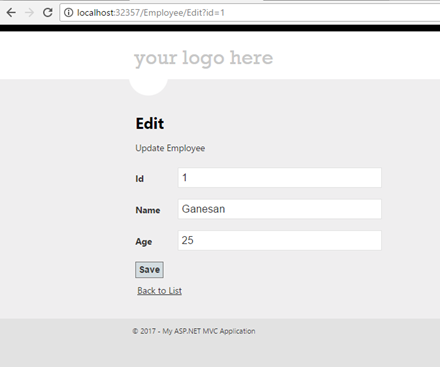
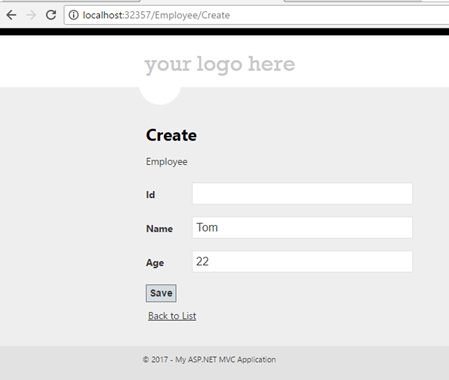
Click below to download the Angularjs crud solution,
https://1drv.ms/u/s!ArddhCoxftkQg9t6X3vBOck_4proJA
AngularJS validation in MVC
 Download PDF
Document by Ganesanva@hotmail.com – + 919042710472
Create a database in Sql server with name “aspnet-AngularjsValidation-20170420122930”.
Create a Table in SQL server using below script,
| CREATE TABLE [dbo].[Employeedetail] ( [EmployeeId] INT IDENTITY (1, 1) NOT NULL, [EmployeeName] NVARCHAR (MAX) NULL, [Age] INT NOT NULL, [EmailId] NVARCHAR (MAX) NULL, [Phone] INT DEFAULT ((0)) NOT NULL, CONSTRAINT [PK_dbo.Employeedetail] PRIMARY KEY CLUSTERED ([EmployeeId] ASC) ); |
Create a new Project in Visual Studio as below,
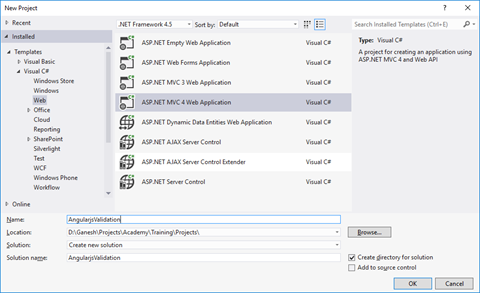
Right click on References and Click Manage Nuget Packets.Install AngularJS in Nuget Packet as shown,

Click on Install. AngularJs scripts will be added as shown in Solution explorer.
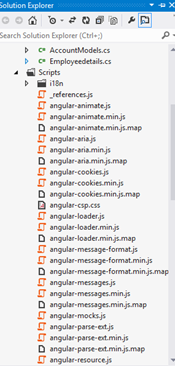
Add the below code in BundleConfig.cs,
| bundles.Add(new ScriptBundle(“~/bundles/angular”).Include( “~/Scripts/angular.js”)); |
Add the below script reference in _Layouts.cshtml,
| @Scripts.Render(“~/bundles/angular”) |
Create a model class file Employeedetail in Model Folder and put the below code,
| [Table(“Employeedetail”)] public class Employeedetail { [Key] public int EmployeeId { get; set; } public string EmployeeName { get; set; } public int Age { get; set; } public string EmailId { get; set; } public int Phone { get; set; } } |
Replace the UserContext class in AccountModels to below code,
| public class UsersContext : DbContext { public UsersContext() : base(“DefaultConnection”) { } public DbSet<UserProfile> UserProfiles { get; set; } public DbSet<Employeedetail> Employeedetails { get; set; } } |
Create EmployeeController class in Controllers and put the below code,
| public class EmployeeController : Controller { private UsersContext db = new UsersContext(); // // GET: /Employee/Create public ActionResult Create() { return View(); } [HttpPost] public string Create1(Employeedetail employeedetail) { if (ModelState.IsValid) { db.Employeedetails.Add(employeedetail); db.SaveChanges(); return “success”; } return “success”; } protected override void Dispose(bool disposing) { db.Dispose(); base.Dispose(disposing); } } |
Create Employee Folder in Views and Create Create.cshtml file, put the below code
| @model AngularjsValidation.Models.Employeedetail @{ ViewBag.Title = “Create”; } <h2>Create</h2> <div ng-app=”mainApp” ng-controller=”employeeController”> <form name=”employeeForm” novalidate> <table border=”0″> <tr> <td>Employee name:<span style=”color:red”>*</span></td> <td> <input name=”name” type=”text” ng-model=”name” required> <span style=”color: red” ng-show=”employeeForm.name.$dirty && employeeForm.name.$invalid”> <span ng-show=”employeeForm.name.$error.required”>Employee Name is Mandatory</span> </span> </td> </tr> <tr> <td>Age<span style=”color:red”>*</span> </td> <td> <input name=”Age” type=”text” ng-model=”Age” required> <span style=”color: red” ng-show=”employeeForm.Age.$dirty && employeeForm.Age.$invalid”> <span ng-show=”employeeForm.Age.$error.required”>Employee Age is Mandatory</span> </span> </td> </tr> <tr> <td>Email: <span style=”color:red”>*</span> </td> <td> <input name=”email” type=”email” ng-model=”email” length=”100″ required> <span style=”color: red” ng-show=”employeeForm.email.$dirty && employeeForm.email.$invalid”> <span ng-show=”employeeForm.email.$error.required”>Email is required.</span> <span ng-show=”employeeForm.email.$error.email”>Invalid email address.</span> </span> </td> </tr> <tr> <td>Phone number<span style=”color:red”>*</span> </td> <td> <input type=”text” name=”phone” ng-model=”phone” ng-required=”true” ng-minlength=”10″ ng-maxlength=”10″ /> <span style=”color: red” ng-show=”employeeForm.phone.$dirty && employeeForm.phone.$invalid”> <span ng-show=”employeeForm.phone.$error.required || employeeForm.phone.$error.number”>Valid phone number is required </span> <span class=”help-block” ng-show=”((employeeForm.phone.$error.minlength || employeeForm.phone.$error.maxlength) && employeeForm.phone.$dirty) “> phone number should be 10 digits </span> </span> </td> </tr> <tr> <td></td> <td> <button ng-disabled=”employeeForm.name.$dirty && employeeForm.name.$invalid || employeeForm.Age.$dirty && employeeForm.Age.$invalid || employeeForm.email.$dirty && employeeForm.email.$invalid || employeeForm.phone.$dirty && employeeForm.phone.$invalid ” ng-click=”AddUpdateEmployee()”> Submit</button> </td> </tr> </table> </form> </div> <script> var mainApp = angular.module(“mainApp”, []); mainApp.controller(’employeeController’, function ($scope, EmployeeService) { $scope.AddUpdateEmployee = function () { debugger; var Employee = { EmployeeId: 0, EmployeeName: $scope.name, Age: $scope.Age, EmailId: $scope.email, Phone: $scope.phone }; var getAction = $scope.Action; var getData = EmployeeService.AddEmp(Employee); getData.then(function (msg) { alert(msg.data); // $scope.divEmployee = false; }, function () { alert(‘Error in adding record’); }); } }); mainApp.factory(‘EmployeeService’, [‘$http’, function ($http) { var EmployeeService = {}; // Add Employee EmployeeService.AddEmp = function (employee) { var response = $http({ method: “post”, url: “/Employee/Create1”, data: JSON.stringify(employee), dataType: “json” }); return response; } return EmployeeService; }]); </script> <div> @Html.ActionLink(“Back to List”, “Index”) </div> @section Scripts { @Scripts.Render(“~/bundles/jqueryval”) } |
The Solution Explorer will looks like below,
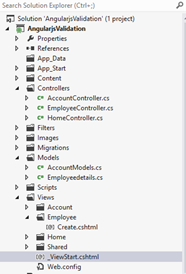
Output as below,
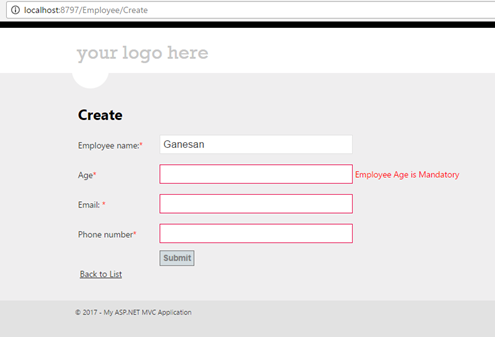
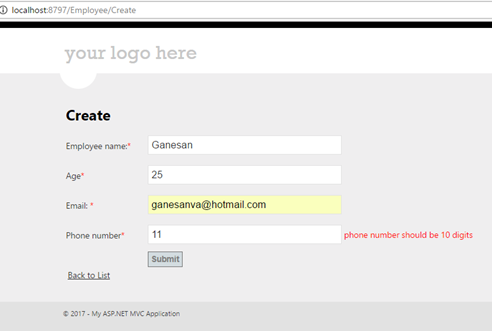
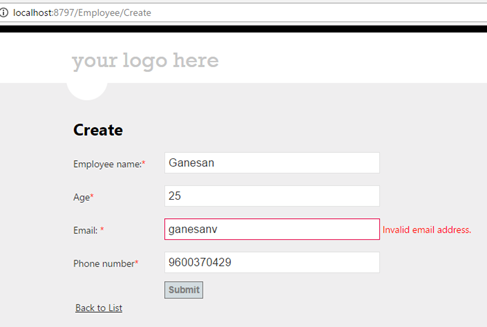
On clicking Submit,
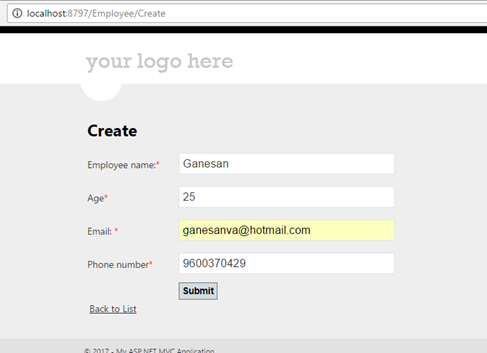
Database mdf SQL Express back up will be on App_Data.
Click below to download the solution,
https://1drv.ms/u/s!ArddhCoxftkQg9h1B4IrqJibyFfExQ
Grid view using Angular JS
Document by Ganesanva@hotmail.com – + 919042710472
Create AngularGrid.html as shown below in windows explorer.
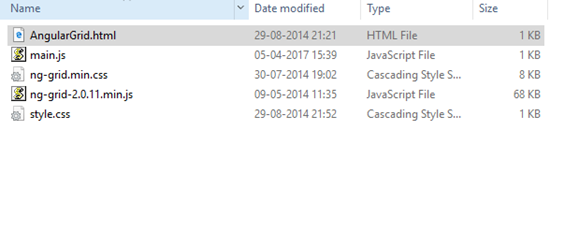
Put the below code in AngularGrid.html,
| <html ng-app=”myApp”> <head lang=”en”> <meta charset=”utf-8″> <title>Getting Started With ngGrid Example</title> <link rel=”stylesheet” type=”text/css” href=”ng-grid.min.css” /> <link rel=”stylesheet” type=”text/css” href=”style.css” /> <script type=”text/javascript” src=”http://code.jquery.com/jquery-1.8.2.js”></script> <script type=”text/javascript” src=”https://ajax.googleapis.com/ajax/libs/angularjs/1.2.23/angular.min.js”></script> <script src=”ng-grid-2.0.11.min.js”></script> <script type=”text/javascript” src=”main.js”></script> </head> <body ng-controller=”MyCtrl”> <div class=”gridStyle” ng-grid=”gridOptions”> </div> </body> </html> |
Create main.js and put the below code,
| var app = angular.module(‘myApp’, [‘ngGrid’]); app.controller(‘MyCtrl’, function($scope) { $scope.myData = [{EmployeeName: “Sam”, age: 22}, {EmployeeName: “google”, age: 24}, {EmployeeName: “Yahoo”, age: 28}, {EmployeeName: “Bing”, age: 27}, {EmployeeName: “Ram”, age: 26 }, {EmployeeName: “Ganesan”, age: 25}, {EmployeeName: “Raj”, age: 22}, ]; $scope.gridOptions = { data: ‘myData’ }; }); |
Create style.css and Put below code,
| .gridStyle { border: 2px solid rgb(212,212,212); width: 800px; height: 400px } |
Download the files ng-grid.min.css,ng-grid-2.0.11.min.js at the end of blog and put it on the same path.
In order to make this code dynamic, we have to give a dynamic JSON value from Database in myData.
Output:

Click here to download the solution,
https://1drv.ms/u/s!ArddhCoxftkQg9dAzVE1LuxbhTk6Aw
Create Search Service application in SharePoint
Document by Ganesanva@hotmail.com – + 919042710472
Go to Central Administration
Navigate to Application Management -> Manage Service Applications
Click on New -> Search Service Application as shown
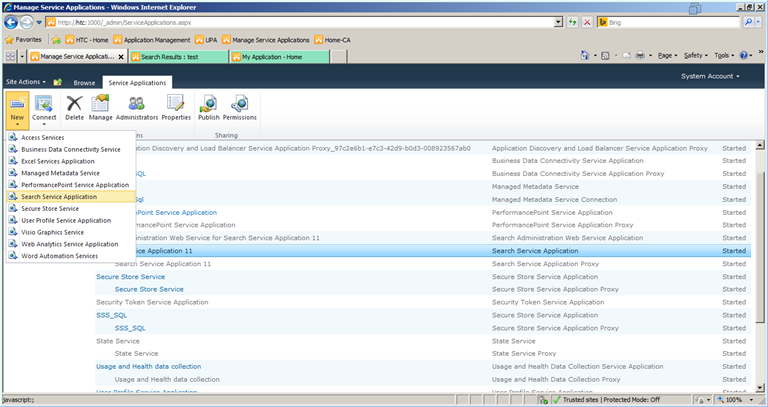
Fill the Pop up as shown below.
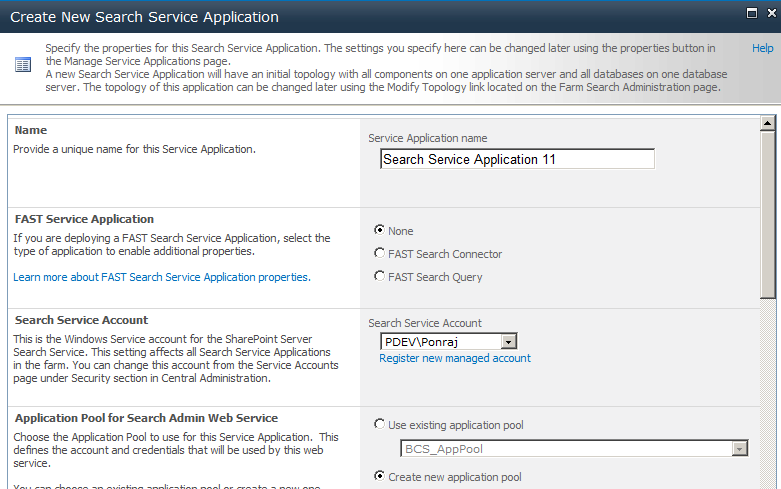
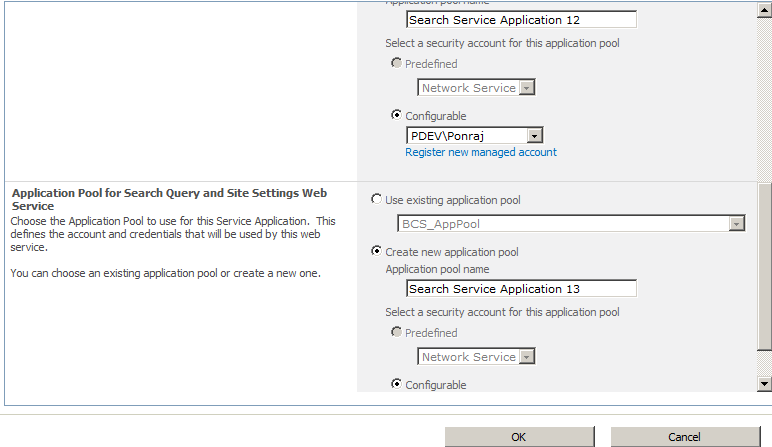
Search Service Application 11 will be created as shown below.
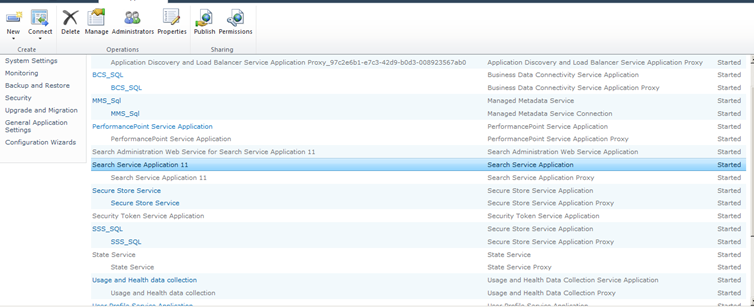
Select the “Search Service Application” and Click on “Manage” in top ribbon.
Next -> Click on Content Sources.
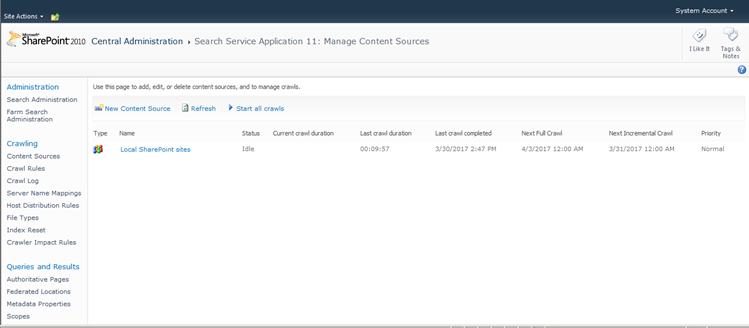
Click on the link “Local SharePoint Sites”.
Type the web application that need to be crawled in the Start Addresses text box.

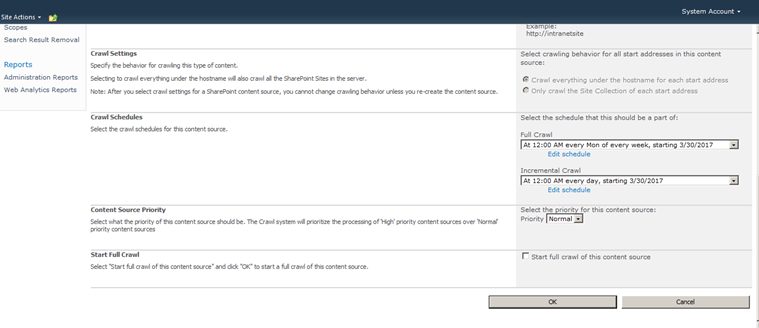
Click on Create Schedule on Full Crawl.
Enter the schedule details as below.
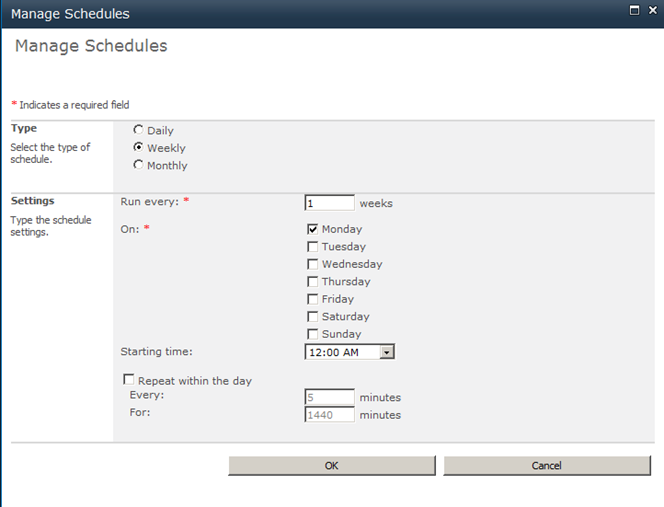
Click on Create Schedule in Incremental Crawl. Enter the details as below.
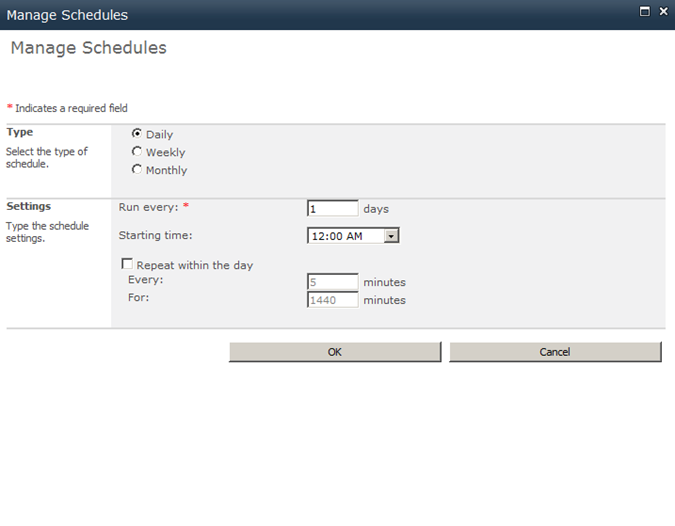
Check box the Start Full Crawl of this Content Source.
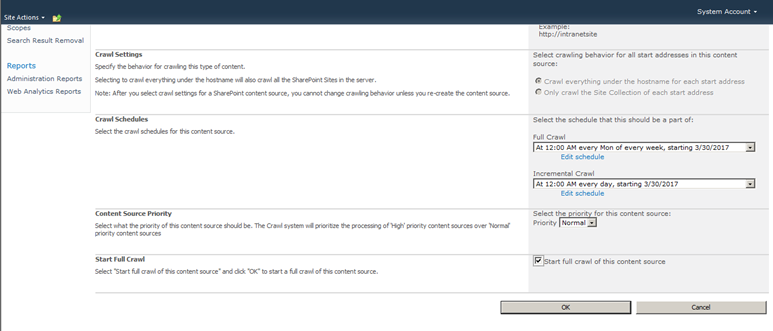
Click OK.
The site will now get crawled and all the Search content in Content database will be now moved on to the Search database.
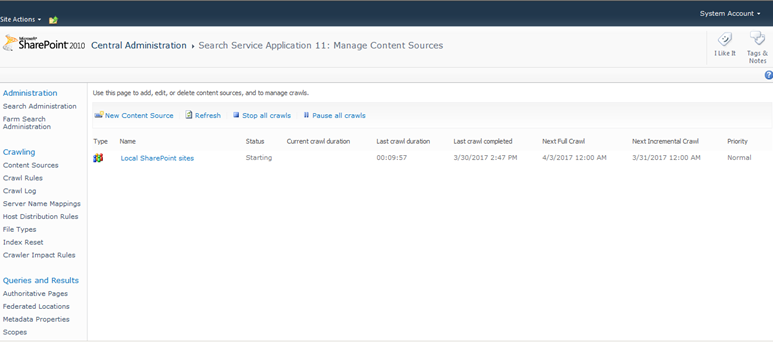
Once the Crawling gets completed, the status will change to “Idle”.
Go on to the site that is crawled and in Home page you can find the search box which allows to search based on Crawling.
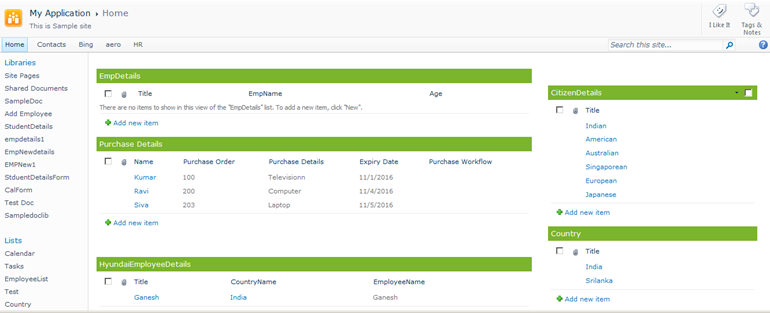
Enter employee in Search this site text box and press enter.
The search result will be shown as below in “/_layouts/OSSSearchResults.aspx” URL.
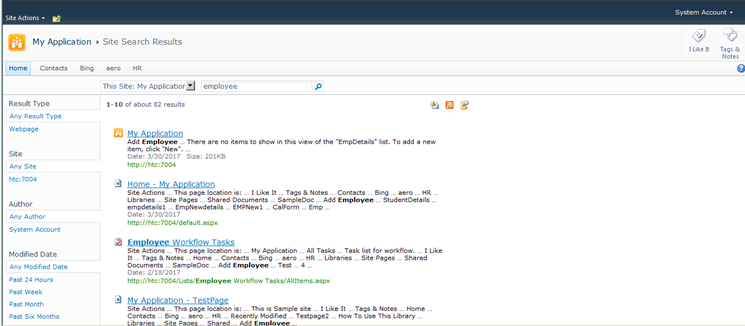
It allows to filter the search in various options and allow to create Custom scope for the search within the site collection.
CRUD operation in share point using JSOM
Document by Ganesanva@hotmail.com – + 919042710472
This blogs shows you an example for JavaScript Client side object model.
Create a List “EmployeeList” with below columns,
The List looks like below,
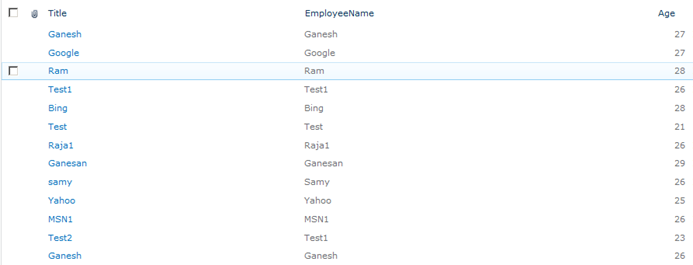
Create a text file “Saveitem.txt” and js file “Saveform.js” in Site Assets as shown below,
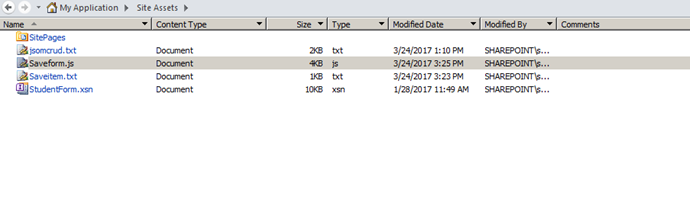
Put the below code in Saveitem.txt,
| <script src=”https://ajax.googleapis.com/ajax/libs/jquery/1.12.0/jquery.min.js”></script> <script type=”text/javascript” src=”/SiteAssets/Saveform.js”> </script> <table border=”0″ cellspacing=”2″ cellpadding=”2″> <tr> <td> Employee Name </td> <td> <input type=”text” id=”txtEmpName” /> </td> </tr> <tr> <td> Employee Age </td> <td> <input type=”text” id=”txtEmpAge” /> </td> </tr> <tr> <td> </td> <td> <input type=”hidden” id=”txtId” /> <input type=”Button” value=”Save” id=”btnSave” onclick=”createItem()” /> <input type=”Button” value=”Update” id=”btnUpdate” onclick=”updateItem()” /> </td> </tr> <tr> <td colspan=”2″> <table border=”0″ cellspacing=”2″ cellpadding=”2″ id=”tbldata”> <thead> <tr> <td> Id </td> <td> Employee Name </td> <td> Employee Age </td> </tr> </thead> <tbody> </tbody> </table> </td> </tr> </table> |
Put the below code in “Saveform.js”,
| $(document).ready(function(){ $(‘#btnUpdate’).hide(); SP.SOD.executeFunc(‘sp.js’, ‘sp.runtime’, retrieveListItems); }); function editvalue(element) { var Id=element.parentNode.parentElement.cells[0].outerText; var EmpName=element.parentNode.parentElement.cells[1].outerText; var Age=element.parentNode.parentElement.cells[2].outerText; $(‘#txtId’).val(Id); $(‘#txtEmpName’).val(EmpName); $(‘#txtEmpAge’).val(Age); $(‘#btnUpdate’).show(); $(‘#btnSave’).hide(); } function updateItem() { var context = new SP.ClientContext.get_current(); var web = context.get_web(); var list = web.get_lists().getByTitle(‘EmployeeList’); var listItem = list.getItemById($(‘#txtId’).val()); listItem.set_item(“Title”, $(‘#txtEmpName’).val()); listItem.set_item(“EmployeeName”, $(‘#txtEmpName’).val()); listItem.set_item(“Age”, $(‘#txtEmpAge’).val()); listItem.update(); //Update the List Item context.load(listItem); context.executeQueryAsync(onGetUserNameSuccess, onGetUserNameFail); } function createItem() { var context = new SP.ClientContext.get_current(); var web = context.get_web(); var list = web.get_lists().getByTitle(‘EmployeeList’); var listCreationInformation = new SP.ListItemCreationInformation(); //Object for creating Item in the List var listItem = list.addItem(listCreationInformation); listItem.set_item(“Title”, $(‘#txtEmpName’).val()); listItem.set_item(“EmployeeName”, $(‘#txtEmpName’).val()); listItem.set_item(“Age”, $(‘#txtEmpAge’).val()); listItem.update(); //Update the List Item context.load(listItem); context.executeQueryAsync(onGetUserNameSuccess, onGetUserNameFail); } function onGetUserNameSuccess() { $(‘#txtEmpName’).val(”); $(‘#txtEmpAge’).val(”); $(‘#btnUpdate’).hide(); $(‘#btnSave’).show(); alert(‘Success’); retrieveListItems(); } // This function is executed if the above call fails function onGetUserNameFail(sender, args) { alert(‘Failed to get user name. Error:’ + args.get_message()); } var siteUrl = ‘http://htc:7004/’; function retrieveListItems() { var clientContext = new SP.ClientContext.get_current(); var oList = clientContext.get_web().get_lists().getByTitle(‘EmployeeList’); var camlQuery = new SP.CamlQuery(); camlQuery.set_viewXml(‘<View><Query></Query></View>’); this.collListItem = oList.getItems(camlQuery); clientContext.load(collListItem); clientContext.executeQueryAsync(Function.createDelegate(this, this.onQuerySucceeded), Function.createDelegate(this, this.onQueryFailed)); } function onQuerySucceeded(sender, args) { var listItemEnumerator = collListItem.getEnumerator(); $(‘#tbldata tbody’).empty(); while (listItemEnumerator.moveNext()) { var oListItem = listItemEnumerator.get_current(); $(‘#tbldata tbody’).append(‘<tr class=”child”><td>’+oListItem.get_item(‘ID’) +'</td><td>’+oListItem.get_item(‘Title’) +'</td><td>’+oListItem.get_item(‘Age’) +'</td>’+'<td>’+ ‘<input type=\”Button\” value=\”Edit\” onclick=\”editvalue(this)\” /></td></tr>’); } } function onQueryFailed(sender, args) { alert(‘Request failed. ‘ + args.get_message() + ‘\n’ + args.get_stackTrace()); } |
Create a page in Site pages library and edit the page,
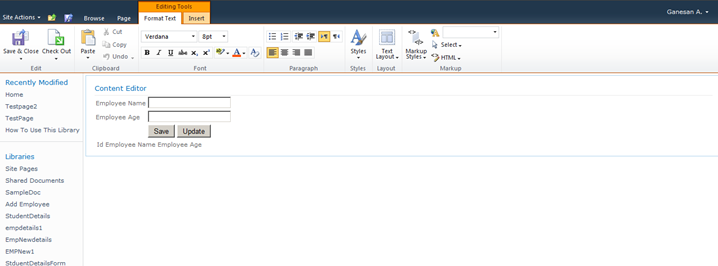
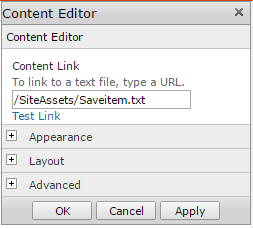
Put “/SiteAssets/Saveitem.txt” in Content Editor web part.
Output as below,
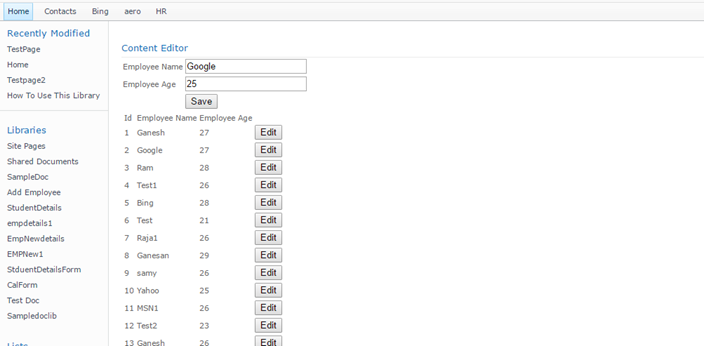
Click on Save.
Click on Edit.
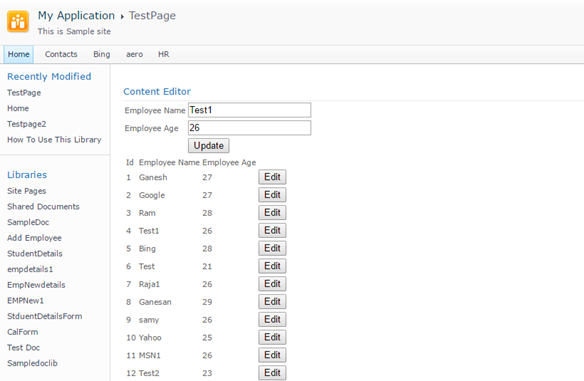
Click Update.
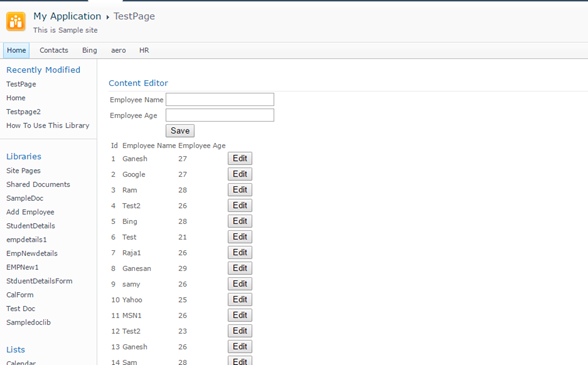
Click here to download the solution,
https://1drv.ms/u/s!ArddhCoxftkQg9VWsy-V87mHMy6C1g
CRUD operation in SharePoint using Power shell commands
Document by Ganesanva@hotmail.com – + 919042710472
Create a List “EmployeeList” with below columns.

The List looks as below,
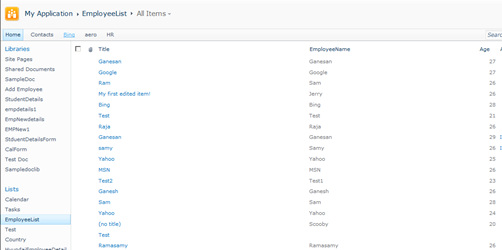
Create a power shell script CRUD.ps1 with below code,
| Add-PSSnapin Microsoft.SharePoint.PowerShell -ErrorAction SilentlyContinue $web = Get-SPWeb http://htc:7004/ $list = $web.Lists[“EmployeeList”] $option = Read-Host ‘Enter Option 1.Create item 2.Update item 3.Read item’ if($option -eq 1) { #Create a new item $newItem = $list.Items.Add() $Title = Read-Host ‘Enter Title’ $EmployeeName = Read-Host ‘Enter Employee Name’ #Add properties to this list item $newItem[“Title”] = $Title $newItem[“EmployeeName”] = $EmployeeName #Update the object so it gets saved to the list $newItem.Update() echo ‘item updation Done’ } if($option -eq 2) { #Get all items in this list and save them to a variable $items = $list.items $Titlevalue = Read-Host ‘Enter Title value to update’ #Go through all items foreach($item in $items) { #If the “Title” column value equals “My first item!” do something with it if($item[“Title”] -eq $Titlevalue) { $Title = Read-Host ‘Enter Title’ $EmployeeName = Read-Host ‘Enter Employee Name’ #Change the value of the “Title” column $item[“Title”] = $Title $item[“EmployeeName”] = $EmployeeName #Update the item $item.Update() } } echo ‘item updation Done’ } if($option -eq 3) { $items = $list.items #Go through all items foreach($item in $items) { write-host “`n” write-host “Title:”$item[“Title”] write-host “Employee Name:” $item[“EmployeeName”] } } |
Open Windows PowerShell ISE from Start menu.
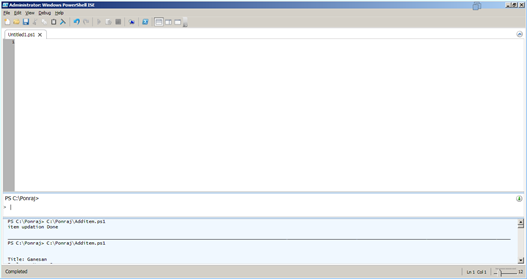
If windows PowerShell ISE not found in start menu do the below steps.
Simply, go and add this feature:
add PowerShell ise: here is the steps:
Open Server Manager
2. Click the Features node
3. Click the Add Features link
4. Check the box for “Windows PowerShell Integrated Scripting Environment”.
5. Click Next, then Install
6. Wait until installation is complete
7. Open PowerShell ISE from Programs>Accessories>PowerShell folder
Open the CRUD.PS1 from File -> Open in Windows PowerShell ISE.
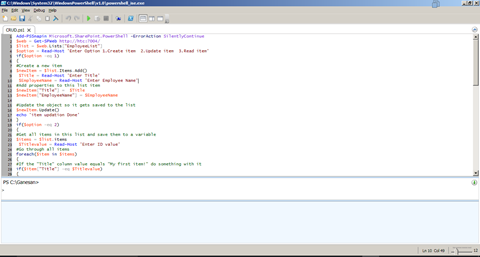
Output as below:
Click on the Play button.

Enter “1”
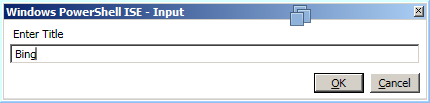
Click OK.
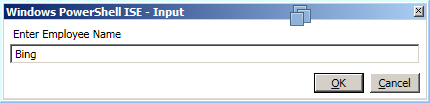
Click Ok.
The Output windows shows as below,
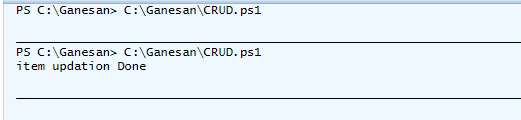
The item gets added in List as below,
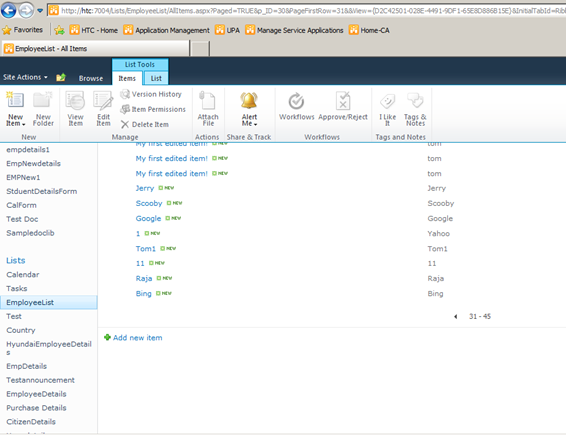
Run again and select the Option “2”.

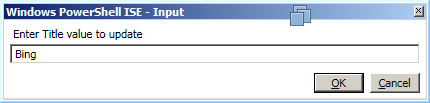
Checks for Title equals “Bing”

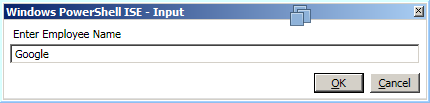
Now the item Bing gets updated to Google in the list.
Run the Script again and enter option “3”.
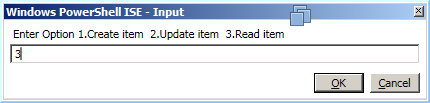
The output will be printed as below,
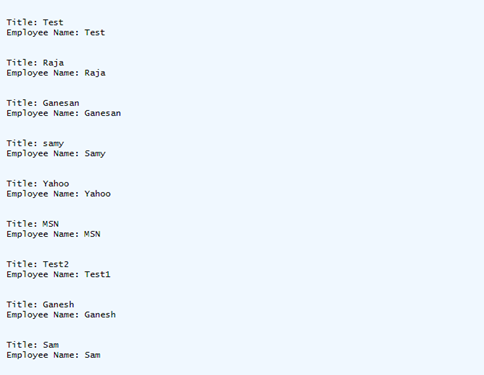
Click below to download the solution,
https://1drv.ms/u/s!ArddhCoxftkQg9VV49MnJI30l3tRsA
CRUD Operation using Server object model in Console Application
Create a List “Student Details” in Share point as shown below,
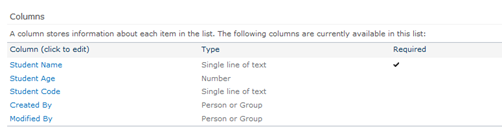

Create a new Console Application as shown below,
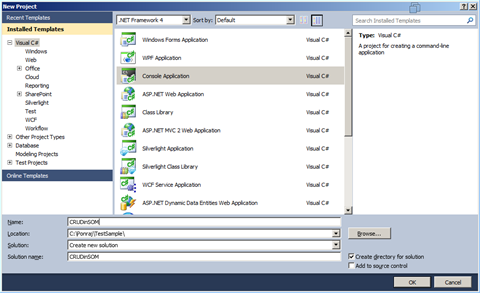
Click Ok.
Add References in the Solution as shown in Solution Explorer,
Replace the Class Program with the below code,
| class Program { static void Main(string[] args) { string siteUrl = “http://htc:7004/”; using (SPSite site = new SPSite(siteUrl)) // Site Collection { using (SPWeb web = site.OpenWeb()) // Site { SPList list = web.Lists[“Student Details”]; // List SPQuery curQry = new SPQuery(); curQry.Query = “”; startconsole: Console.WriteLine(“Enter your Option:”); Console.WriteLine(“1. Create New item in Student Details List”); Console.WriteLine(“2. Update item in Student Details List”); Console.WriteLine(“3. Get list of items in Student Details List”); Console.WriteLine(“Enter 1 or 2 or 3”); int optionvalue = Convert.ToInt32(Console.ReadLine()); if (optionvalue == 1) { Console.WriteLine(“Enter EStudent Name”); string EmpName = Console.ReadLine(); Console.WriteLine(“Enter Student Age”); string Age = Console.ReadLine(); Console.WriteLine(“Enter Student Code”); string Code = Console.ReadLine(); SPListItem oListItem = list.Items.Add(); oListItem[“Title”] = EmpName; oListItem[“Student_x0020_Age”] = Age; oListItem[“Student_x0020_Code”] = Code; oListItem.Update(); Console.WriteLine(“Inserted successfully”); } else if (optionvalue == 2) { //Get the Items using Query SPListItemCollection olistitemcollection = list.GetItems(curQry); Console.WriteLine(“Id” + “\t” + “Name” + “\t” + “Age” + “\t” + “Code”); foreach (SPListItem oitem in olistitemcollection) { Console.WriteLine(Convert.ToString(oitem[“ID”]).Trim() + “\t” + Convert.ToString(oitem[“Title”]).Trim() + “\t” + oitem[“Student_x0020_Age”] + “\t” + oitem[“Student_x0020_Code”]); } Console.WriteLine(“Enter Id to update”); int id = Convert.ToInt32(Console.ReadLine()); Console.WriteLine(“Enter EStudent Name”); string EmpName = Console.ReadLine(); Console.WriteLine(“Enter Student Age”); string Age = Console.ReadLine(); Console.WriteLine(“Enter Student Code”); string Code = Console.ReadLine(); SPListItem oListItem = list.Items.GetItemById(id); oListItem[“Title”] = EmpName; oListItem[“Student_x0020_Age”] = Age; oListItem[“Student_x0020_Code”] = Code; oListItem.Update(); Console.WriteLine(“Updated successfully”); } else if (optionvalue == 3) { Console.WriteLine(“List of items as below”); SPListItemCollection olistitemcollection = list.GetItems(curQry); Console.WriteLine(“Id” + “\t” + “Name” + “\t” + “Age” + “\t” + “Code”); foreach (SPListItem oitem in olistitemcollection) { Console.WriteLine(Convert.ToString(oitem[“ID”]).Trim() + “\t” + Convert.ToString(oitem[“Title”]).Trim() + “\t” + oitem[“Student_x0020_Age”] + “\t” + oitem[“Student_x0020_Code”]); } } Console.WriteLine(“Do you want to repeat the option Y/N?”); string optionresult = Console.ReadLine(); if (optionresult == “Y”) { goto startconsole; } } } } } |
Output as shown below,
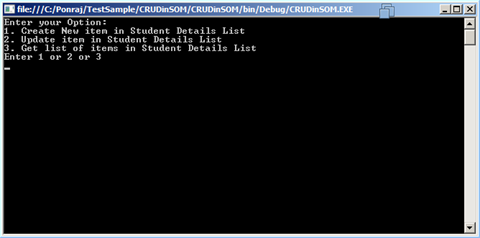
Enter Option 3
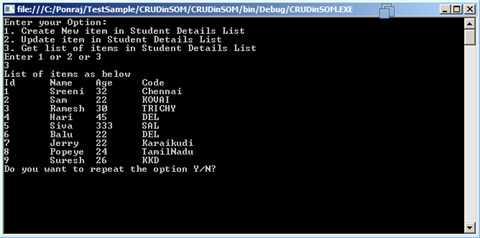
Enter Y
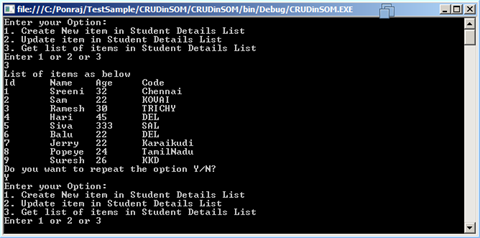
Enter Option 2
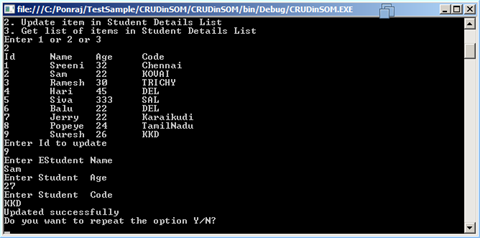
Enter Y and enter Option 1

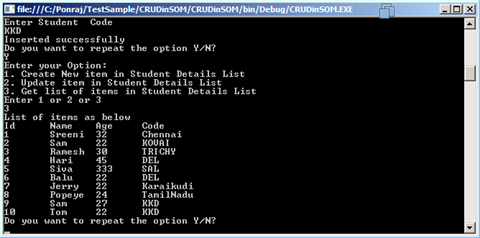
Click below link to download the solution,
https://1drv.ms/u/s!ArddhCoxftkQg9VMr5BmgrwH2-FzMA
CRUD operation in Client side object model C#.net
Document by Ganesanva@hotmail.com – + 919042710472
This Blog helps you to do CSOM Crud operation in SharePoint 2010 using Managed C# code.
Create a List “Student Details” in Share point as shown below,

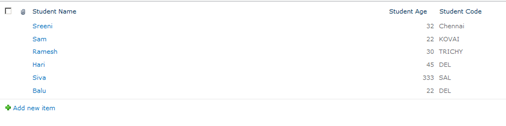
Create a new Console Application as shown below,
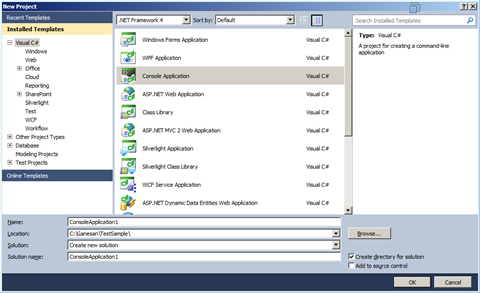
Click Ok.
Add References in the Solution as shown in Solution Explorer,
Replace the Class Program with the below code,
| class Program { static void Main(string[] args) { string siteUrl = “http://htc:7004/”; ClientContext clientContext = new ClientContext(siteUrl); List oList = clientContext.Web.Lists.GetByTitle(“Student Details”); startconsole: Console.WriteLine(“Enter your Option:”); Console.WriteLine(“1. Create New item in Student Details List”); Console.WriteLine(“2. Update item in Student Details List”); Console.WriteLine(“3. Get list of items in Student Details List”); Console.WriteLine(“Enter 1 or 2 or 3”); int optionvalue = Convert.ToInt32(Console.ReadLine()); if (optionvalue == 1) { Console.WriteLine(“Enter EStudent Name”); string EmpName = Console.ReadLine(); Console.WriteLine(“Enter Student Age”); string Age = Console.ReadLine(); Console.WriteLine(“Enter Student Code”); string Code = Console.ReadLine(); ListItemCreationInformation itemCreateInfo = new ListItemCreationInformation(); ListItem oListItem = oList.AddItem(itemCreateInfo); oListItem[“Title”] = EmpName; oListItem[“Student_x0020_Age”] = Age; oListItem[“Student_x0020_Code”] = Code; oListItem.Update(); clientContext.ExecuteQuery(); Console.WriteLine(“Inserted successfully”); } else if (optionvalue == 2) { CamlQuery oquery = new CamlQuery(); ListItemCollection oListItemCollection = oList.GetItems(oquery); clientContext.Load(oListItemCollection); clientContext.ExecuteQuery(); Console.WriteLine(“Id” + “\t” + “Name” + “\t” + “Age” + “\t” + “Code”); foreach (ListItem oitem in oListItemCollection) { Console.WriteLine(Convert.ToString(oitem[“ID”]).Trim() + “\t” + Convert.ToString(oitem[“Title”]).Trim() + “\t” + oitem[“Student_x0020_Age”] + “\t” + oitem[“Student_x0020_Code”]); } Console.WriteLine(“Enter Id to update”); int id = Convert.ToInt32(Console.ReadLine()); Console.WriteLine(“Enter EStudent Name”); string EmpName = Console.ReadLine(); Console.WriteLine(“Enter Student Age”); string Age = Console.ReadLine(); Console.WriteLine(“Enter Student Code”); string Code = Console.ReadLine(); ListItemCreationInformation itemCreateInfo = new ListItemCreationInformation(); ListItem oListItem = oList.GetItemById(id); oListItem[“Title”] = EmpName; oListItem[“Student_x0020_Age”] = Age; oListItem[“Student_x0020_Code”] = Code; oListItem.Update(); clientContext.ExecuteQuery(); Console.WriteLine(“Updated successfully”); } else if (optionvalue == 3) { CamlQuery oquery = new CamlQuery(); ListItemCollection oListItemCollection = oList.GetItems(oquery); clientContext.Load(oListItemCollection); clientContext.ExecuteQuery(); Console.WriteLine(“List of items as below”); Console.WriteLine(“Id” + “\t” + “Name” + “\t” + “Age” + “\t” + “Code”); foreach (ListItem oitem in oListItemCollection) { Console.WriteLine(Convert.ToString(oitem[“ID”]).Trim() + “\t” + Convert.ToString(oitem[“Title”]).Trim() + “\t” + oitem[“Student_x0020_Age”] + “\t” + oitem[“Student_x0020_Code”]); } } Console.WriteLine(“Do you want to repeat the option Y/N?”); string optionresult = Console.ReadLine(); if (optionresult == “Y”) { goto startconsole; } } } |
Output as shown below,
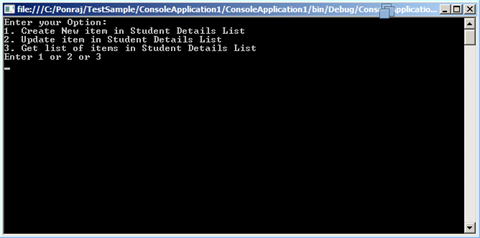
Enter Option 1,
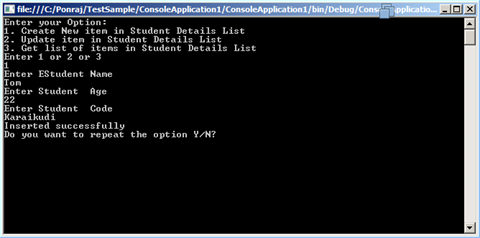
Enter Option 3
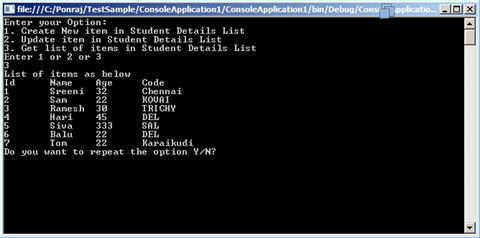
Enter Option Y
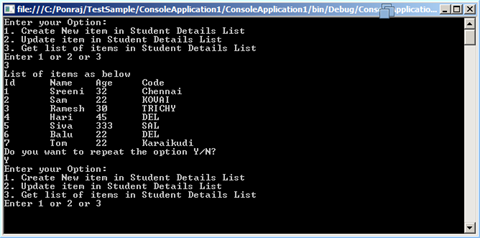
Enter Option 2

Enter N to exit
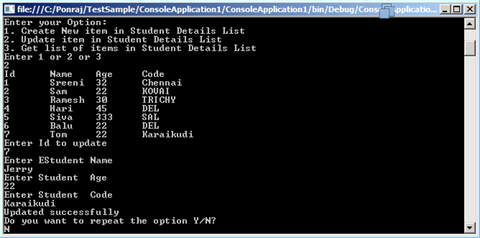
Click below to download the solution,
https://1drv.ms/u/s!ArddhCoxftkQg9VJ4aFU07BD91QxkA
Planning a Better Career in Life with Dot Net Training Programs
Software training courses are necessary for the students who want to get better jobs in leading companies. They mainly aim at imparting the skills required for a project to complete it on time with high accuracy levels. There are different types of programs available for final year students to nourish their abilities effectively. Dot net is a software framework introduced by Microsoft that aims at enhancing the interactive capability of the websites with synchronized details. It is widely used platform for data access, cryptography, networking communication and other purposes to get desired results. Students willing to become .net expert in their life must focus on attending a training program in a reputed institute for increasing the skills efficiently.
On the other hand, identifying a coaching center is not an easy going job which requires proper research. The internet today provide methods for knowing details of the best dot net training institute in Chennai easily for selecting a course accordingly. This will help in developing the abilities of a student with professional teams for achieving better results. They even offer .net training courses with real- time projects enabling the students to achieve their goals. Most coaching centers cover modern facilities for learning lessons in a comfortable environment to focus more on their objective. In addition to that, they conduct training programs online with experienced teachers for getting more benefits. Dot net coaching is extremely useful for those who want to start a bright career in their life.
Moreover, it plays a significant role in improving the capabilities of working employees to upgrade their knowledge. Different types of programs are available for the students to select a right one depending upon the needs. The .net training in Chennai makes it possible for the freshers to sharpen their skills with highly qualified instructors. It involves various modules allowing the students to gain more exposure. Another advantage of undergoing a training course is that it gives ways for acquiring a certificate at flexible prices. The coaching programs are an ideal one for passing the interview test in reputed companies. Furthermore, they help to learn the lessons with the study materials and expert mentors by addressing essential needs.
Dot net training institute offer courses to students with flexible batch timings to ensure more advantages. It is necessary to know the syllabus and other details of a course before the joining procedure. Dot net training institute in Chennai allows the students to experience a better learning in a comfortable environment. Apart from that, it helps to carry out the tasks correctly by minimizing the errors and mistakes. Dot net course Chennai is a must one for the college students to get placed in various companies with high salaries. It is possible to evaluate the needs of students with the course for making them more effective in a project. The online courses are an ideal choice for those who want to learn the lessons in their home and other places for obtaining a certificate at the earliest.
Create External List using BCS in share point 2010
Go to Application Management -> Manage Service Applications as shown below.
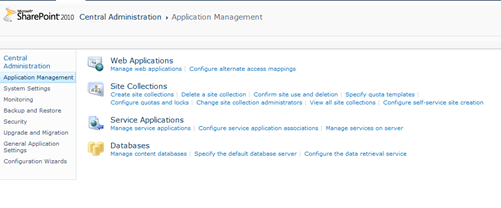
Click on New ->Business Data Connectivity Service
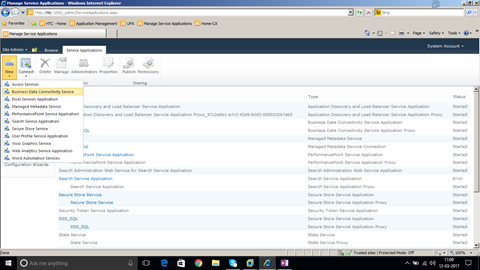
Enter Service Application Name and Click OK.
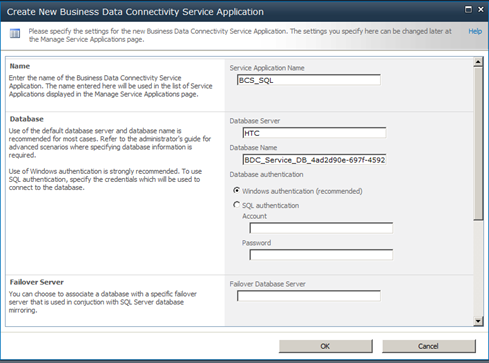
Business Data Connectivity Service application is created as shown below,
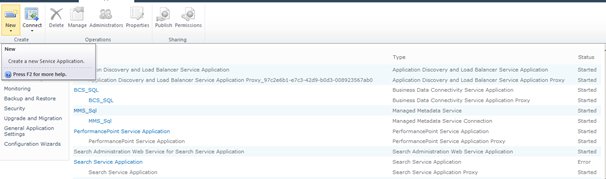
Create New -> Secure Store Service application as shown below,
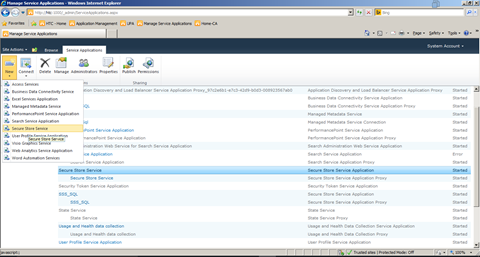
Enter the name “Secure Store Service” and Click Ok.
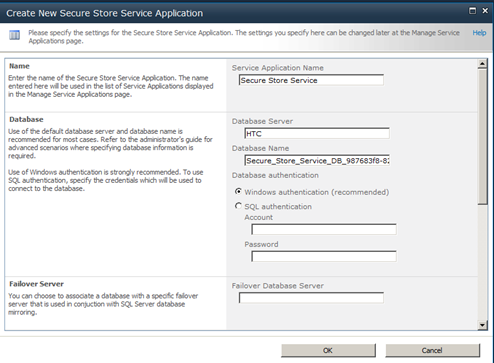
Secure Store service is created as shown below.
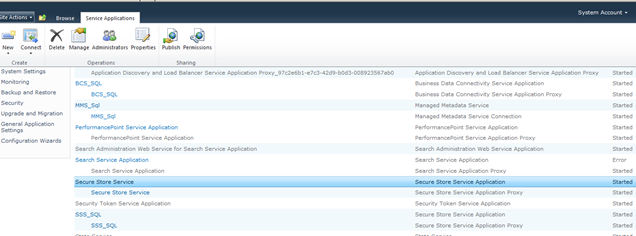
Business Connectivity service and Secure store service are the prerequisites for Creating BCS in SharePoint.
Open site in SharePoint Designer as shown below.
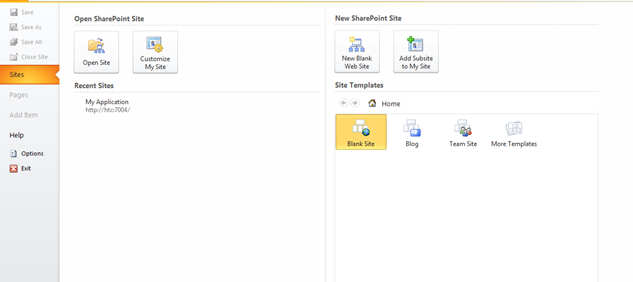
Open Sql Server and Create a Database StudentDB.
Create a Table EmployeeDB with below Script,
| CREATE TABLE [dbo].[EmployeeDB]( [EmployeeID] [int] IDENTITY(1,1) NOT NULL, [EmployeedName] [text] NULL, [EmployeedSalary] [float] NULL, CONSTRAINT [PK_EmployeeDB] PRIMARY KEY CLUSTERED ( [EmployeeID] ASC )WITH (PAD_INDEX = OFF, STATISTICS_NORECOMPUTE = OFF, IGNORE_DUP_KEY = OFF, ALLOW_ROW_LOCKS = ON, ALLOW_PAGE_LOCKS = ON) ON [PRIMARY] ) ON [PRIMARY] TEXTIMAGE_ON [PRIMARY] |
Table Design looks as below,
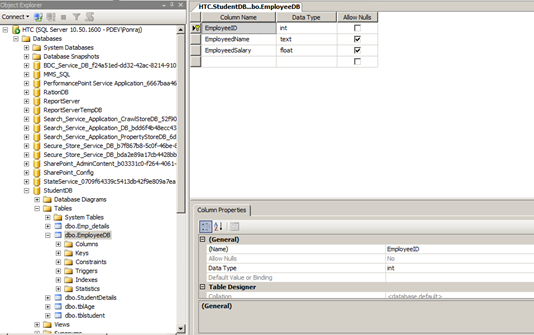
Go to External Content types option in SPD as shown below,
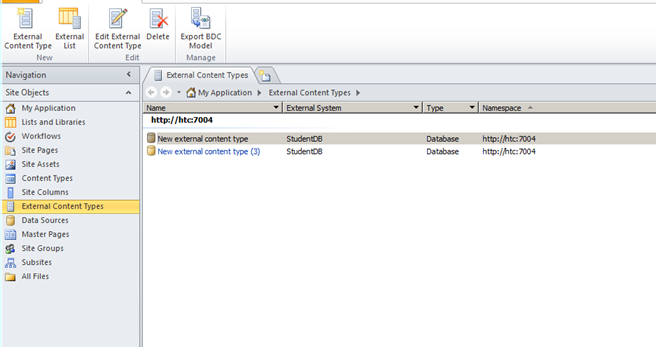
Click on External Content Type button in Top menu. The designer looks as below,
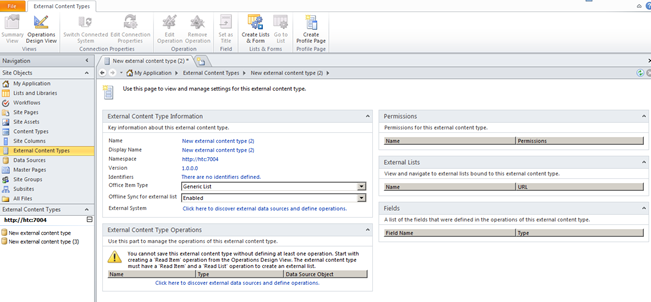
Click on the option “Click here to discover external data sources and define operations” under External Content Type Operations.
The designer looks as below,
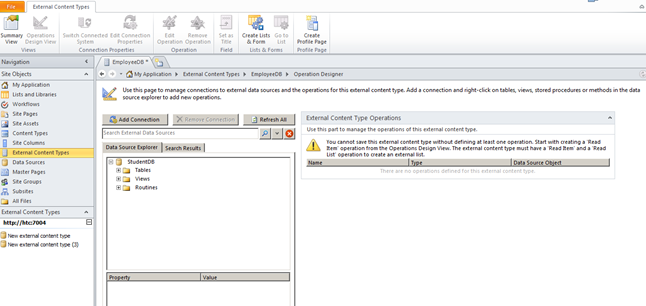
Click on Add Connection.
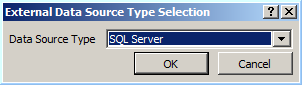
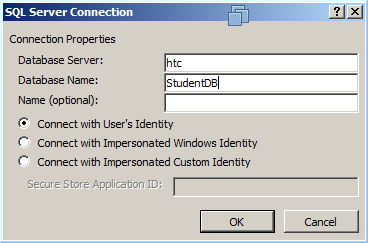
Click OK.
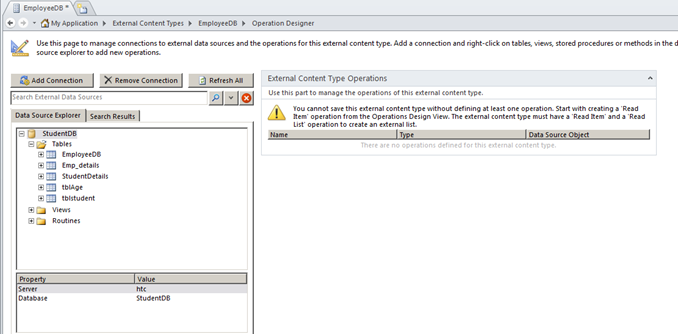
Right Click on the Table and Select Create all operations as shown below.
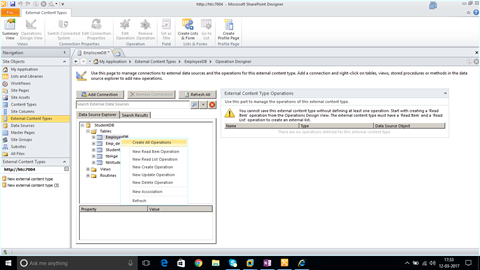
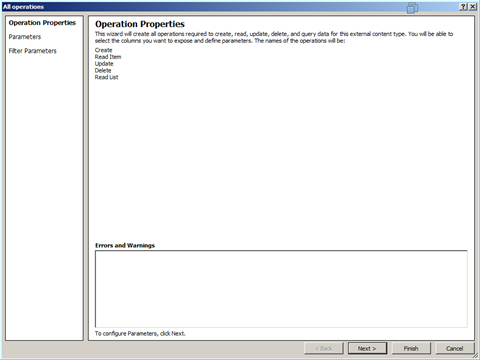
Click on Next.
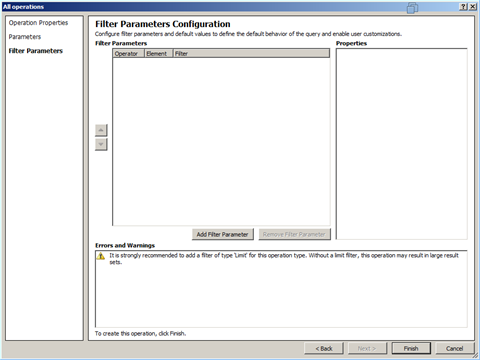
Click on Finish.
Save the Content Type in the Name EmployeeDB as shown below.
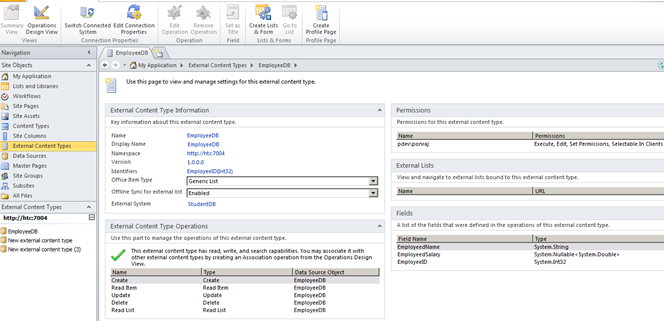
Open the SharePoint Site http://htc:7004/ in Browser.
Click on Site Action -> Site Content.
Click on Create.

Click on External List.
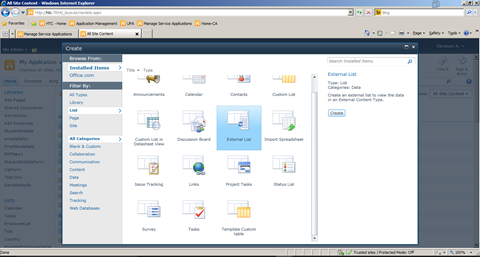
Click Create.
Select the Content type from the list.
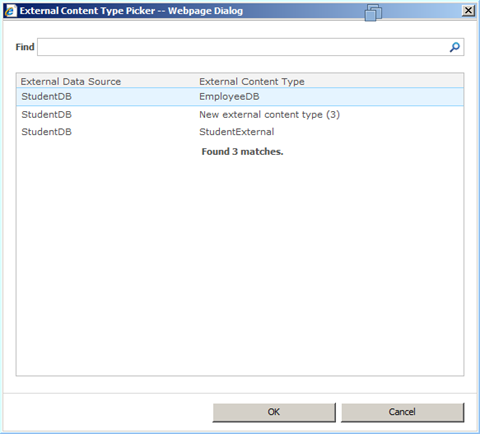
Click Ok.
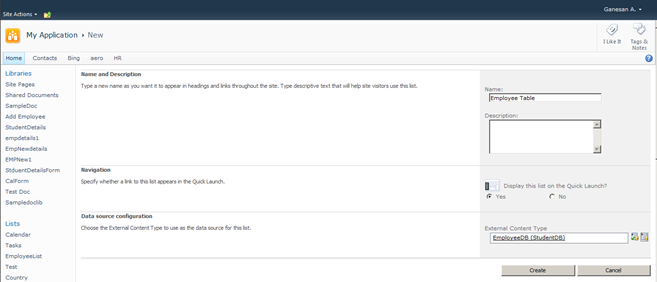
Give name as Employee Table and Click on Create.
The Output as below,
External List is created as shown below.
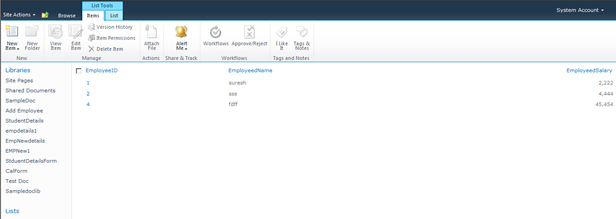
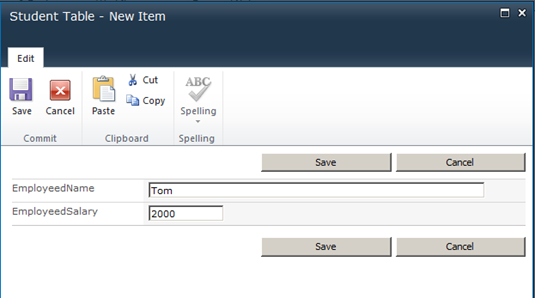
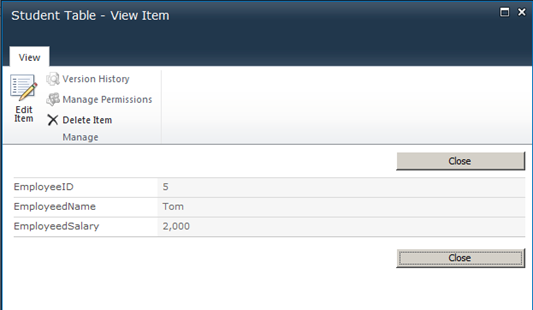
Now the External List allow CRUD Operation.
Dot net CRUD operation with Ms access database
Save the MS access db as db1.mdb file (Access 2000 Database file format) as shown below.
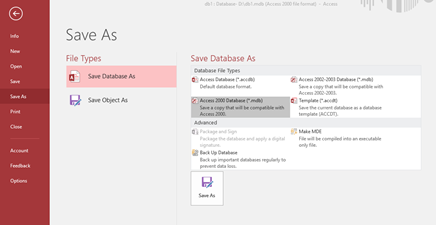
-
Create a table tblUserDetails in MS access with below columns.
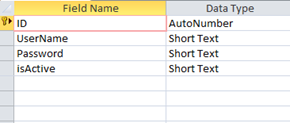
Create a table tblStudentDetails with the below columns.
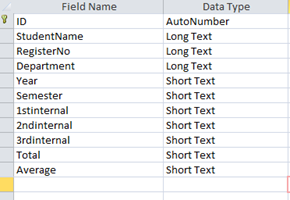
Create a new windows Application project MsAccessCRUD
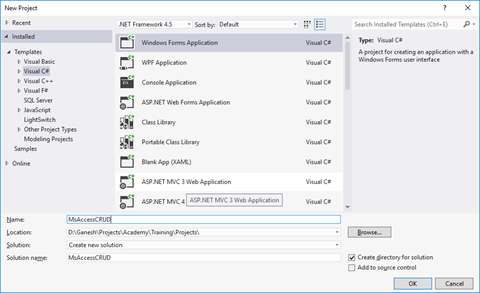
Add a windows form AddLoginDetails.cs
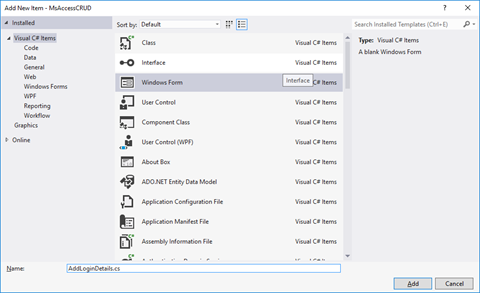
Design the form as below,
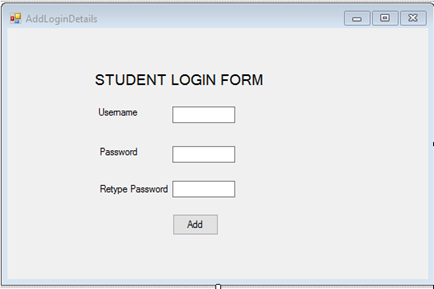
Replace the AddLoginDetails class file as below,
| public partial class AddLoginDetails : Form { public AddLoginDetails() { InitializeComponent(); } private void btnLogin_Click(object sender, EventArgs e) { System.Data.OleDb.OleDbConnection conn = new System.Data.OleDb.OleDbConnection(); conn.ConnectionString = @”Provider=Microsoft.Jet.OLEDB.4.0;” + @”Data source= D:\db1.mdb”; OleDbCommand cmd = new OleDbCommand(); cmd.CommandType = CommandType.Text; cmd.CommandText = @”Insert Into tblUserDetails(UserName,[Password])VALUES(‘”+txtUserName.Text+”‘,'”+txtPassword.Text+”‘)”; cmd.Connection = conn; conn.Open(); cmd.ExecuteNonQuery(); System.Windows.Forms.MessageBox.Show(“Record Successfully Created”); StudentLogin objStudentLogin = new StudentLogin(); objStudentLogin.Show(); this.Hide(); conn.Close(); } } |
Add New form StudentLogin.cs and design as below,
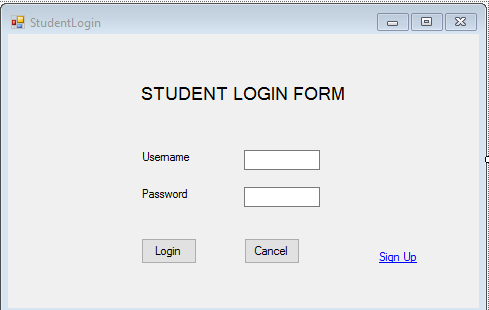
Replace the StudentLogin Class with below code,
| public partial class StudentLogin : Form { public StudentLogin() { InitializeComponent(); } private void Button2_Click(object sender, EventArgs e) { // txtUserName.Text System.Data.OleDb.OleDbConnection conn = new System.Data.OleDb.OleDbConnection(); conn.ConnectionString = @”Provider=Microsoft.Jet.OLEDB.4.0;” + @”Data source= D:\db1.mdb”; OleDbCommand cmd = new OleDbCommand(); cmd.CommandType = CommandType.Text; cmd.CommandText = @”select * from tblUserDetails where Password='” +txtPassword.Text +”‘”; cmd.Connection = conn; conn.Open(); OleDbDataReader OleDBDR = cmd.ExecuteReader(); while (OleDBDR.Read()) { string value= OleDBDR[0].ToString(); System.Windows.Forms.MessageBox.Show(“Login Successful”); ShowStudentDetails objform = new ShowStudentDetails(); objform.Show(); this.Hide(); } conn.Close(); } private void Button1_Click(object sender, EventArgs e) { } private void linkLabel1_LinkClicked(object sender, LinkLabelLinkClickedEventArgs e) { AddLoginDetails obj = new AddLoginDetails(); obj.Show(); this.Hide(); } } |
Add a new form ShowStudentDetails.cs and design the form as below,

Replace the ShowStudentDetails.cs class file with below code,
| public partial class ShowStudentDetails : Form { public ShowStudentDetails() { InitializeComponent(); } private void ShowStudentDetails_Load(object sender, EventArgs e) { System.Data.OleDb.OleDbConnection conn = new System.Data.OleDb.OleDbConnection(); conn.ConnectionString = @”Provider=Microsoft.Jet.OLEDB.4.0;” + @”Data source= D:\db1.mdb”; OleDbCommand cmd = new OleDbCommand(); cmd.CommandType = CommandType.Text; cmd.CommandText = @”select * from tblStudentDetails”; cmd.Connection = conn; conn.Open(); OleDbDataAdapter ada = new OleDbDataAdapter(cmd); DataSet ds = new DataSet(); ada.Fill(ds); dgvStudentdetails.DataSource = ds.Tables[0]; conn.Close(); } } |
The solution explorer will look as below,
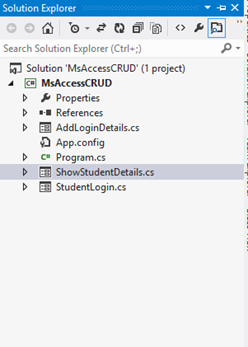
Replace the connection string for Ms access database before running the solution, now its d:\db1.mdb
The Output as below,
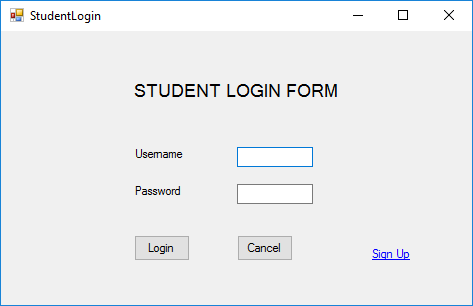
Click on Sign Up,

Click Add.
Ms Access DB as below,
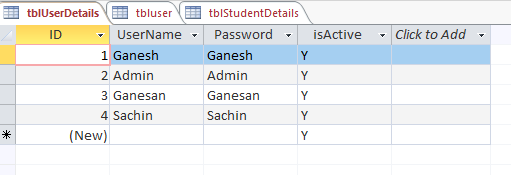
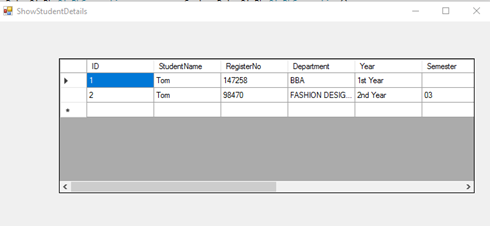
Click below to download the solution,
Maria Academy – Best Dot net Training Institute in Chennai
Maria Academy is highly professionalized and experienced in providing best Dot net training courses in Chennai. Out of all other, why exactly .Net? As a platform, .Net has a lot of advantages over other platforms just like how we an edge over all others providing .Net training courses in Chennai. To list few, .Net allows multiple languages, horizontal scalability, easier interface and consistent Ul practices. With growing scope of .Net in various business functions like CRM, Supply management, Finance, having a grip on .Net is going to be a huge add on to your knowledge hub. Knowing dot net is known to double your chances of getting right into the field. With the growing competition if your hunt for best Dot net training institute has just begun, without any further hesitations, enter our premises for best dot net training and gain multiple advantages.
With training comes knowledge and with us it’s experienced and processed knowledge that is going to reach you. We at Maria Academy are proudly holding a team of highly qualified and experienced faculty team for your best dot net training. Be it basics or ProLevel, we will always ensure you an excellent coverage and training. We are offering you a wonderful opportunity to do your .Net courses with our easily approachable and simple team who have produced brilliant results and have always ensured smoother running of all our training institutes. We believe in providing a quicker and easier understanding and aid your learning process more effectively.
We provide a complete course on dot net that prepares you to directly get on to working with dot net with ease and perfection. We also ensure you a trouble-free admission and learning process and a friendly environment for your course period. At Maria Academy your goal becomes our duty, and your betterment becomes our goal. We will tirelessly work to ensure your learning process becomes easier and fruitful for your entry into the most competitive IT field. For best dot.net training courses and guidance instantly, feel free to reach us at our contact number.
We at Maria Academy have committed ourselves to provide best .Net training to ensure you with knowledge and experience. In this busy and huge city, our .Net training institutes are easily accessible and are located at various prime locations. Find our centres for dot net courses in Chennai here. With a very economical budget, you can easily complete your .Net course with added advantages and boost your career and multiply your chances of getting a good entry into Software field. Nothing worth comes easy, but an exception is our offer of dot net courses which comes easy Into your hands and gets your hands earn more and our hands responsible for your development. For further assistance and guidance on .Net, contact us.
MVC Training in Chennai
MVC training in Chennai has evolved by leaps and bounds in the last few years. Normally this course is designed as an 8 to 10 lecturer in a classroom session. There is a hand on lab exercises with the help of a live project which is evaluated by a trainer. To undertake this training you need to choose an institute of repute and the main point is that the learning environment has to be indeed good. They should provide you with a conducive learning environment where you can go on to understand the concepts of MVC in general. The training sessions needs to be a combination of theory and practical in details. It should be flexible and convenient as far as the timings are concerned. The course normally starts to begin with a demo view and an on student review. The instructors need to answer all the doubts of the student.
Real doting training is provided by most of the institutes in case of fresher’s to help them placed in software companies. The students are educated by the professional instructors in such a manner in the domain of Microsoft technologies so that they go on to become experts in this domain. Job assistance re provided to them so that they can stay ahead of the competition. From time to time workshops are conducted in the concept of .net technology. A good institute will not push the students into the course, and they are advised to undertake a free interactive session and then go on to decide which the best course of action is. All their efforts are channelized in the direction on how to go about fulfilling the dreams of the students.
What do you need to know about MVC in general?
MVC Training in Chennai is the best place to incorporate your skills in this domain. You can avail the services hands on of an experienced instructor and training on the latest version of MVC 5.0 is provided. In The focus is on theory and the main advantage of it over the web form is illustrated .Then one gets to know on to how to create a controller and then action. The MVC presentation has to start with some sort of diagram. When you are looking for something you tend to place a request that gets routed to a router. You need to understand the design pattern of MVC and then work on the module of ASP. NET framework and in this process, you tend to have an idea of developing lightweight web applications. You need to ensure that you have a suitable amount of walk thoughts and video tutorials as part of the program. Some of the features of this program are as follows
- You can modulate using the areas
- Work and develop areas that tend to be mobile compatible
- Have a clear cut idea about the benefits of MVC design in comparison to the traditional ASP. NET web forms
To undertake the course it is suggested that prior knowledge of HTML is needed.
Create Site Columns, Content Types, Bind content type to list in share point
Document by Vairavan – enquiry@softwaretraininginchennai.com – + 919042710472
Navigate to the Site URL http://htc:7004/
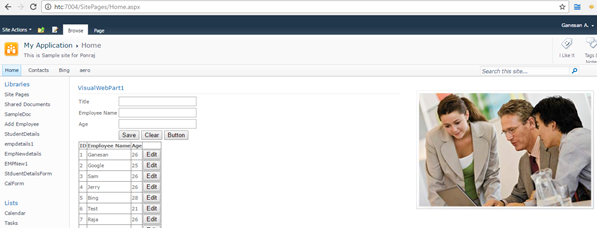
Click on Site Action -> Site Settings
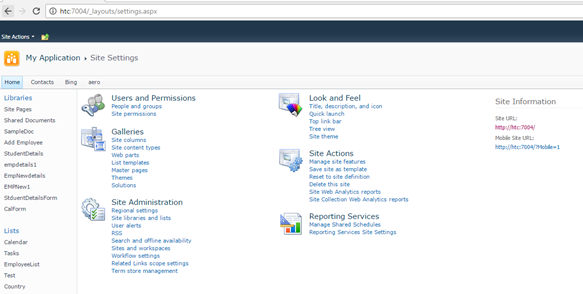
Click on Site Columns in Gallery.
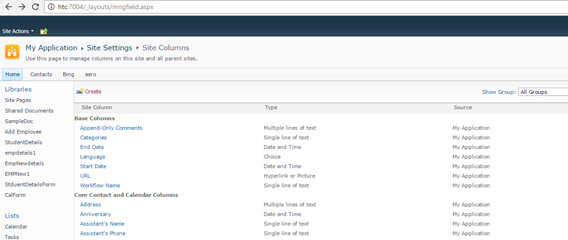
http://htc:7004/_layouts/mngfield.aspx
Click on Create.
Create a Site column with column name StudentName and type as Single Line of Text. Click Ok.
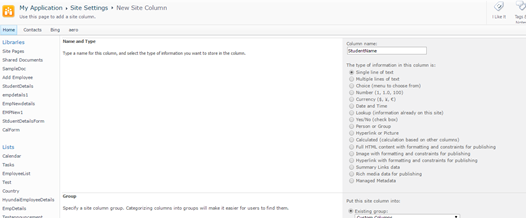
Create Site column Age with Number as DataType.
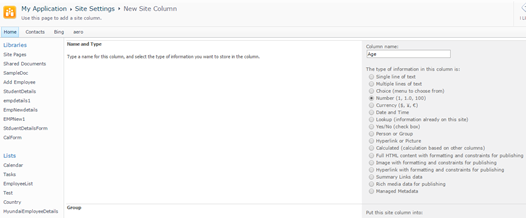
Create a site column Place with Choice
Chennai
Madurai
Trichy.
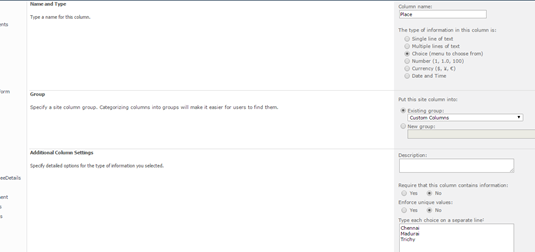
Navigate to Site Action –>Site Settings
Click on Site Content Types in Gallery.
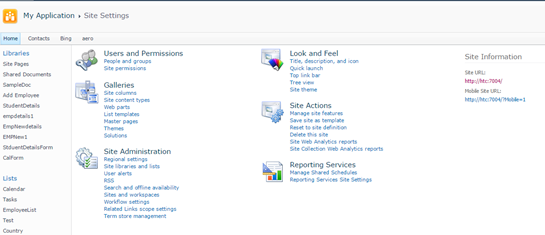
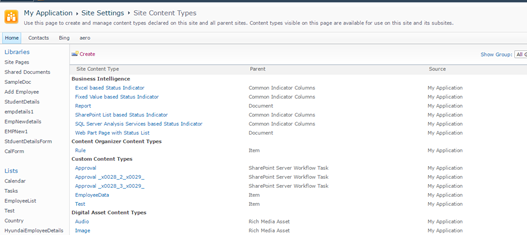
Click on Create.Create a site content type with name as StudentDetails and Parent Content Type from as
List Content Type and Parent Content Type as Item.
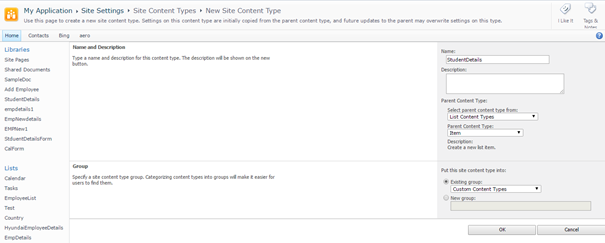
Click Ok.
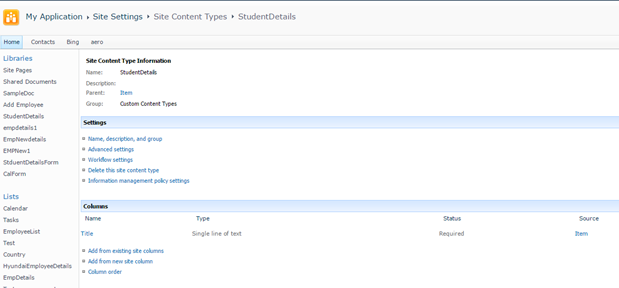
Click on Add from Existing Site column.
Select Custom Columns in the dropdown.
Add StudentName,Age,Place to Columns to add.Click on Add.
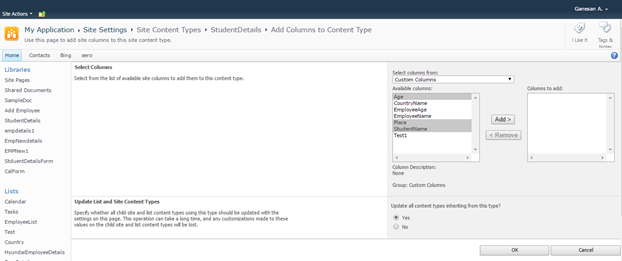
Click Ok.
Create a Custom List as shown below.
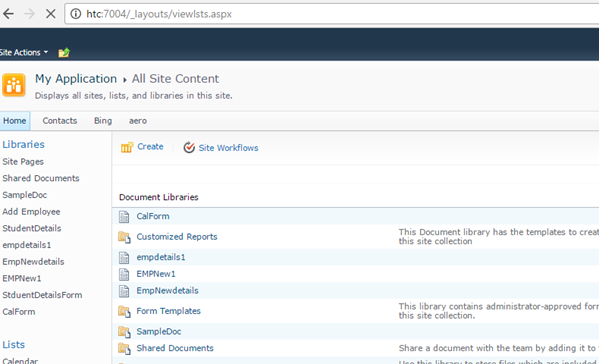
Click on Site Action –> View All site content
Click on Create.
Select Custom List as shown.
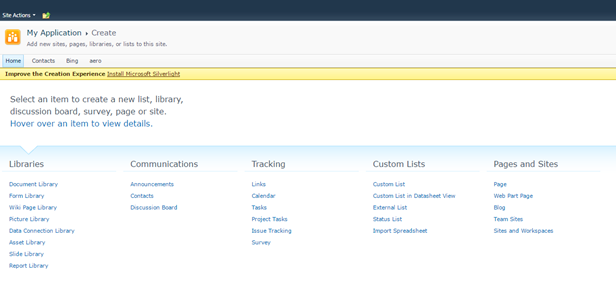
Create a List StudentDB.
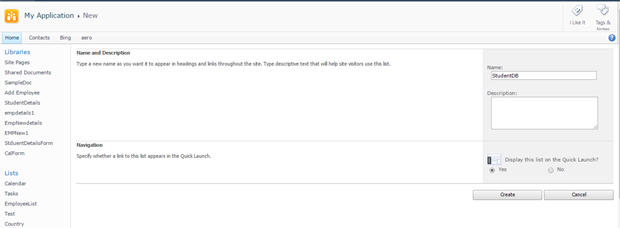
Click on Create.
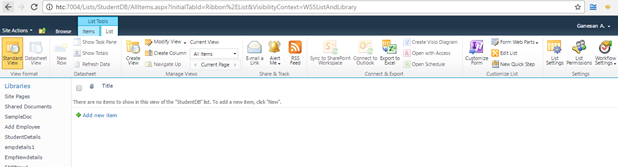
Click on List settings. Click on Advanced Settings.
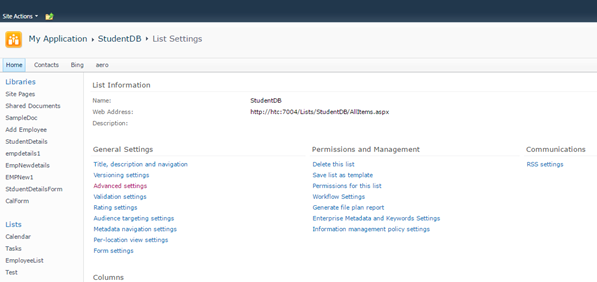
Change Allow Management of Content Types to Yes.
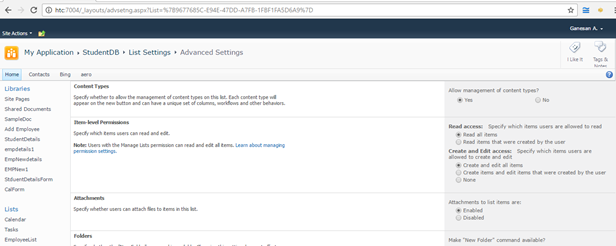
Click Ok.
Click on Add from Existing Site content Types from Content Types Tab.
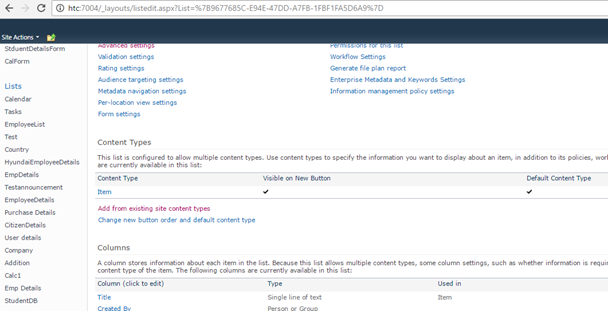
Select Custom Content Types from Dropdown as shown below.
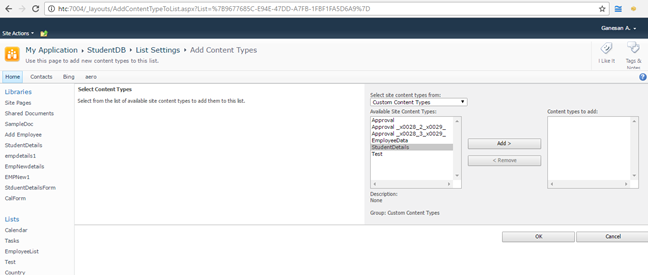
Select Student Details and Click on Add.
Click on Ok .Now the content Type will be added to List.
Now you can see both content types.

Click on Item Content Type.
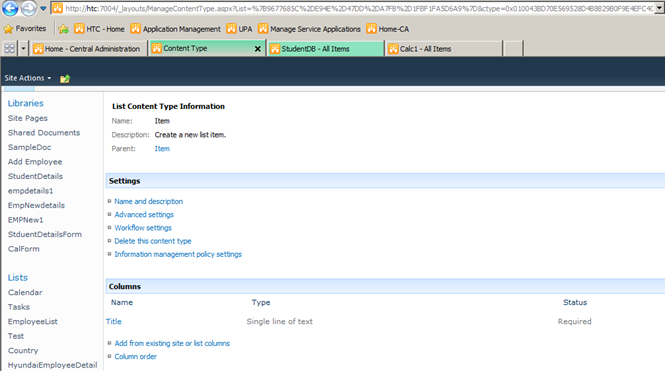
Click on Delete this Content Type.
Now you can see only one Content Type associated with the List ie. StudentDetails .
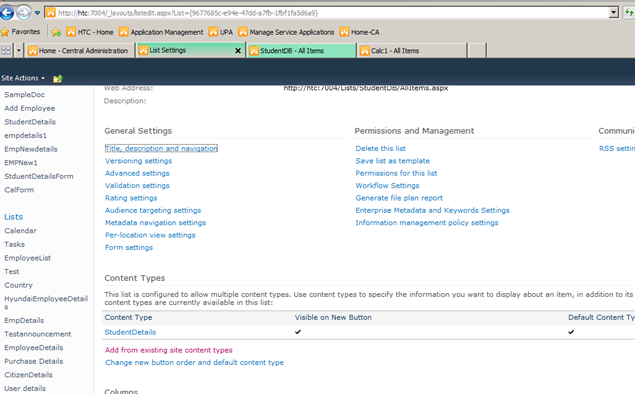
Click on New item in StudentDb List.It shows StudentDetails ContentType.
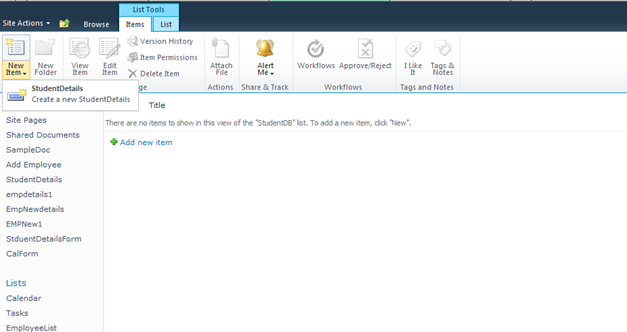
http://htc:7004/Lists/StudentDB/AllItems.aspx
Click on New Student Details link. The New form appears as below.
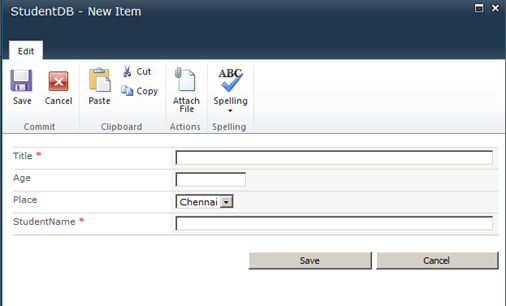
Click on Modify View and Add the columns to View.
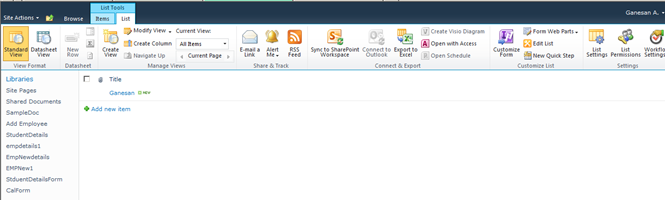
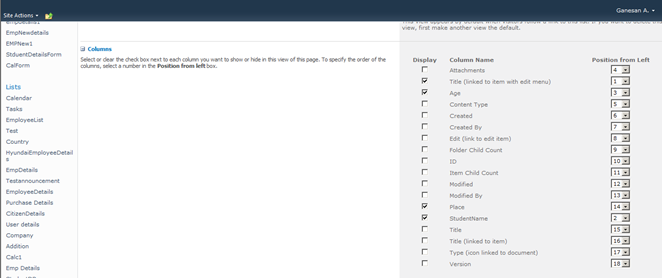
Click on Ok .Now the view looks as below.

All About Dot Net Courses and Training available in Chennai
The .net courses are gaining in popularity and the developers have been able to create intelligent applications which can go on to integrate with other platforms within a limited time frame. Net training in Chennai has also soared the popularity charts in a big manner. Net is a concept that you would need on your windows PC to run the computer.
One of the main reasons on why you should undertake dot net training in Chennai is because of the fact that it works out to be one of the popular programming languages that provides everything to be developed and you can go on to employ web based architectural deployment. More and more organizations are on the verge of implementing web services and .net technologies which helps to connect the business on a global platform. Another important aspect is that when you undertake dot net course Chennai you open your world of opportunities and gain employment to some of the top companies in the world.
When you undertake a dot net training institute in Chennai you will have hands on idea about the operating system, the fundamentals of programming along with the object oriented concepts. All the job aspirants who are pursuing graduation in IT or non IT stream who are looking to make the most of the job opportunities can go ahead and pursue this course. Roughly, this course spreads around 2126 hours.
To learn the, best dot net training institute in Chennai, there are some points that you need to give due consideration of sorts. Rather than rely on online training you can resort to the classroom led, instructor training. When there is a face to face interaction the focus not only improves but you are better faced to deal with employment chances. The institute that you should choose needs to have teaching staff with the proven level of experience. There should be a process where the teachers are handpicked and all their skills are tested, before they embark on the journey to provide their knowledge to the students. A good set up will undertake your periodic evaluation from time to time and you will be able to understand on where you stand currently. If you tend to miss any classes they will make arrangements that you attend the alternate classes and cover it up. In case of any doubts that might spring up, the faculty is always there to lend you a helping hand. If the situation permits you can also opt for extra classes and clear your doubts as well.
In the modern day world, with information being part and parcel of our life in a big way, choosing a good institute is an easy task. You just need to type the course name of dot net and a host of names will spring up in front of you. You need to do a research yourself and find out that in terms of value of money the course is right up there.
Send mail to users from gmail account using c#.net
Document by Alagappan -ganesanva@hotmail.com – + 919042710472
Click on File –> New Project in Visual Studio. Enter the solution name as MailUser.
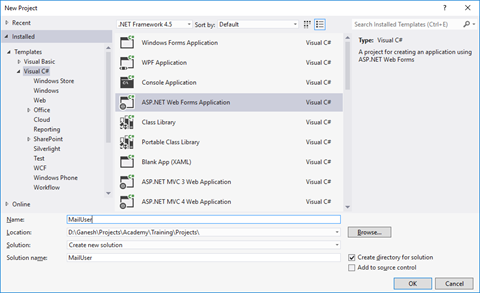
Click OK
Right Click on the Project and add new item.
Add new form with name SendEmail.aspx
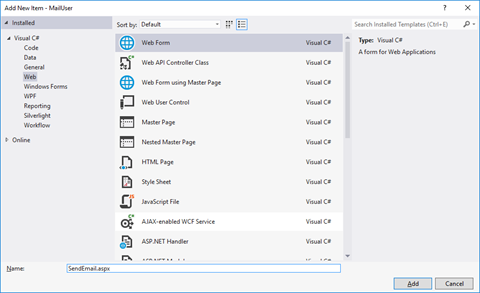
Put / Replace the below code in SendEmail.aspx
| <!DOCTYPE html> <html xmlns=”http://www.w3.org/1999/xhtml”> <head runat=”server”> <title></title> </head> <body> <form id=”form1″ runat=”server”> <div> <table border=”0″ cellspacing=”2″ cellpadding=”2″> <tr> <td> Email To </td> <td> <asp:TextBox ID=”txtMailTo” runat=”server”></asp:TextBox> </td> </tr> <tr> <td> Subject </td> <td> <asp:TextBox ID=”txtSubject” runat=”server”></asp:TextBox> </td> </tr> <tr> <td> Body </td> <td> <asp:TextBox ID=”txtBody” runat=”server” TextMode=”MultiLine”></asp:TextBox> </td> </tr> <tr> <td> </td> <td> <asp:Button ID=”btnSend” runat=”server” Text=”Send” OnClick=”btnSend_Click” /> </td> </tr> </table> </div> </form> </body> </html> |
Put / Replace the below code In SendEmail.aspx.cs
| public partial class SendEmail : System.Web.UI.Page { protected void Page_Load(object sender, EventArgs e) { } protected void btnSend_Click(object sender, EventArgs e) { string result=SendEmailtousers(txtMailTo.Text, txtSubject.Text, txtBody.Text); Response.Write(result); } protected string SendEmailtousers(string toAddress, string subject, string body) { string result = “Message Sent Successfully..!!”; string senderID = WebConfigurationManager.AppSettings[“SenderID”];// use sender’s email id here.. string senderPassword = WebConfigurationManager.AppSettings[“SenderPassword”]; // sender password here… try { SmtpClient smtp = new SmtpClient { Host = “smtp.gmail.com”, Port = 587, EnableSsl = true, DeliveryMethod = SmtpDeliveryMethod.Network, Credentials = new System.Net.NetworkCredential(senderID, senderPassword), Timeout = 30000, }; MailMessage message = new MailMessage(senderID, toAddress, subject, body); message.CC.Add(WebConfigurationManager.AppSettings[“CCMail”]); smtp.Send(message); } catch (Exception ex) { result = “Error sending email.!!!””; } return result; } } |
Add the below code in web.config below Connectionstrings tag
| <appSettings> <add key=”SenderID” value=”ganesvija@gmail.com”/> <add key=”SenderPassword” value=”*****”/> <add key=”CCMail” value=”ganesanva@hotmail.com”/> </appSettings> |
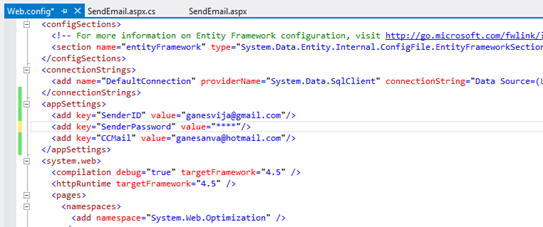
Replace **** with actual password in key SenderPassword.
Run the solution.
The Output as below,
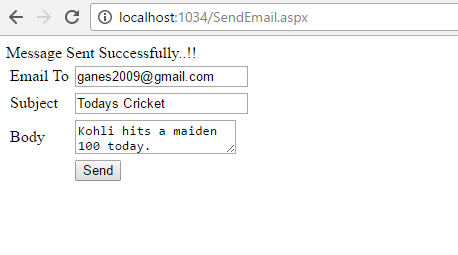
GMAIL inbox,

Note:
In order to trigger mail from client, Enable this on the From Address Gmail account.
Turn on Allow for Less Secure apps.
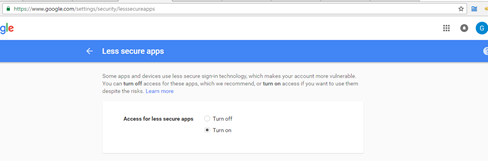
https://www.google.com/settings/security/lesssecureapps
Reference:
https://support.google.com/accounts/answer/6010255?hl=en
Click below to download the solution,
https://1drv.ms/u/s!ArddhCoxftkQg7UPuVICB-batxhXag
Real Time Dot Net Training Centers in Chennai
There is a wide market for freshers in software companies, especially in dot net field. Many real time dot net training centers are available in Chennai. Experts in dot net training centers train students in Microsoft technologies to excel in IT sector. Trainers in dot net training centers have more than four years of experience in IT sector. The real time dot net training centers provide three types of services which include dot net training, share point training and web development. Training on dot net is given to students for job assistance purpose and training is given till the students are familiar with the technology. The training centers give a complete guidance on software development life cycle. Regular workshops on dot net technology have been conducted for students and students have their own choice of choosing timing.
Trainers in dot net training centers provide assistance for Microsoft certification such as Microsoft certified technology specialist for dot net and SQL server. Both online and offline training classes are available for dot net. Online sessions are conducted via Skype, students can save money and time by adopting online dot net training. The dot net course include dot net architecture, OOPS concept, web and windows application with visual studio, connect Sql server database using ado.net, entity framework. Apart from this dot net training centers give training in web services, deploying dot net applications, to build Asp.net web application with MVC architecture.
Practices on design patterns based on dot net with programming share point 2010 application. C# dot net programming with real time examples and web applications. Dot trainers mainly focus on training people to excel well in dot net to meet world class standards. The real time dot net centers have well equipped classrooms, broad band facilities, course materials. Students can get real time exposure as all trainers are good at their teaching skills. The training centers provide course materials for all students who enroll under the training program, apart from this they also train persons for resume preparation. Experts in real time dot net training centers train persons based on current technology requirement. Based on market strategy students can avail the best options from experts and can develop themselves in dot net technology.
Training batches are small so that trainers give more attention to each individual to train persons to become expert in that field and also they can clarify student doubts. Based on their flexi timing students can avail the training. The trainers in dot net training centers prepare students to face the interview. Apart from coaching they train students from interview point. Students can have both course based training as well as interview based training. Certificates are issued to all the students after their successful completion of the course. The certificates enable the students to get placed in software companies. Students who have been trained by the dot net training centers excel well in programming skills. In addition to this they develop knowledge in software related to dot net applications.
State management in Asp.net
Document by Vairavan – Ganesanva@hotmail.com – +919042710472
There are 2 types of state management
1.Server side
2.Client Side
Client Side
- View State
- Hidden Fields
- Cookies
- Query strings
Server Side
- Application state
- Session state
View state
It allows to maintain the value with in the page
Hidden Fields
It is the control in Asp.net used to store value with in the page. It does not shows visibility in the page.
Cookies
It is the small amount of data stored in client browser session
Query string
IT allows to pass the data from one page to another in the browser URL.
Application state:
Asp.net allows to save values using Application state in HttpApplicationstate class.
Session State:
It allows to store data in the server side using HttpSessionState class.
Create a new Project File –>New Project in Visual studio
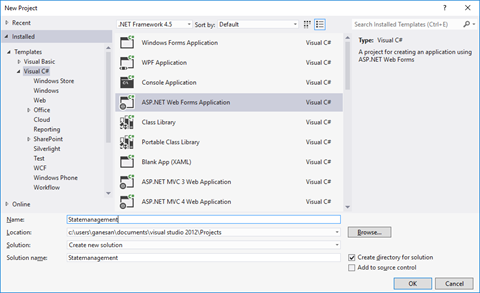
Click ok.
Right Click on the solution and Add New Item.
Select Web form and Name GetValues.aspx.

Add one another form as SetValues.aspx
Put / Replace the below HTML in SetValues.aspx
| <!DOCTYPE html> <html xmlns=”http://www.w3.org/1999/xhtml”> <head runat=”server”> <title></title> </head> <body> <form id=”form1″ runat=”server”> <div> <asp:TextBox ID=”txtsessionvalue” runat=”server”></asp:TextBox> <asp:Button ID=”btnSetSession” runat=”server” Text=”Set Session Value” OnClick=”btnSetSession_Click” /> </div> </form> </body> </html> |
Put / Replace the below code in SetValues.aspx.cs
| public partial class SetValues : System.Web.UI.Page { protected void Page_Load(object sender, EventArgs e) { } protected void btnSetSession_Click(object sender, EventArgs e) { Session[“Uservalue”] = txtsessionvalue.Text; Response.Redirect(“GetValues.aspx?ID=2”); } } |
Put / Replace the below HTML in GetValues.aspx
| <!DOCTYPE html> <html xmlns=”http://www.w3.org/1999/xhtml”> <head runat=”server”> <title></title> </head> <body> <form id=”form1″ runat=”server”> <div> <asp:TextBox ID=”txtviewstate” runat=”server”></asp:TextBox> <asp:Button ID=”btnGetSession” runat=”server” Text=”Get Session” OnClick=”btnGetSession_Click” /> <asp:Button ID=”btnSetViewState” runat=”server” Text=”Set View State” OnClick=”btnSetViewState_Click” /> <asp:Button ID=”btnGetViewState” runat=”server” Text=”Get View State” OnClick=”btnGetViewState_Click” /> <asp:Button ID=”btnGetQuerystringvalue” runat=”server” Text=”Get Query string Value” OnClick=”btnGetQuerystringvalue_Click” /> </div> </form> </body> </html> |
Put / Replace the below code in GetValues.aspx.cs
| public partial class GetValues : System.Web.UI.Page { protected void Page_Load(object sender, EventArgs e) { } protected void btnGetSession_Click(object sender, EventArgs e) { string sessionvalue = (string)Session[“Uservalue”]; Response.Write(“The Session State value is ” + sessionvalue); } protected void btnSetViewState_Click(object sender, EventArgs e) { ViewState[“data”] = txtviewstate.Text; } protected void btnGetViewState_Click(object sender, EventArgs e) { string viewstatevalue = (string)ViewState[“data”]; Response.Write(“The view State value is “+viewstatevalue); } protected void btnGetQuerystringvalue_Click(object sender, EventArgs e) { string QueryStringvalue = (string)Request.QueryString[“ID”]; Response.Write(“The Query string value is ” + QueryStringvalue); } } |
The Output as below,

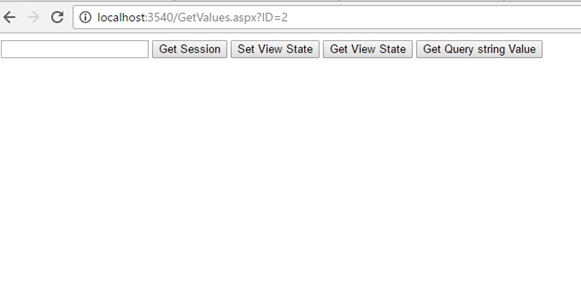
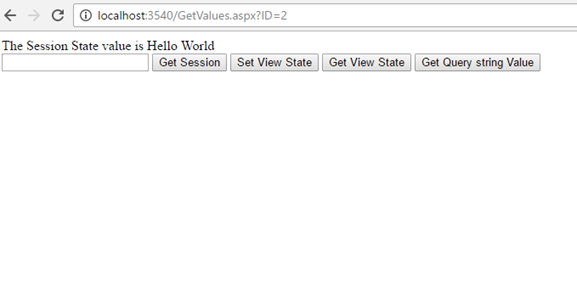
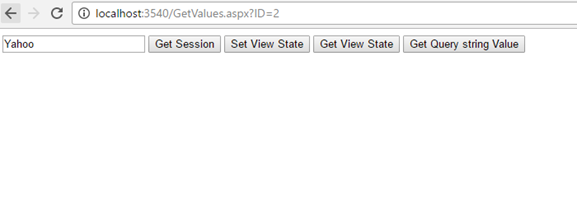

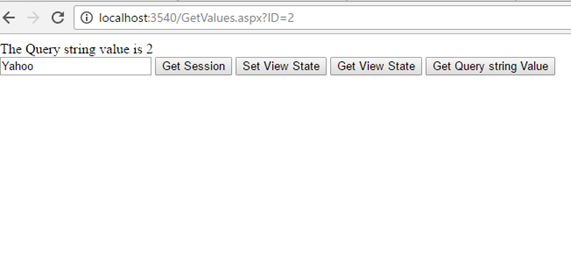
Click below to download the solution,
https://1drv.ms/u/s!ArddhCoxftkQg617pH3vPsuhyrHvDA
CRUD operation in PHP with MySQL
Download and install XAMPP from the below url
https://www.apachefriends.org/download.html
Run the Xampp Exe File as below,
xampp-win32-7.0.13-0-VC14-installer.exe
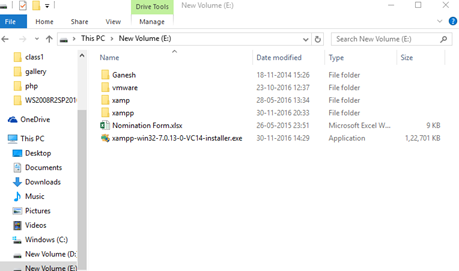
Install XAMPP in the Customised location as below in E:\ drive.
Run Xampp_control.exe from XAMPP folder,
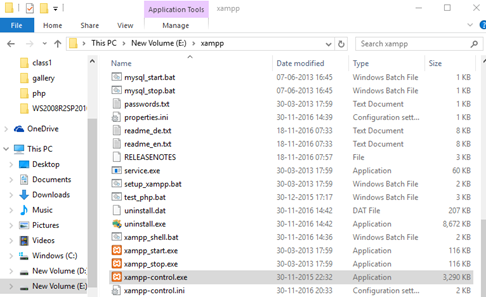
Start Apache and Mysql in XAMPP Control Panel
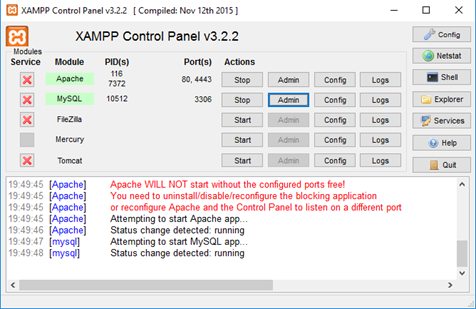
Click on Admin to redirect to MySQL Page,
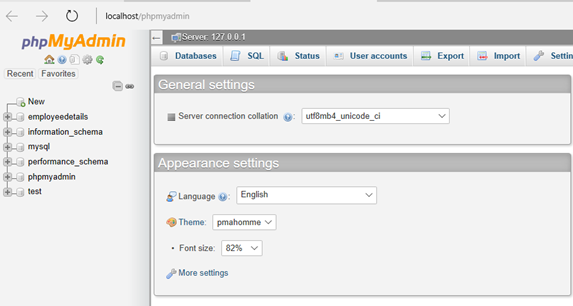
Create employeedetails Database by clicking on New.
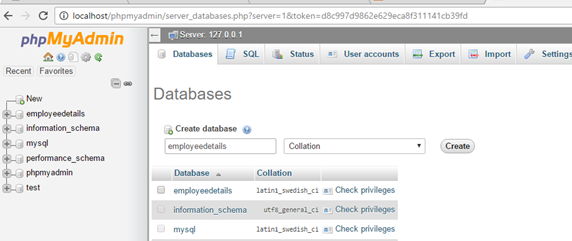
Click on Create to create database.
Click on New to create a new table.
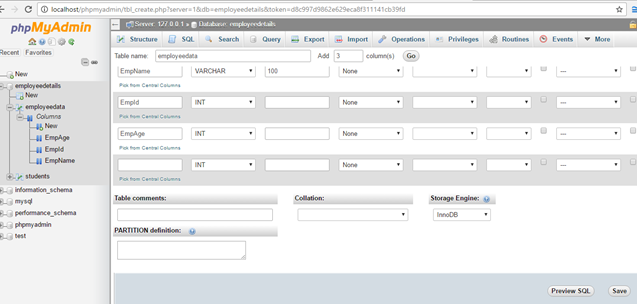
Click on Save to create a new table.
Put the PHP files in htdocs folder as below,

Create CRUD folder in htdocs.
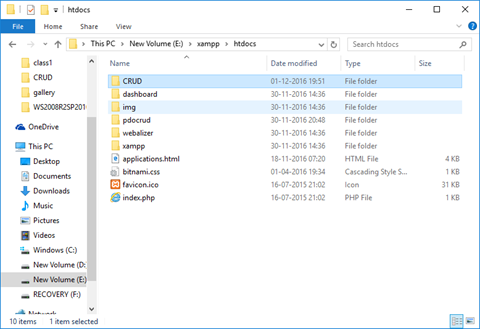
Create db.php,AddEmployee.php,index.php as shown below in CRUD folder.
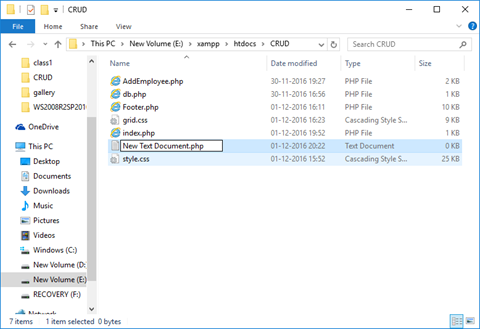
Add below code in db.php,
| <?php $servername = “localhost”; $username = “root”; $password = “”; $dbname = “employeedetails”; // Create connection $conn = new mysqli($servername, $username, $password, $dbname); ?> |
Code in index.php,
| <style type=”text/css”> </style> <?php include(‘db.php’); ?> <a href=”AddEmployee.php” value=”Create Employee” >Create</a> <table cellspacing=”5″ cellpadding=”5″> <tr> <th> Employee Id </th> <th> Employee Name </th> <th> Age </th> </tr> <?php $sql =”select * from employeedata”; $result1 = $conn->query($sql); if ($result1->num_rows > 0) { // output data of each row while($row = $result1->fetch_assoc()) { ?> <tr> <td> <?php echo $row[“EmpId”]?> </td> <td> <?php echo $row[“EmpName”]?> </td> <td> <?php echo $row[“EmpAge”]?> </td> <td> <a href=”AddEmployee.php?edited=1&id=<?php echo $row[“EmpId”]; ?>”>Edit</a> </td> <td> <a href=””>Delete</a> </td> </tr> <?php } }else { echo 0; } ?> </table> |
Code in AddEmployee.php as below,
| <?php include(‘db.php’); $EmployeeID=”; $EmployeeName=”; $Age=”; $Operation=’Create’; if(isset($_POST[‘btnSave’])) { if($_POST[‘txtoperation’] ==”Create”) { $EmpId=$_POST[‘txtEmployeeID’]; $EmpName=$_POST[‘txtEmployeeName’]; $Age=$_POST[‘txtAge’]; $sql=”INSERT INTO Employeedata(EmpId, EmpName, EmpAge) VALUES (‘$EmpId’,’$EmpName’,’$Age’)”; if ($conn->query($sql) === TRUE) { echo “New record created successfully”; header(‘Refresh:0; index.php’); } else { echo “Error: ” . $sql . “<br>” . $conn->error; } } else { $EmpId=$_POST[‘txtEmployeeID’]; $EmpName=$_POST[‘txtEmployeeName’]; $Age=$_POST[‘txtAge’]; $sql=”UPDATE Employeedata SET EmpName=’$EmpName’,EmpAge=’$Age’ WHERE EmpId='{$_GET[‘id’]}'”; if ($conn->query($sql) === TRUE) { echo “New record updated successfully”; header(‘Refresh:0; index.php’); } else { echo “Error: ” . $sql . “<br>” . $conn->error; } } } if(isset($_GET[‘edited’])) { $sql =”select * from employeedata where EmpId='{$_GET[‘id’]}'”; $result1 = $conn->query($sql); if ($result1->num_rows > 0) { // output data of each row if($row = $result1->fetch_assoc()) { $EmployeeID=$row[“EmpId”]; $EmployeeName=$row[“EmpName”]; $Age=$row[“EmpAge”]; $Operation=”Edit”; } } } ?> <form action=”” method=”post”> <table> <tr> <td>Employee Id</td> <td><input type=”text” name=”txtEmployeeID” value=”<?php echo $EmployeeID; ?>” /> <input type=”hidden” name=”txtoperation” value=”<?php echo $Operation; ?>” /> </td> </tr> <tr> <tr> <td>Student Name</td> <td><input type=”text” name=”txtEmployeeName” value=”<?php echo $EmployeeName; ?>” /></td> </tr> <tr> <td>Age</td> <td><input type=”text” name=”txtAge” value=”<?php echo $Age; ?>” /></td> </tr> <tr> <td></td> <td><input type=”submit” value=”save” name=”btnSave” /></td> </tr> </table> </form> |
The Output is as below,

http://localhost/CRUD/index.php
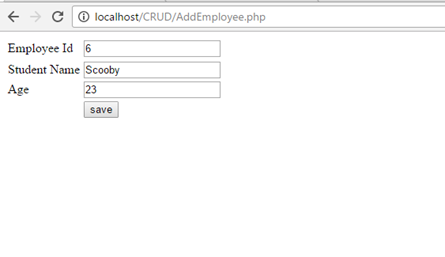
http://localhost/CRUD/AddEmployee.php
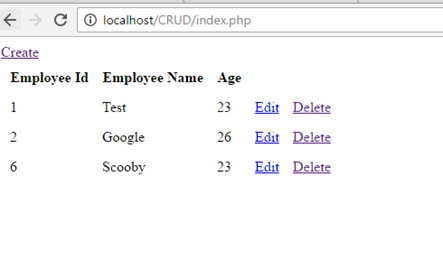
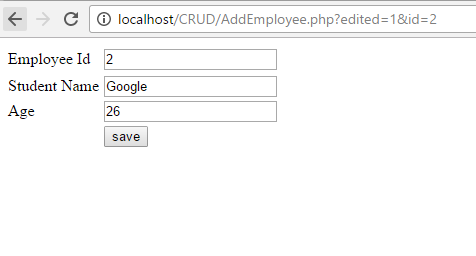
http://localhost/CRUD/AddEmployee.php?edited=1&id=2
Click below to download the solution,
https://1drv.ms/u/s!ArddhCoxftkQg6w5Te07v0wqAspR4g
JQuery validation in Asp.net web application
Document by Ganesan – Ganesanva@hotmail.com – + 919042710472
Create a new Asp.net web application using File -> New Project
Solution Explorer looks as below,
Add new page AddEmployee.aspx
Put / replace the below code in AddEmployee.aspx
| <html xmlns=”http://www.w3.org/1999/xhtml”> <head runat=”server”> <title></title> <script src=”https://ajax.googleapis.com/ajax/libs/jquery/1.12.0/jquery.min.js”></script> <script type=”text/javascript”> function validate() { if ($(‘#txtEmployeeName’).val() == “”) { alert(‘Please enter Employee Name’); return false; } if ($(‘#txtAge’).val() == “”) { alert(‘Please enter Age’); return false; } var radios = document.getElementsByName(‘Gender’); var radioselected = ”; for (var i = 0, length = radios.length; i < length; i++) { if (radios[i].checked) { // do whatever you want with the checked radio radioselected = radios[i].value; // only one radio can be logically checked, don’t check the rest break; } } if(radioselected ==””) { alert(‘Please select Gender’); return false; } if ($(‘#ddlCity’).val() == “–Select–“) { alert(‘Please select city’); return false; } return true; } </script> </head> <body> <form id=”form1″ runat=”server”> <div> <table border=”0″ cellspacing=”2″ cellpadding=”2″> <tr> <td>Employee Name </td> <td> <asp:TextBox ID=”txtEmployeeName” runat=”server”></asp:TextBox> </td> </tr> <tr> <td>Age </td> <td> <asp:TextBox ID=”txtAge” runat=”server”></asp:TextBox> </td> </tr> <tr> <td>Gender </td> <td> <asp:RadioButton ID=”rbtnMale” runat=”server” GroupName=”Gender” Text=”Male” /> <asp:RadioButton ID=”rbtnFemale” runat=”server” GroupName=”Gender” Text=”Female” /> </td> </tr> <tr> <td>City </td> <td> <asp:DropDownList ID=”ddlCity” runat=”server”> <asp:ListItem Text=”–Select–” Value=”–Select–“></asp:ListItem> <asp:ListItem Text=”Chennai” Value=”Chennai”></asp:ListItem> <asp:ListItem Text=”Madurai” Value=”Madurai”></asp:ListItem> </asp:DropDownList> </td> </tr> <tr> <td></td> <td> <asp:Button ID=”btnSave” runat=”server” Text=”Save” OnClientClick=”return validate();” OnClick=”btnSave_Click” /> </td> </tr> </table> </div> </form> </body> </html> |
Replace the below code in AddEmployee.aspx.cs
| public partial class AddEmployee : System.Web.UI.Page { protected void Page_Load(object sender, EventArgs e) { } protected void btnSave_Click(object sender, EventArgs e) { Response.Write(“Saved Successfully”); } } |
On clicking Save button ,JQuery validation Fires as below.
The Output is as below,
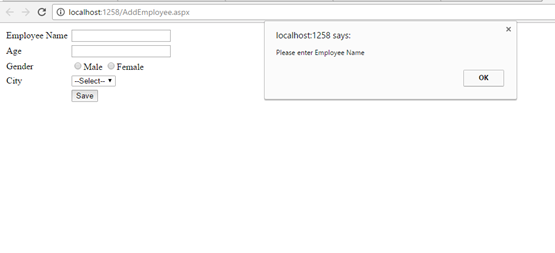
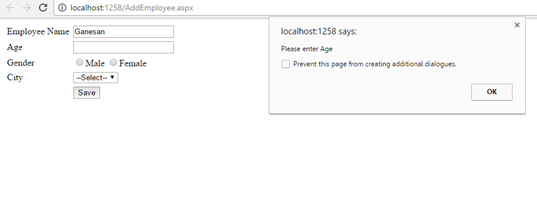
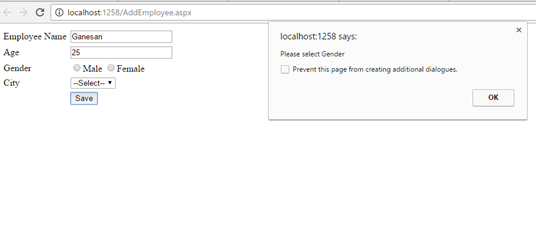
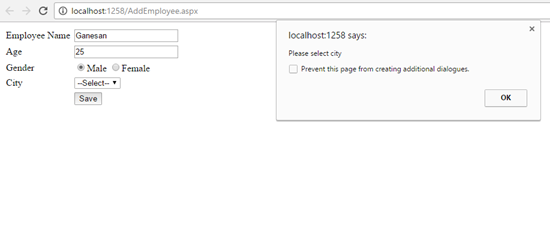
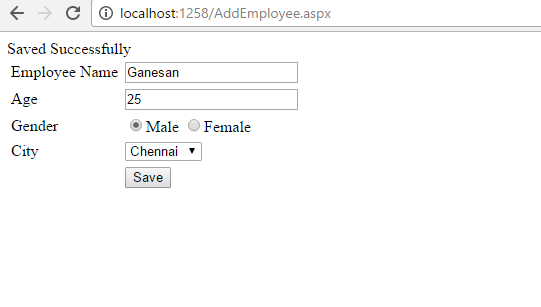
Note
You can check the Jquery validation using Console in Chrome.
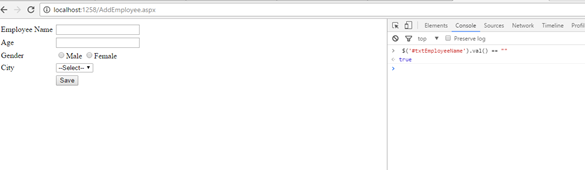
Click below to download the solution,
https://1drv.ms/u/s!ArddhCoxftkQg6orGTGKP9owdu4fbQ
CRUD in ASP.net web application using Stored procedure
Document by Maria Academy – mariatrainingacademy@gmail.com – +919042710472
Create Database in SQL server as below,
| Create database StudentDB |
Create StudentDetails table using the below script,
| CREATE TABLE [dbo].[StudentDetails]( [StudentId] [int] IDENTITY(1,1) NOT NULL, [StudentName] [varchar](100) NULL, [Age] [int] NULL ) ON [PRIMARY] |
Run the below Stored Procedures in SQL Server,
| create Proc [dbo].[Ins_StudentDetails] @StudentName varchar(100), @Age int as begin INSERT INTO [StudentDetails] ([StudentName] ,[Age]) VALUES (@StudentName ,@Age) |
| create Proc [dbo].[Select_StudentDetails] as begin select * from StudentDetails end |
| create Proc [dbo].[Update_StudentDetails] @StudentId int, @StudentName varchar(100), @Age int as begin UPDATE [StudentDetails] SET [StudentName] = @StudentName ,[Age] = @Age WHERE StudentId=@StudentId end |
Create a new Asp.net web application CRUDinProcedure as below,
File -> New Project
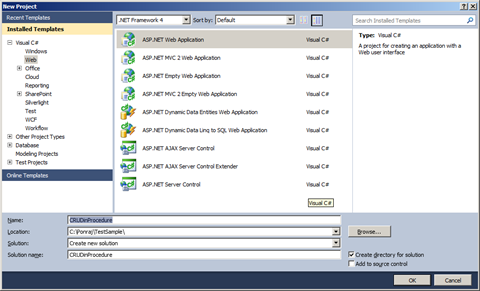
Click OK.
Solution Explorer as below,
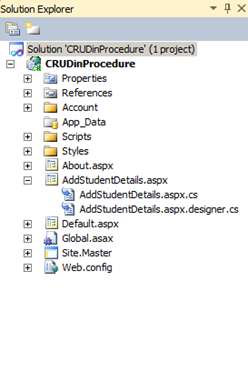
Add new Page AddStudentDetails.aspx
Put / Replace the below code in AddStudentDetails.aspx
| <html xmlns=”http://www.w3.org/1999/xhtml”> <head id=”Head1″ runat=”server”> <title></title> </head> <body> <form id=”form1″ runat=”server”> <div> <table border=”0″ cellspacing=”2″ cellpadding=”2″> <tr> <td> <asp:Label ID=”lblStudentName” runat=”server” Text=”Student Name”></asp:Label> </td> <td> <asp:TextBox ID=”txtStudentName” runat=”server”></asp:TextBox> </td> </tr> <tr> <td> <asp:Label ID=”lblAge” runat=”server” Text=”Age”></asp:Label> </td> <td> <asp:TextBox ID=”txtAge” runat=”server”></asp:TextBox> </td> </tr> <tr> <td></td> <td> <asp:Button ID=”btnSubmit” runat=”server” Text=”Submit” OnClick=”btnSubmit_Click” /> <asp:Button ID=”btnUpdate” runat=”server” Text=”Update” OnClick=”btnUpdate_Click” /> <asp:Button ID=”btnClear” runat=”server” Text=”Clear” OnClick=”btnClear_Click” /> <asp:HiddenField ID=”hfId” runat=”server”></asp:HiddenField> </td> </tr> <tr> <td colspan=”2″> <asp:GridView ID=”grvStudentDetails” runat=”server” AutoGenerateColumns=”false”> <Columns> <asp:BoundField DataField=”StudentId” HeaderText=”StudentId” /> <asp:BoundField DataField=”StudentName” HeaderText=”StudentName” /> <asp:BoundField DataField=”Age” HeaderText=”Age” /> <asp:TemplateField> <ItemTemplate> <asp:Button ID=”btnEdit” runat=”server” Text=”Edit” OnClick=”btnEdit_Click” /> </ItemTemplate> </asp:TemplateField> </Columns> </asp:GridView> </td> </tr> </table> </div> </form> </body> </html> |
Replace the below code in AddStudentDetails.aspx.cs,
| public partial class AddStudentDetails : System.Web.UI.Page { SqlConnection con = new SqlConnection(ConfigurationManager.ConnectionStrings[“DefaultConnection”].ToString()); protected void Page_Load(object sender, EventArgs e) { if (!Page.IsPostBack) { BindGrid(); } } private void BindGrid() { btnSubmit.Visible = true; btnUpdate.Visible = false; SqlCommand cmd = new SqlCommand(“Select_StudentDetails”, con); cmd.CommandType = CommandType.StoredProcedure; SqlDataAdapter ada = new SqlDataAdapter(cmd); DataSet ds = new DataSet(); ada.Fill(ds); grvStudentDetails.DataSource = ds.Tables[0]; grvStudentDetails.DataBind(); } protected void btnSubmit_Click(object sender, EventArgs e) { con.Open(); SqlCommand cmd = new SqlCommand(“Ins_StudentDetails”, con); cmd.CommandType = CommandType.StoredProcedure; cmd.Parameters.Add(“@StudentName”, SqlDbType.VarChar).Value = txtStudentName.Text; cmd.Parameters.Add(“@Age”, SqlDbType.Int).Value = txtAge.Text; int result = cmd.ExecuteNonQuery(); if (result > 0) { Response.Write(“Inserted Successfully”); } con.Close(); BindGrid(); btnClear_Click(null, null); } protected void btnEdit_Click(object sender, EventArgs e) { Button btn = (Button)sender; //Get the row that contains this button GridViewRow gvr = (GridViewRow)btn.NamingContainer; hfId.Value = gvr.Cells[0].Text; txtStudentName.Text = gvr.Cells[1].Text; txtAge.Text = gvr.Cells[2].Text; btnSubmit.Visible = false; btnUpdate.Visible = true; } protected void btnUpdate_Click(object sender, EventArgs e) { con.Open(); SqlCommand cmd = new SqlCommand(“Update_StudentDetails”, con); cmd.CommandType = CommandType.StoredProcedure; cmd.Parameters.Add(“@StudentId”, SqlDbType.Int).Value = hfId.Value; cmd.Parameters.Add(“@StudentName”, SqlDbType.VarChar).Value = txtStudentName.Text; cmd.Parameters.Add(“@Age”, SqlDbType.Int).Value = txtAge.Text; int result = cmd.ExecuteNonQuery(); if (result > 0) { Response.Write(“Updated Successfully”); } con.Close(); BindGrid(); btnClear_Click(null, null); } protected void btnClear_Click(object sender, EventArgs e) { txtStudentName.Text = string.Empty; txtAge.Text = string.Empty; hfId.Value = string.Empty; } } |
Screenshot as below,
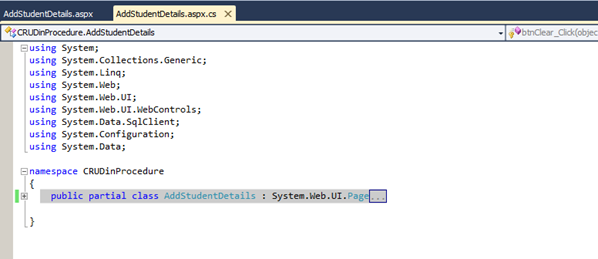
The Output will be as below,

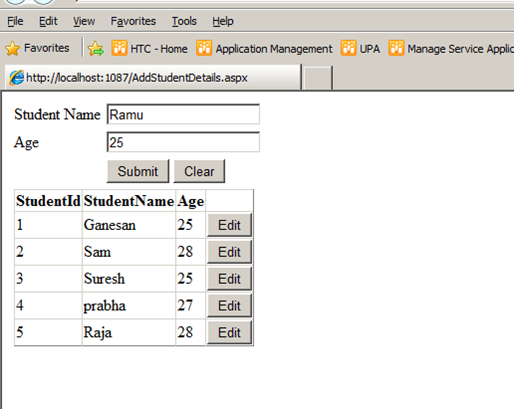
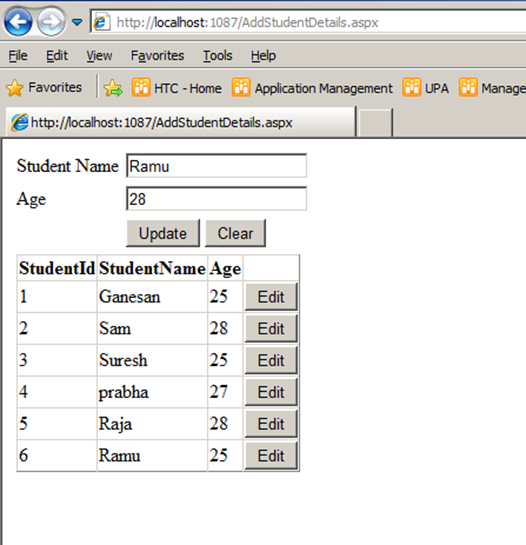
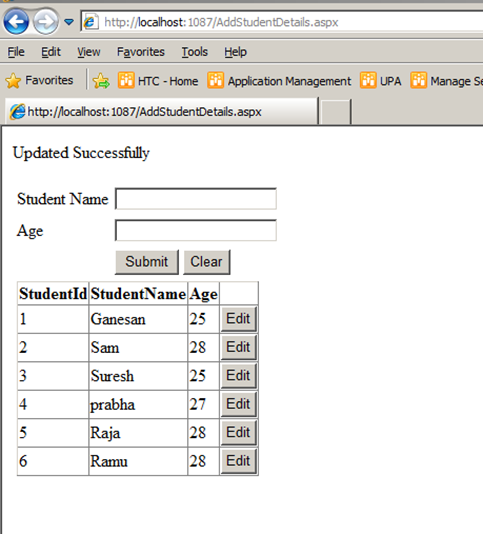
Click below to download the solution,
https://1drv.ms/u/s!ArddhCoxftkQg6of7HjHOGOkB8IMXA
Dot Net Training Institute in Chennai
Dot net is a software program developed by Microsoft Corporation that plays a significant role in web development applications. Dot net employees are in great demand over the recent years and many companies recruit them who have undergone a training program. There are several private institutes that organize training classes for college students and working people to shape their skills effectively. However, it is necessary to identify a right one among them for developing the abilities considerably. This will help to start a bright career after completing college studies. There are several sources available for knowing the details of a coaching center in a location. On the other hand, it is essential to make a study on them from the internet for finding a institute accordingly.
Dot net training classes are extremely useful for the beginners who want to get jobs with good salaries in various fields. At the same time, it is advisable to check the prerequisites before choosing a training program. Dot net training institute in Chennai offers programs from basic to advanced levels which ultimately help students to focus more on their objectives. It provides excellent opportunities for the students to learn the lessons with latest concepts. Expert staffs and industry professionals will show ways for enhancing the skills of a student in a comfortable environment. Students can get also interact with them for knowing more about opportunities in various industries to start a bright future. Moreover, it is possible to build the skills with real time projects for getting a certificate with high grades.
Most training institutes organize full time, part time and week end classes for the students with excellent teaching faculties. Moreover, they can choose online classes to study the lessons from anywhere easily. Some even conduct seminars, workshops and conferences in order to evaluate the potentials of students. Dot net course Chennai enables the students to undergo training at affordable rates for reaching next levels. Apart from coaching, it offers job assistance services to students who have successfully finished a course. Anyone interested in knowing more about the programs can attend the introductory sessions in a center for gaining more ideas. This in turn gives ways for increasing the efficiency levels while applying for a job in a company.
It is advisable to select a best dot net training institute in Chennai that provide classes with the updated syllabus. Students can enroll their names in a training course for learning the lessons with industry experts. Fresh graduates will benefit a lot with a training program for achieving goals. One must give importance to the reviews and testimonials before joining in an institute for meeting essential requirements. The main objective of dot net course is to make students to fulfill their dreams. Another advantage is that it helps to become familiar with the applications when seeking jobs in a software company. Training fees are an affordable one enabling the students to develop their abilities with innovative approaches. Dot net training paves ways for seeking jobs in reputed companies with high salaries.
CRUD operation with SharePoint List in Visual web part
Document by Ganesan – Ganesanva@hotmail.com – + 919600370429
-
Create EmployeeList in Sharepoint 2010 site with the below Columns.
EmployeeName, Age

- Create a new Visual Web part Project using File –>New Project
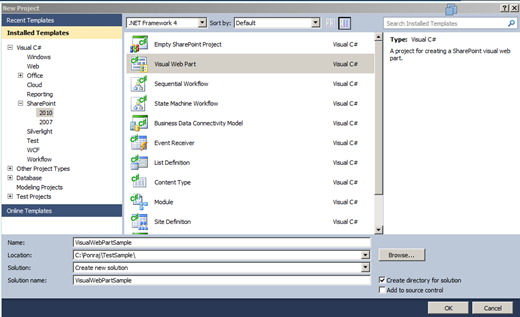
Click Ok.
The Solution Explorer will looks as below,
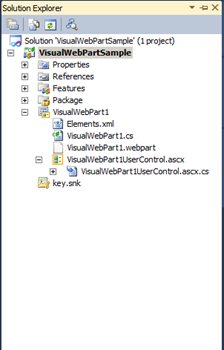
In VisualWebPart1UserControl.ascx Put the below code snippet,
| <table border=”0″ cellpadding=”2″ cellspacing=”2″> <tr> <td colspan=”2″ style=”color:Green”> <asp:Label ID=”lblresults” runat=”server”></asp:Label> </td> </tr> <tr> <td> Employee Name </td> <td> <asp:TextBox ID=”txtEmployeeName” runat=”server”></asp:TextBox> </td> </tr> <tr> <td> Age </td> <td> <asp:TextBox ID=”txtAge” runat=”server”></asp:TextBox> </td> </tr> <tr> <td> </td> <td> <asp:Button ID=”btnSave” runat=”server” Text=”Save” OnClick=”btnSave_Click” /> <asp:Button ID=”btnUpdate” runat=”server” Text=”Update” onclick=”btnUpdate_Click” /> <asp:HiddenField ID=”hfId” runat=”server” /> <asp:Button ID=”btnClear” runat=”server” Text=”Clear” onclick=”btnClear_Click” /> </td> </tr> <tr> <td colspan=”2″> <asp:GridView ID=”grvEmployeeDetails” runat=”server” AutoGenerateColumns=”false”> <Columns> <asp:BoundField DataField=”ID” HeaderText=”ID” /> <asp:BoundField DataField=”EmployeeName” HeaderText=”Employee Name” /> <asp:BoundField DataField=”Age” HeaderText=”Age” /> <asp:TemplateField> <ItemTemplate> <asp:Button ID=”btnEdit” runat=”server” Text=”Edit” onclick=”btnEdit_Click” /> </ItemTemplate> </asp:TemplateField> </Columns> </asp:GridView> </td> </tr> </table> |
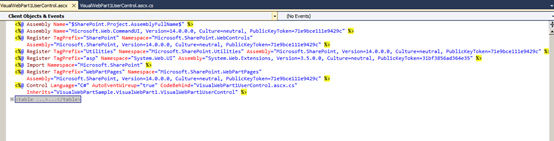
In VisualWebPart1UserControl.ascx.cs put/Replace the below code snippet,
| public partial class VisualWebPart1UserControl : UserControl { protected void Page_Load(object sender, EventArgs e) { if (!Page.IsPostBack) { BindGrid(); btnSave.Visible = true; btnUpdate.Visible = false; } } private void BindGrid() { using (SPSite site = new SPSite(SPContext.Current.Site.Url)) // Site Collection { using (SPWeb web = site.OpenWeb()) // Site { SPList list = web.Lists[“EmployeeList”]; // List SPQuery curQry = new SPQuery(); curQry.Query = “”; //Get the Items using Query SPListItemCollection olistitemcollection = list.GetItems(curQry); DataTable dt = olistitemcollection.GetDataTable(); grvEmployeeDetails.DataSource = dt; grvEmployeeDetails.DataBind(); } } } protected void btnSave_Click(object sender, EventArgs e) { using (SPSite site = new SPSite(SPContext.Current.Site.Url)) // Site Collection { using (SPWeb web = site.OpenWeb()) // Site { SPList list = web.Lists[“EmployeeList”]; // List SPListItem oListItem = list.Items.Add(); oListItem[“Title”] = txtEmployeeName.Text; oListItem[“EmployeeName”] = txtEmployeeName.Text; oListItem[“Age”] = txtAge.Text; oListItem.Update(); BindGrid(); lblresults.Text = “Saved Successfully”; } } } protected void btnEdit_Click(object sender, EventArgs e) { Button btn = (Button)sender; //Get the row that contains this button GridViewRow gvr = (GridViewRow)btn.NamingContainer; hfId.Value = gvr.Cells[0].Text; txtEmployeeName.Text = gvr.Cells[1].Text; txtAge.Text = gvr.Cells[2].Text; btnSave.Visible = false; btnUpdate.Visible = true; } protected void btnUpdate_Click(object sender, EventArgs e) { using (SPSite site = new SPSite(SPContext.Current.Site.Url)) // Site Collection { using (SPWeb web = site.OpenWeb()) // Site { SPList list = web.Lists[“EmployeeList”]; // List SPListItem oListItem = list.Items.GetItemById(Convert.ToInt32(hfId.Value)); oListItem[“Title”] = txtEmployeeName.Text; oListItem[“EmployeeName”] = txtEmployeeName.Text; oListItem[“Age”] = txtAge.Text; oListItem.Update(); BindGrid(); lblresults.Text = “Updated Successfully”; } } } protected void btnClear_Click(object sender, EventArgs e) { txtEmployeeName.Text = string.Empty; txtAge.Text = string.Empty; hfId.Value = string.Empty; lblresults.Text = string.Empty; btnSave.Visible = true; btnUpdate.Visible = false; } } |
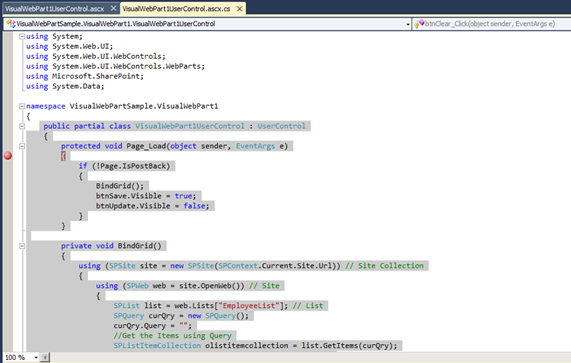
Right click on the Project and Click Deploy.
Go to Home Page and Click on Site Actions –>Edit Page
Insert –>Web part in Ribbon.

Select the Web part and click Add.
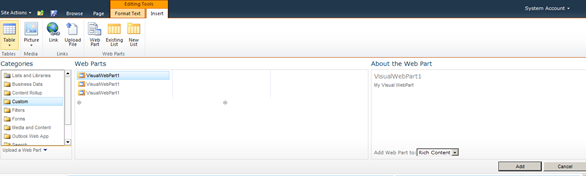
The Output as below,
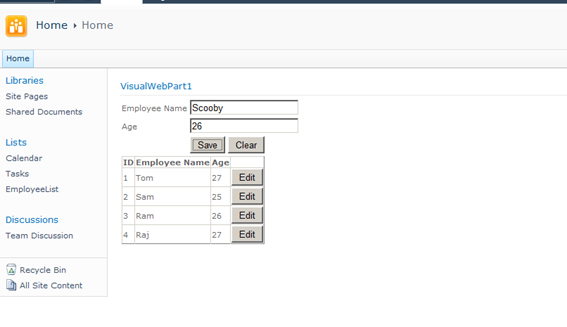
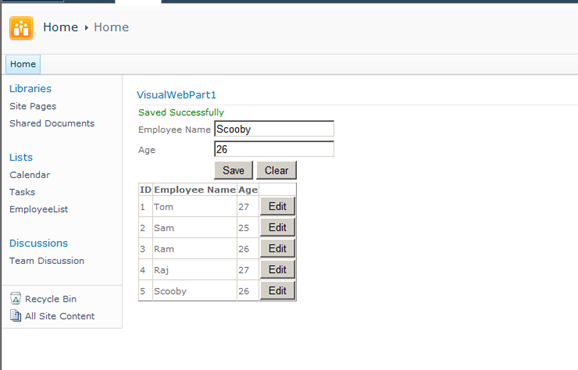
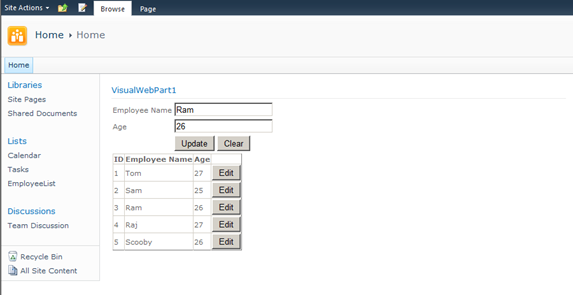
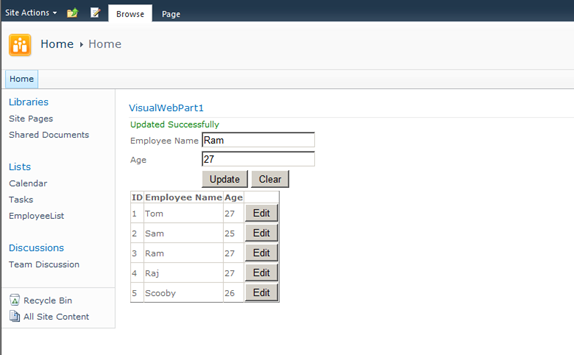
Click below to download the solution,
https://1drv.ms/u/s!ArddhCoxftkQg6l3ED81o25f4nzffg
Dot net / SharePoint freelance Consultants in Chennai
Document by Ganesan – Ganesanva@hotmail.com – +919042710472
Given the huge demand for dot net and SharePoint applications today and the growing importance of freelancers across the city, .net and SharePoint freelancers in Chennai have engaged in providing the best available professional coaching in the software applications. The job opportunities for dot net with certification have significantly increased the number of .net freelancers in Chennai. Whether it is for professional or educational purposes, it is advisable to take a Dot net Freelance trainer in Chennai to meet the ever-changing demands of corporates and educational systems.
Hiring a Microsoft certified trainer in Chennai helps with professional coaching on Microsoft technologies such Asp.Net, C#.Net, SQL server etc. And in today’s digitalized world, the virtual presence of the trainers in substantial enough for an expert coaching on the applications. An online Dot net trainer uses the best practices of the industry to ensure dot net and SharePoint solutions meet business and educational needs of contemporary period.
A certified Dot net corporate trainer in Chennai combines the passion for technological innovation and deep platform expertise to ensure that proper training is delivered. The key focus of an online Dot net trainer in Chennai is to equip individuals leverage dot net and SharePoint technologies effectively to meet the professional and educational requirements. Young and dynamic professional and aspiring students can utilize the services of many Dot net part time consultants in Chennai to handle challenging and innovative projects. Further, given the array of opportunities in SharePoint and dot net, career as a Freelance SharePoint developer in Chennai or as an asp.net MVC consultant in Chennai holds a lot of promise for the future.
Today’s competitive market has brought dot net and SharePoint professionals to the forefront. A few years ago, a dot net or a SharePoint consultant in Chennai would have been just another consultant but today dot net and SharePoint developers have defined the career path of many individuals and professional services. Being ahead of the industry and constantly upgrading in the latest versions, dot net and SharePoint developers have been and are the preferred vendors for many corporates and students for their training and educational needs.
Along with a good demonstration of how projects are developed in real-time environment, a Microsoft certified trainer in Chennai imparts confidence and knowledge of technical skills for both freshers and working professionals and also ensures that the sessions are well structured and interactive.
With the shifting expectations of the IT industry and education, the ecosystems of dot net and SharePoint and the range of professionalism exhibited by dot net and SharePoint trainers have become more radical and created excitement and interest in learning more about the applications.
Asp.net MVC Course content
Document by Vairavan – enquiry@softwaretraininginchennai.com – + 919042710472
- MVC Architecture
- Benefits of Asp.net MVC
- Explanation on Model, View and Controller.
- Filters in MVC
- View models
- JQuery and JavaScript
- Entity Framework with Asp.net
- Code First Approach
- Database First Approach
- POCO Generator
- Data Annotation in MVC
- Custom Data Annotation
- Textbox, Option button ,List box ,Dropdown controls in MVC
- Ajax call in MVC
- Dependency Injection
- MVC with Bootstrap controls
- Layered Architecture in MVC
- Working with Areas
- Partial Views
- Working with Web api
- WCF Consumption in ASP.net MVC
- Convert Asp.net web application to MVC application
- MVC with Angular JS
- Sample Project on MVC
Consume Web api Http service in MVC solution
Document by Vairavan – ganesanva@hotmail.com – + 919042710472
Create a MVC solution using Code First Approach MVC Entity framework.
Add a Web Api Controller Class as below,
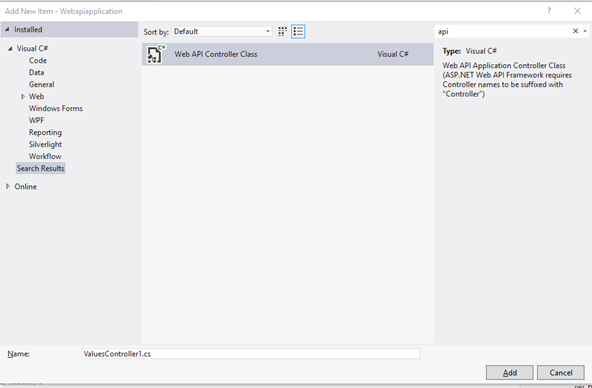
Look on the WebApiConfig.cs how the Routes are made.
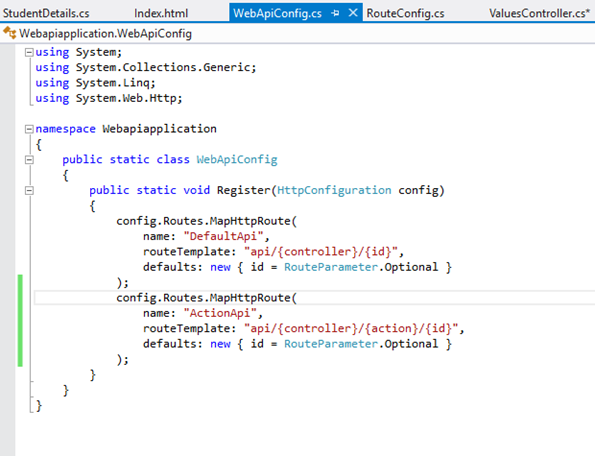
The API URL can be routed as both API/Controller/Id and Api/Controller/Action/Id by registering the Routes in Web api config.
Add the Below code in Api Controller(Used for CRUD),
| private UsersContext db = new UsersContext(); // GET api/values public IEnumerable<StudentDetails> GetallStudents() { return db.StudentDbset.ToList(); } // GET api/values/5 public StudentDetails GetStudents(int id) { StudentDetails studentdetails = db.StudentDbset.Find(id); return studentdetails; } [HttpPost] [ActionName(“Delete”)] // Post api/values/Delete/5 public string DeleteStudents(int id) { StudentDetails studentdetails = db.StudentDbset.Find(id); db.StudentDbset.Remove(studentdetails); db.SaveChanges(); return “Deleted”; } // POST api/values [HttpPost] [ActionName(“Post”)] public void Post([FromBody]string value) { } // PUT api/values/5 public void Put(int id, [FromBody]string value) { } // DELETE api/values/5 public void Delete(int id) { } |
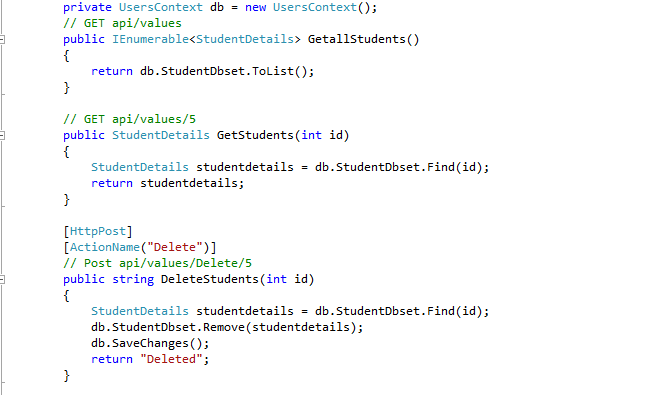
Screen clipping taken: 02-09-2016 18:44
The Above Api methods can be accessed using below URL,
http://localhost:16842/api/Values
http://localhost:16842/api/Values/5
http://localhost:16842/api/Values/Delete/5
The data can be returned as JSON,Xml or any other format depends on the attribute.
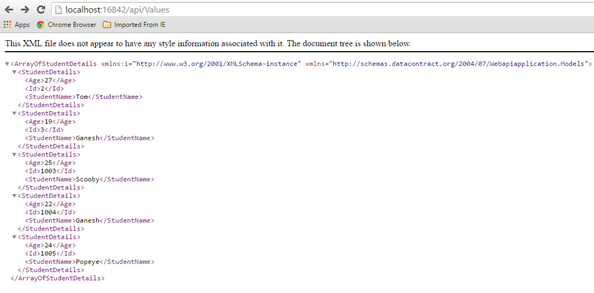
Create a new HTML page in the Solution as index.html
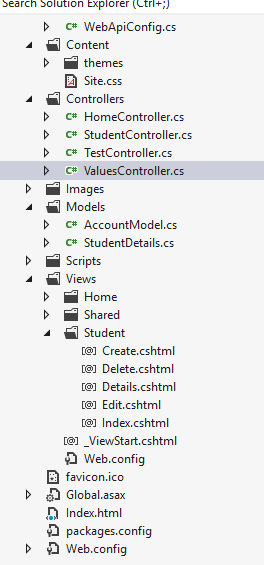
Put below code in Index.html,
| <!DOCTYPE html> <html xmlns=”http://www.w3.org/1999/xhtml”> <head> <title>Product App</title> </head> <body> <div> <h2>All Products</h2> <ul id=”products” /> </div> <div> <h2>Search by ID</h2> <input type=”text” id=”prodId” size=”5″ /> <input type=”button” value=”Search” onclick=”find();” /> <p id=”product” /> </div> <script src=”http://ajax.aspnetcdn.com/ajax/jQuery/jquery-2.0.3.min.js”></script> <script> var uri = ‘/api/values’; $(document).ready(function () { // Send an AJAX request $.getJSON(uri) .done(function (data) { // On success, ‘data’ contains a list of products. $.each(data, function (key, item) { // Add a list item for the product. $(‘<li>’, { text: formatItem(item) }).appendTo($(‘#products’)); }); }); }); function formatItem(item) { return item.studentName + ‘: $’ + item.Age; } function find() { var id = $(‘#prodId’).val(); $.getJSON(uri + ‘/’ + id) .done(function (data) { $(‘#product’).text(formatItem(data)); }) .fail(function (jqXHR, textStatus, err) { $(‘#product’).text(‘Error: ‘ + err); }); } </script> </body> </html> |
Now the MVC Application Works with Controller web api repository and a HTML page.
The output will be,
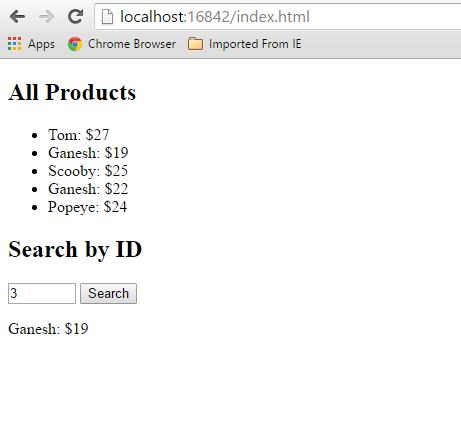
Click below to download the solution,
https://1drv.ms/u/s!ArddhCoxftkQg6hMmGfATxDIT2rtJw
Reference
http://www.asp.net/web-api/overview/getting-started-with-aspnet-web-api/tutorial-your-first-web-api
http://www.asp.net/web-api/overview/web-api-routing-and-actions/routing-in-aspnet-web-api
POCO Generator to generate Model Class files
Document by Ganesan – Ganesanva@hotmail.com – + 919600370429
Download POCO Generator EXE from the below URL.
It can be used for Reverse Engineering to change DB first approach to Code First Approach.

http://www.codeproject.com/Articles/892233/POCO-Generator
Connect to the DB.
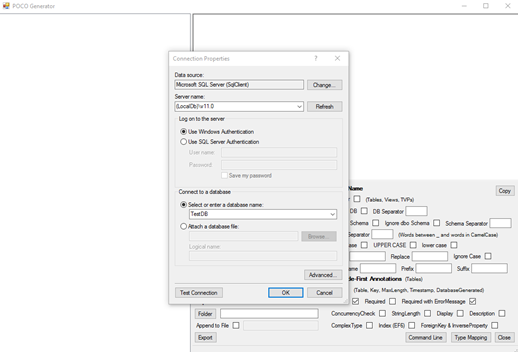
Select the Table that you want to Generate POCO Classes.
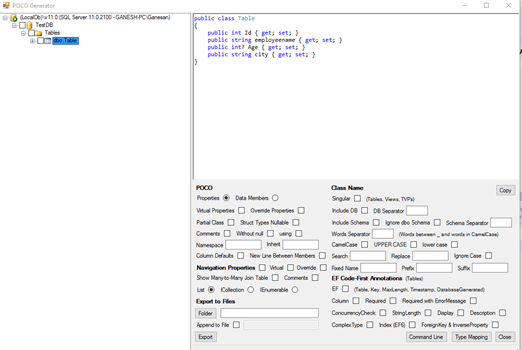
You can even generate Required attribute and Error field as EF Code First annotation as highlighted below.
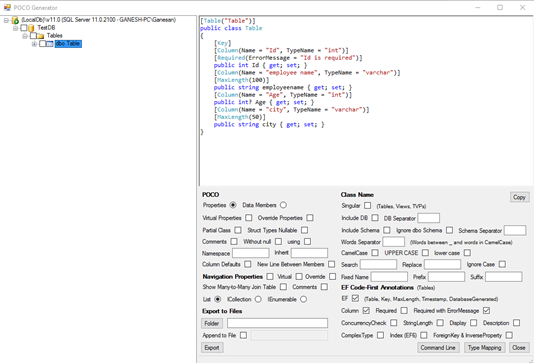
Areas in MVC
Document by Ganesan – ganesanva@hotmail.com – + 919600370429
-Create a MVC Application
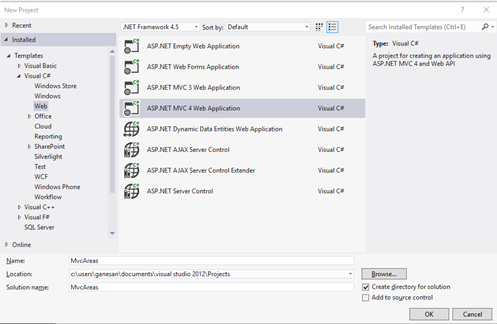
Click OK
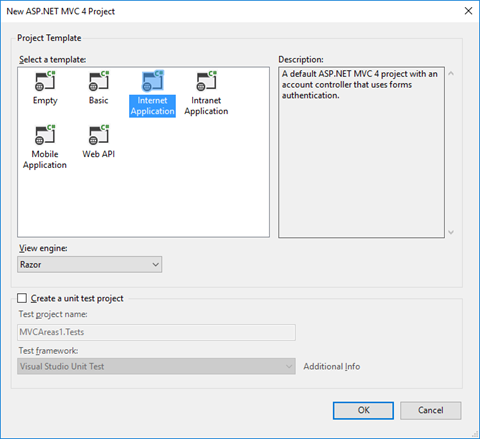
– Add Connection in web.config file as below,
| <connectionStrings> <add name=”TestConnection” connectionString=”Data Source=(LocalDb)\v11.0;Initial Catalog=TestDB;Integrated Security=True;Pooling=False” providerName=”System.Data.SqlClient” /> </connectionStrings> |
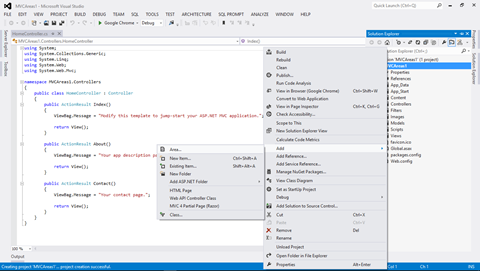
Add Area in the solution with name Admin
Create a Table in TestDB with AdminDetails Table as below.
| CREATE TABLE [dbo].AdminDetails ( [AdminId] INT NOT NULL PRIMARY KEY IDENTITY, [FirstName] VARCHAR(50) NOT NULL, [Lastname] VARCHAR(50) NOT NULL, [Email] VARCHAR(50) NULL, [Password] VARCHAR(50) NULL ) |
Create Employee Table in TestDB as below,
| CREATE TABLE [dbo].[Employee] ( [AdminId] INT NOT NULL, [employee name] VARCHAR (100) NULL, [Age] INT NULL, [Email] VARCHAR (50) NULL, PRIMARY KEY CLUSTERED ([AdminId] ASC) ); |
Add AdminDetails.cs in Admin Areas model as below,
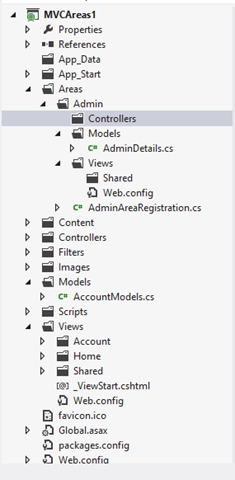
AdminDetails.Cs snippet as below,
| public class AdminDetails { [Key] public int AdminId { get; set; } public string FirstName { get; set; } public string Lastname { get; set; } public string Email { get; set; } public string Password { get; set; } } public class AdminContext : DbContext { public AdminContext() : base(“TestConnection”) { } public DbSet<AdminDetails> AdminDetailsDB { get; set; } } |
Right Click on Controller and Add Controller as below,
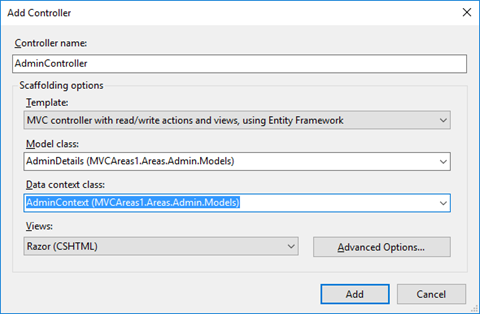
Now CRUD operation generated using Scaffolding.
Similarly Add Student Area by Right clicking on the solution and Add Areas.
Add StudentDetails.cs model in the Student Area.
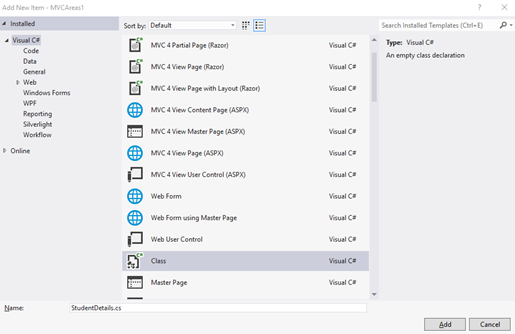
Copy the below snippet in StudentDetails.cs file,
| public class StudentDetails { [Key] public int Id { get; set; } public string StudentName { get; set; } public int? Age { get; set; } } public class StudentContext : DbContext { public StudentContext() : base(“TestConnection”) { } public DbSet<StudentDetails> StudentDetailsDB { get; set; } } |
Add Scaffolding for StudentController as below,
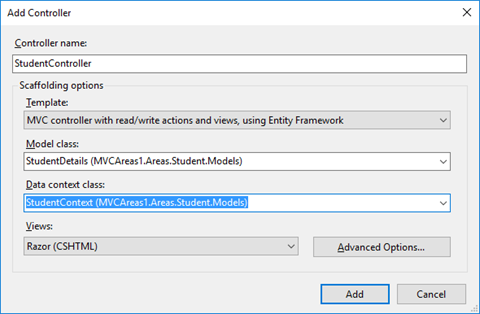
Now the Solution Explorer looks as below,
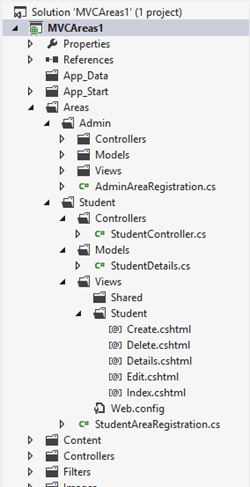
In AdminAreaRegistration and StudentAreaRegistration we can see the routing for Pages,
The OUTPUT for AREA Pages will be as below,
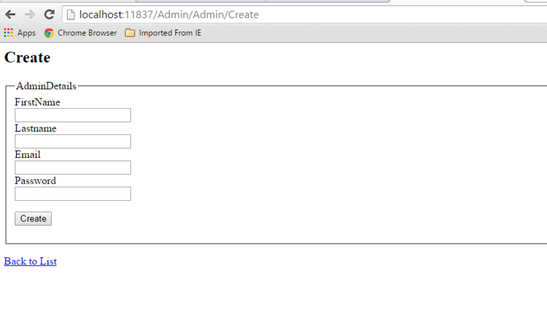
http://localhost:11837/Admin/Admin/Create
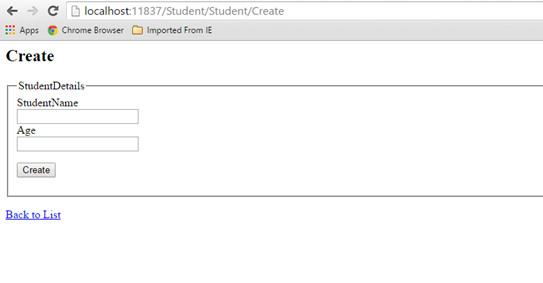
http://localhost:11837/Student/Student/Create
It allows to separate the modules in application development. This also helps for Link Building with relevant keywords.
Click below to download the solution,
https://1drv.ms/u/s!ArddhCoxftkQg6hXj8wspGLO_44ifQ
Windows Application CRUD Operation with ADO.net
Document by Ganesan – Ganesanva@hotmail.com – +919600370429
Create TestDB Database in Server Explorer
Create table UserDetails in TestDB with the below code snippet,
| CREATE TABLE [dbo].[UserDetails] ( [UserId] INT IDENTITY (1, 1) NOT NULL, [UserName] VARCHAR (100) NULL, [Password] VARCHAR (100) NULL, [City] VARCHAR (100) NULL, PRIMARY KEY CLUSTERED ([UserId] ASC) ); |
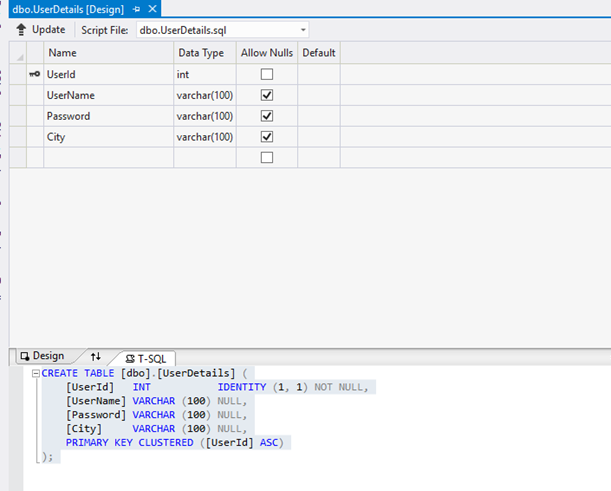
Add the below Connection string in app.config,
| <connectionStrings> <add name=”TestConnection” connectionString=”Data Source=(LocalDb)\v11.0;Initial Catalog=TestDB;Integrated Security=True;Pooling=False” providerName=”System.Data.SqlClient” /> </connectionStrings> |
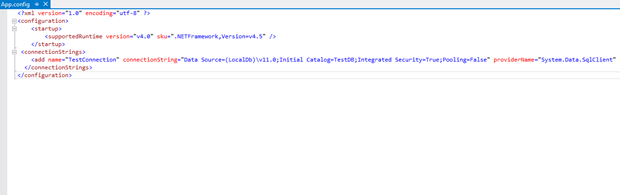
Design Form1 as below,
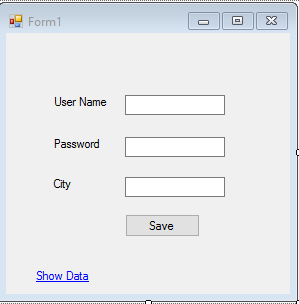
Textbox Properties
UserName Name – txtUserName
Password Name – txtPassword
City Name – txtCity
Save -btnSave
Show Data Link Name -linkLabel1
Events
btnSave OnClick =btnSave_Click
Show Data Link onClick= linkLabel1_LinkClicked
Add below Namespace in Form1.cs.
| Using System.Data.SqlClient; Using System.Configuration; |
Add Reference System.Configuration.DLL in the Project.
In Form1.cs (Replace) put the below Snippet,
| public partial class Form1 : Form { SqlConnection con = new SqlConnection(ConfigurationManager.ConnectionStrings[“TestConnection”].ConnectionString); public Form1() { InitializeComponent(); } private void btnSave_Click(object sender, EventArgs e) { con.Open(); SqlCommand cmd = new SqlCommand(“insert into UserDetails values(‘”+txtUserName.Text+”‘”+”,'”+txtPassword.Text +”‘,'”+txtCity.Text+”‘)”,con); int results=cmd.ExecuteNonQuery(); con.Close(); if (results > 0) { MessageBox.Show(“Inserted Successfully”); } } private void Clear() { txtUserName.Text = string.Empty; txtPassword.Text = string.Empty; txtCity.Text = string.Empty; } private void linkLabel1_LinkClicked(object sender, LinkLabelLinkClickedEventArgs e) { ShowData objShowData = new ShowData(); objShowData.Show(); this.Hide(); } } |
Add ShowData.cs form as below design,
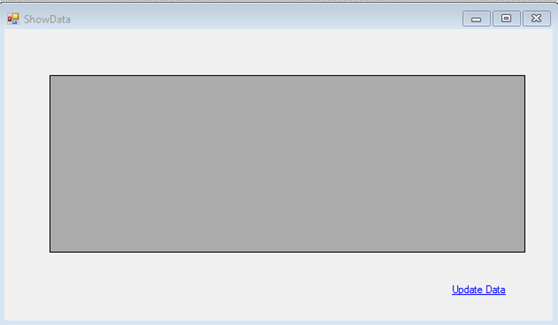
Properties
DataGrid Name – dgvGridData
Update Data Name – lnkUpdate
Events
lnkUpdate Link onClick Event – lnkUpdate_LinkClicked
ShowData Form OnLoad Event – ShowData_Load
Add below Namespace in ShowData .cs.
| Using System.Data.SqlClient; Using System.Configuration; |
In ShowData.cs (Replace) put the below Snippet,
| public partial class ShowData : Form { SqlConnection con = new SqlConnection(ConfigurationManager.ConnectionStrings[“TestConnection”].ConnectionString); public ShowData() { InitializeComponent(); } private void ShowData_Load(object sender, EventArgs e) { SqlCommand cmd = new SqlCommand(“select * from UserDetails”, con); SqlDataAdapter ada = new SqlDataAdapter(cmd); DataSet ds = new DataSet(); ada.Fill(ds); dgvGridData.DataSource = ds.Tables[0]; } private void lnkUpdate_LinkClicked(object sender, LinkLabelLinkClickedEventArgs e) { UpdateUserData objUpdateUserData = new UpdateUserData(); objUpdateUserData.Show(); this.Hide(); } } |
Add UpdateUserData.cs Form as below Design,
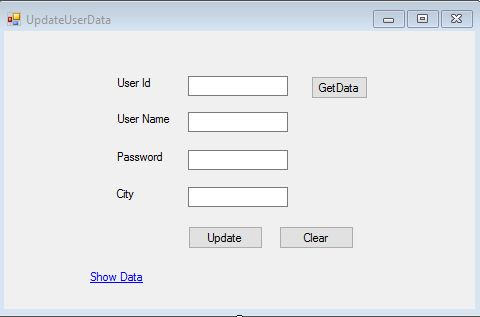
Properties
UserId textbox Name – txtUserId
UserName Textbox -txtUserName
Password Textbox – txtPassword
City Textbox – txtCity
Update button name -btnUpdate
Get Data button Name – btnGet
Clear button Name – btnClear
Show Data Link Name -linkLabel1
Event :
btnUpdate onClick =btnUpdate_Click
btnGet onClick= btnGet_Click
btnClear onClick =btnClear_Click
linkLabel1 onClick – linkLabel1_LinkClicked
Add below Namespace in UpdateUserData .cs.
| Using System.Data.SqlClient; Using System.Configuration; |
Put (Replace) the below snippet in UpdateUserData.cs ,
| public partial class UpdateUserData : Form { SqlConnection con = new SqlConnection(ConfigurationManager.ConnectionStrings[“TestConnection”].ConnectionString); public UpdateUserData() { InitializeComponent(); } private void btnUpdate_Click(object sender, EventArgs e) { con.Open(); SqlCommand cmd = new SqlCommand(“Update UserDetails Set UserName='” + txtUserName.Text + “‘,Password='” + txtPassword.Text + “‘,City='” + txtCity.Text + “‘ where UserId=” + txtUserId.Text, con); int results = cmd.ExecuteNonQuery(); con.Close(); if (results > 0) { MessageBox.Show(“Updated Successfully”); } Clear(); } private void Clear() { txtUserId.Text = string.Empty; txtUserName.Text = string.Empty; txtPassword.Text = string.Empty; txtCity.Text = string.Empty; btnGet.Enabled = true; } private void btnGet_Click(object sender, EventArgs e) { con.Open(); SqlCommand cmd = new SqlCommand(“select * from UserDetails where UserId=”+txtUserId.Text, con); SqlDataReader dr = cmd.ExecuteReader(); while (dr.Read()) { txtUserName.Text = dr[“UserName”].ToString(); txtPassword.Text = dr[“Password”].ToString(); txtCity.Text = dr[“City”].ToString(); } con.Close(); btnGet.Enabled = false; } private void linkLabel1_LinkClicked(object sender, LinkLabelLinkClickedEventArgs e) { ShowData objShowData = new ShowData(); objShowData.Show(); this.Hide(); } private void btnClear_Click(object sender, EventArgs e) { Clear(); } } |
The Output as below,
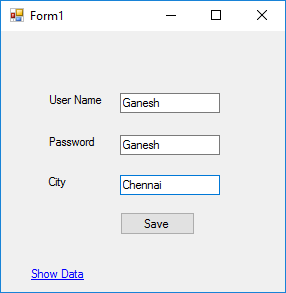
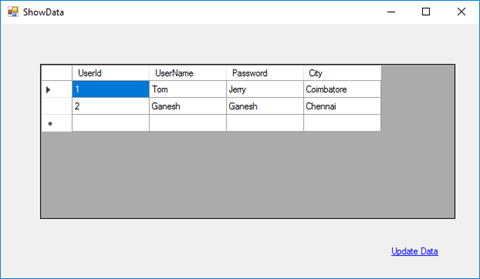

Table Data as below,
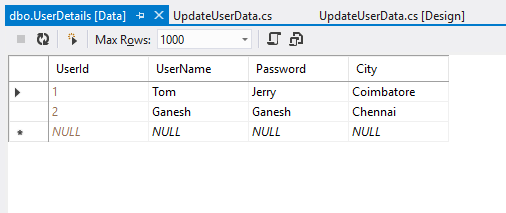
Click below to download the solution,
https://1drv.ms/u/s!ArddhCoxftkQg6khuXmrBnLklntXTA
Consume WCF application in MVC
Document by Ganesan – Ganesanva@hotmail.com – + 919600370429
Create a new MVC application.
Create Connection string in Web.config as below.
| <connectionStrings> <add name=”TestConnection” connectionString=”Data Source=(LocalDb)\v11.0;Initial Catalog=TestDB;Integrated Security=True;Pooling=False” providerName=”System.Data.SqlClient” /> </connectionStrings> |
Create StudentDetails.cs Class file as below.
| [DataContract] public class StudentDetails { [DataMember] public int Id { get; set; } [DataMember] public string StudentName { get; set; } [DataMember] public int? Age { get; set; } } |
Create DBContext.Cs file as below
| public class UsersContext : DbContext { public UsersContext() : base(“TestConnection”) { } public DbSet<StudentDetails> studentDbset { get; set; } } |
Create ScafFolding and autogenerate Views and controllers.
Make sure the Code now works in DB first approach. After this we are going to change the
data source to consume From WCF.
Create Service Reference as below,
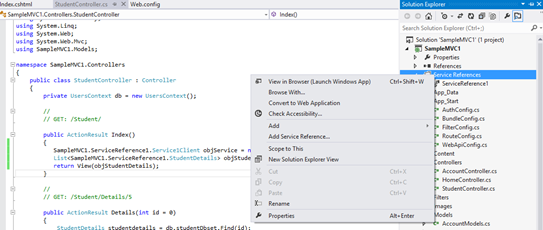
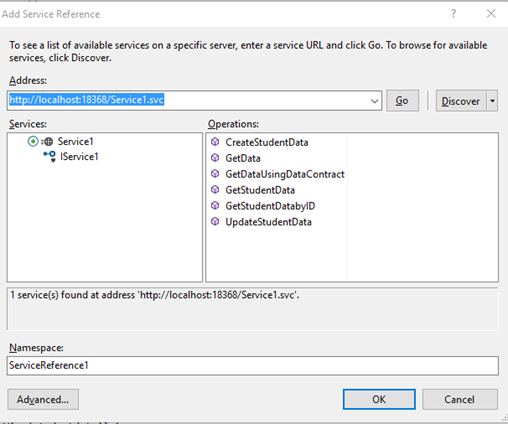
Click OK. Now the service reference will be added as below,
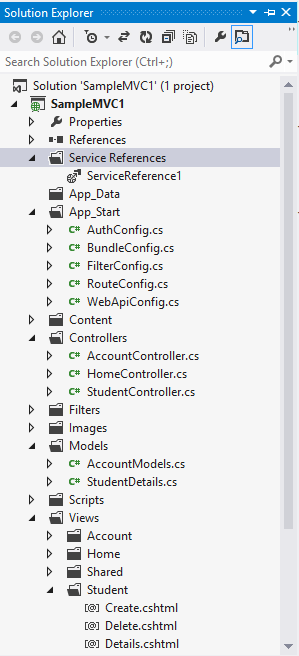
Replace the Controller methods for CRUD as below,
| public ActionResult Index() { SampleMVC1.ServiceReference1.Service1Client objService = new ServiceReference1.Service1Client(); List<SampleMVC1.ServiceReference1.StudentDetails> objStudentDetails= objService.GetStudentData(); return View(objStudentDetails); } [HttpPost] public ActionResult Create(SampleMVC1.ServiceReference1.StudentDetails studentdetails) { if (ModelState.IsValid) { SampleMVC1.ServiceReference1.Service1Client objService = new ServiceReference1.Service1Client(); string result= objService.CreateStudentData(studentdetails); return RedirectToAction(“Index”); } return View(studentdetails); } // // GET: /Student/Edit/5 public ActionResult Edit(int id = 0) { SampleMVC1.ServiceReference1.Service1Client objService = new ServiceReference1.Service1Client(); SampleMVC1.ServiceReference1.StudentDetails studentdetails = objService.GetStudentDatabyID(id); if (studentdetails == null) { return HttpNotFound(); } return View(studentdetails); } // // POST: /Student/Edit/5 [HttpPost] public ActionResult Edit(SampleMVC1.ServiceReference1.StudentDetails studentdetails) { if (ModelState.IsValid) { SampleMVC1.ServiceReference1.Service1Client objService = new ServiceReference1.Service1Client(); string result = objService.UpdateStudentData(studentdetails); return RedirectToAction(“Index”); } return View(studentdetails); } |
Replace the view First line I.E model reference to point to Service model

Similar for other pages too.
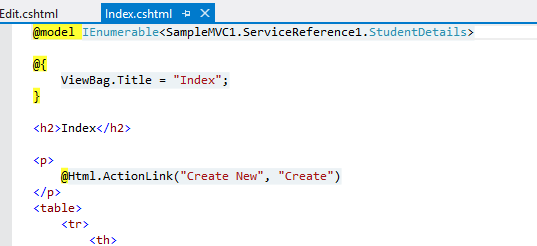
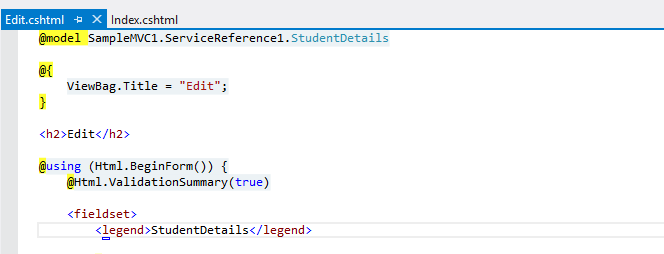
Now the pages will be like below
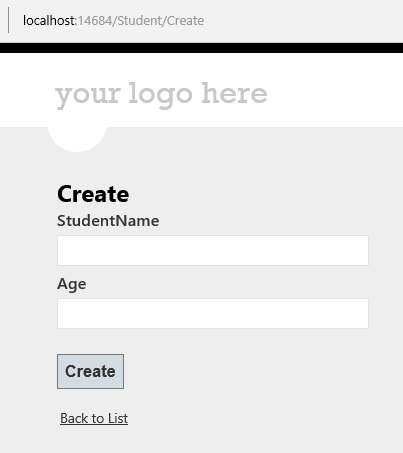

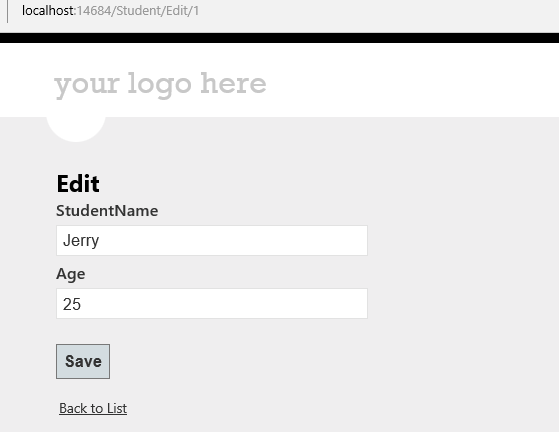
Click on the Link below to get the sample solution
https://1drv.ms/u/s!ArddhCoxftkQg6gdCJeDrlqBAJE0vg
Create wcf Application for CRUD operation
Document by Ganesan – Ganesanva@hotmail.com – + 919600370429
-Create StudentDetails Table in Local DB
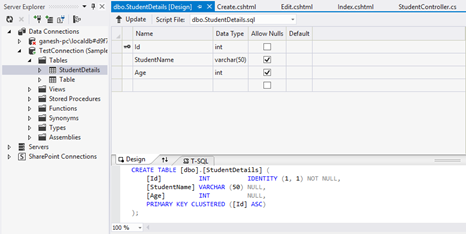
Right Click on the DB and Click Properties.
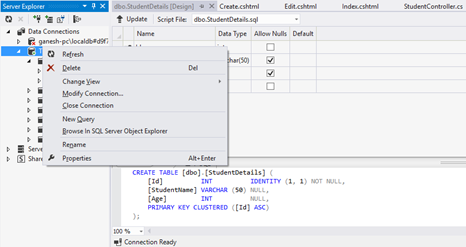
Connection String can be seen in Property window.
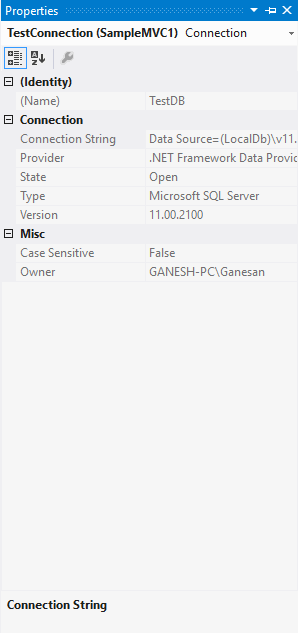
– Create a new WCF Service Application.
Put the connection string above in Web.config as in Snippet.
| <connectionStrings> <add name=”TestConnection” connectionString=”Data Source=(LocalDb)\v11.0;Initial Catalog=TestDB;Integrated Security=True;Pooling=False” providerName=”System.Data.SqlClient” /> </connectionStrings> |
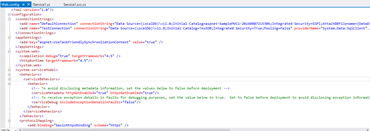
Create StudentDetails.cs Class file as below.
| [DataContract] public class StudentDetails { [DataMember] public int Id { get; set; } [DataMember] public string StudentName { get; set; } [DataMember] public int? Age { get; set; } } |
Create DBContext.Cs file as below
| public class UsersContext : DbContext { public UsersContext() : base(“TestConnection”) { } public DbSet<StudentDetails> studentDbset { get; set; } } |
Open the default interface file IService1.cs
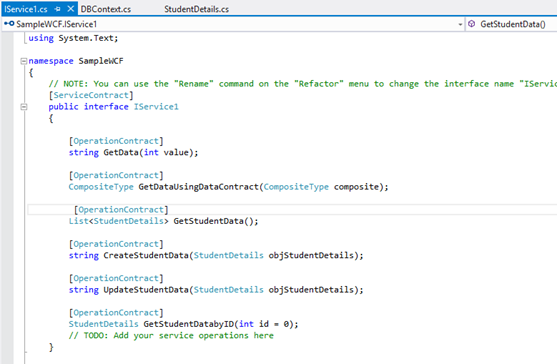
Insert the Snippet as below
| [OperationContract] List<StudentDetails> GetStudentData(); [OperationContract] string CreateStudentData(StudentDetails objStudentDetails); [OperationContract] string UpdateStudentData(StudentDetails objStudentDetails); [OperationContract] StudentDetails GetStudentDatabyID(int id = 0); |
Implement the below code in Service1.Svc.cs
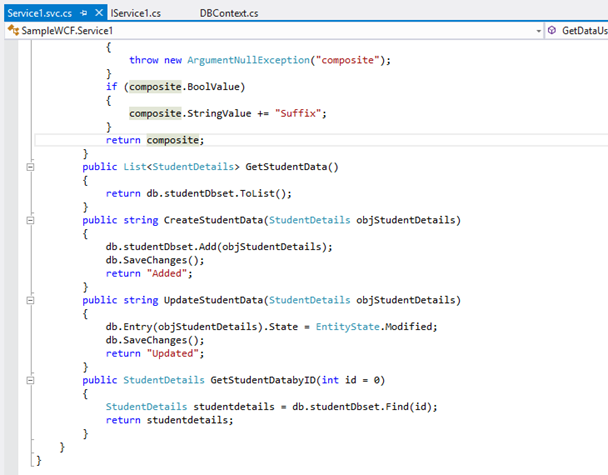
Code Snippet
| public List<StudentDetails> GetStudentData() { return db.studentDbset.ToList(); } public string CreateStudentData(StudentDetails objStudentDetails) { db.studentDbset.Add(objStudentDetails); db.SaveChanges(); return “Added”; } public string UpdateStudentData(StudentDetails objStudentDetails) { db.Entry(objStudentDetails).State = EntityState.Modified; db.SaveChanges(); return “Updated”; } public StudentDetails GetStudentDatabyID(int id = 0) { StudentDetails studentdetails = db.studentDbset.Find(id); return studentdetails; } |
Run the Service application as below

Click on the Link below to get the sample solution
https://1drv.ms/u/s!ArddhCoxftkQg6gdCJeDrlqBAJE0vg
Linq query with different data sources List, Array and SQL
Document by Ganesan – Ganesanva@hotmail.com – + 919600370429
Create StudentDetails Table in TestDB using the below snippet,
| CREATE TABLE [dbo].[StudentDetails] ( [Id] INT IDENTITY (1, 1) NOT NULL, [StudentName] VARCHAR (50) NULL, [Age] INT NULL, [inchargeStudentId] INT NULL, PRIMARY KEY CLUSTERED ([Id] ASC) ); |
– Create a Console Application
Use SQL to Linq Converter,
http://www.sqltolinq.com/
Click on Generate Linq to SQL Model Files,
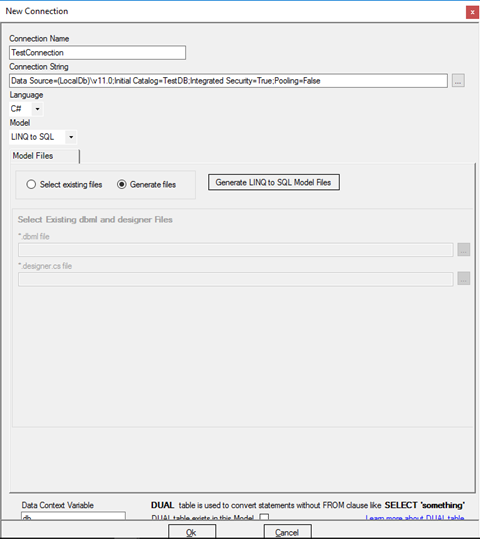
Browse a Folder and Click on OK.
Click on Generate Linq to SQL Files,
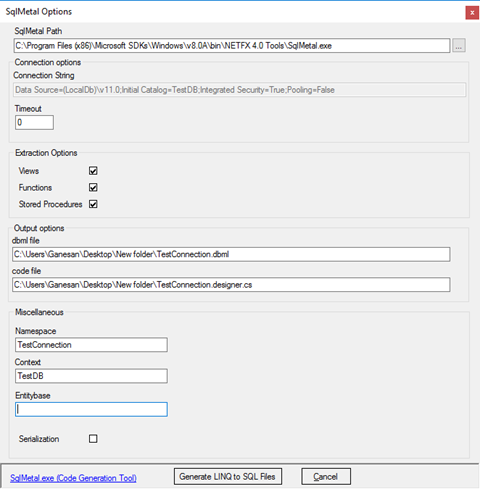
Convert SQL query to Linq as below,
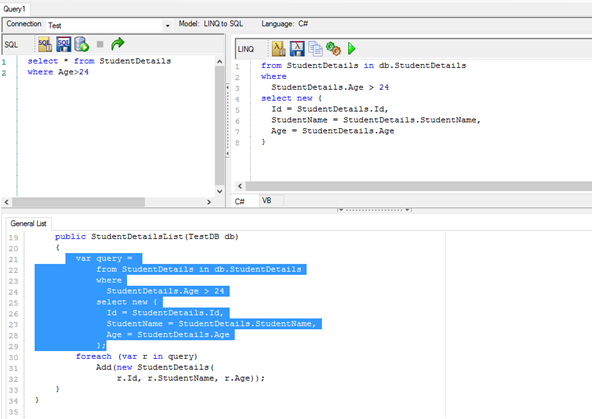
Age> 24 and StudentName contains ‘Sco’
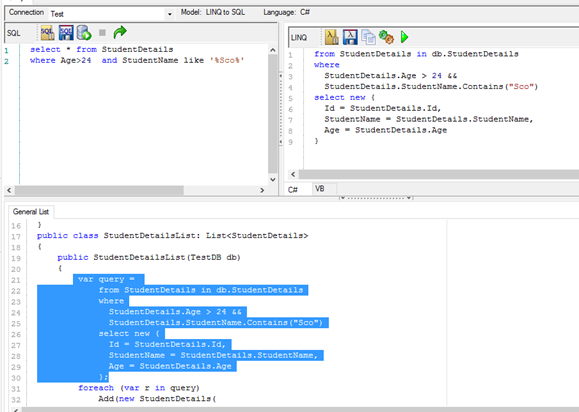
Screen clipping taken: 10-09-2016 19:21
Self Join in Linq
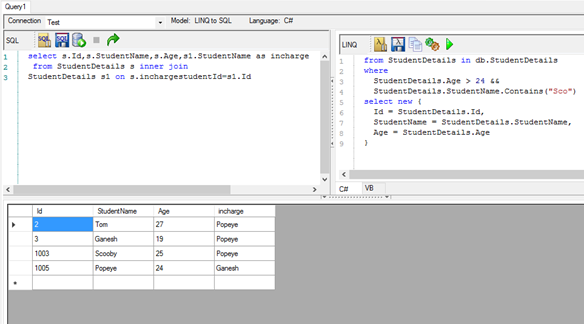
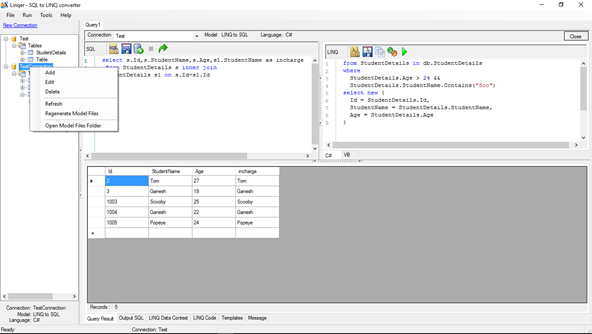
Right click on the table and select Regenerate Model Files.
Insert the connection below in App.config,
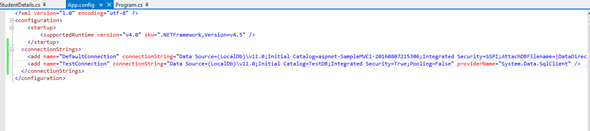
| <connectionStrings> <add name=”TestConnection” connectionString=”Data Source=(LocalDb)\v11.0;Initial Catalog=TestDB;Integrated Security=True;Pooling=False” providerName=”System.Data.SqlClient” /> </connectionStrings> |
Add StudentDetails.cs and data context file as below,
| public class StudentDetails { public int Id { get; set; } public string StudentName { get; set; } public int? Age { get; set; } public int? InchargeStudentId { get; set; } } public class UsersContext : DbContext { public UsersContext(): base(“TestConnection”) { } public DbSet<StudentDetails> studentDbset { get; set; } } |
Insert the below Code snippet in Console,
| class Program { private static UsersContext db = new UsersContext(); static void Main(string[] args) { /* Getting the Student Db Collection from DB */ List<StudentDetails> obj= db.studentDbset.ToList(); foreach (var item in obj) { Console.WriteLine(“Student Name” + “\t” + item.StudentName + “\t” + “Age:” + item.Age); } /* Getting the Student Db Collection for Age>24 from DB */ Console.WriteLine(“———————————————————-“); Console.WriteLine(“Printing Age > 24”); var query = from StudentDetails1 in db.studentDbset where StudentDetails1.Age > 24 select new { Id = StudentDetails1.Id, StudentName = StudentDetails1.StudentName, Age = StudentDetails1.Age }; foreach (var r in query) Console.WriteLine(“Student Name” + “\t” + r.StudentName + “\t” + “Age:” + r.Age); /* Getting the Student Db Collection for Age>24 from DB */ Console.WriteLine(“———————————————————-“); Console.WriteLine(“Printing Age > 24 && Student Name contains Sco”); var query1 = from StudentDetails1 in db.studentDbset where StudentDetails1.Age > 24 && StudentDetails1.StudentName.Contains(“Sco”) select new { Id = StudentDetails1.Id, StudentName = StudentDetails1.StudentName, Age = StudentDetails1.Age }; foreach (var r in query1) Console.WriteLine(“Student Name” + “\t” + r.StudentName + “\t” + “Age:” + r.Age); /* Getting the Student Db Collection for getting Incharge on Self join from DB */ Console.WriteLine(“———————————————————-“); Console.WriteLine(“Printing self join for Students Lead”); var query2 = from s in db.studentDbset join s1 in db.studentDbset on new { InchargeStudentId = s.InchargeStudentId.Value } equals new { InchargeStudentId = s1.Id } select new { s.Id, s.StudentName, s.Age, incharge = s1.StudentName }; foreach (var r in query2) Console.WriteLine(“Student Name” + “\t” + r.StudentName + “\t” + “Age:” + r.Age + “\t” + “Incharge:” + r.incharge); /* Getting the Collection from DB */ Console.WriteLine(“———————————————————-“); Console.WriteLine(“Printing from Array”); string[] ary = new string[] { “Jan”, “Feb”, “Mar”, “Apr”, “May”, “Jun”, “Jul”, “Aug”, “Sep”, “Oct”, “Nov”, “Dec” }; var res = from months in ary where months.StartsWith(“J”) select new { MonthStartWith_J = months }; foreach (var r in res) Console.WriteLine(“Month:” + “\t” + r.MonthStartWith_J); /* Getting the Collection from DB */ Console.WriteLine(“———————————————————-“); Console.WriteLine(“Printing from Collection”); List<string> objstring = new List<string>(); objstring.Add(“Yahooo”); objstring.Add(“Google”); objstring.Add(“HCL”); var obj1 = from company in objstring where company.StartsWith(“Goo”) select new { companyStartWith_Goo = company }; foreach (var r in obj1) Console.WriteLine(“Month:” + “\t” + r.companyStartWith_Goo); Console.ReadLine(); } } |
The Output as below,
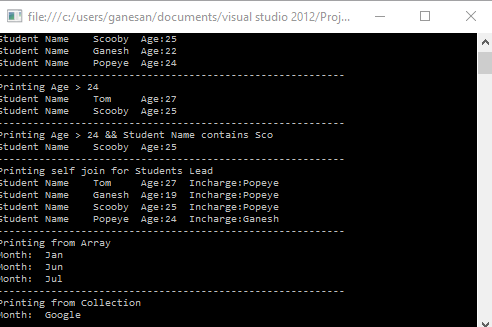
Screen clipping taken: 10-09-2016 21:34
Click below for download,
https://1drv.ms/u/s!ArddhCoxftkQg6hZlD6medX1rPn9pw
Reference
http://www.dotnetlearners.com/linq/linq-to-string-array-with-example.aspx
Asp.net Validation Controls
Document by Ganesan -ganesanva@hotmail.com – + 919600370429
List of Asp.net Validation available are as follows,
1.Required Field validator
2.Regular Expression validator
3.Range Validator
4.Custom Validator
5.Compare Validator
Create a new Asp.net Web application
File -> New Project
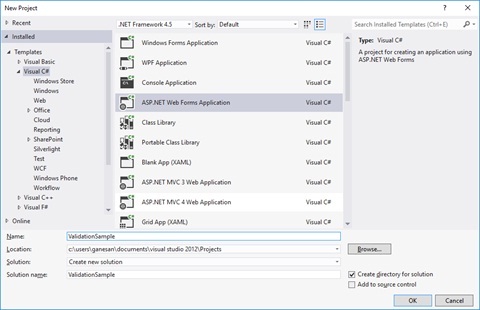
Right click on the solution and Add New web form page AddStudentDetails.aspx as below,

Replace the HTML Tag in AddStudentDetails.aspx with below snippet,
| <html xmlns=”http://www.w3.org/1999/xhtml”> <head runat=”server”> <title></title> </head> <body> <form id=”form1″ runat=”server”> <div> <table border=”0″ cellspacing=”2″ cellpadding=”2″> <tr> <td>Student Name </td> <td> <asp:TextBox ID=”txtStudentName” runat=”server”></asp:TextBox> <asp:RequiredFieldValidator ID=”RQStudentName” runat=”server” ControlToValidate=”txtStudentName” ErrorMessage=”Please enter Student Name” ForeColor=”Red”> </asp:RequiredFieldValidator> </td> </tr> <tr> <td> Date of Birth </td> <td> <asp:TextBox ID=”txtDOB” runat=”server”></asp:TextBox> <asp:RangeValidator ID=”Rvalid” runat=”server” ControlToValidate=”txtDOB” ErrorMessage=”Date of Birth should not be greater than current date” Type=”Date” ForeColor=”Red”></asp:RangeValidator> </td> </tr> <tr> <td> Age </td> <td> <asp:TextBox ID=”txtAge” runat=”server”></asp:TextBox> <asp:RequiredFieldValidator ID=”RqAge” runat=”server” ControlToValidate=”txtAge” ErrorMessage=”Please enter Student Age” ForeColor=”Red”> </asp:RequiredFieldValidator> <asp:RangeValidator ID=”RgAge” runat=”server” ControlToValidate=”txtAge” ErrorMessage=”Age should be greater than 18″ MinimumValue=”18″ ForeColor=”Red” MaximumValue=”2000″ Type=”Integer”></asp:RangeValidator> </td> </tr> <tr> <td> City </td> <td> <asp:DropDownList ID=”ddlCity” runat=”server”> <asp:ListItem Text=”–Select–” Value=”–Select–“></asp:ListItem> <asp:ListItem Text=”Chennai” Value=”Chennai”></asp:ListItem> <asp:ListItem Text=”Madurai” Value=”Madurai”></asp:ListItem> </asp:DropDownList> <asp:RequiredFieldValidator ID=”RqCity” runat=”server” InitialValue=”–Select–” ControlToValidate=”ddlCity” ErrorMessage=”Please enter Student City” ForeColor=”Red”> </asp:RequiredFieldValidator> </td> </tr> <tr> <td> Email Id </td> <td> <asp:TextBox ID=”txtEmailId” runat=”server”></asp:TextBox> <asp:RequiredFieldValidator ID=”RqEmailId” runat=”server” ControlToValidate=”txtEmailId” ErrorMessage=”Please enter Email ID” ForeColor=”Red”> </asp:RequiredFieldValidator> <asp:RegularExpressionValidator ID=”REVEmailId” runat=”server” ErrorMessage=”please enter correct email id” ControlToValidate=”txtEmailId” ValidationExpression=”\w+([-+.’]\w+)*@\w+([-.]\w+)*\.\w+([-.]\w+)*” ForeColor=”Red”></asp:RegularExpressionValidator> </td> </tr> <tr> <td> User Name </td> <td> <asp:TextBox ID=”txtUserName” runat=”server”></asp:TextBox> <asp:RequiredFieldValidator ID=”RequiredFieldValidator1″ runat=”server” ControlToValidate=”txtUserName” ErrorMessage=”Please enter UserName” ForeColor=”Red”> </asp:RequiredFieldValidator> <asp:CustomValidator ID=”CVUserName” runat=”server” ControlToValidate=”txtUserName” OnServerValidate=”CVUserName_ServerValidate” ErrorMessage=”UserName should not be greater than 15 digits” ForeColor=”Red”></asp:CustomValidator> </td> </tr> <tr> <td> Password </td> <td> <asp:TextBox ID=”txtPassword” runat=”server” TextMode=”Password”></asp:TextBox> <asp:RequiredFieldValidator ID=”RequiredFieldValidator2″ runat=”server” ControlToValidate=”txtPassword” ErrorMessage=”Please enter Password” ForeColor=”Red”> </asp:RequiredFieldValidator> </td> </tr> <tr> <td> Retype Password </td> <td> <asp:TextBox ID=”txtRetypePassword” runat=”server” TextMode=”Password”></asp:TextBox> <asp:RequiredFieldValidator ID=”RequiredFieldValidator3″ runat=”server” ControlToValidate=”txtRetypePassword” ErrorMessage=”Please enter Retype Password” ForeColor=”Red”> </asp:RequiredFieldValidator> <asp:CompareValidator ID=”cmpPasswordmatch” runat=”server” ControlToCompare=”txtPassword” ControlToValidate=”txtRetypePassword” ErrorMessage=”Password and Retype Password should not match” ForeColor=”Red”> </asp:CompareValidator> </td> </tr> <tr> <td></td> <td> <asp:Button ID=”btnSave” runat=”server” Text=”Save” CausesValidation=”true” OnClick=”btnSave_Click” /> </td> </tr> </table> </div> </form> </body> </html> |
Replace the AddStudentDetails.cs class with the below snippet,
| public partial class AddStudentDetails : System.Web.UI.Page { protected void Page_Load(object sender, EventArgs e) { Rvalid.MinimumValue = DateTime.MinValue.ToString(“dd-MM-yyyy”); Rvalid.MaximumValue = DateTime.Now.ToString(“dd-MM-yyyy”); } protected void CVUserName_ServerValidate(object source, ServerValidateEventArgs args) { args.IsValid = (args.Value.Length < 15); } protected void btnSave_Click(object sender, EventArgs e) { if (Page.IsValid) { Response.Write(“Saved”); } } } |
The Output as below,
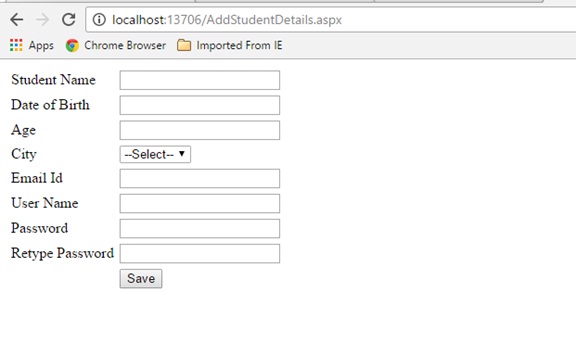
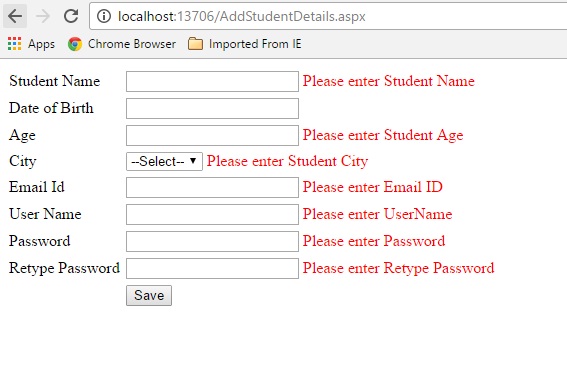
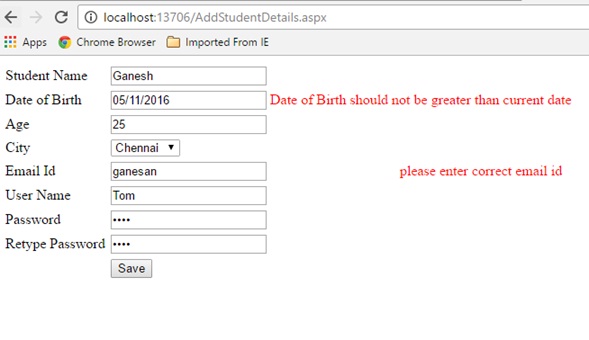
Custom Validation on server event,
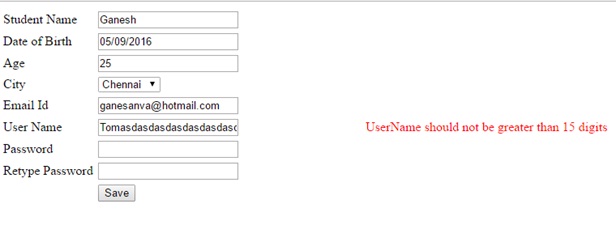
Click below to download the solution,
https://1drv.ms/u/s!ArddhCoxftkQg6kmic1tyrHNsIbXqA
Asp.net CRUD operation with Ado.net
Document by Ganesan – Ganesanva@hotmail.com – + 919600370429
– Create Database in SQL as “StudentDB”
– Create Table “StudentDetails” with the below snippet,
| CREATE TABLE [dbo].[StudentDetails] ( [Id] INT IDENTITY (1, 1) NOT NULL, [StudentName] VARCHAR (50) NULL, [Age] INT NULL, PRIMARY KEY CLUSTERED ([Id] ASC) ); |
You can see the DB created in local SQL express as below,
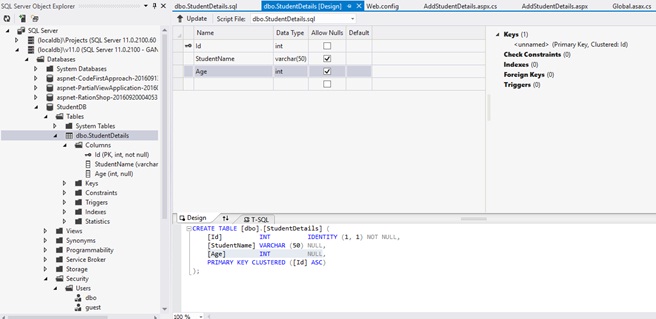
– Create a new Asp.net Web forms Application as below
File –> New Project
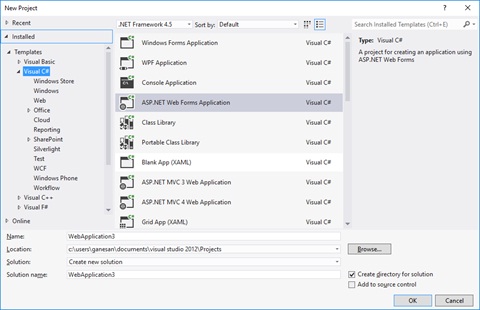
Add the Connection string in Web.config as below snippet,
| <connectionStrings> <add name=”DefaultConnection” providerName=”System.Data.SqlClient” connectionString=”Data Source=(localdb)\v11.0;Initial Catalog=StudentDB;Integrated Security=True;Connect Timeout=15;Encrypt=False;TrustServerCertificate=False” /> </connectionStrings> |
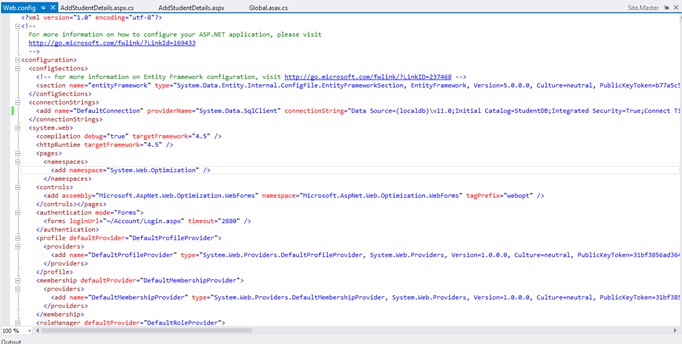
Add new Page as AddStudentDetails.aspx as below,
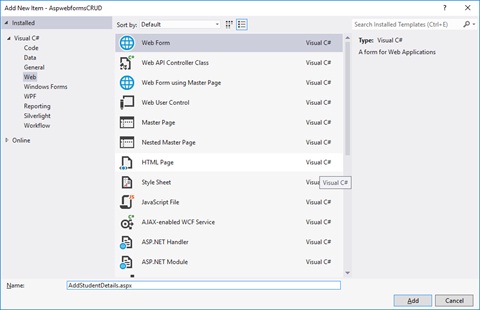
Replace the Below HTML code in AddStudentDetails.aspx file as below,
| <html xmlns=”http://www.w3.org/1999/xhtml”> <head runat=”server”> <title></title> </head> <body> <form id=”form1″ runat=”server”> <div> <table border=”0″ cellspacing=”2″ cellpadding=”2″> <tr> <td> <asp:Label ID=”lblStudentName” runat=”server” Text=”Student Name”></asp:Label> </td> <td> <asp:TextBox ID=”txtStudentName” runat=”server”></asp:TextBox> </td> </tr> <tr> <td> <asp:Label ID=”lblAge” runat=”server” Text=”Age”></asp:Label> </td> <td> <asp:TextBox ID=”txtAge” runat=”server”></asp:TextBox> </td> </tr> <tr> <td></td> <td> <asp:Button ID=”btnSubmit” runat=”server” Text=”Submit” OnClick=”btnSubmit_Click” /> <asp:Button ID=”btnUpdate” runat=”server” Text=”Update” OnClick=”btnUpdate_Click” /> <asp:Button ID=”btnClear” runat=”server” Text=”Clear” OnClick=”btnClear_Click” /> <asp:HiddenField ID=”hfId” runat=”server”></asp:HiddenField> </td> </tr> <tr> <td colspan=”2″> <asp:GridView ID=”grvStudentDetails” runat=”server” AutoGenerateColumns=”false”> <Columns> <asp:BoundField DataField=”Id” HeaderText=”Id” /> <asp:BoundField DataField=”StudentName” HeaderText=”StudentName” /> <asp:BoundField DataField=”Age” HeaderText=”Age” /> <asp:TemplateField> <ItemTemplate> <asp:Button ID=”btnEdit” runat=”server” Text=”Edit” OnClick=”btnEdit_Click” /> </ItemTemplate> </asp:TemplateField> </Columns> </asp:GridView> </td> </tr> </table> </div> </form> </body> </html> |
Replace the AddStudentDetails.aspx.cs file as below,
| public partial class AddStudentDetails : System.Web.UI.Page { SqlConnection con = new SqlConnection(ConfigurationManager.ConnectionStrings[“DefaultConnection”].ToString()); protected void Page_Load(object sender, EventArgs e) { if (!Page.IsPostBack) { BindGrid(); } } private void BindGrid() { btnSubmit.Visible = true; btnUpdate.Visible = false; SqlCommand cmd = new SqlCommand(“Select * from StudentDetails”, con); SqlDataAdapter ada = new SqlDataAdapter(cmd); DataSet ds = new DataSet(); ada.Fill(ds); grvStudentDetails.DataSource = ds.Tables[0]; grvStudentDetails.DataBind(); } protected void btnSubmit_Click(object sender, EventArgs e) { con.Open(); SqlCommand cmd = new SqlCommand(“insert into StudentDetails values(‘”+txtStudentName.Text+”‘,”+txtAge.Text+”)”, con); int result=cmd.ExecuteNonQuery(); if (result > 0) { Response.Write(“Inserted Successfully”); } con.Close(); BindGrid(); btnClear_Click(null, null); } protected void btnEdit_Click(object sender, EventArgs e) { Button btn = (Button)sender; //Get the row that contains this button GridViewRow gvr = (GridViewRow)btn.NamingContainer; hfId.Value = gvr.Cells[0].Text; txtStudentName.Text = gvr.Cells[1].Text; txtAge.Text = gvr.Cells[2].Text; btnSubmit.Visible = false; btnUpdate.Visible = true; } protected void btnUpdate_Click(object sender, EventArgs e) { con.Open(); SqlCommand cmd = new SqlCommand(“Update StudentDetails set StudentName='” + txtStudentName.Text + “‘,Age=” + txtAge.Text + ” where Id=”+hfId.Value, con); int result = cmd.ExecuteNonQuery(); if (result > 0) { Response.Write(“Updated Successfully”); } con.Close(); BindGrid(); btnClear_Click(null, null); } protected void btnClear_Click(object sender, EventArgs e) { txtStudentName.Text = string.Empty; txtAge.Text = string.Empty; hfId.Value = string.Empty; } } |
Run the solution.
The Output will be below,
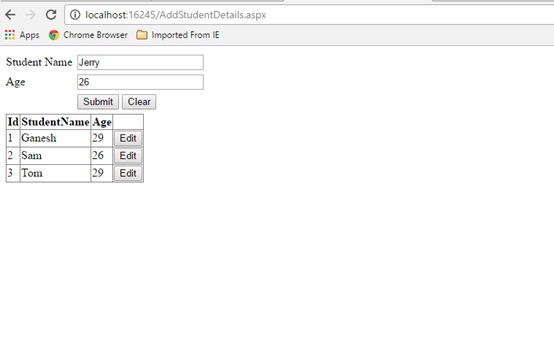
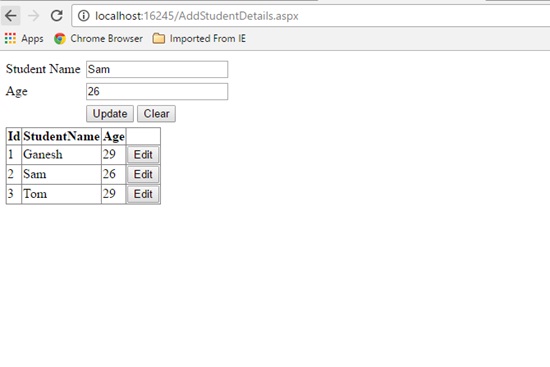
Click below to download the solution,
https://1drv.ms/u/s!ArddhCoxftkQg6h98mZAX_-Zv-6reQ
Identifying Dot Net Coaching Institutes in Chennai for Shaping the Skills
Dot net training is an essential one for those who get jobs in leading IT companies and other firms with better salaries. There are many organizations that recruit employees based on their experience and skills. Some even conduct tests for analyzing the potentials of a job seeker. It is an essential one to undergo a training program in a leading institute for shaping the potentials efficiently. However, it is necessary to find a right training center properly for choosing a course depending upon the needs. The internet is a best platform for this purpose because it helps to compare the services offered by various institutes easily. With dot net coaching, it is possible to develop the potentials to reach high levels in career.
Most training centers organize the classes based on the requirements of a person to shape his or her abilities with excellence. Besides that, they focus more on conduct the program with industry experts and live projects for achieving better results. Dot not training in Chennai is a suitable for students, job seekers and employees to develop their skills at different levels. It gives ways for learning the lessons in a comfortable environment to meet exact needs. Apart from that, it contributes a lot in augmenting the programming and other potentials with expert teaching faculties. Anyone interested in knowing more about the coaching classes can get ideas from a counselor for selecting a program which perfectly suits their requirements.
Some institutes even assist the students to apply for the jobs in reputed companies. On the other hand, it is necessary to go through the testimonials and reviews before choosing a course in a center. This will help a lot for learning the lessons in a comfortable environment. Different types of coaching programs are available for the students to augment their abilities. Dot net training institute in Chennai mainly aims at developing self confidence levels of students with different types of tasks. In fact, it gives ways for analyzing their skills with theory and practice classes. Satisfaction guarantee is the primary aim of a coaching center in Chennai while offering services to students. Online training is also available for those who want to augment their skills anywhere.
Dot net training is a perfect one for both employees and employers to complete a project with more accuracy. They can learn more about problem solving techniques to gain more benefits. It is an important one to consider certain important facts before choosing an institute. Study materials offered by the institutes are extremely useful for ensuring desired outputs when executing a new project. Many training institutes allow students to pay their fees with flexible options. Besides that, they conduct exams for the students to correct their mistakes as soon as possible. It is possible to learn more about the training programs from the internet for seeking admission into a right one. The students can undergo coaching classes in a center with the latest computer applications for meeting essential needs in the learning procedure.
Best Dot Net Training Institute in Chennai
Microsoft.net preparing can gain from your preferred dot net training institute in Chennai. The need to comprehend the general working can be clarified in this article. Microsoft confirmation matters a considerable measure when you are searching for a course like this one. The sole reason is on the grounds that the course is bit excessive and included details. You should be clear in your nuts and bolts before you dive in such confirmation. The foundation through which you plan to finish this course ought to likewise be known. One little wrong move can make enormous issues for your vocation.
Utilization of web should be possible to discover the dot net training in Chennai . There are various dot net training institute in Chennai through which you can take in this course. You have to research well concerning such prerequisites; there are sites of the establishments which offer such courses. Check these sites to know subtle elements like course information, charges, timings, choices of classes and learning. Points are imperative with regards to learning net instructional class. Check if the course has every one of the points or not, this will give you greatest inclination as far as thinking about the course.
You have to check as to notoriety in the best dot net training institute in Chennai. This should be possible when by checking the ex-understudies remarks on the site of the establishment. On the off chance that you get the chance to see negative and discourteous remarks then it’s ideal to see some other organization. Extra data can be picked up by reaching the understudies on the off chance that they have said their contact number. Each coin has two sides so it’s not going to be green the distance. Minor issues will keep on being available yet can be overlooked when your needs are set.
.net training in Chennai installment choices are likewise present when you wish to apply. On the off chance that you are making the complete installment in one go then expect some rebate on your last sum. If not this then there would be extra which can help in future learning. This sort of procedure is seen in a large portion of the .net training in Chennai.
Arrangement alternatives are likewise there that can give you the ideal help in your vocation. Finishing Microsoft.net preparing in this manner ends up being gainful and key over the long haul. You would have the ideal vocation in IT field. Continuously explore well with regards to online courses so you get most extreme advantages over the long haul.
Programming codes are not physical items. We can’t see the codes, yet the client can utilize the consequences of a running a coded program as a product application. The product applications so created have reclassified our ordinary encounters and made life so natural, be it controlling a flight or purchasing basic needs from a store. Learning dot net course chennai is along these lines a superb street to pick up livelihood and enhance a man’s vocation profile.
Looking for Dot Net Training in Chennai?
Today, dot net professionals are in great demand and many companies are willing to recruit them with high salaries. Dot net is a software framework used for a variety of applications to maintain accuracy levels. It plays a vital role in web development, communication, data access and other areas for carrying out a project work with more efficiency. There are several software training institutes that organize dot net classes for those who want to enhance their levels. On the other hand, it is an important one to evaluate them from the internet for identifying a right center accordingly. The dot net training programs mainly focus on increasing the programming, problem solving, analytic and other skills of job seekers with excellence.
It is also a suitable one for the employees to develop their abilities effectively to implement the latest techniques in the programming side. Dot net training in Chennai involves different levels that help a person to develop his or her abilities considerably. Those who want to build their career in dot net can participate in the coaching classes which help them to seek jobs in leading companies. However, the fees for the training program might vary with a center and one should know more about them for accomplishing goals in life. Dot net training institute in Chennai offers both online and classroom services for students and others to focus more on their skill sets with excellence for ensuring optimal results.
Experienced trainers will assist the students to upgrade their skills with real time projects. In addition to that, they show methods for them to become an expert in IT industry. It is possible to seek jobs in software and other industries with a best dot net training institute in Chennai for starting a bright career. Fresh graduates who come out from their college and university can benefit a lot with the training programs for meeting essential needs. Moreover, they can know the course details from the faculties to select a right program which exactly suits a student. The dot net training aims at preparing a student to overcome challenges in a project to achieve desired outputs. It makes feasible ways for increasing the efficiency levels with industry experts and workshops.
As software technologies are growing rapidly these days, it is necessary for an employee or a student to implement them in a project. Several employers give preference to candidates who have a strong technical background. Having a dot net certificate will help a person to make his or her dreams true one in the job search process. Dot net course Chennai makes feasible ways for starting a new journey with flying colors. It is a perfect choice for excelling in programming areas for meeting essential requirements. Students must read the reviews and testimonials of training institutes before selecting a training program. This will help in getting more ideas about the coaching classes for augmenting the skills with industry experts and others. Most training centers conduct training programs with study materials to learn the lessons with the latest techniques.
Recent Posts
- How React Is Transforming E-Commerce and SaaS Platforms
- Why Many Python Learners Fail Technical Interviews and How to Prepare Effectively
- Why Industry-oriented Software Training Courses are preferred in Chennai
- Expert Tips for Building Interactive Dashboards with Power BI
- Best Daily Practice Techniques for Power BI Beginners
Categories
- All
- Angularjs training in Chennai
- ASP.NET Core
- Data Analytics
- Dot Net Development Course
- dot net training
- dot net training in chennai
- dotnet full stack developer
- Free dotnet training
- information on dotnet
- Learn Java in chennai
- Learn Python at Karaikudi
- learn python online
- learn python online from chennai
- Linq Queries in .net
- mutual funds
- MVC Training Tutorials
- PHP Training in Chennai
- pmp training online
- power apps online training
- Power platofrm
- Python Training Online
- React Full Stack Development
- React training
- ReactJs
- share market
- Sharepoint framework online training
- SharePoint Freelancers in Chennai
- software testing
- spfx online training
- SQL Course Details
- Stock market
- Uncategorized